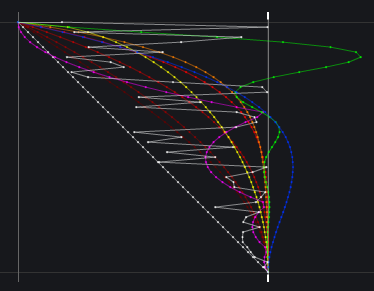
I’ve been working on this for a while and finally I have the courage to post the results.
I’m also testing the pololu micro serial servo controller in the hope I could achieve better results. One good thing the pololu controller has, is the ability to set the speed of the movement, I guess it is a good plus to have this extra control. And using this feature together with the filter you get really cool and smooth movements, check the end of the video.
The point I don’t like in this experience is that the robot shakes a lot, but that is due to the weak support. I will have to arrange a solution to void so much shakiness.
The low pass filter below is what makes the desaceleration while the value reaches the destination point. I’ve posted the full code below the video.
filter: 0.05; // 1 = no filter // has to be between 0.01 and 1
destinationValue = 1000;
destinationValueFiltered = destinationValueFiltered * (1.0-filter) + destinationValue * filter;
----------------------------------------------------------------------------------------------------------------------------
Links section for further development:
Robert Penner's Easing Equations:
http://robertpenner.com/easing/
Visualizers of easing equations:
http://www.robertpenner.com/easing/easing_demo.html
http://www.gizma.com/easing/
Processing Easing
http://processing.org/learning/basics/easing.html
Robert Penner's easing equations demo in Processing:
http://jesusgollonet.com/processing/pennerEasing/
Animation & Shaping:
http://www.megamu.com/processing/shapetween/
-------------------------------------------------------
Arduino Forum Topics:
Converting Easing Functions ActionScript -> Wiring
http://www.arduino.cc/cgi-bin/yabb2/YaBB.pl?num=1187650321
----------------------------------------------------------------------------------------------------------------------------
Code to move one servo directly connected to the Arduino:
// easing servo movements with low pass filter
// the servo signal must be connected directly to the arduino pin 2

// Time interval, this executes one piece of code from time to time
// Download Metro lybrary and instructions:
// http://www.arduino.cc/playground/Code/Metro
#include <Metro.h>
int duration = 3500; // duration of the interval in miliseconds
Metro intervaller = Metro (duration);

// MegaServo library
// download and instructions:
// http://www.arduino.cc/playground/Code/MegaServo
#include <MegaServo.h>
MegaServo servos;

// servos minimum and maximum position
#define MIN_POS 800 // the minuimum pulse width for your servos
#define MAX_POS 2200 // maximum pulse width for your servos

// servo pin
#define s0_pin 2

// variables to hold new destination positions
int d0; // destination0
int d0_sh; // destination0 to be smoothed

// the filter to be aplied
// this value will be multiplied by "d0" and added to "d0_sh"
float filtro = 0.05; // 0.01 to 1.0

// setup runs once, when the sketch starts
void setup() {
  // initialize serial comunication
  Serial.begin(9600);

  // set servo pin
  servos.attach(s0_pin);
}

// main program loop, executes forever after setup()
void loop() {

  // check the time interval, if it reaches limit "duration" goes back to one
  // and runs the code
  if (intervaller.check() == 1) {

    // calculate a new random position between max and min values
    d0 = random(MIN_POS, MAX_POS);

    // resets interval with a new random duration
    intervaller.interval(random(500,2000));
   }

  // smooth the destination value
  d0_sh = d0_sh * (1.0-filtro) + d0 * filtro;

  // assign new position to the servo
  servos.write(d0_sh);

  // delay to make the servo move
  delay(25);
}
And this is the code to use with the pololu micro serial servo controller:
// easing servo movements with a low pass filter and Pololu Micro Serial Servo Controller

// Time interval, this executes one piece of code from time to time
// Download Metro lybrary and instructions:
// http://www.arduino.cc/playground/Code/Metro
#include <Metro.h>
int duration = 3500; // duration of the interval in miliseconds
Metro intervaller = Metro (duration);

// servos minimum and maximum position
#define MIN_POS 500 // the minuimum pulse width for your servos
#define MAX_POS 5500 // maximum pulse width for your servos

// variables to hold new destination positions
int d0; // destination0
int d0_sh; // destination0 to be smoothed

// the filter to be aplied
// this value will be multiplied by "d0" and added to "d0_sh"
float filtro = 0.05;   // 0.01 to 1.0

// set servo speed, goes from 1 to 127
int servoSpeed = 120;

// setup runs once, when the sketch starts
void setup() {
  // initialize serial comunication
  Serial.begin(9600);

  // set servo pin and speed
  servoSetSpeed(0, servoSpeed);
}

// main program loop, executes forever after setup()
void loop() {

  // check the time interval, if it reaches limit "duration" goes back to one
  // and runs the code
  if (intervaller.check() == 1) {

    // calculate a new random position between max and min values
    d0 = random(MIN_POS, MAX_POS);

    // resets interval with a new random duration
    intervaller.interval(random(500,3000));
  }

  // smooth the destination value
  d0_sh = d0_sh * (1.0-filtro) + d0 * filtro;

  // assign new position to the servo
  put(0,d0_sh);

  // delay to make the servo move
  delay(25);
}


// functions from this forum topic:
// http://forum.pololu.com/viewtopic.php?f=16&t=745&start=60&st=0&sk=t&sd=a

void put(int servo, int angle)
{
  //servo is the servo number (typically 0-7)
  //angle is the absolute position from 500 to 5500

  unsigned char buff[6];

  unsigned int temp;
  unsigned char pos_hi,pos_low;

  //Convert the angle data into two 7-bit bytes
  temp=angle&0x1f80;
  pos_hi=temp>>7;
  pos_low=angle & 0x7f;

  //Construct a Pololu Protocol command sentence
  buff[0]=0x80; //start byte
  buff[1]=0x01; //device id
  buff[2]=0x04; //command number
  buff[3]=servo; //servo number
  buff[4]=pos_hi; //data1
  buff[5]=pos_low; //data2

  //Send the command to the servo controller
  for(int i=0;i<6;i++){
    Serial.print(buff[i],BYTE);
  }

}

void servoSetSpeed(int servo, int speed){
  //servo is the servo number (typically 0-7)
  //speed is servo speed (1=fastest, 127=slowest)
  //set speed to zero to turn off speed limiting

  unsigned char buff[5];
  unsigned char speedcmd;

  speedcmd=speed&0x7f;//take only lower 7 bits of speed

  buff[0]=0x80;//start byte
  buff[1]=0x01;//device id
  buff[2]=0x01;//command number
  buff[3]=servo;//servo number
  buff[4]=speed;//data1

  for(int i=0;i<5;i++){
    Serial.print(buff[i],BYTE);
  }
}
https://www.youtube.com/watch?v=g6uo2K8M6BM


