

Hey everyone, it’s been some time since I’ve posted something here, so here’s my latest project. This actually is not exactly a robot project, but since it’s an automated wearable that does a certain job, it might be considered as “robotic”.
This is a bracelet that makes you feel the environment “colder”. I know it sounds weird, but it just works. It’s a DIY version of the Wristify (renamed as Embr Wave recently) which is an upcoming product. More details can be found here: https://embrlabs.com/
It works by cooling down your inner wrist with a certain interval. When you cool your inner wrist you feel like the environment is getting colder so it’s a very useful gadget when the weather is hot. Heating up your inner wrist in cold weather also works great, but this version I made only cools it down.
This is the 3rd iteration I made. I’m still adjusting and optimizing it, once it’s done I plan to release full instructions to build one, including 3d printable files, component list, a diagram to connect them, and the arduino code required to run it.
Here are a couple of photos: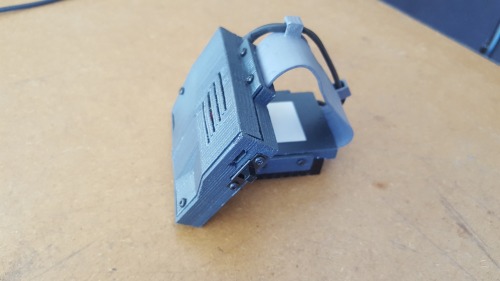
My aim in this project is to avoid any custom printed boards and custom parts. I’ve tried to design everything to be 3d printable, every electronic component to be out-of-shelf and easily connectable. This way any maker can build it easily as a weekend project.
Also I need to note that in no way I want to harm Embr Labs by making a DIY version of their awesome device. This is merely a project aimed for makers, not their target customer base.
P.S: Also people in Embr Labs are super cool, been talking to them for a while and promised to release full instructions once they release their device. :)
Here are the full component list used in the project:
-Arduino Nano (used a cheap clone)
-5V DC-DC converter
-3.6V Micro USB LiPo charger
-3.6V 1500mAh LiPo Battery
-5V 30x30mm Peltier
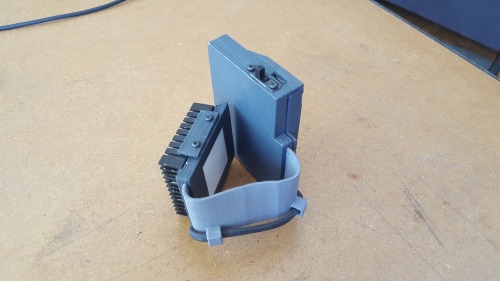
-40x40x10mm Aluminum Heatsink
-BC337 Transistor
-A micro switch, some cable, PLA for printing, heat shrinking tube, some non-conductive tape etc.
Here is a quick look to inside the case: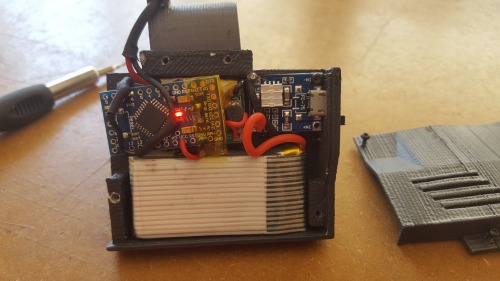
The working principle is quite simple, the arduino controls the peltier to cool down your inner wrist with a certain interval.
A peltier is a thermoelectric plate, when powered it cools down one side, and heats the other side. At the moment the arduino turns on the peltier for 4 seconds and turns it off for 10 seconds in a cycle. This cycle is important to create the “cooling down effect”. If you constantly cool down the wrist, your body adjusts to the cold and stops feeling the effect. By applying the lower temperature in a cycle, your body can not adjust and you keep feeling the cooling down effect. And for some reason (there are tons of papers on this) when you feel your inner wrist cooling down, your entire body feels the same thing.
The biggest problem with this setup is cooling down the hot side of the peltier. If you don’t remove the heat from that side fast enough, the heat starts leaking to the cold side and the effect stops working. To do this I used a large enough heatsink to remove the heat in this version.
In the first prototype I used a heatsink + fan setup, which worked amazing. I decided to give up on the fan in the newer version to save space and to avoid any moving part.
First Prototype (was quite big):

Working on the second prototype (smaller but not enough):
Removing the fan caused problems, after using the device for 10+ minutes, the heatsink starts reaching to a temperature where it can’t remove the heat fast enough, and the peltier starts leaking heat to the inner wrist. To avoid this problem I connected the peltier to a PWM pin on arduino and now I turn on the peltier fully on the on cycle, but I don’t completely turn it off on the off cycle. I keep applying the voltage with a lower PWM cycle on the off cycle, which does not cool down the cold side, but keeps the heat from leaking to the other side. Of course, this method uses more battery power and the heatsink gets hotter, but it just works.
I’ll be tweaking the PWM values of the on and off cycles before releasing the instructions to reach the perfect setup possible.
Another problem with this device is that -as mentioned before- it only cools you down, but does not heat you up unlike the original Embr Wave. Doing that is quite easy by simply reversing the polarization of the peltier, and might be accomplished by adding a simple H-Bridge (maybe a motor driver?) instead of the transistor on the next version of the bracelet. A button can be used to change the mode of the bracelet, and the arduino would provide the correct polarization to the peltier to run it on cooling down or heating up cycle.
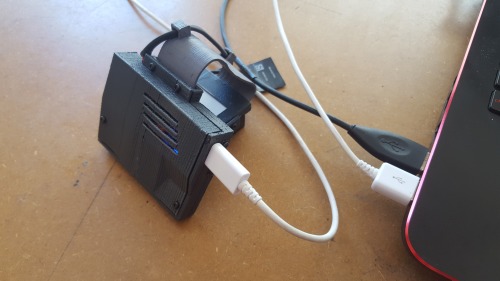
It charges through usb :)
Please send me your comments on the project. And I’m also trying to improve the wristband part of the device, which currently is printed with PLA and snaps to your arm. It sometimes doesn’t feel too secure, and should be improved, any recommendation about making it better would be appreciated. :)
When attached to your wrist, it makes you feel the environment cooler.
- Control method: autonomous
- CPU: Atmega 328
- Operating system: Arduino
- Power source: 3.6V LiPo
- Programming language: C
This is a companion discussion topic for the original entry at https://community.robotshop.com/robots/show/diy-climate-control-bracelet