

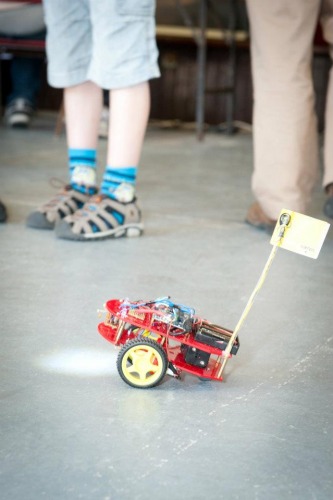
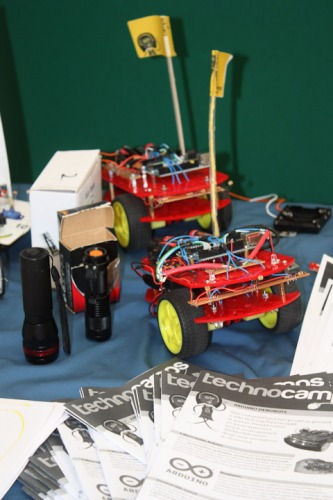
These robots were created as a small demo of how easy it can be to get up and running. It's a Magician chassis with an Arduino Uno and L293D. We're probably the biggest consumer of Magician chassis - we've got about 30 at the moment and I'm just requested another 20. They're relatively inexpensive and easy for small hands to assemble, though we do find the motor wires have a habit it of breaking. I'm hoping to move to a 3D printed design in February.
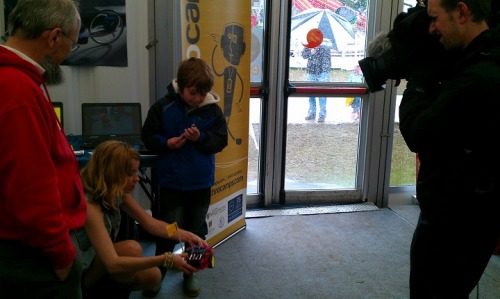
They were originally simply named "demo bots" but after a typo in an email became known as Demon bots. The original versions use LDRs for photophillic and photophobic behaviour. They were shown on s4c when we appeared at the Urdd Eisteddfod with a variety of toys.
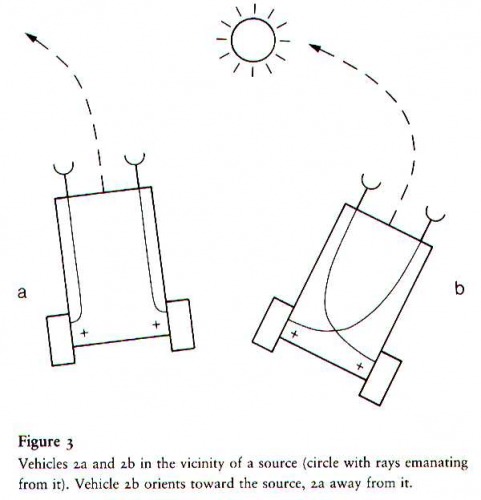
They are essentially Braitenberg vehicles, though we have made various adaptations - such as attaching a pen so that a path can be programmed in s4a then drawn in the real world.
Parts & Construction
The original design:
All of the tools and components are common place; they should be easy to find online or in electronics shops.
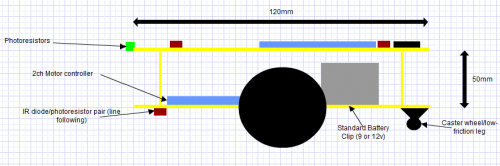
- L293D H-Bridge (approx. £2.50)
- Arduino Uno (approx. £20)
- Magician Chassis including a 4xAA battery pack and 2xDC motor & wheel sets (approx. £14)
- 3x LDRs (aprox £1.50)
The “Magician” chassis we used is an affordable and easy kit, but we recognise it is only available through certain suppliers. An alternative chassis could be created from scratch using two 15x20cm pieces of 3-5mm acrylic plastic, held with 3cm high struts. Motors would be attached to the base (with glue or an acrylic bracket) slightly forward of the centre of gravity. In lieu of a castor wheel, a curved piece of strong wire could be attached to the rear to support the vehicle and reduce friction.
Updates
I'll post updates as we try new things out with these bots. Any suggestions of enertaining demonstrations we might do with these robots would be greatly appreciated.
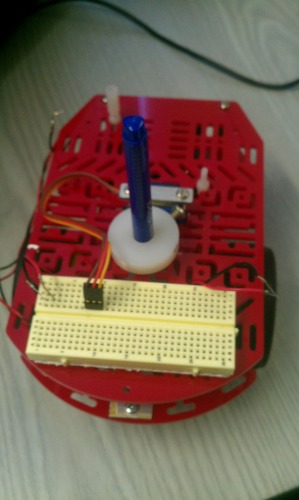
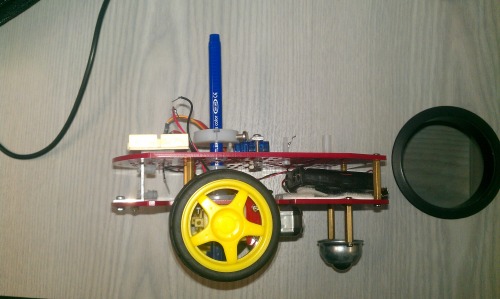
Currently we are working on two versions - a drawing robot (once programmed in s4a a servo mounted pen will draw a line on the ground) and battle bots which have detatchable parts that will fall off on impact, when they all fall off the robot stops moving.
Arduino demo bot
- Actuators / output devices: 2x 3V DC motors
- Control method: autonomous
- Power source: 8xAA
- Sensors / input devices: 3 LDRs (left, right, centre)
- Target environment: classroom
This is a companion discussion topic for the original entry at https://community.robotshop.com/robots/show/demonbot