Create an internet controlled robot using Livebots

livebotDemo.zip (462Bytes)

Hi everone!

Here I will show you how to create an internet controlled robot or other installation using Livebots.

Livebots is a project I'm working on which consists of an easy to use website for all the robots that people can interact with through the internet.

As an example I will be using a simple Arduino UNO with a LED connected to a Raspberry Pi to show you the concept, but of course you can use anything that can be receive messages by the serial port and any computer you would like.


The Robot Head uses the same code: https://www.robotshop.com/letsmakerobots/node/36025 :-)


UPDATE!

We've just released our own Raspberry Pi distro! This means you can simply download it and skip all the software is already installed!

We could use feedback, so if you can, please try it and tell us what you think: http://livebots.cc/Pi

Cheers!


Step 1: Program the arduino

Attached is a simple arduino program that reads the messages form the serial port and lights the LED when they contain "HIGH" and turns it off when "LOW".

Feel free to adapt it to your own needs.


Step 2: Add the robot to the Livebots website

Start by creating an account (http://livebots.cc/Account/Register).


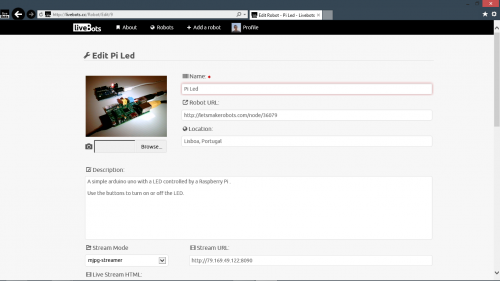
Click Add a Robot and upload your bot's picture (http://livebots.cc/Upload/1).


Then you can add your robot information that will appear on the robot's page.


Step 3: Install PySerial

In order to let python communicate with arduino you will need to install pySerial: http://pyserial.sourceforge.net/  
1. Download and click on open: http://sourceforge.net/projects/pyserial/

2. Unzip and untar the files


3. Install pySerial. On a terminal window, navigate to the folder where you have the files and run the following command:
cd pyserial-2.5
sudo python setup.py install


 For more info on how to do this on raspberry pi go here:
http://www.doctormonk.com/2012/04/raspberry-pi-and-arduino.html


Step 4: Get Livebots python class

We have a respository for the pyhon code we use to control the robots, you can find it here: https://bitbucket.org/XicoMBD/livebots

In order to use it to control your own robot just follow this steps:

1. Download livebots.py from the repository and save it somewhere convenient


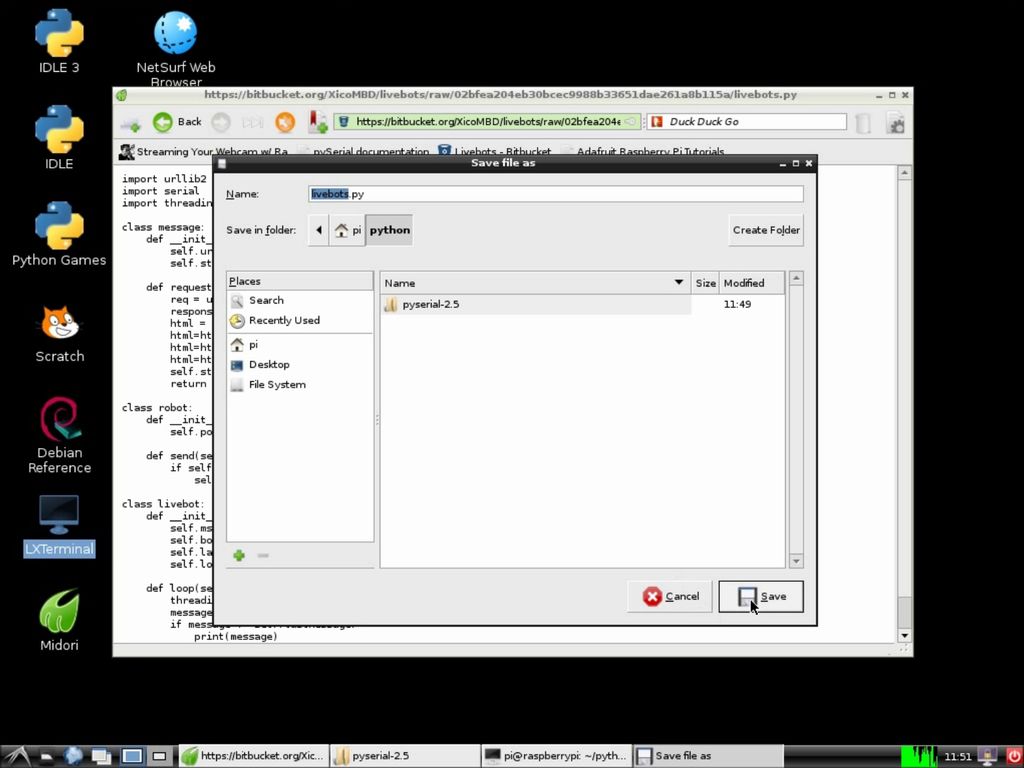
2. Open the terminal window and navigate to the folder where you saved the class

3. Run python:
python


4. Import the library:
>>> from livebots import * 


5. Create the livebot (Enter the Livebot number on the first field and the serial port name on the second):
>>> livebot('9','/dev/ttyACM0')


 Step 5: Get the webcam streamer for Raspberry Pi

 To stream the webcam video using raspberry pi, mjpg-streamer should be the best option: http://sourceforge.net/apps/mediawiki/mjpg-streamer/

In order to install it on your pi follow the steps:
1. Install subversion:
sudo apt-get update
sudo apt-get install subversion


2. Go to the folder where you want to have the mjpg-stremer, for example /home/pi
cd /home/pi


3. Get mjpg-streamer:
svn co https://mjpg-streamer.svn.sourceforge.net/svnroot/mjpg-streamer mjpg-streamer


4. Install libjpeg8-dev
sudo apt-get install libjpeg8-dev


5. Install ImageMagick
sudo apt-get install imagemagick


6. Make the project:
cd mjpg-streamer/mjpg-streamer
make


7. When it finishes you should be ready to start streaming your video. To do so, enter the following command:
./mjpg_streamer -i "./input_uvc.so" -o "./output_http.so -w ./www"


8. Now you should be able to view the stream from another computer on your network. Open a web browser and open the following link:
http://{name or IP-address of the Raspi}:8080


9. However, to let the stream be viewed from outsite your network you will need to port forward your router. This varies from router to router, so please search on google how to do it on yours.

 For more information go here: http://wolfpaulus.com/journal/embedded/raspberrypi_webcam


Step 6: Put the stream on Livebots and setup the control mode

If you’re using mjpg-streamer select it on the Stream Mode combobox and paste your URL on the Stream URL textbox (for example: http://79.169.49.122:8090)


 Then you can choose your control mode. If you go for the Buttons, select it on the Control Mode combobox and add your buttons content on the table.


 If you want color on the buttons add one of the following tags to the cell:

  • #Green
  • #Red
  • #Blue
  • #Orange


Uncheck the Is Draft box, check the LIVE box and it's done!


 Now your robot will appear on the robots list and on the front page.


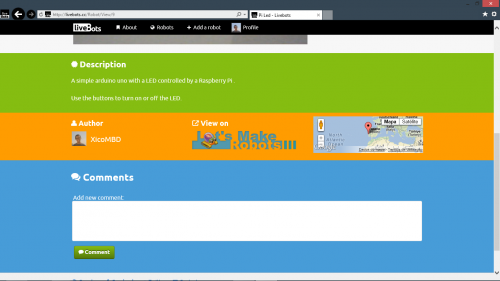
TIP: If on the robot's URL you put an Let's Make Robots url, an View on LMR button will appear on the robot's page :-)

Screenshot__130_.png

Screenshot__131_.png


Hope you enjoy!

maybe a stupid question but…

 do I really need a raspberry pi to do this? Or can I use any other microcontroller connected to serial port on a pc?

You can use whatever you want :smiley:

Here I use the raspberry instead of other computer, on robot head I have an arduino connected to an old netbook, the Farruscos are both connected to a Mac Mini, and navic’s hand has an arduino with an ethernet shield.

Use what you have at hand, and if you need help feel free to ask :slight_smile:

Great project with a great

Great project with a great potential. Well done.

I just bought a raspberry :smiley:
I did search for some more information about that raspberry and the more I read about them the more I get interested by these. Especially the web control. Not quite sure what I want to control yet… a robot… or the lights in my room? I sure will find a purpose for it.

Livebots Distro

Hey xico,

For the last few days I’ve been messing around with my pi, and I’ve finally settled (or did I?) with using your Livebots raspbian modified distro.

So far:

- the pi connects wirelessly (via dongle) to my router.

- and I can forward streams outside my lan

However, 

the mjpg-streamer often fails with the error:

"Unable to dequeue buffer: Input/output error

 i: Error grabbing frames"

and when I say often, I it only run for a few minutes… at best.


I tried motion but it also fails, although it seems to run for longer times… but sometimes it just stops streaming despite the daemon still running.


So, have you encountered this issue and/or have any suggestions to mitigate the problem?


That’s a problem I have had

That’s a problem I have had sometimes, but never understood what causes it.

At that time I saw this post and entered a comment but never got an answer. 

I was having that problem the first time I tried the Pi, then for some reason decided to reinstall the wheezy distro on it and had it running for weeks without a single problem.

I guess it depends on your luck :stuck_out_tongue:


PS: Found this just now (http://www.bobtech.ro/tutoriale/raspberry-pi/78-streaming-webcam-in-format-m-jpg-cu-raspberry-pi), he seems to have a way to restart when it fails. Se if you can get it working…

Yeah, I couldn’t find an

Yeah, I couldn’t find an explicit answer for that problem either, the “best” one I’ve found was do an rpi-upgrade… but it seems very vague, I could try it if it weren’t for the fear of ruining my wireless connection. I had some troubles with the setting initially with wheezy, then when I finally manage to connect with my dongle… tried to transpose it to Moebius (trying to build up from a lean distro) but after rpi-updates, kernel recompilations, modules recompilations, several pre-compiled modules… no luck, the best that I got was being able to do “iwlist wlan0 scan” and see the networks… but I digress… but at least for the Livebots distro (which I supposed is based on the latest official raspbian?) it was easy to transpose the wireless solution, and after doing a df -h I actually realized it was not that “fat” :stuck_out_tongue:

UPDATESeems like that the solution you linked works well, just had to tweak the script a little to get it to work like I wanted it to :wink:

As for the P.S. that was something I was planning on doing in case I couldn’t find a “native solution”, so if it works you just saved me the trouble of writing the script myself, thanks :smiley:


Count me in.

I’m just downloading the RasPi distro with the intention of putting up a LiveBot - Won’t be ready for the end of April though.

Bit of a learning curve for me as I’ve brushed against Unix / Linux before but never really had to delve into it.  I’m also going through the ‘Python for Kids’ book to get a quick idea of the differences between that and the thirty-year old programming language I’m familiar with (and still use).  I can see there’s plenty of info around on the specific libraries where I need to get in a bit deeper. 

The project will use a PicAxe 18M2 controlled from the RasPi serial and half a dozen servos.  It will also involve a feline component!

(Might be worth you updating your Instructable with information about the RasPi distro as it would make things a bit less daunting for the user new to Linux / RasPi.  Also, any chance of getting the distro set up as a torrent to improve the download time?))

Awesome!

I’m looking forward to see it working!

As for the distro, I haven’t announced it that much because of the problem that kariloy described. I want to make sure it works before telling newbies to use it. Unfortunately, beacause of University and stuff I haven’t had any time to look at it in these past few months :-/