

Autosquared, or automatic automobile, or just A2 is my current testbed for developing GPS code, ultrasonic sensor relilibility, etc in an outdoor enviroment while GPS (https://www.robotshop.com/letsmakerobots/node/34827) my other outdoor platform waits for some approprate wheels and batteries, but it's story really starts back when I first got my EZO; It was a dark and stormy night, lightining flashed and thunder rumbled as I sat in my lair with my robot's body and eye laying on my workbenck contemplating how to program my new friend's mind... Wait, wrong style, Uhh, Ok... A2's story starts with an EZ0 and a cheap RC car that I bought at a discount store without the controler, this was right when I actually got serious with non-lego robotics, and I had an arduino, a vision sensor and an RC car, I was going to build an awesome outdoor robot!
I started out by stripping the circut board out, and then before I got baffeled trying to figure out the steering box, I replaced it with a servo:
I also built a full forward/full reverse relay driver for the drive motor:

And I mounted the EZ0 in a piece of pipe and into the front bumper:
I grabbed my arduino, and a reciever to implement failsafe should anything go wrong, wired it all up, and wrote a program I thought would work nicely. There done. Except not, the servo acted all funny, and would not centre, and always wanted to go to one side. After a few frustrating hours I realised with all my point to point wireing (and powering the arduino from it's power jack) I had forgoten to connect some ground wires together. Oops. Ok, got that fixed, and now it was working fine, responding to the failsafe, responding when I put my hand in front of the sensor while it's wheels were up in the air, everything was going great:

I took it out to test, and found rapidly that I had much too long of a delay at the end of my code, it was crashing into things inbetween sensor readings, so I picked it up, and found I was too late, I hadn't put any spring loading on my servo horn like the maker had, and when it crashed into things the servo gears stripped from the torque applied to the wheels. I went to take it apart, and found that I couldn't, too much hot glue in the servo box. That is the rather anticlimactic story of V1. Lessons learned: Tie your grounds together, Make the wheel steering sprung so it will not strip, Do not use excessive glue on things that might need to be taken apart, Minimise or eliminate delays in code. Not such a high price for the knowledge gained. One servo (not even, the circut board was still good) and a cheap RC car chassis.
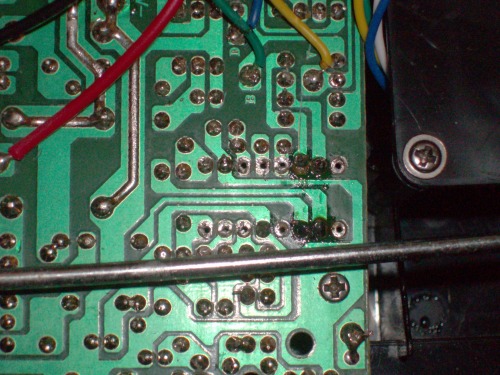
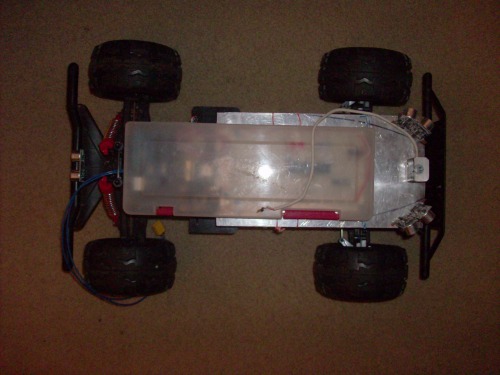
Anyway, I stripped every usable part from the bot, threw the rest away, and left the photos sit untill they might be useful (This was a few years before I discovered LMR) But, this is not the end of the story, as it would happen, I went back to the discount store a few months ago and, lo, there was another exactly the same RC car. With my last failure in mind, I bought the new (well, used, returned, stored for a while and resold) Chassis. It sat neglected on my shelf for a while, but when I recieved my Adafruit Ultimate GPS, and with my bot GPS not even close to complete I decided I needed a fairly quick, easy and painless platform to test my new toys with. I looked around my room, and there was the car just begging to be hacked. Before I even purchased the car, I was lurking around LMR and found a good discussion on hacking an RC car by removing the Rx chip, looking up it's pinout and sending signals to the output pins. This sounded ideal, and when I cracked the car open there was a nice pin thru hole chip that looked suspiously like an Rx chip. I googled it's part number, found the pinout and soldered some wires!

(up near the top, in the parallel rows, not the wires you can see)
different angle:
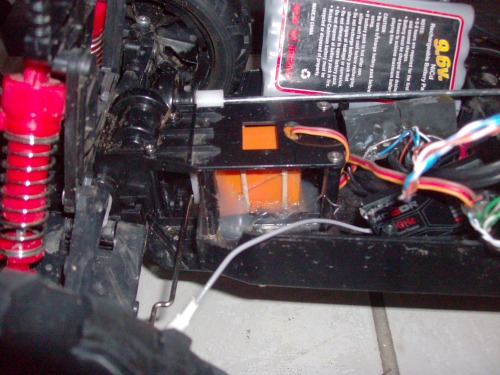
I now have a regular RC car, but instead of RC it now has 6 wires running out of it, unregulated power, forward, reverse, left, and right. Hot glue on a tupperware container and a EZ0, tape a battery to the rear bumper and I am ready to test it out:
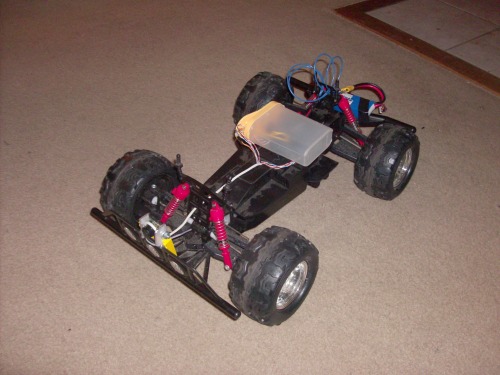
First lesson learned: do not mount an EZ0 sideways, it is a very well made device, with a very wide field of view, so when it was sideways it took any dipression/rock in the ground to be something to avoid. Second lesson: do not mount the sensor on the front bumper. The arduino sees an object no problem, and tells the car to stop, however, being such a cheap car, even with the arduino telling it to stop 3 feet away, it still crashes into things when it has gotten to top speed.
So I go out to the shop and make a bit of a nicer deck on which to mount my sensors/control electronics:
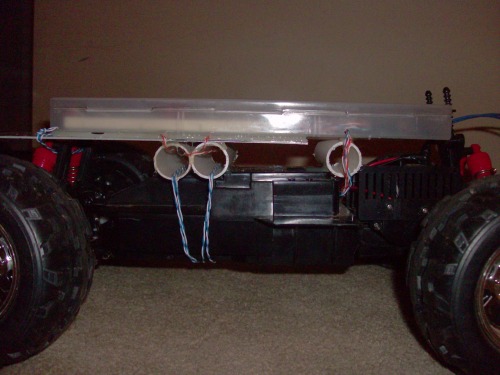
The clear plastic container mounted on top also provides a lot more room for more electronics:
I temporaraly screwed the EZ0 on upside down (there was a handy screw already there from my robot bunker) to the deck, shoved some toothpicks under the front to rase the elevation a few degrees, and tried it out again: (this pic was taken from an iPod touch, so it's a bit bad.)

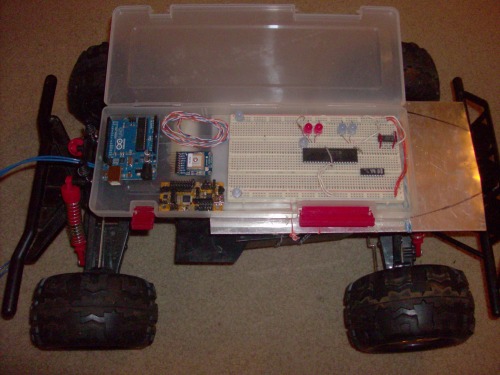
The big aluminum and duct-tape box on the back is a containment device, I am using some bulging LIPOs for this build (my friend gave them to me and I did not want them to go to waste) but I had a really bad experence with almost setting my house on fire after trying to charge a (different) bulging LIPO and destroying a fairly nice remote controled car, that taught me my lesson on not using abused LIPOs, but I thought if I make a fireproof box, put the LIPO in it, and keep an eye on it while the car was running, if/when it catches on fire, I can just tip the car onto it's side and let the burinig lipo fall to the ground. So I grabbed two convienetly bent pieces of aluminum, and taped them together. Perfect, now I don't have to worry about a battery alarm or abusing my LIPOs at all (if they are already bulging, there is not much more you can do except catch them on fire anyway right, and besides, they were headed for the trash anyway.) The first video is of this version (albeit with the rear suspension wired down to it's lowest setting in an attempt to get some elevation for the EZ0) Lessons from this build: do not mount the EZ0 upside-down, for all the mentioned reasons above. And, mount the EZ0 on an ajustable tilt, for the same reasons. Ok, got it. I now turn to lego for the solution to these sensor problems that have been plagueing me:

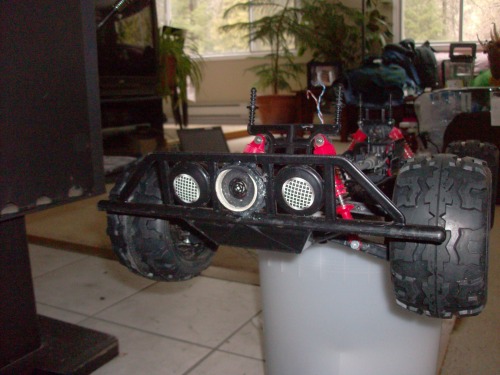
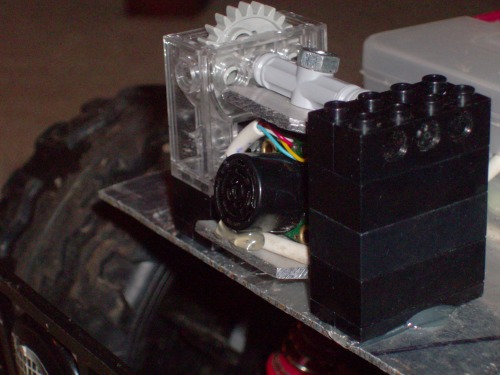
here is a close up of the sensor mount ( Notice how much inclination it needs to not catch phantom objects!)
This is the Current (as of posting) version, and has proven to be fairly relilable, ajustable sensor inclination, lots of flex room for the bumper, and lots of room for electronics, you can see it in action in the second video. It still suffers from getting stuck once in a while, but I plan on addressing that soon. My future plans go something like this: GPS and compass for nav, possibily an accelerometer so if it gets tilted and the front sensor points at the ground giving the BACK UP THERE IS SOMETHING THERE! reading (you can see this happining on the snow bank in I think the second video) it can tell and go forward instead, some wheel encoders on both rear wheels, both for dead-reconing, and also to see when it gets stuck ( no wheels turning, or one spinning really fast and the other not at all) I first thought of the typical black/white pattern, but my wheels have 3 nice little dimples in them that I think small magnets could be glued into and used with a hall effect sensor: (the other three have some rased plastic bits that would make gluing magnets in a bit harder and clumseyer.

And lastly, adding some SRF04s to make my field of view a bit better: 4 on the front and one on the back (more anti-getting-stuck efforts)
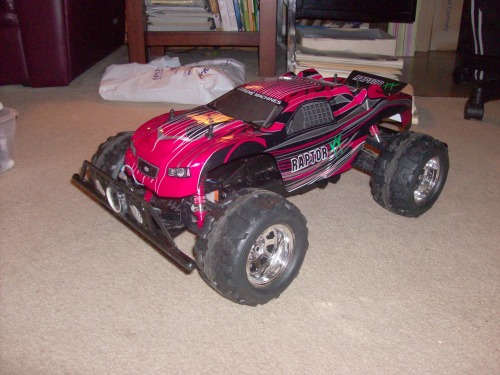
and I am going to leave you with this picture, mainly because I think it looks awesome:

sorry about the second video by the way. I will see if I can fix that soon.
UPDATE 4/24/13==============================================================
While I was testing the bot outside some more, fine tuning the sensor angle, code etc. I turned it on after one revision, and it didn't go anywhere. I picked it up and fliped the power swich a few times, I could hear the motor driver relays click, and the steering responded, so I concluded that my super-cheap RC car had finally burnt out it's motor. The 1.5v extra from my LIPO rather than a 9.6v battery pack may have contributed, but I doubt it was that much. Probably just because it was such a cheap car. I probably should have learned my lesson by now, but if I go back and there is another car I will probably buy it and continue where I left off. untill then, I will mark this as complete.
Avoids stuff outdoors
- Actuators / output devices: Original RC motor, Original steering box
- CPU: arduino uno
- Power source: 11.1 v 3 cell LIPO
- Programming language: Arduino
- Sensors / input devices: Maxbotics EZO
- Target environment: Outdoors
This is a companion discussion topic for the original entry at https://community.robotshop.com/robots/show/autosquared
