Stops and reverses for a millisecond when it comes within 30 cm of an object for effective braking when it picks up speed. Looks left and right and chooses the direction with the most space. PWM to about 1/4 of the speed.
Issues corrected.
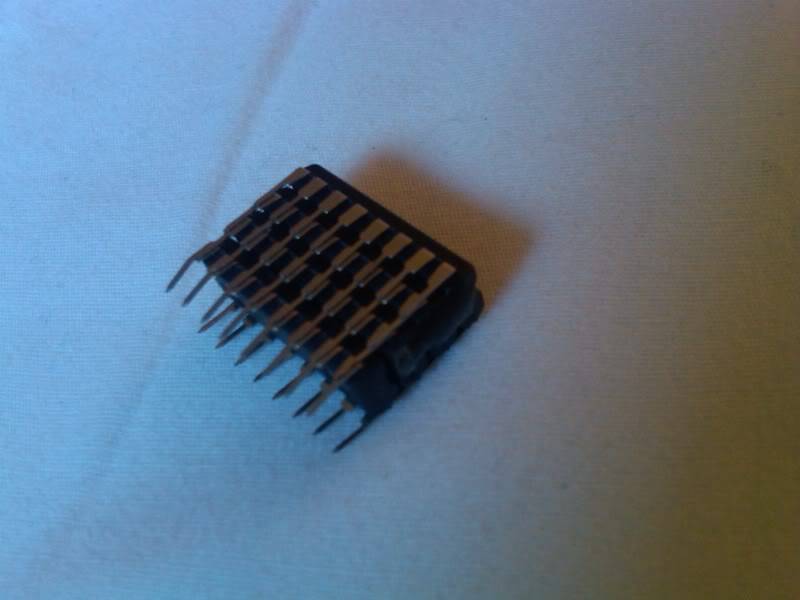
To drive the motors properly I ended up having to stack 4 sn754410 chips on top of one another to handle the current. Works great.
There is about a half sec lag between the response time of the right wheel after the left wheel. Not sure theres anything that can be done about this though. *Corrected this issue with a few tweaks to the code*
The speed is still an issue. Because of the gear ratio on the car itself it is a speed demon. If I alter the code to slow it down it won't be able to move properly. If I speed it up, it picks up speed quickly and moves faster than It can react to detected objects, which causes it to occasionally rams into things. Increased the distance to keep from objects to 30 cm from 20 cm to allow it more reaction time. Still experimenting on findind a suitable speed and distance. I added a huge bumper so it can ram into whatever it likes now without damaging itself.
Would like to add white led headlights to the front which turn on while it is moving forward, red led headlights to the rear which turn on as it backs up, and maybe green or blue leds somewhere which light as it turns.
Any ideas, suggestions, inputs or comments are welcome! nothing wrong with learning
UPDATE: Changed the code so it now looks left and right and makes the best choice where to go when it comes to an object. Added Brake Lights and headlights. PWM the speed to about 1/4 of what its capable of. Reverses for 1 millisec when it detects something for more effective braking... not bad for my first robot huh. Last Video Shows The Final Product
It actually works pretty well b/c as it approaches an object it slows itself down and backs up if it gets inside 30 cm. It does occasianally bump into things though and then begin to reverse. I can adjust the maxspeed in the program. Ill upload a video of it roaming around as soon as I can.
Funny! Found your project while searching for better h bridge for my makey robot. I wanted something faster than what is in the Makey plan so I used an old RC tyco fast traxx (which is same kind of design - two motors but with tracks). TB6612FNG melted. Tried one L293D and that chips output to the motors was too weak. I might try your chip stack. It’s just wrong and I like it.
Have you thought about using two ping detectors and no servo? More cycles spent detecting objects while traveling fast than waiting for the servo.
Yea I saw your page on Makey seemed like a cool idea. I commented about the servo not panning on the avoidance code. Also had an issue finding the right motor driver. One L293d is just not powerful enough and overheats, but stack them and the current splits so each one handles less current but the voltage doesnt change. Easy fix! I used sn754410 chip b/c it can handle twice the current as the L293d.
I have thought about using two ping sensors. That would take care of the delay having to wait for the servo to turn and allow the one ping to detect left and right. Those tyco RC cars are really fast. Have to PWM them. In your code I just adjust the MAXSPEED to slow it down
Does stacking of the chips works without any problems? I mean you program same way as you would for only one L293 right? This is pretty cool setup you’ve got here, I might copy/steal it for my hungry 5A motors ^^
The stacking puts the chips in parallel so they split the current. the sn754410 is pin for pin the same chip as the l293d but can handle 1 amp instead of the 0.6 amp of the l293d… 4 chips equals capable of handling 4 amps. It works great. and yes the programming is the same as it would be for 1 chip.
Doubled L293n side by side and bot now runs faster and cooler!!! I’ll try PWM at 128 to the motors “enable” pins instead of running 5v straight to L293 enable pins (lazy).