

Haven't posted a robot since December 2008. Not sure it classifies as a robot, but back then we were just evolving and "Something Else" didn't exist as a category!
Anyway, here we go. This was a cheap toy belonging to my 7 y/o (Yes, I spoke of a 7 y/o back in 2008, but now my 2 y/o is 7). It was ready for the bin. Turns out the ony thing wrong with it was teh 4-core cable connecting the hand controller to it. Soon ripped that out and replaced it with an L298 based dual H-bridge controlled by an Arduino. Oh, yeah. This is my first Arduino project, having previously been a PIC RISC sort of chap.
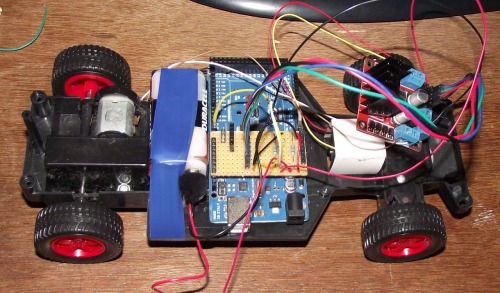
I added bluetooth (not shown) and downloaded Arduino Bluetooth RC Car, although that's poorly named as it will work with any device capable of receiving a serial stream from a Bluetooth receiver. Why? Because I'm an Android virgin. I'm 100% comfortable with Java, but Andriod API is a deep, dark, horrible, ugly, cold place. I just can't get to grips with it.
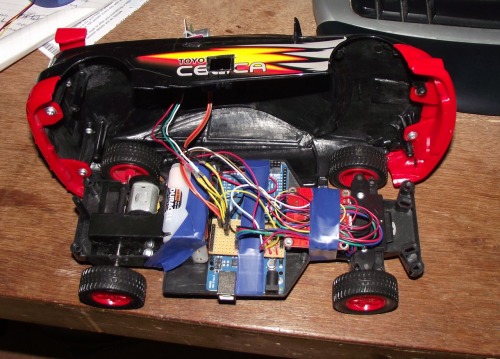
Here's it mostly assembled. I can control it with the above software. now, I'm off to make it do something more clever on its own.
Can be remote controlled (Bluetooth) or navigate autonomously by ultrasonic.
- Actuators / output devices: motors x2, servo x1
- Control method: Bluetooth
- CPU: Arduino Mega 2560
- Power source: 6x AA cells
- Programming language: Arduino sketch
- Sensors / input devices: Ultrasound scanner
- Target environment: indoor
This is a companion discussion topic for the original entry at https://community.robotshop.com/robots/show/arduinavicaro