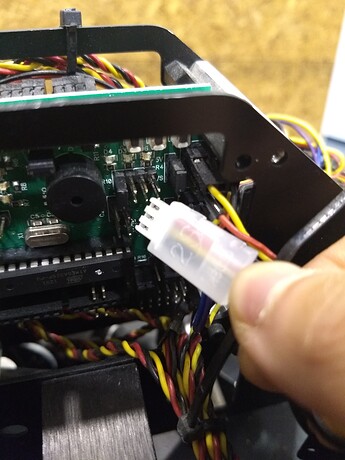
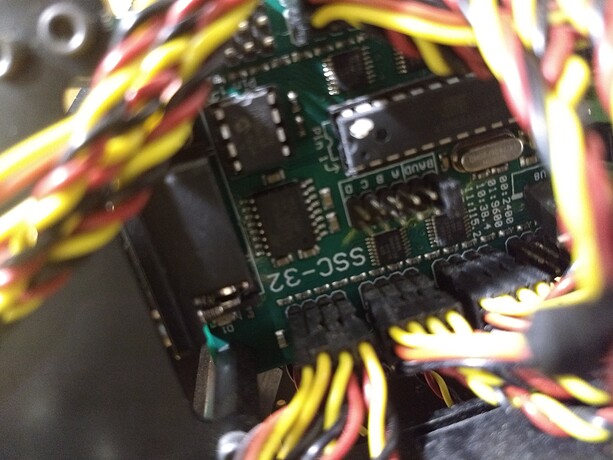
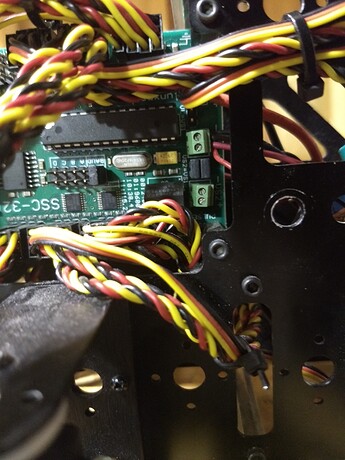
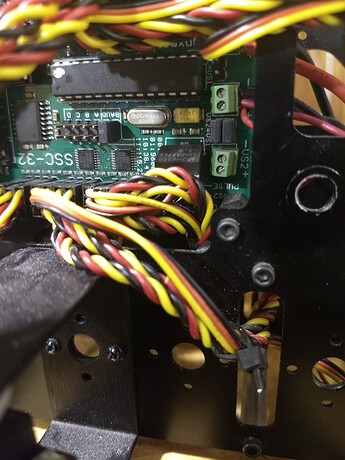
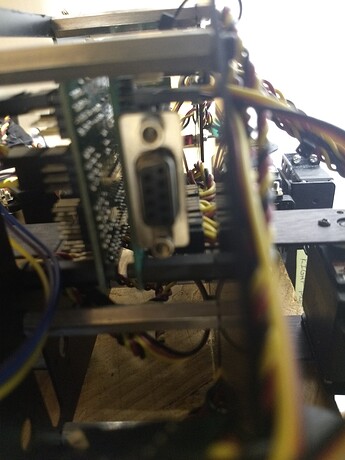
Hi, I was trying to turn on the 4 DOF T-Hex robot purchased from Robot Shop and somehow after fiddling with it I think I may have fried the circuit boards after attempting to plug one of the male connectors on the battery to one of the I/O pins. I went on the Robot Shop website to buy the Lynxmotion SSC-32 Servo Controller only to find out that it has been discontinued and replaced by the Lynxmotion SSC-32U USB Servo Controller. My question is that since it is a new servo controller, will the installation of it be the same as the former SSC-32 servo controller? The pictures below show what I have done as I believed this may have fried the circuit boards connected the male connector from the battery to one of the I/O pins.
Hi @Felixeraruts and welcome to our forum.
We received your email sent to our internal support.
Our colleagues will reply to you beginning of next week.
Thank you.
Could you give us more detail about that connector that’s been connected to the SSC-32 ?
What’s the device, the pinout and where it’s been connected ?
What’s telling you that something is fried ?
Regarding the SSC-32 vs SSC-32U they are interchangeable.
Let us know so we can help
There was another questions send via Chat to our team.
I do have another question. Are the SSC-32U and the Bot Boarduino Boards require codes to operate the robot or are they wiped clean upon arrival?
The SSC-32 is a servo controller which cannot be programmed but the BotBoarduino is an Arduino compatible board that require code to be loaded. The T-Hex do not have code available but one can tweak the code to make it work. (lynxmotion github)
Hi there. Thank you so much for responding as I am grateful for your help! The connecter that’s been connected to the SSC-32 is a part of a Lithium Polymer Battery. The brand is Zeee and is a 80C 7.4V. It is also 5200 mAh.Here is an amazon link to the actual product https://www.amazon.com/Zeee-Batteries-Dean-Style-Connector-Vehicles/dp/B076Z778MJ. I have looked on the manual to see what the pins are called to which I connected the connector. I think it is called JA, JB, JC. where it is next to the jumper JPU.
What told me it has been fried is that smoke came out and the robot was not turning on anymore. When you say pin out, what do you mean by that as I am a beginner to electronics?
The connector you used is the “Balance Port” used to charge the Lithium battery.
Very dangerous and certainly fried something as “JA, JB, JC” are inputs rated 5V.
Regarding the code, initial code was written for a different microcontroller (BASIC Atom Pro 28 / BotBoard).
Thank you very much for the response! I’m guessing buying a new SSC-32U and Servo Controller is the way to solve this since if I fried one board that meant I need to replace all of them or do I need to just buy the Bot Boarduino since I fried that? Furthermore, the link that you showed had the codes for the 3 DOF T-HEX robot to be complete while the 4 DOF T-HEX to be untested. Does that mean part of the code is missing and will not work? Another question is getting the code to the robot itself.I got the part of downloading the Arduino IDE and needing to install the library. However on github https://github.com/Lynxmotion/Arduino-PS2X. I see these different files and when clicked on open more files. I wasn’t sure what to download and what these different files mean? Thank you for taking the time out of your day for doing this as it is very helpful!
There are two boards on your robots, one is the servo controller SSC-32 and the other one a microcontroller (brain) the BotBoarduino.
You fried the BotBoarduino from your explanation.
It’s not impossible that you fried something else, but maybe not.
Electrically it make sense if only the BotBoarduino is fried according to the pins you connected it to.
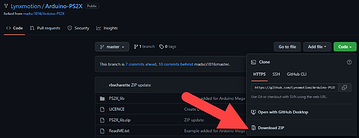
To install the library, you need to download the zip file HERE.
Here is where I took the link
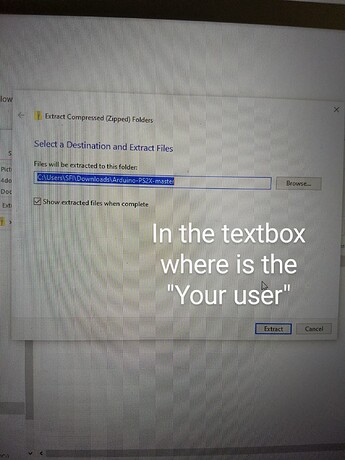
Then un-zip “PS2X_Lib” in the correct folder for Arduino to see it which is the following but you need to change “YourUser” by your windows user name.
C:\Users\YourUser\Documents\Arduino\libraries
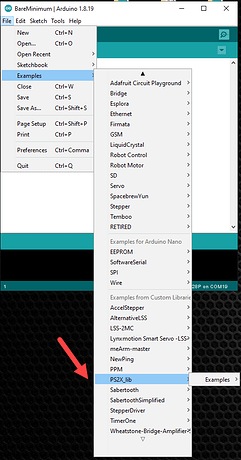
Next time you open Arduino IDE the library should be available in the “Example” section.
The code i’ve linked is “Generic” for hexapods.
It doesn’t have the physical configuration and angles for the T-Hex platform.
I guess another question is how is it that the code that you linked https://github.com/Lynxmotion/3DOF-4DOF-Hex is generic? Will the robot still move the way it is supposed to in regards to having different walking gaits, ability to rotate it’s body, walk in any direction, etc. I tried comparing the code from the manual to the link and they both looked the same so how is the code you provided “generic”? Second, another question is how is it that when you downloaded the zip file that it is named “PS2X_Lib” when compared to when I downloaded it is named “Arduino-PS2X-master.zip” Are they the same file with different names or not. When I tried un zipping the file I get a text bar saying where do I want the zip file. I’m not sure if I was understanding you right but initially in the text bar it had C:\Users\SFI\Downloads\Arduino-PS2X-master or something along those lines to which I typed in what you stated C:\Users\YourUser\Documents\Arduino\libraries Am I right in doing that? Furthermore, isn’t the Arduino IDE need to be of that not to be the newest version as shown here 3DOF-4DOF-Hex/BotBoarduino/4 DoF Ready (untested)/BotBoarduino_CH3R_PS2 at master · Lynxmotion/3DOF-4DOF-Hex · GitHub in the “README” section? Apologies for the long questions but you are a life saver for doing this as all of the computer stuff is new to me.
I guess another question is how is it that the code that you linked https://github.com/Lynxmotion/3DOF-4DOF-Hex is generic?
- When Lynxmotion moved away from Basic Atom Pro 28 a group of people ported the code to be used on an Arduino compatible microcontroller. They made it modular so it can be used with multiple “Physical” dimensions. It is generic as it’s not been set for the T-Hex dimensions.
Will the robot still move the way it is supposed to in regards to having different walking gaits, ability to rotate it’s body, walk in any direction, etc.
- The robot will not work unless the right dimensions are entered in the code.
I tried comparing the code from the manual to the link and they both looked the same so how is the code you provided “generic”?
- I can’t tell, not sure what you are comparing at the moment.
Second, another question is how is it that when you downloaded the zip file that it is named “PS2X_Lib” when compared to when I downloaded it is named “Arduino-PS2X-master.zip” Are they the same file with different names or not.
- The link I provided is a Zip file which include, but doesn’t limit to, a PS2X_Lib folder. You need to unzip and/or move that folder.
When I tried un zipping the file I get a text bar saying where do I want the zip file. I’m not sure if I was understanding you right but initially in the text bar it had C:\Users\SFI\Downloads\Arduino-PS2X-master or something along those lines to which I typed in what you stated C:\Users\YourUser\Documents\Arduino\libraries Am I right in doing that?
- That location should be modified by replacing the “YourUser” by your user name
Furthermore, isn’t the Arduino IDE need to be of that not to be the newest version as shown here 3DOF-4DOF-Hex/BotBoarduino/4 DoF Ready (untested)/BotBoarduino_CH3R_PS2 at master · Lynxmotion/3DOF-4DOF-Hex · GitHub in the “README” section? Apologies for the long questions but you are a life saver for doing this as all of the computer stuff is new to me.
- I do not understand this. The version of Arduino IDE is not important, that’s a software to open / edit / compile code to be sent to the Arduino compatible board (BotBoarduino).
Could you give the process on how I would enter in the right dimensions or at least start on it? Is there a manual on how to do this on the lynxmotion website? When you say dimensions, the dimensions of what specifically? Would the dimensions work through calibration?
T_Hex_4DOF_PhoenixV20.bas (48.1 KB)
Is github the only place where there are prewritten programs for the BotBoarduino of the 4 DOF T-HEX since the codes on the lynxmotion website 4DOF T-Hex Tutorial on step 16 won’t work? Are they any prewritten programs that work online without having to edit or am I having to edit online? The reason why I’m asking is because when buying the kit itself it said that the programming is already done for the robot.
Could you give the process on how I would enter in the right dimensions or at least start on it? Is there a manual on how to do this on the lynxmotion website? When you say dimensions, the dimensions of what specifically? Would the dimensions work through calibration?
- No user guide is available for editing the code
This was what I was looking at when comparing the codes.
- The code available on GitHub is made for Arduino microcontrollers. (HERE)
- The original code with a “.bas” extension is code for the BASIC Atom 28 microcontroller.
- In the above code, you also have a “T_Hex_4DOF_cfg.bas” which is probably what one would need to transfer to the “Hex_Cfg.h” for Arduino. (could be already the same but need to be verified)
Is github the only place where there are prewritten programs for the BotBoarduino of the 4 DOF T-HEX since the codes on the lynxmotion website 4DOF T-Hex Tutorial on step 16 won’t work?
- *GitHub is a place to share code (and more for programmers) and you should not edit anything online. You need to download the code and open it in Arduino IDE. *
- Step 16 will not work since it’s based of the old BASIC Atom 28 microcontroller.
Are they any prewritten programs that work online without having to edit or am I having to edit online? The reason why I’m asking is because when buying the kit itself it said that the programming is already done for the robot.
- The only program is based on the Phoenix code and untested (HERE)
-
We have a disclaimer on the product page regarding the code.
Some tips:
- Download & Install Arduino IDE (HERE)
- Download the “3DOF-4DOF-Hex” repository from GitHub (HERE)
- Unzip the whole folder somewhere. (EX: Desktop)
- Download the “Arduino-PS2X” repository from GitHub (HERE)
- Install the PS2X library by unzipping the “PS2X_Lib” folder to the “Document/Arduino/Library” folder.
- Open the “BotBoarduino_CH3R_PS2.ino” project.
Thank you for the response. In regards to the code, where would you recommend I start in regards to either contacts with people or anything else in order to understand the code so as to make the dimensions?
The installation and downloading of the IDE and files worked. Thank you! Could you specify please which body dimensions of the T-HEX I need to enter into the code in Arduino? For example, is it the start positions feet, min/max angles, the length of the tibia of the 4 DOF T-HEX. What I did was I replaced any values that was different in the ported code in the Arduino IDE from the BASIC code on the lynxmotion website manual. Would this method that I explained get the robot up and running with no issues? If so, could you please point it out. With what I understood, here is what I have done in case you want to see it. I have posted the file of the changed values of the Arduino code(it is the one that says “Copy_of_Hex_Cfg” and the file of the BASIC code. Thank you and have a good day as I appreciate you taking the time out of your day for doing this!
Copy_of_Hex_Cfg (1).pdf (12.7 KB)
T_Hex_4DOF_cfg.pdf (9.1 KB)
I can only say that it might work, since it’s actually untested.
At that point you need your replacement BotBoarduino to proceed and make sure to do the Calibration first.
Can you take a picture of your SSC-32 ? Wondering if it’s the USB or not.
Regards,
Are the only parts of the code that need tweaking are the body dimensions or are there more parts of the code that need it as well? Let me know if you need more clearer pictures.
In theory only the dimensions, but again this is untested code.
So you really have the SSC-32 original version, not the USB one.
In order to Calibrate the robot you will need a USB to Serial adapter (goes to the DB9 port) and Lynxterm.
Calibration is done in THIS guide.
It’s a process of moving each joints as close as possible to the angles in the guide and record them in the SSC-32.


