

Vase.stl (445784Bytes)
Description
So today in this tutorial I am going to explain how to 3D print a vase using Vase Mode also known as Spiralize in Cura with a Gcode based 3D printer. This 3D print took around an hour to do and I used a modified nozzle with 1.5mm diameter to give me some unique printing advantages over using plain old Vase Mode with my 3D printer.
What is Vase Mode?
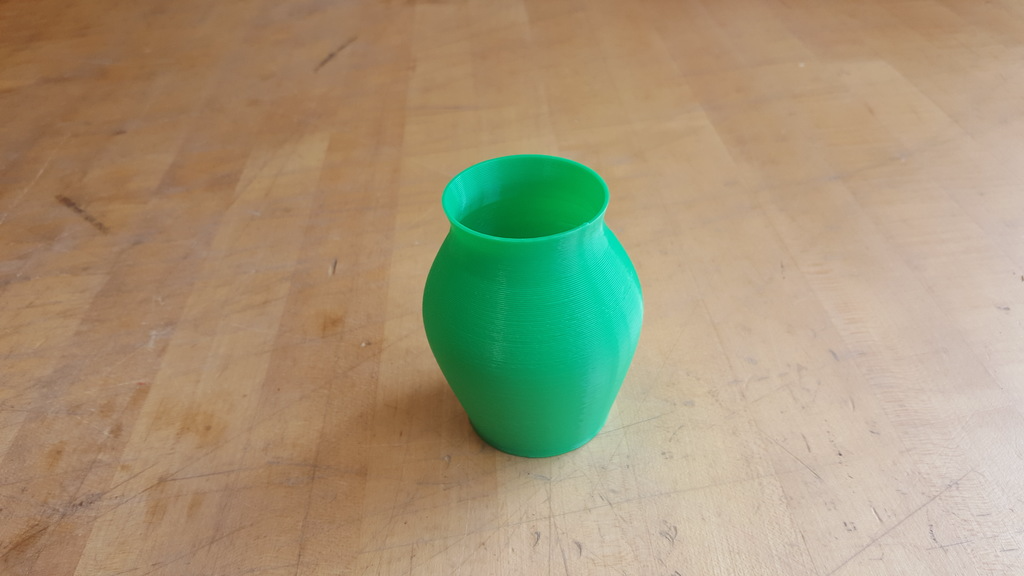
Vase Mode is a 3D printer Slicer Setting that is used usually for demonstrational purposes. The reason Vase Mode is used for demonstrational purposes is because it looks very cool while printing and it does it very fast. Vase Mode does is it takes a regular model like this.

Into this after it is printed.

Vase mode took the model and made it topless and hollow like a vase would be. Anything that is on the top of it isn't printed and it is one perimeter thick or one pass thick.
Why will we be modding a nozzle?
Unfortunately regular nozzles for 1.75mm filament tend to not to have a very large diameter. I basically redrilled the hole in order to get really fast printing and a thick plastic vase.
Tools and Materials.
We will need the following stuff for this project.
- 3D printer that accepts gcode.
- Vise.
- Drill or Drill Press.
- 1/16" Drill bit
- A spare nozzle for your hotend.
- Windows machine.
- Cura 3.1
Step 1: Nozzle Modifications
You need to get your vise and put your nozzle in it. Then simply redrill the hole to be the diameter of your 1/16" Drill Bit.
Step 2: Cura Setup
Now after you put on the Nozzle onto your 3D printer that we just moded you need to open up Cura. After you open up cura open the .STL file that is given to you in this tutorial to download. You will need to go to "Print Setup>> Custom>> Special Modes>> Spiralize" and you need to click Spiralize to enable it. If Spiralize isn't there when you go to enable it you search for it in the search bar. After that set your Line Width to about 1.5mm. You can search for it in the search bar if you can't find it.
I used 20mm/s for print speed for this print. The reason I did this was because I didn't want any thermal dropouts while printing and if I printed any faster there would have been cooling problems with the print. This will vary upon printer. I will explain more about this in the next step.
Step 3: Troubleshooting
In order to trouble shoot it is expected you have the knowedge of using your 3D printer to print before hand otherwise I would not reccomend you do this for your first 3D print.
Warping is a common issue with this style of 3D printing. Warping looks like in this style of printing drooping and holes in the 3D print. If you are printing PLA make sure you have your fan onto it's maximum capacity. For ABS this may vary upon fan speed or not using a fan at all. If none of this helps slow down your print speed or increase it. It is unlikely though it needs increasing.
Splitting usually occurs printing in ABS. If you are printing in ABS for this 3D print you most definitely need an enclosure otherwise the layers don't stick to each other.
Any other known problems I would recommend checking out this guide for more information.
https://www.simplify3d.com/support/print-quality-troubleshooting/
Conclusion
You hopefully 3D printed a vase for the first time with this tutorial. There are plenty of Vases you can make from the internet by downloading other .STL files online. I hope you enjoyed this tutorial. Please comment or ask questions if you would like to.