

Monitor Type 1 Diabetes With xDrip Bridge and Improve Your Lives


 xDrip Bridge Module
The diagnosis
About two years ago, we had an unfortunate surprise. Our little five-year-old boy was diagnosed with type 1 diabetes. This first hit was very hard on our family, and then ten days later, our youngest son also developed the same disease (two out of three of our children) Usually, there are years between diagnostics in the same family so we were a rare case to say the least. We didn’t have any history of diabetics in our family so that was all new for us. We had to learn how to manage this condition very quickly. We began with insulin injections but it quickly became clear that this wouldn't work for us. Our kids’ blood sugar was out of control and our five-year-old boy would begin school soon and we were not comfortable with the idea of someone from school or kindergarten injecting our kids before lunch or snacks.Tech to the rescue
We began learning about pumps to help us with added flexibility in insulin delivery and to help with the school and kindergarten issue. We also ordered two Dexcom continuous glucose monitoring devices for our kids. That was relieving and frightening at the same time; we were relieved to be able to monitor our kids’ sugar level at any time. However, we were frightened by the massive glucose spikes that we didn't observe when we were doing only a couple of blood tests a day by pricking fingers. We also realized that the glucose level at night was way too high.The Dexcom unit really helped us adjust their required insulin and would wake us at night if they were too low or high.Next - into the Cloud!
While the Dexcom unit was such a great help for us, the receiver would only work when within about 20 feet of my kids. Then I remembered about a cool tech guy named Scott Hanselman who had this blog which I had been following for years. He normally posted a lot of useful information for programmers, but being a type 1 diabetic himself, he also posted a lot of diabetic-related news which I used to ignore or sometimes read out of curiosity. Suddenly these posts became very interesting and digging back through his blog seemed like a treasure hunt. I remembered about a “Nightscout” system he used to talk about that sends data back to the cloud and I immediately saw the potential for our family. One way to use the Nightscout is to plug a dedicated smart phone into the Decom’s USB port so that it reads the data and sends it to the internet via Wi-Fi or 3G. The problem with this solution is that the Dexcom USB Port is weak and can easily break. The added strain when moving around caused by a permanently connected cable doesn’t help either. Last, that phone must be dedicated to the task and could not be used for anything else while strapped to the Dexcom. Easy to set up but not optimal.A bridge between the Dexcom and a phone
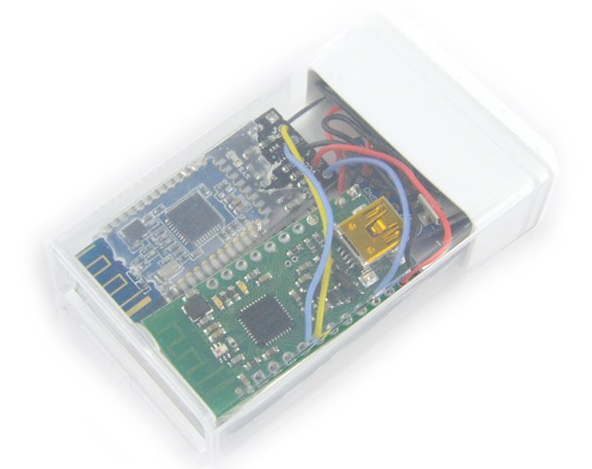
After some research, we’ve found that the better, albeit more complicated solution is to build an “xDrip”. The xDrip is a do-it-yourself (DIY) module built out of off-the-shelf components that wirelessly read the sensor values and sends it to an Android phone using Bluetooth. The software is open source so no programming is required. The real challenge is to source the parts, and then build the device. I had never soldered before but I really wanted to make it work, so I managed to build one for us using information found online. The xDrip module ended up being really useful. When any problem occurred while my son was at kindergarten, I had a complete glucose graph readily accessible to make the best decisions. I even called a few times when my boy’s glycemia was getting way too high. Also, when my kid asks to go to a friend’s birthday party, it would now be possible to at least monitor everything instead of being worried the whole time (to be honest, that didn’t happen yet but I’m sure will get to that point soon as my older T1D kid, now 7 years old, is getting better at managing his diabetes).
Helping the community
To build my first xDrip, I had to order a lot of parts from different websites, so I had to pay multiple times for shipping and duty fees. I had the chance to be working at Robotshop when I built my first xDrip bridge so soon after my first build, I began asking internally if we could enter all the missing parts required to build one, so others could benefit. My request did not fall on deaf ears, and soon, every product required was added and made available on our website. We even added an optional Qi wireless receiver module for easier charging and a Sim800L module for Parakeet builders. I also spread the good news in communities like the “CGM in the Cloud” Facebook group. I was happy to see that people were really grateful. This meant that:- We didn't need to shop on multiple websites anymore.
- Since Robotshop has warehouses in the US, Canada, Europe and Japan, many people were assured NOT to pay for duty fees and could get fast delivery.
- Shipping fees are either free or very low since everything is grouped in one shipment (shipping is free on orders over 75$ in US and Canada)
- Obtaining the best price is assured since Robotshop’s website supports online price matching. If you find a better price elsewhere, you simply need to enter the price and URL in the corresponding fields in the shopping cart page and, if the price match request is legit, Robotshop will automatically lower it to that price.
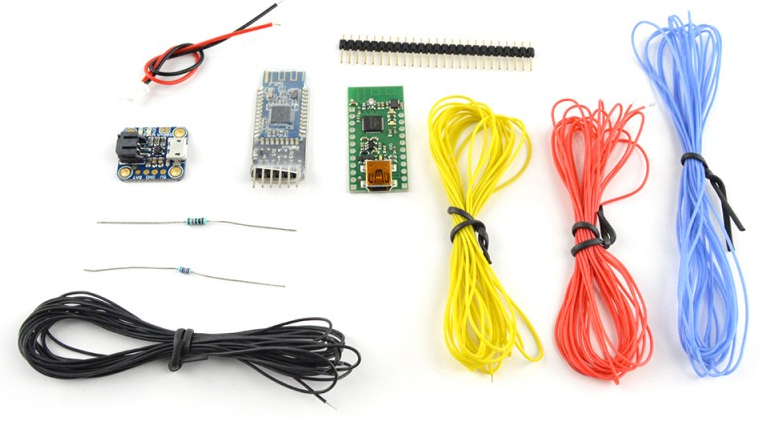 xDRIP Bridge Module Kit
Parts List
- SIM800L module for Parakeet: https://www.robotshop.com/en/sim800l-quad-band-network-mini-gprs-gsm-breakout-module.html
- Wixel: https://www.robotshop.com/en/wixel-programmable-usb-wireless-module-kit.html
- HM-10 Bluetooth moduel: https://www.robotshop.com/en/bluetooth-module-hm-10-arduino-master-slave.html
- Li-po battery: https://www.robotshop.com/en/lithium-polymer-battery-cell-37v-1200mah.html
- Battery charger: https://www.robotshop.com/en/adafruit-micro-usb-lipo-charger.html
- Optional Qi wireless receiver for charging: https://www.robotshop.com/en/universal-qi-wireless-receiver-module.html
- Multiple colors silicon wires: https://www.robotshop.com/en/black-silicon-wire-awg30-3m.html https://www.robotshop.com/en/blue-silicon-wire-awg30-3m.html https://www.robotshop.com/en/red-silicon-wire-awg30-3m.html https://www.robotshop.com/en/yellow-silicon-wire-awg30-3m.html
- 1x 10k resistor
- 1x 27k resistor
Useful Links
- Nightscout project: http://www.nightscout.info/
- xDrip website: http://stephenblackwasalreadytaken.github.io/xDrip/
- Source code to upload on the wixel: https://github.com/jstevensog/wixel-sdk
- Parakeet project page: https://github.com/jamorham/wixel-xDrip/blob/parakeet-gsm-modem/README.md
Edit: Wireless charger
Here are additional details to connect the wireless Qi charging module. The connections needed are displayed here: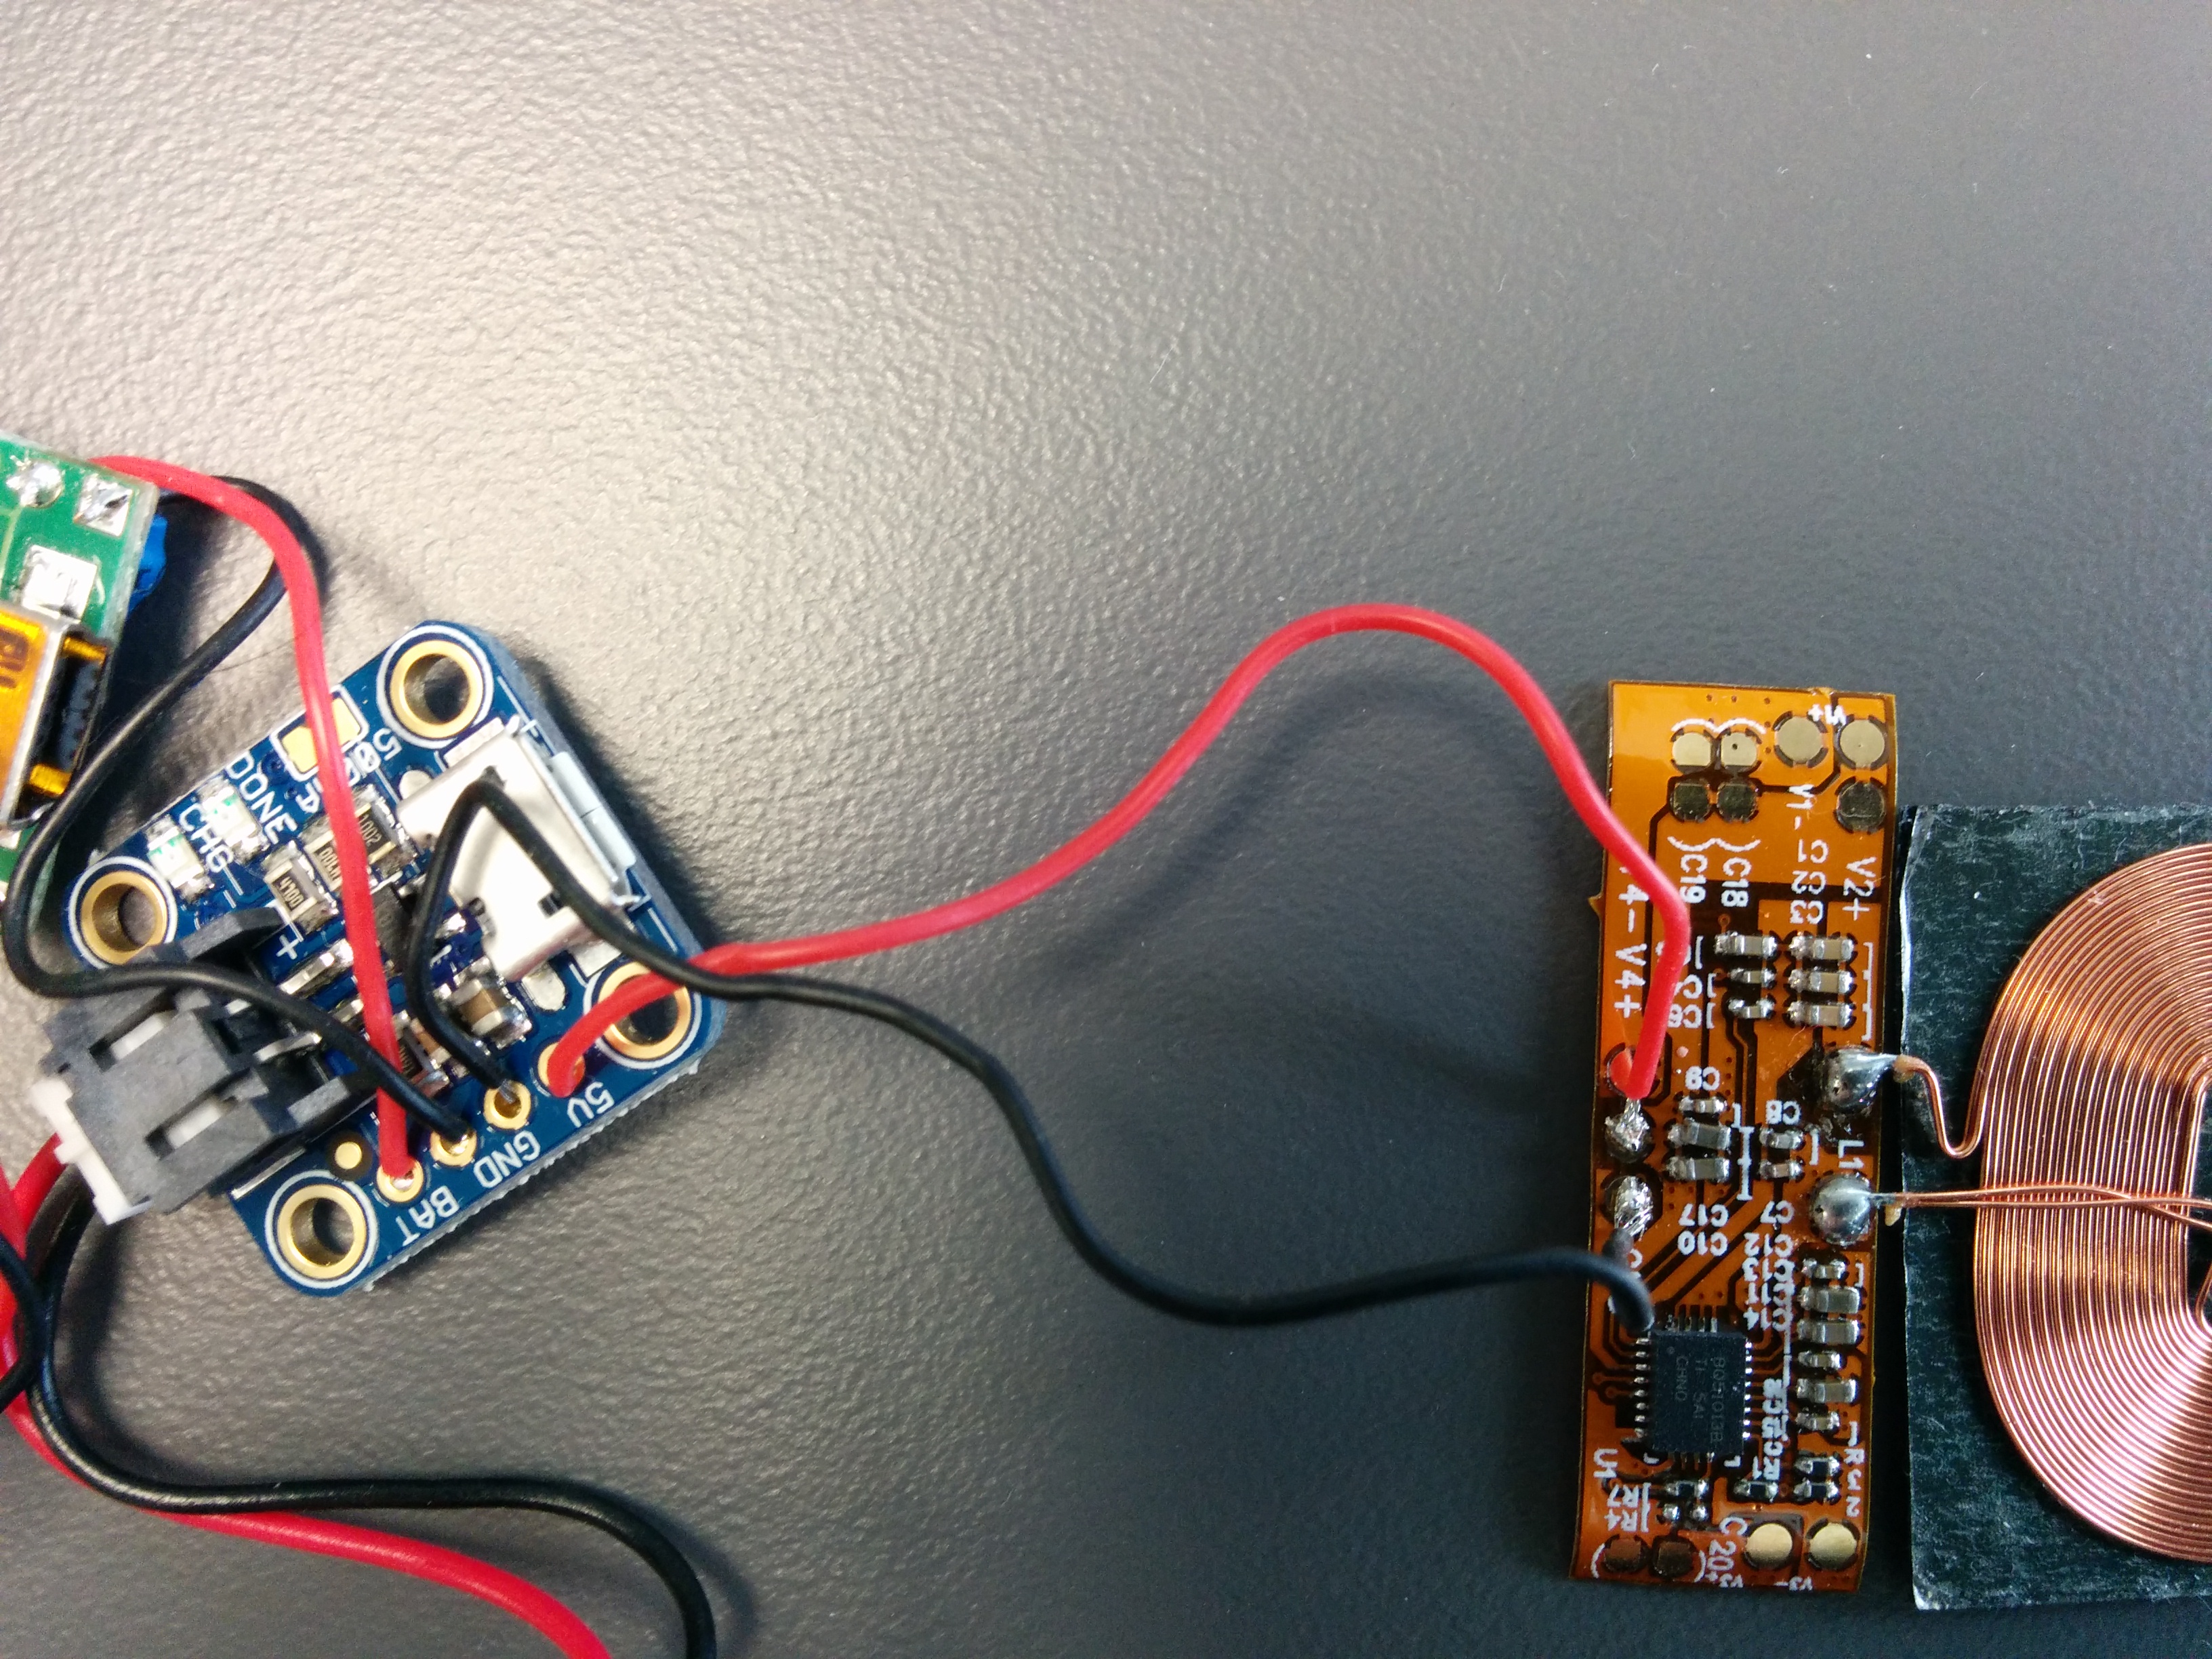 xDrip Qi charger connections
 Qi receiver module installed
Thanks for helping to keep our community civil!
Notify staff privately
You flagged this as spam. Undo flag.Flag Post
It's Spam
This post is an advertisement, or vandalism. It is not useful or relevant to the current topic.
This post is an advertisement, or vandalism. It is not useful or relevant to the current topic.
You flagged this as spam. Undo flag.Flag Post
✅ Your Post Has Been Submitted Successfully!
Your post is currently under review by our moderation team. The review process usually takes up to 48 business hours.
You can track your post's status in the "My Content" section of your profile. Once approved, it will be published and visible to others.

Thank you for contributing to our community!