

Lynxmotion Quadrino Nano - Wireless Communication


Option 1 - Bluetooth Module |
 Quadrino Nano - DFRobot Bluetooth Quadrino Nano - DFRobot Bluetooth |
The least expensive way to get wireless communication is by using a Bluetooth Serial module connected to your Quadrino Nano. Since most mobile devices already handle bluetooth communication there is only one module to buy. Most of the Bluetooth modules work the same and will work with the Quadrino Nano.
Material Needed:
|
Connection:
The MultiWii protocol handles each available COM port on the board and will automatically work if an attached device talks the same language (same protocol). This mean there is no fixed port to connect your Bluetooth module, it can be on either of the two available ports labeled "Serial1" or "Serial3" on the bottom.
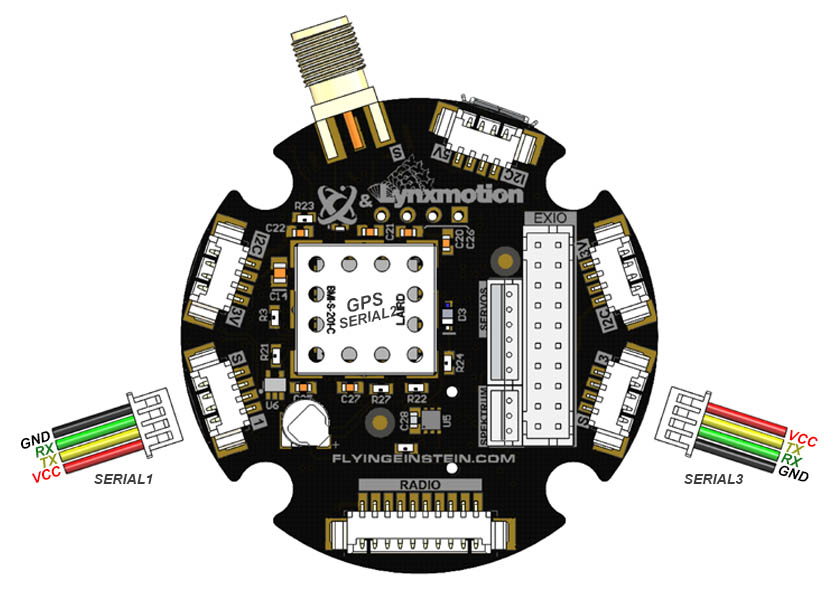 Quadrino Nano - Serial PinOut Quadrino Nano - Serial PinOut |
The Lynxmotion Quadrino Nano UART & I2C harness comes un-assembled (pins not inserted) and need to be installed for the use intended. Use the following diagrams to insert the pins at the right spot on the white Molex connector (#0510210400) for UART/SERIAL connection. |
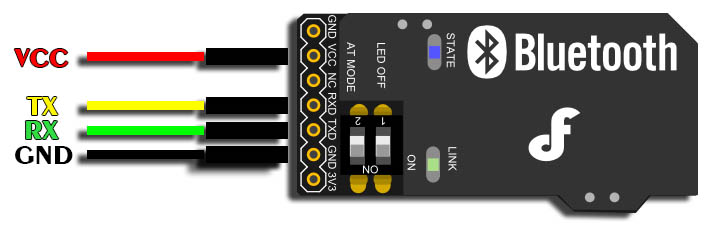 DFRobot Bluetooth - PinOut DFRobot Bluetooth - PinOut |
Now connect the other end of the wiring harness to the Bluetooth module as follows: |
FCT Software Setup:
Most Bluetooth modules are setup from factory with a 9600 baud rate but, MultiWii uses a 115200 baud rate as default. There is a workaround since we added a way to change the baudrate in the FCT (Firmware Configuration Tool) which only affects the communication port used by this module. (Either SERIAL 1 or 3) Using the DFRobot module you will have to flash your Quadrino Nano with a 9600 baud rate and we suggest to do it on both SERIAL 1 and 3 since you can connect the module in either of them.
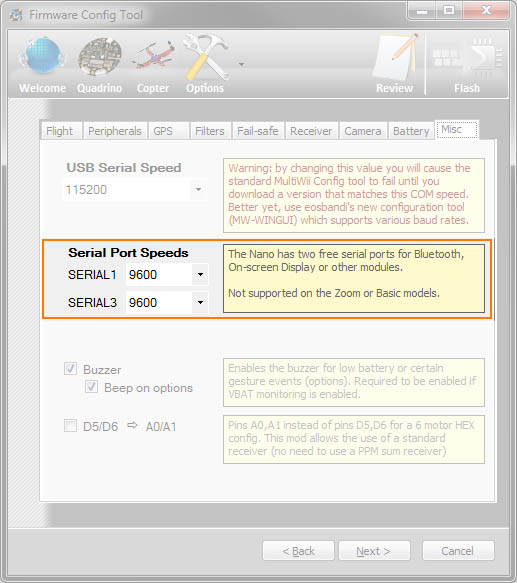 FCT - 9600 Baudrate Settings FCT - 9600 Baudrate Settings |
You can choose the serial port speeds in the "Misc" tab of the Options page. Once that's done you can flash your Quadrino Nano. |
Android Bluetooth Setup:
Now go to Google Play Store to install the EZ-GUI Ground Station application. This is fairly easy and the Free version of the application gives you a lot of options. Once setup, you can access all of what's available with the standard GUI (WinGUI or MultiWiiConf) and much more. This allows for easier PID tuning on the field as well.- Here are the few steps needed to Pair a Bluetooth device in Android 5.0. The screens can change if you are using a different Android version.
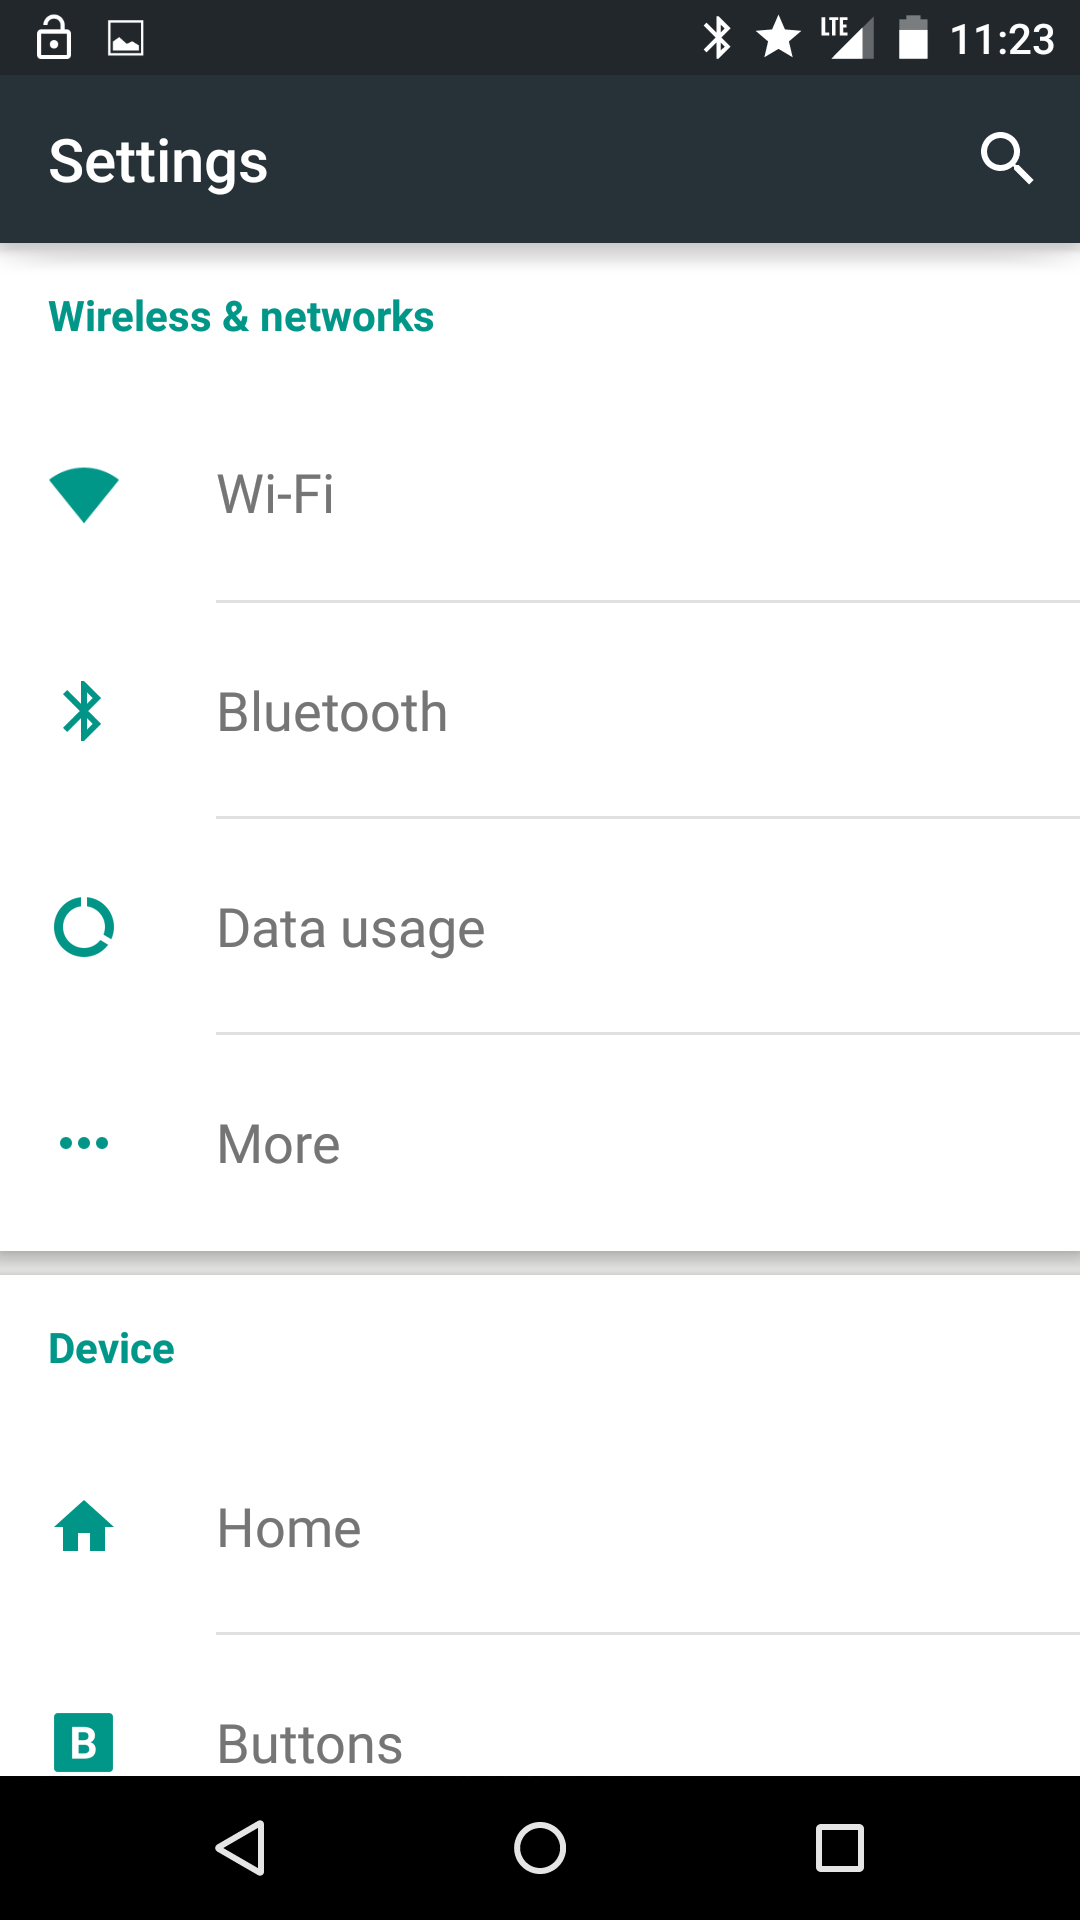 1 - Android Settings 1 - Android Settings |
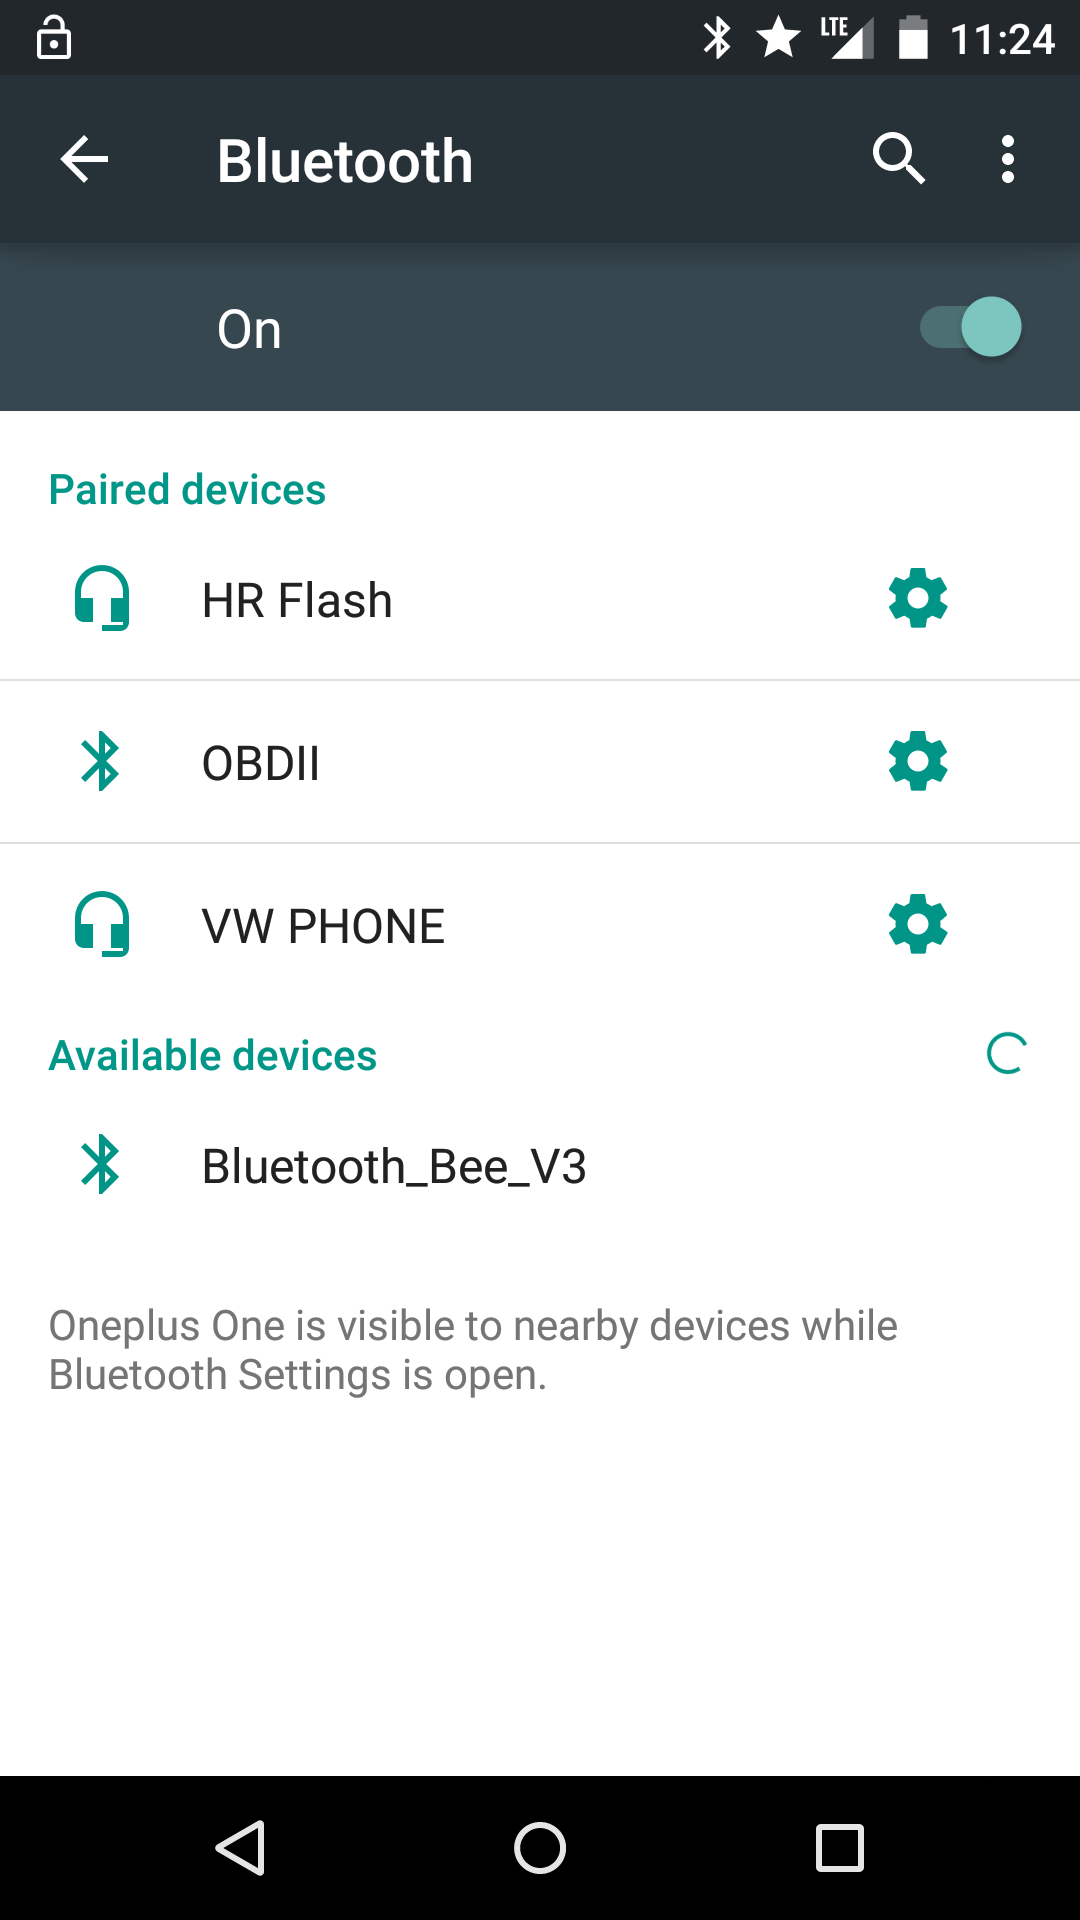 2 - Bluetooth Settings 2 - Bluetooth Settings |
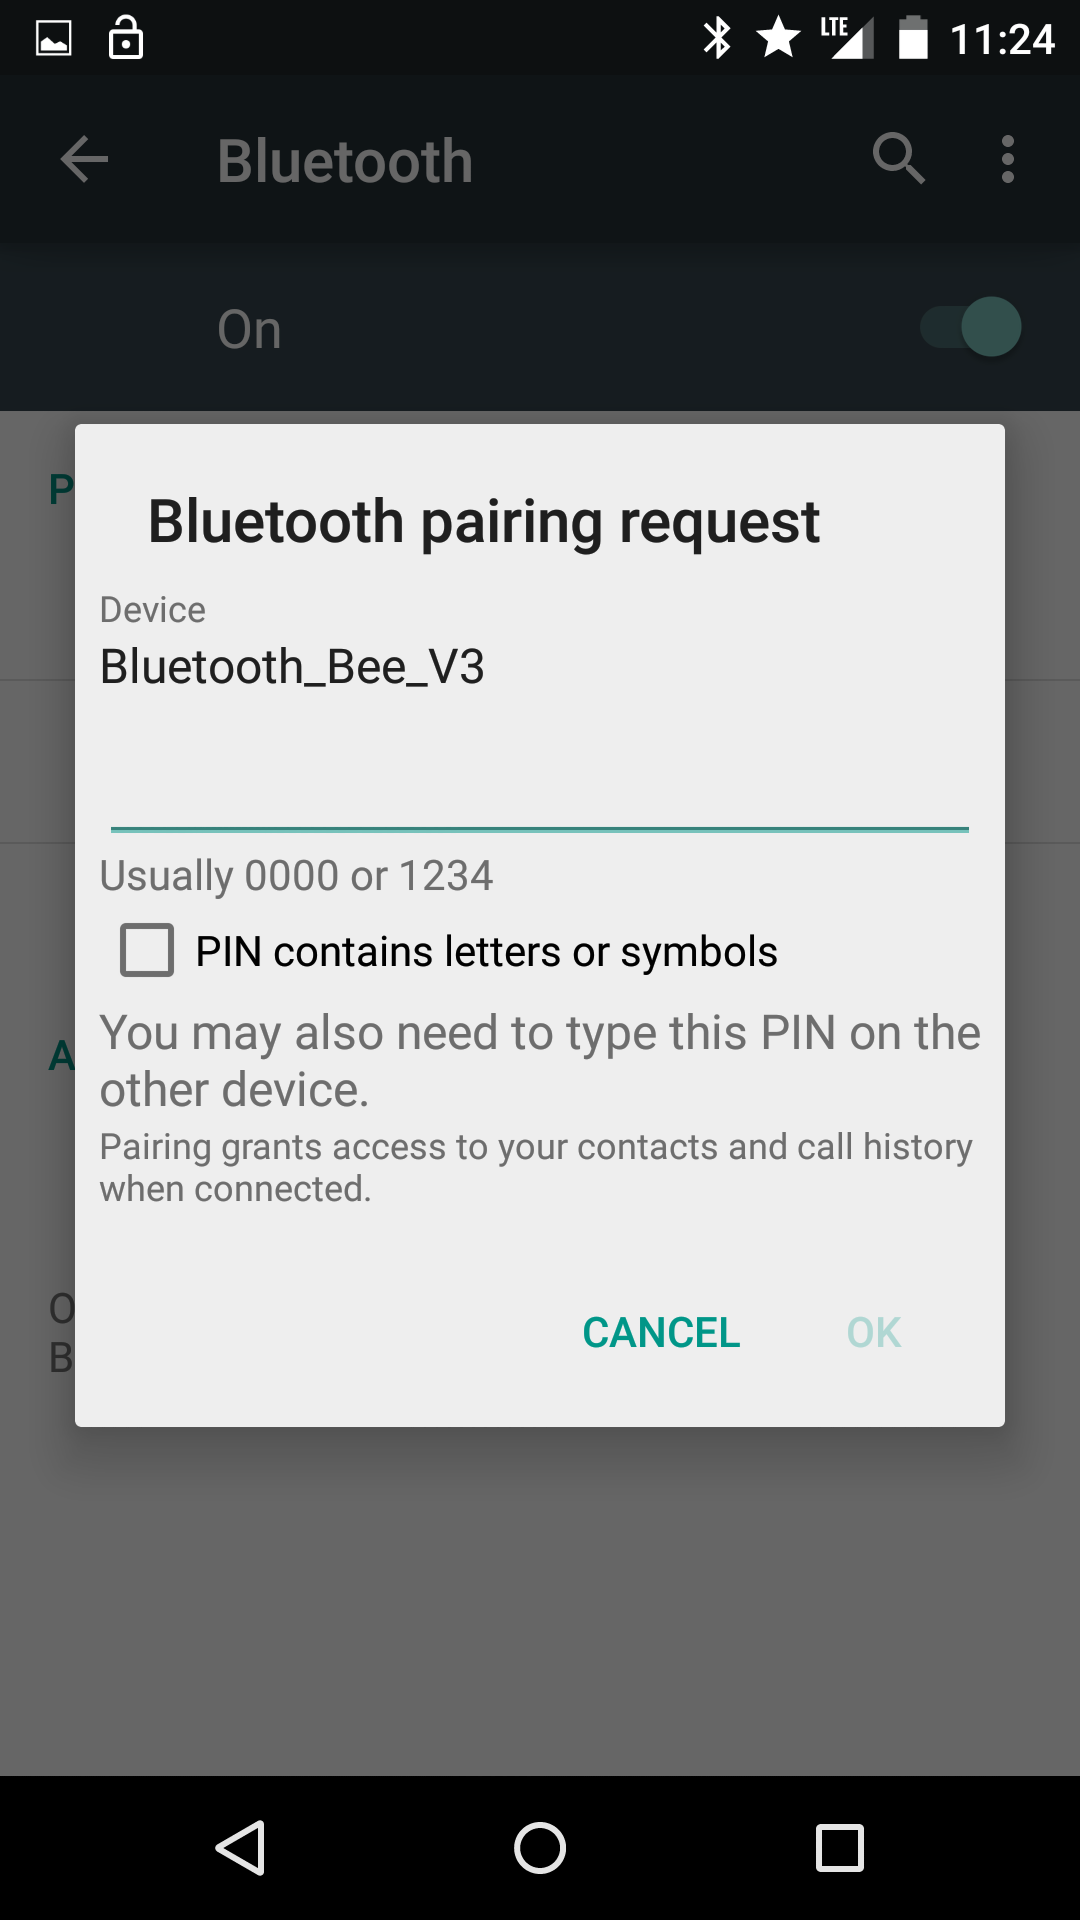 3 - Bluetooth Pairing 3 - Bluetooth Pairing |
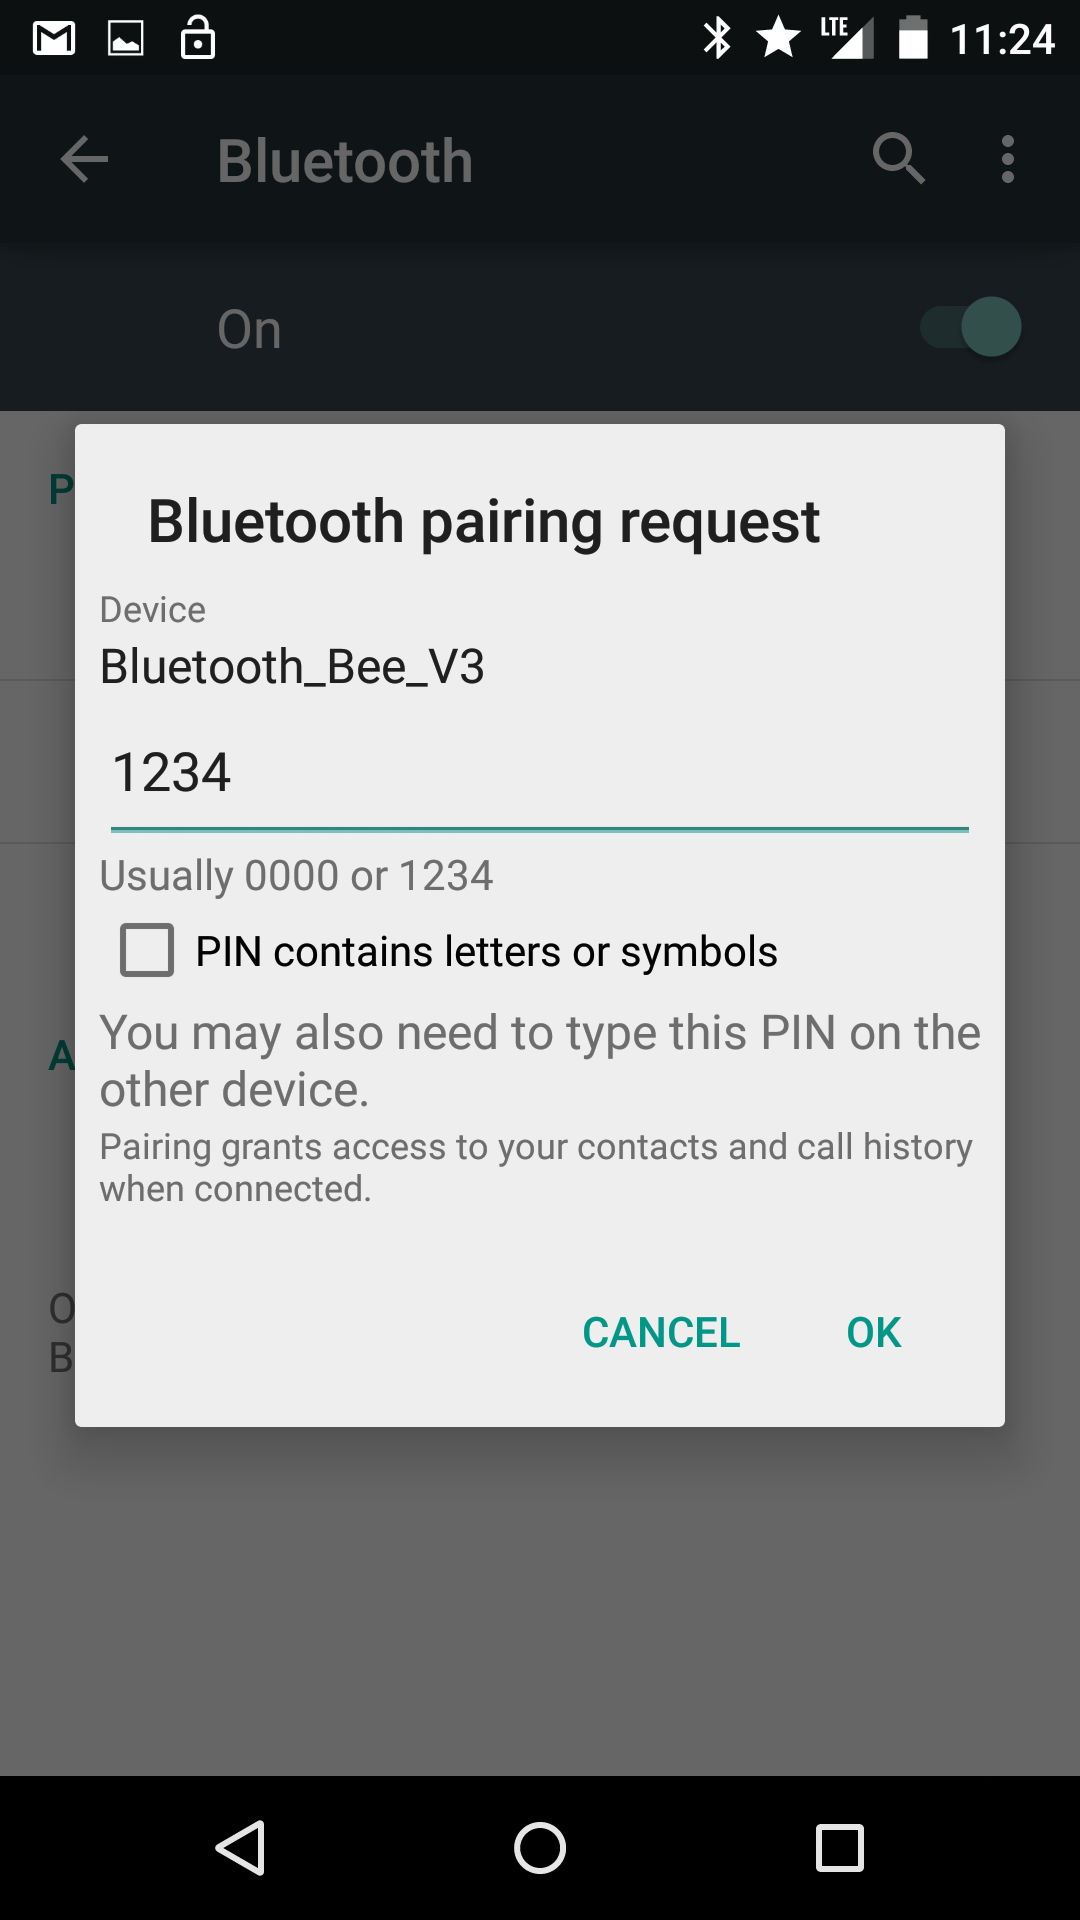 4 - Pin Code "1234" 4 - Pin Code "1234" |
EZ-GUI Setup:
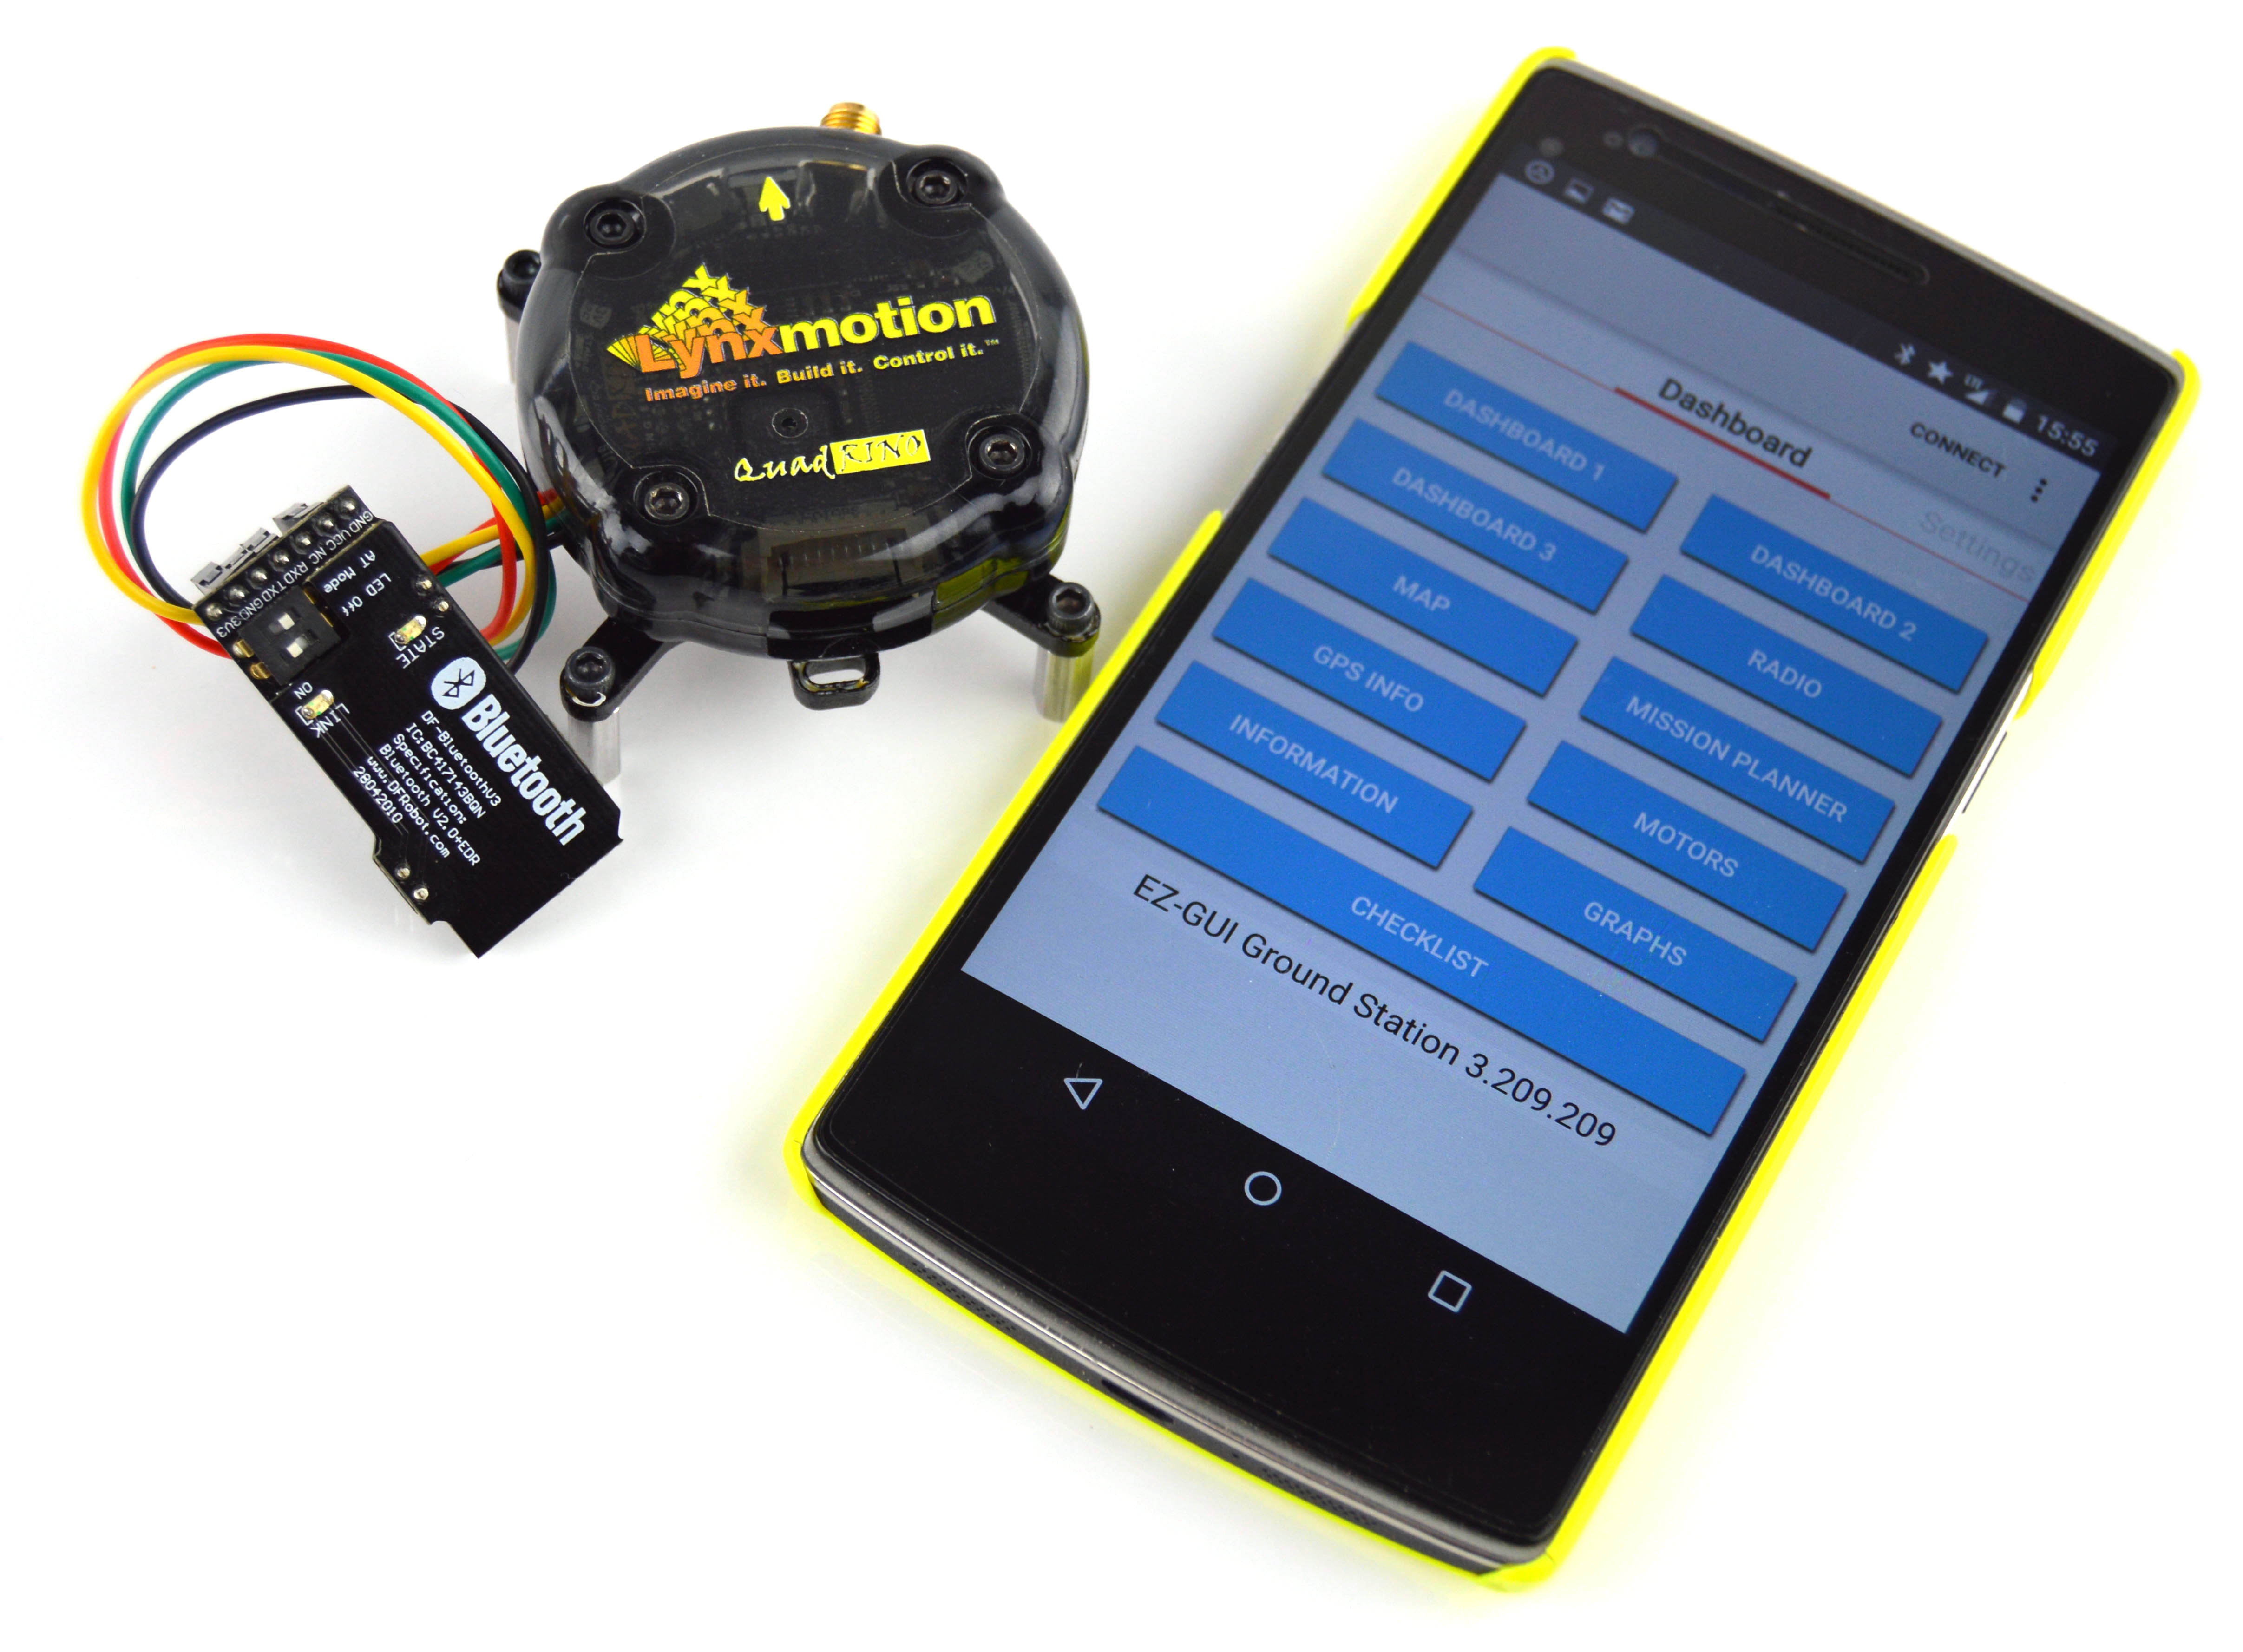
To initiate the connection you need to setup the EZ-GUI application to use your Bluetooth module. First, start the application and swipe to the right until you access the "Config" tab than click on "SETTINGS". In this page select "Bluetooth" and below you can select which Bluetooth device will be used for the communication. Hit the "back" key of your phone and it should save the settings. Click "CONNECT" and when opening the DASHBOARD1 you should see what's on the last image which is real time data from your Quadrino.
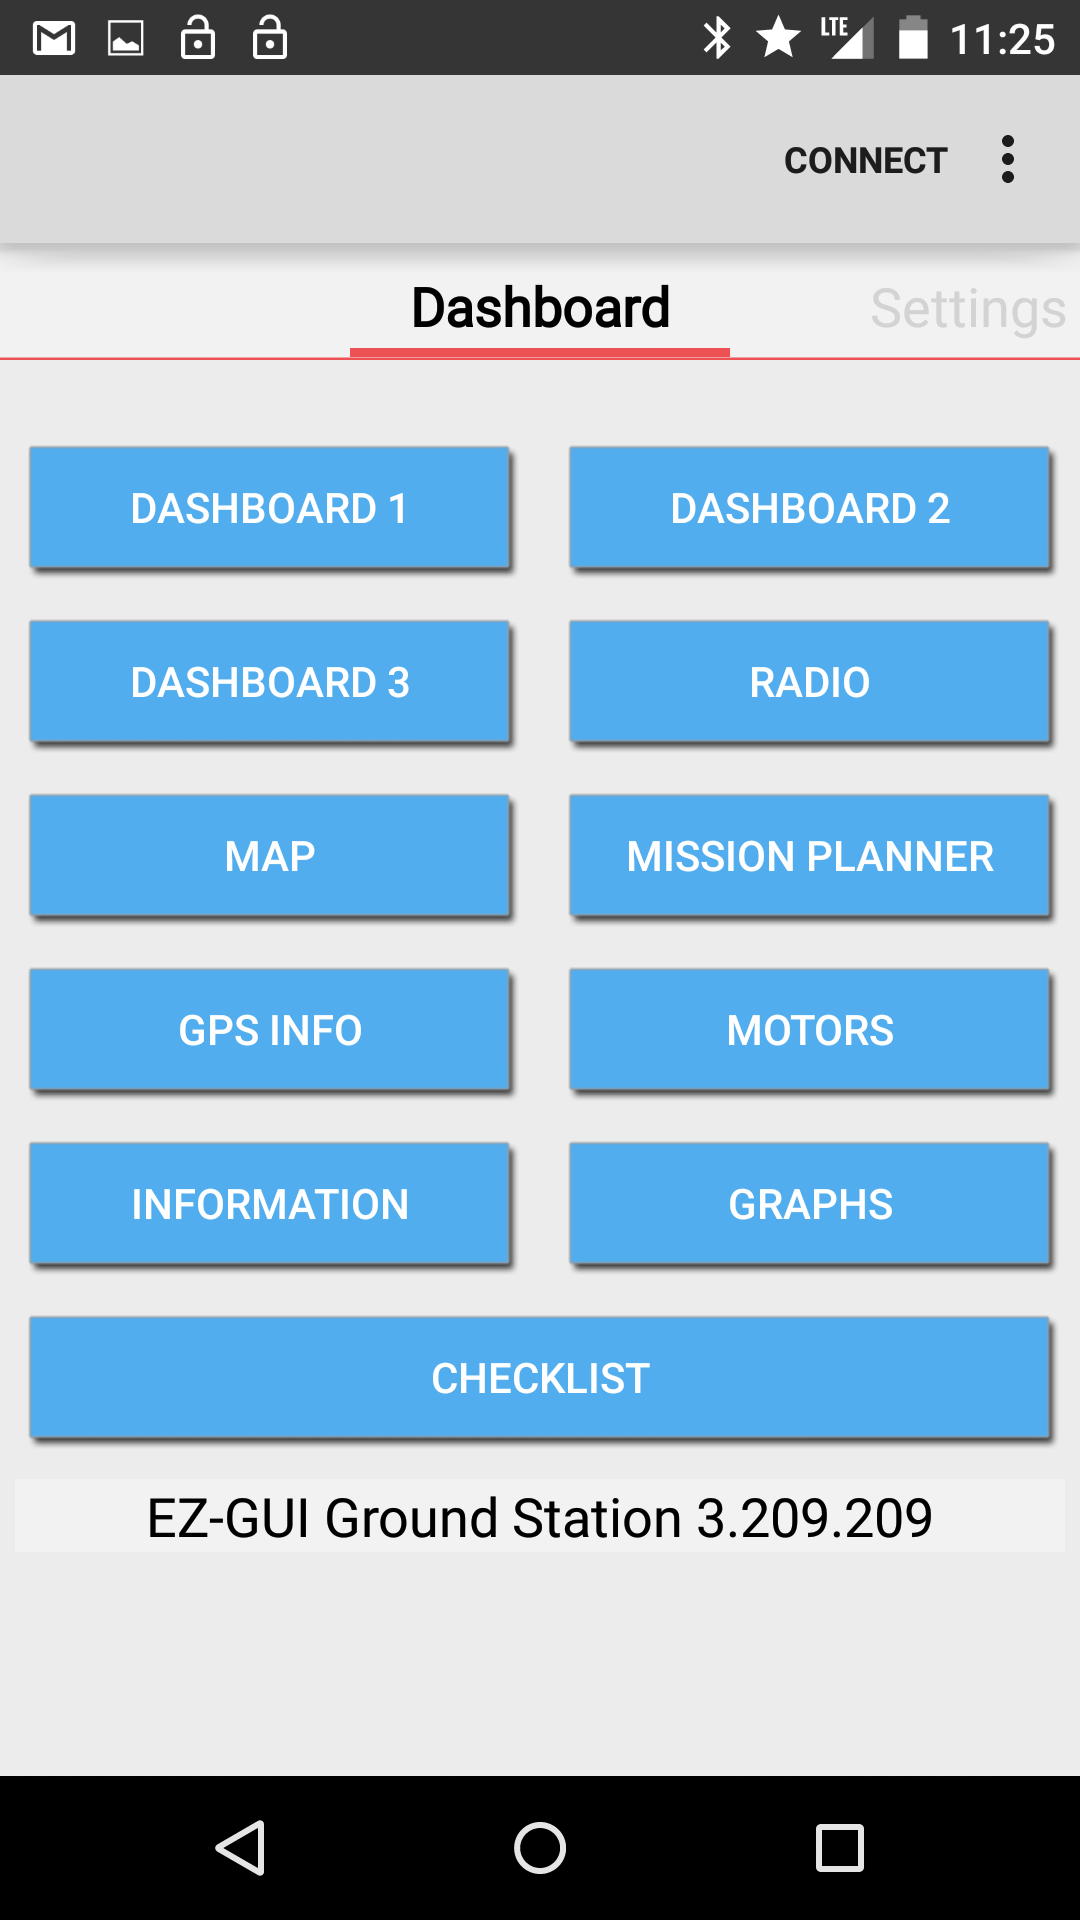 1 - Open EZ-GUI 1 - Open EZ-GUI |
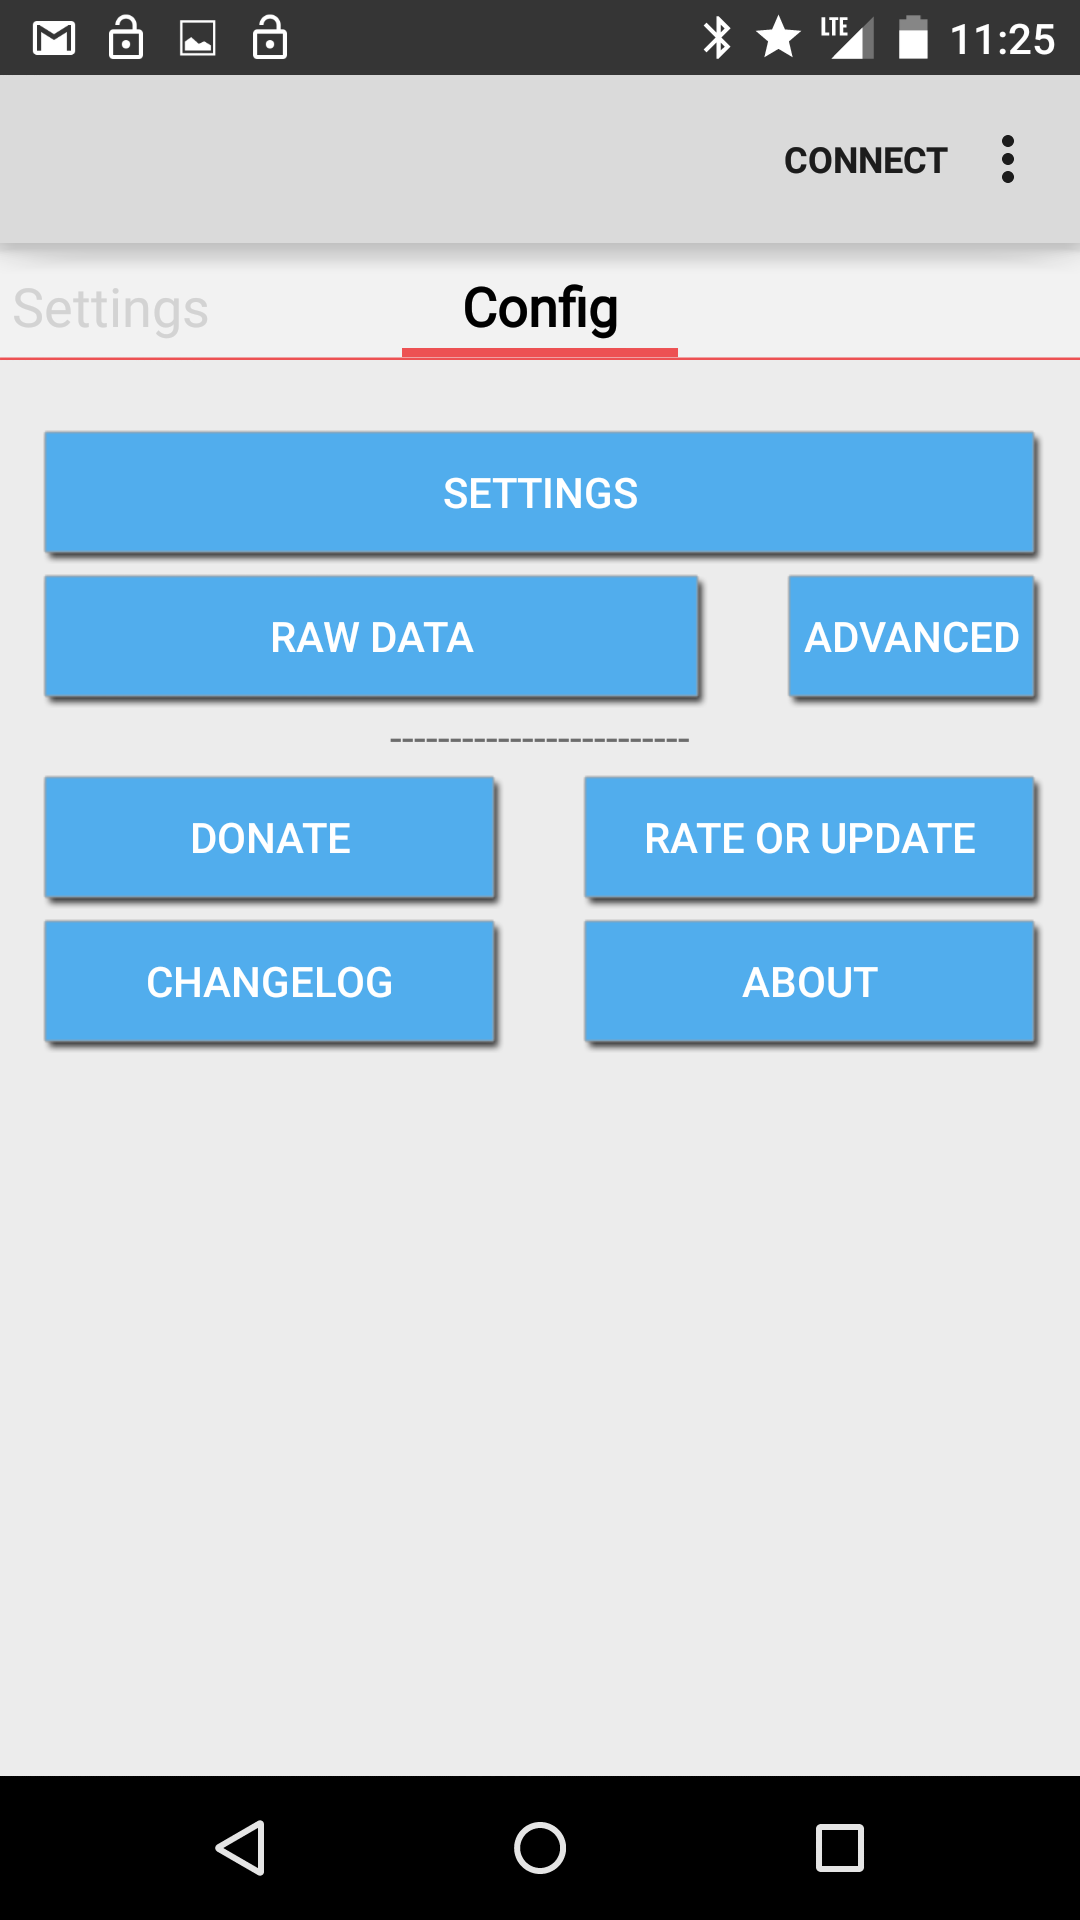 2 - Configuration 2 - Configuration |
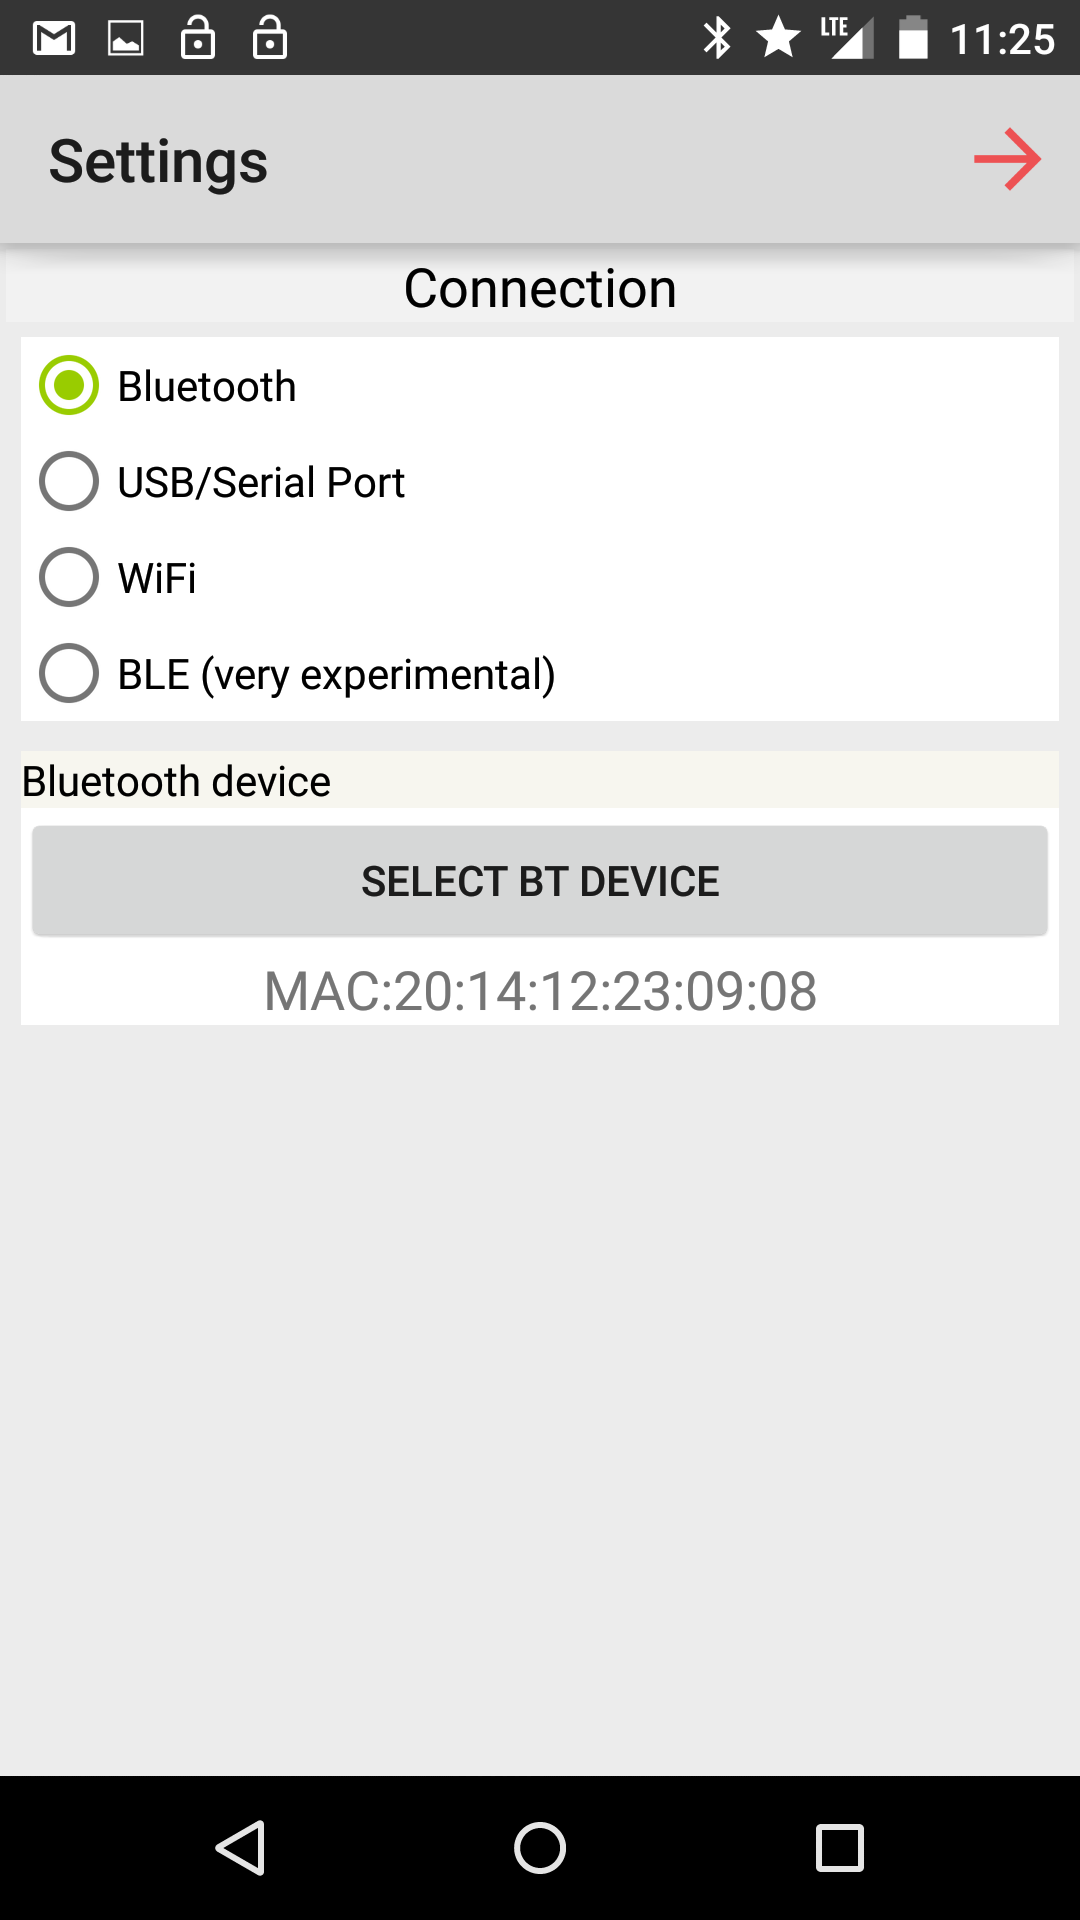 3 - Set Connection 3 - Set Connection |
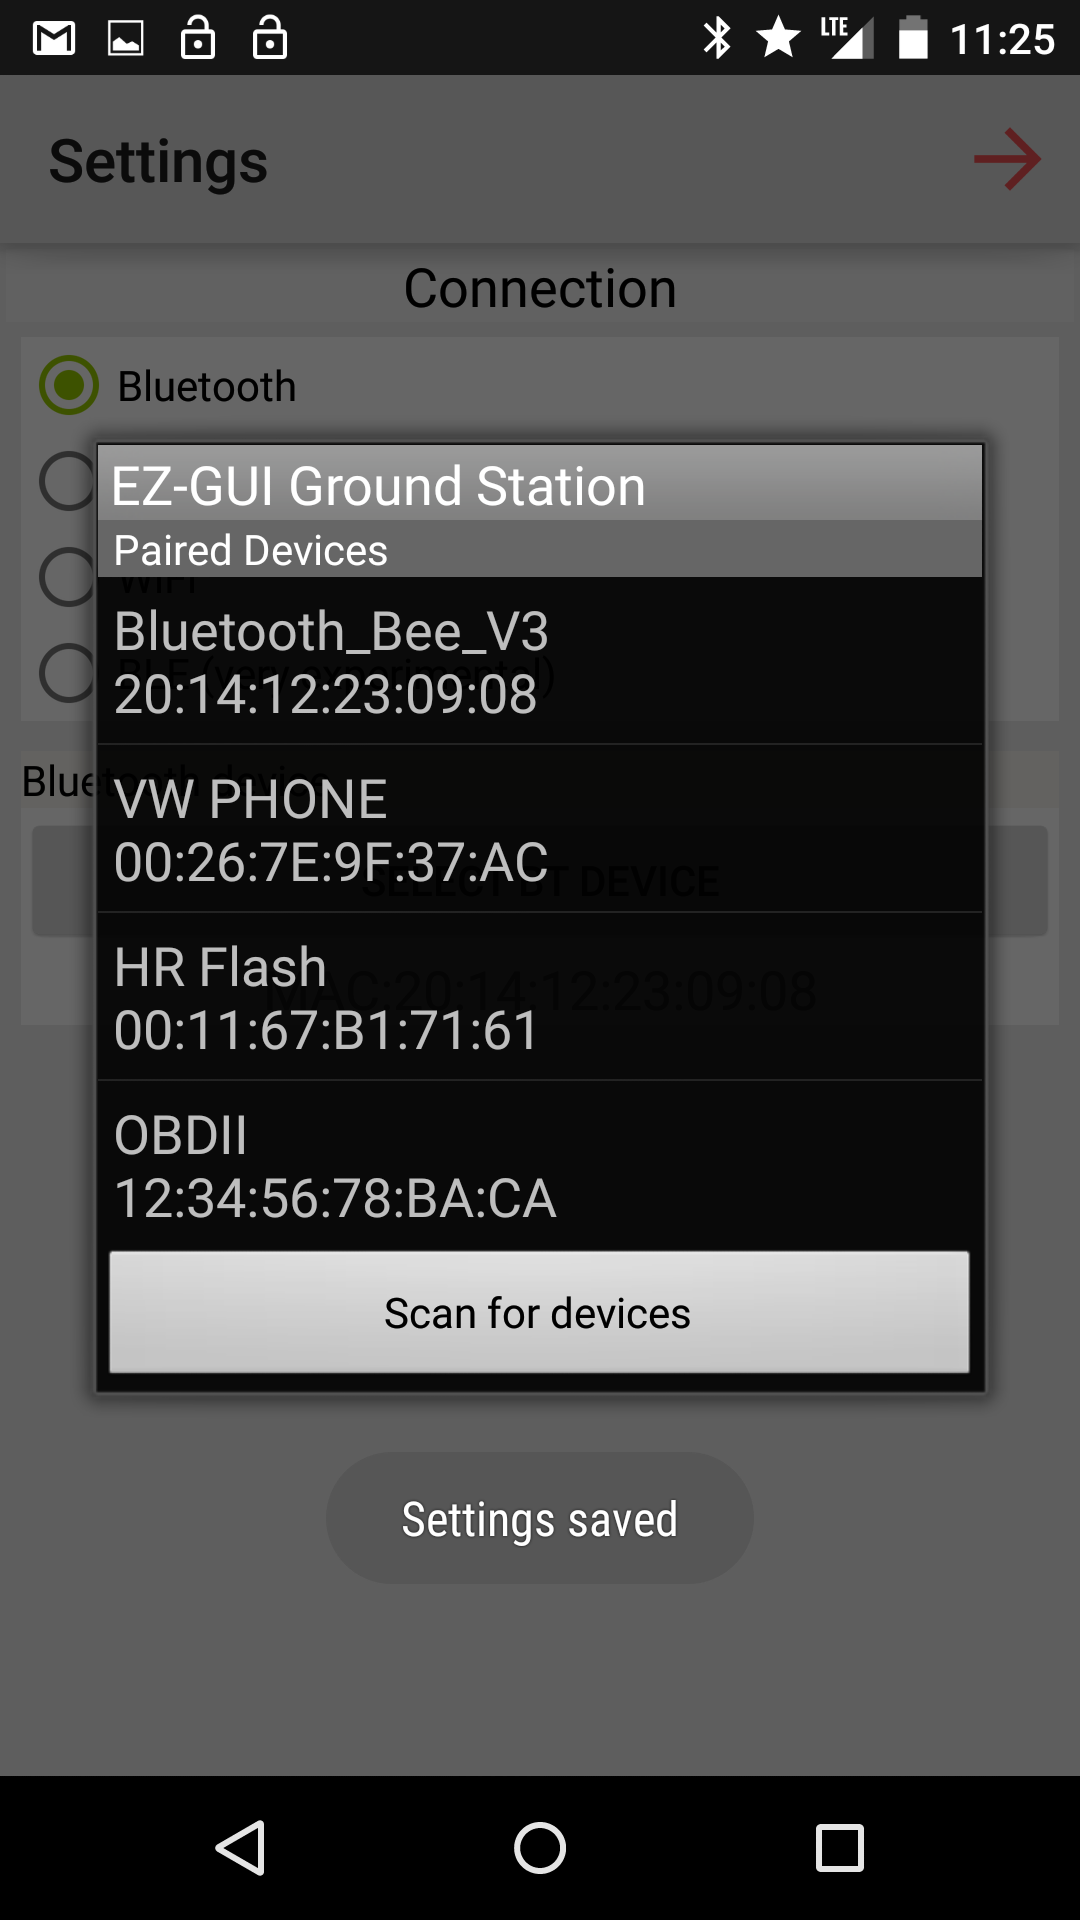 4 - Set Bluetooth Device 4 - Set Bluetooth Device |
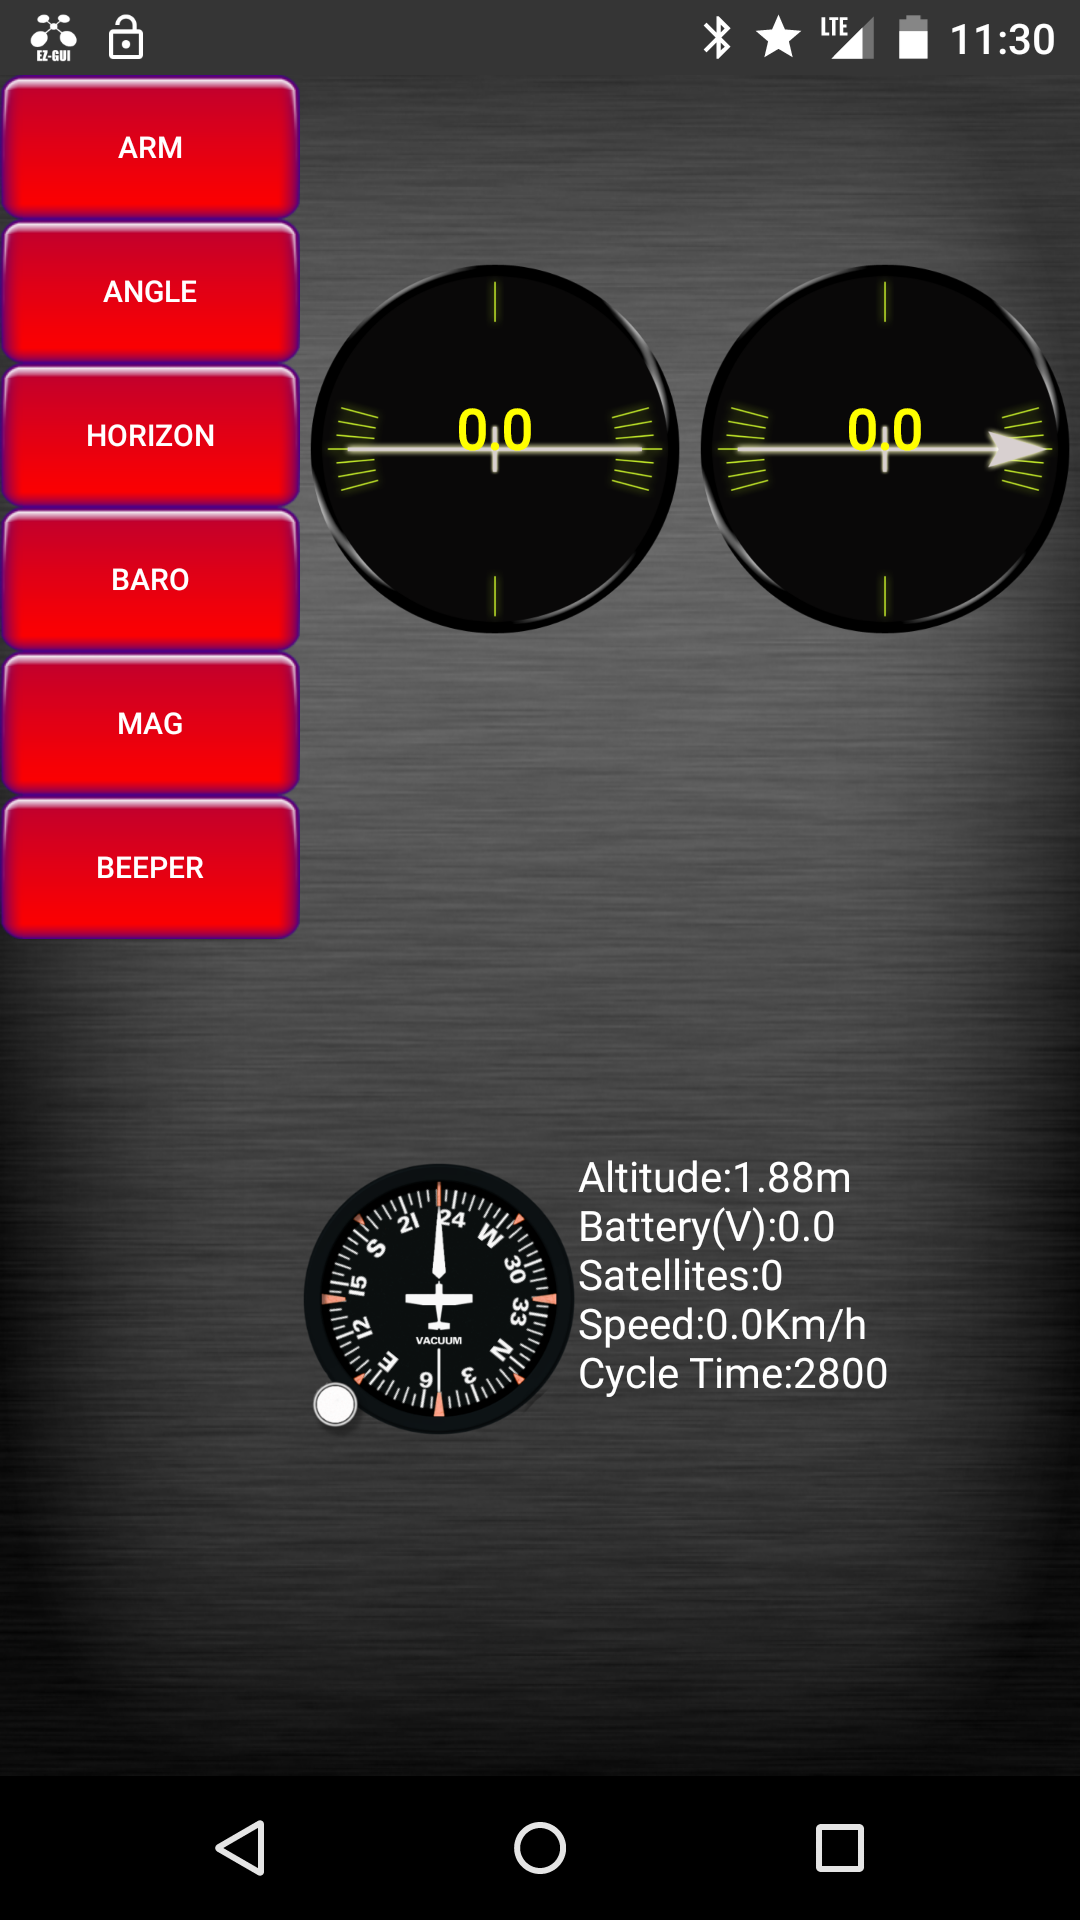 5 - Test DASHBOARD1 5 - Test DASHBOARD1 |
Option 2 - 3DRobotics Radio Modules |
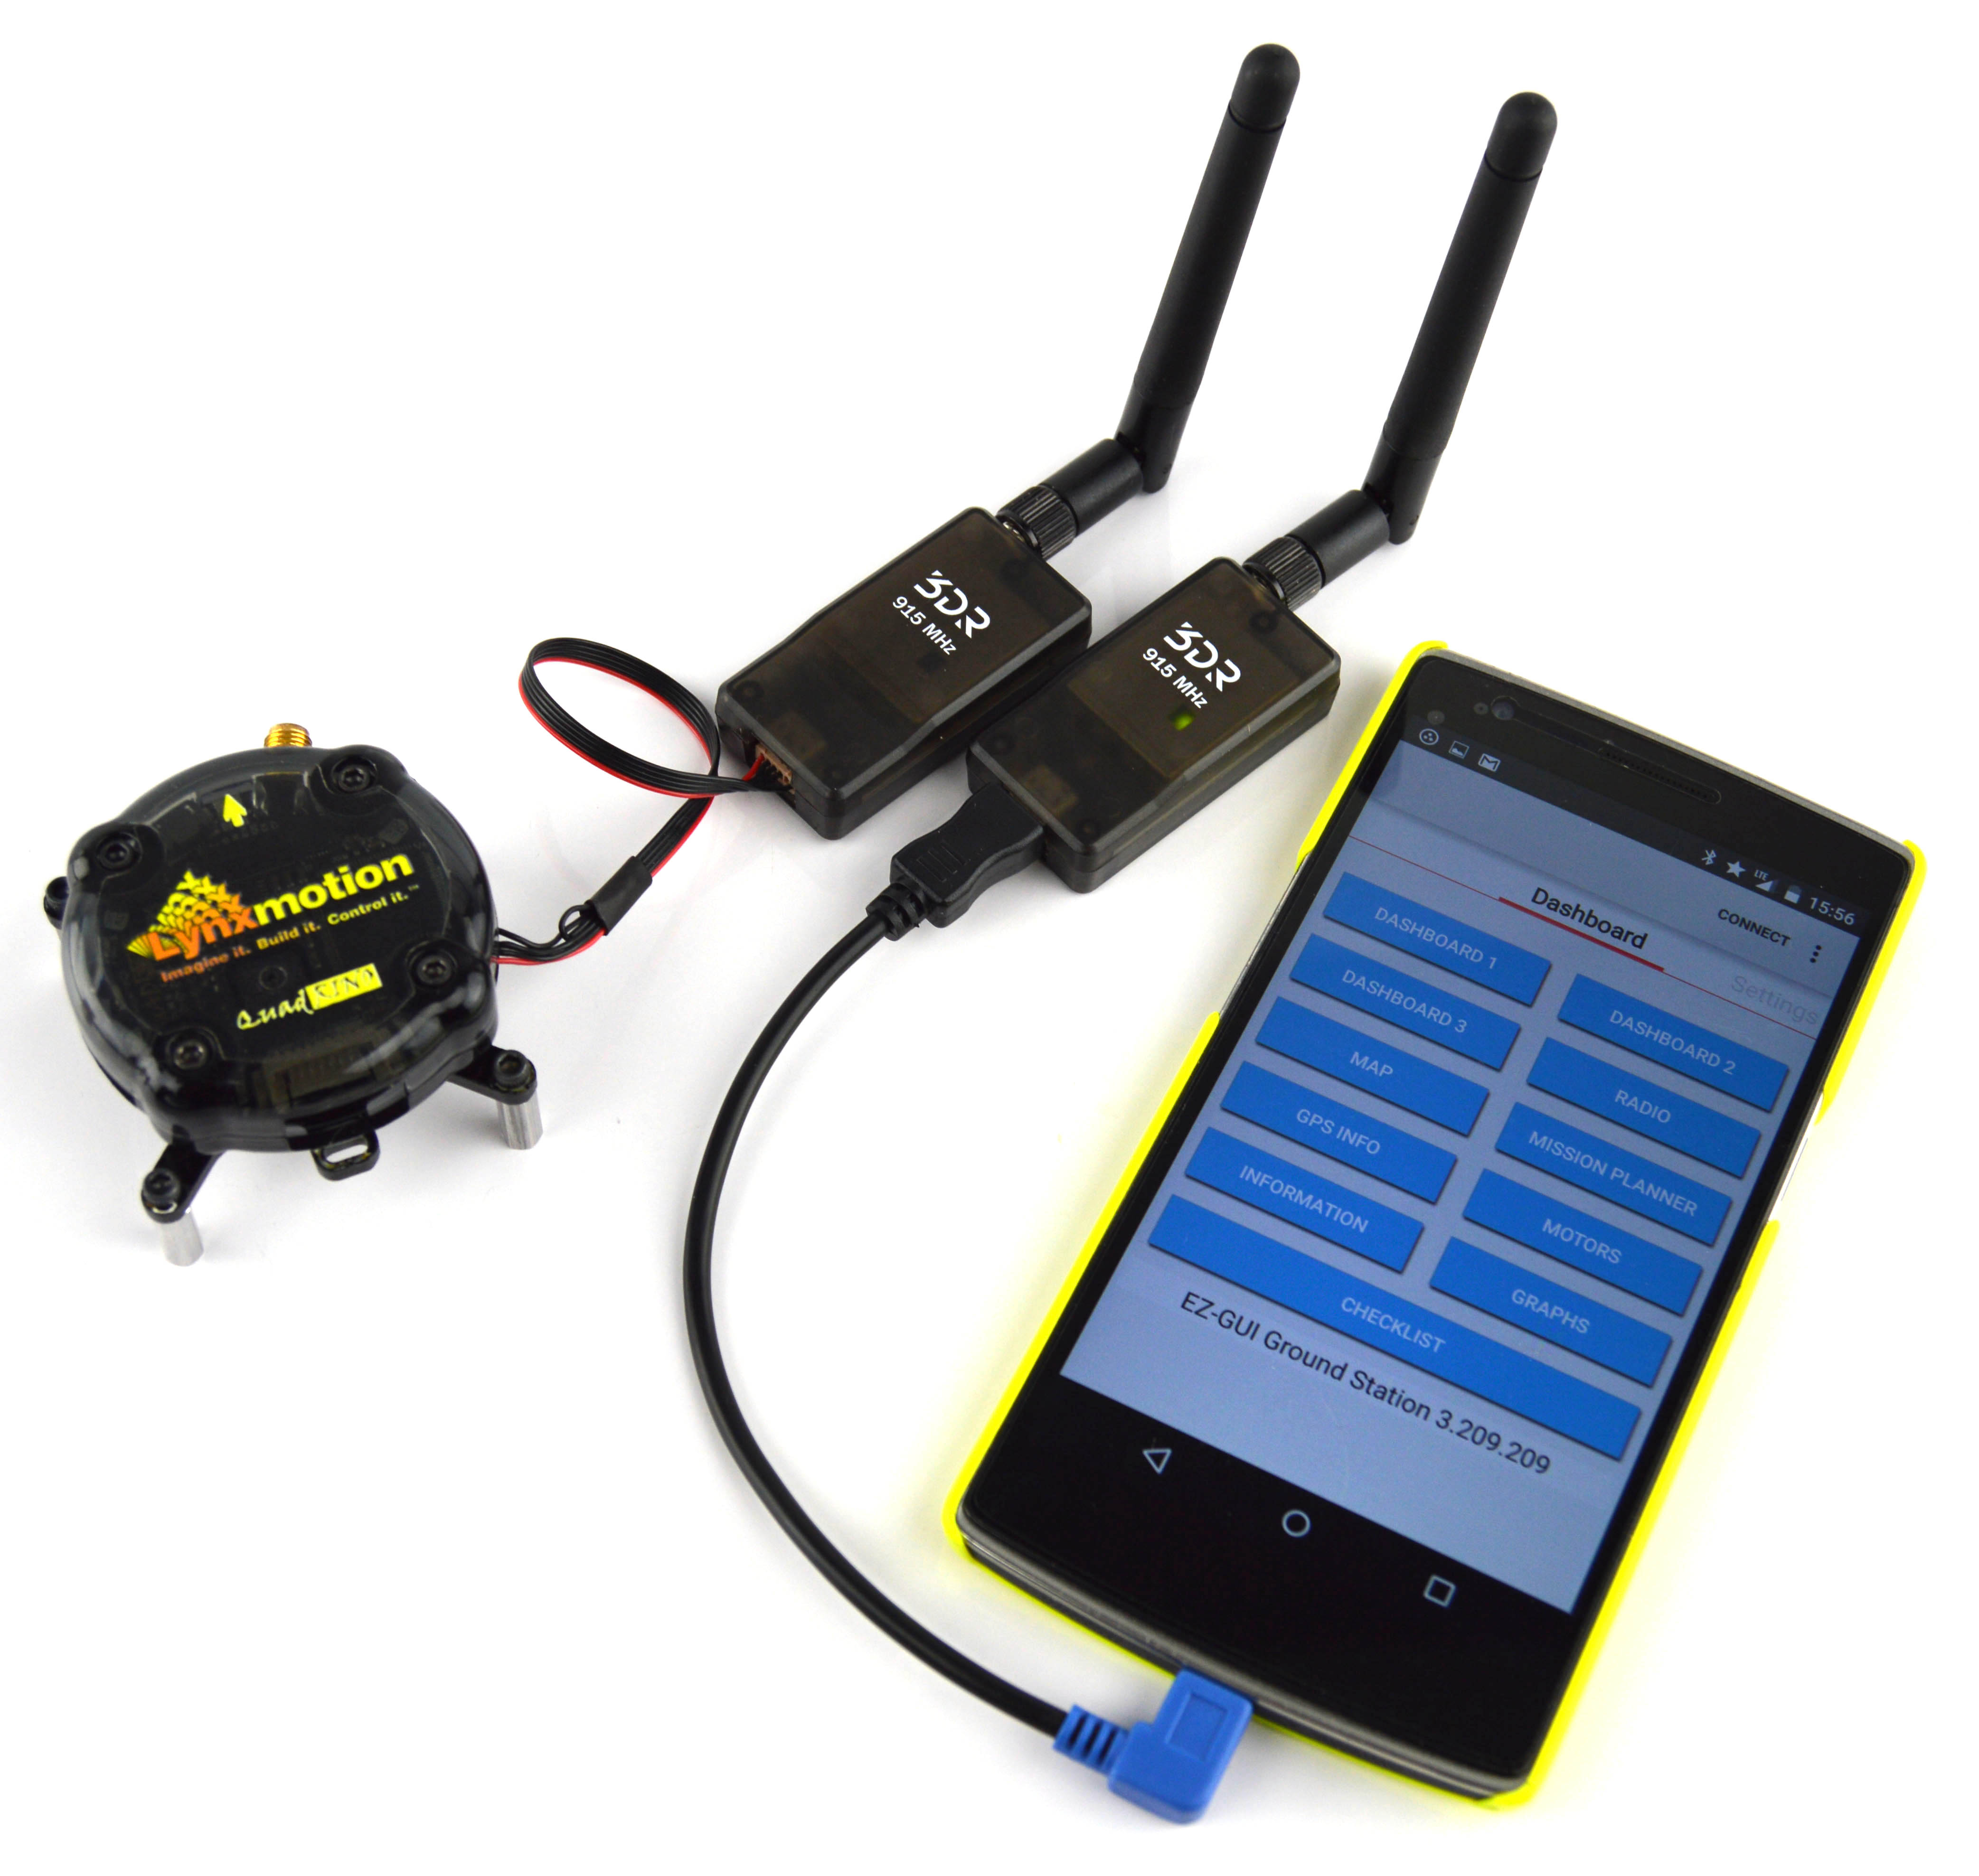 Quadrino Nano - 3DR Radio Set Quadrino Nano - 3DR Radio Set |
The 3DRobotics radio modules are able to do much longer range than a Bluetooth module and are the best choice if you want to have In-Flight connection with your Quadrino Nano. The connector used on the module is not a direct fit but the pins inside the connector are so we can use a Molex connector (#0510210400) and insert the original pins to make it work. Material Needed:
|
Connection:
Those modules are made to be compatible with the APM & PixHawk controller and the provided cables are compatible with them. To make it work on a Quadrino Nano you will need to change one side of the connector. Here is the complete pinout of the pcb which will help us find the right connection.
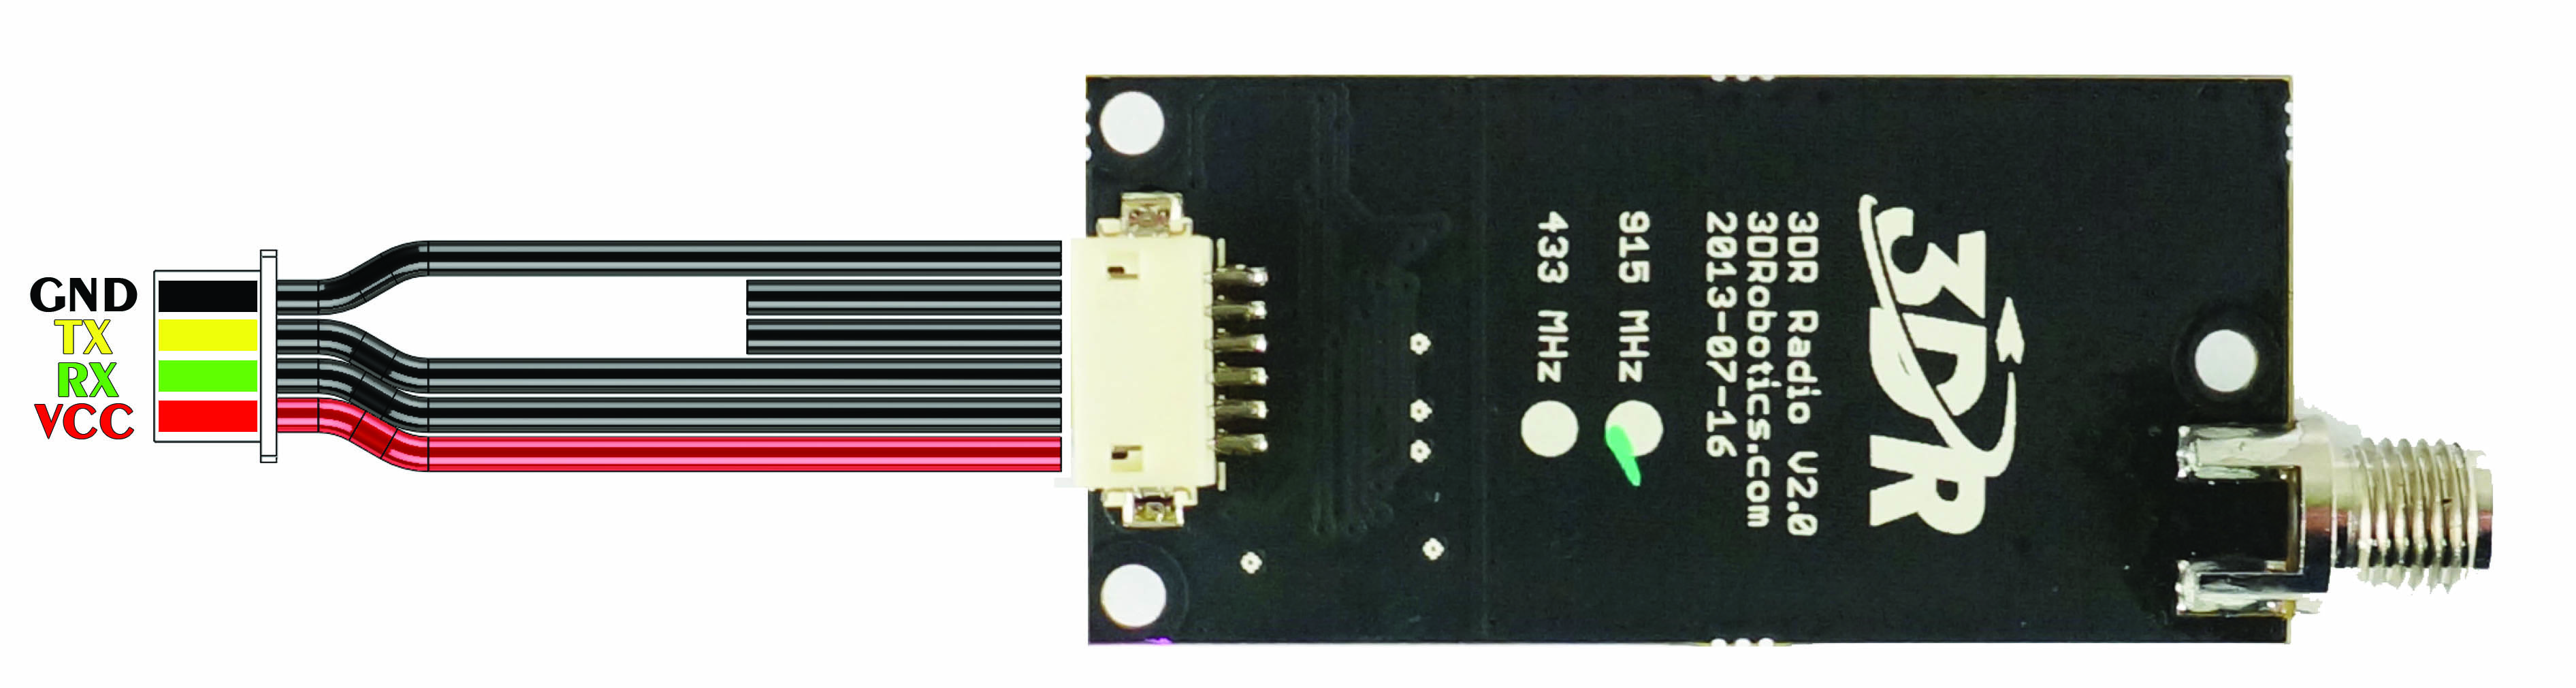
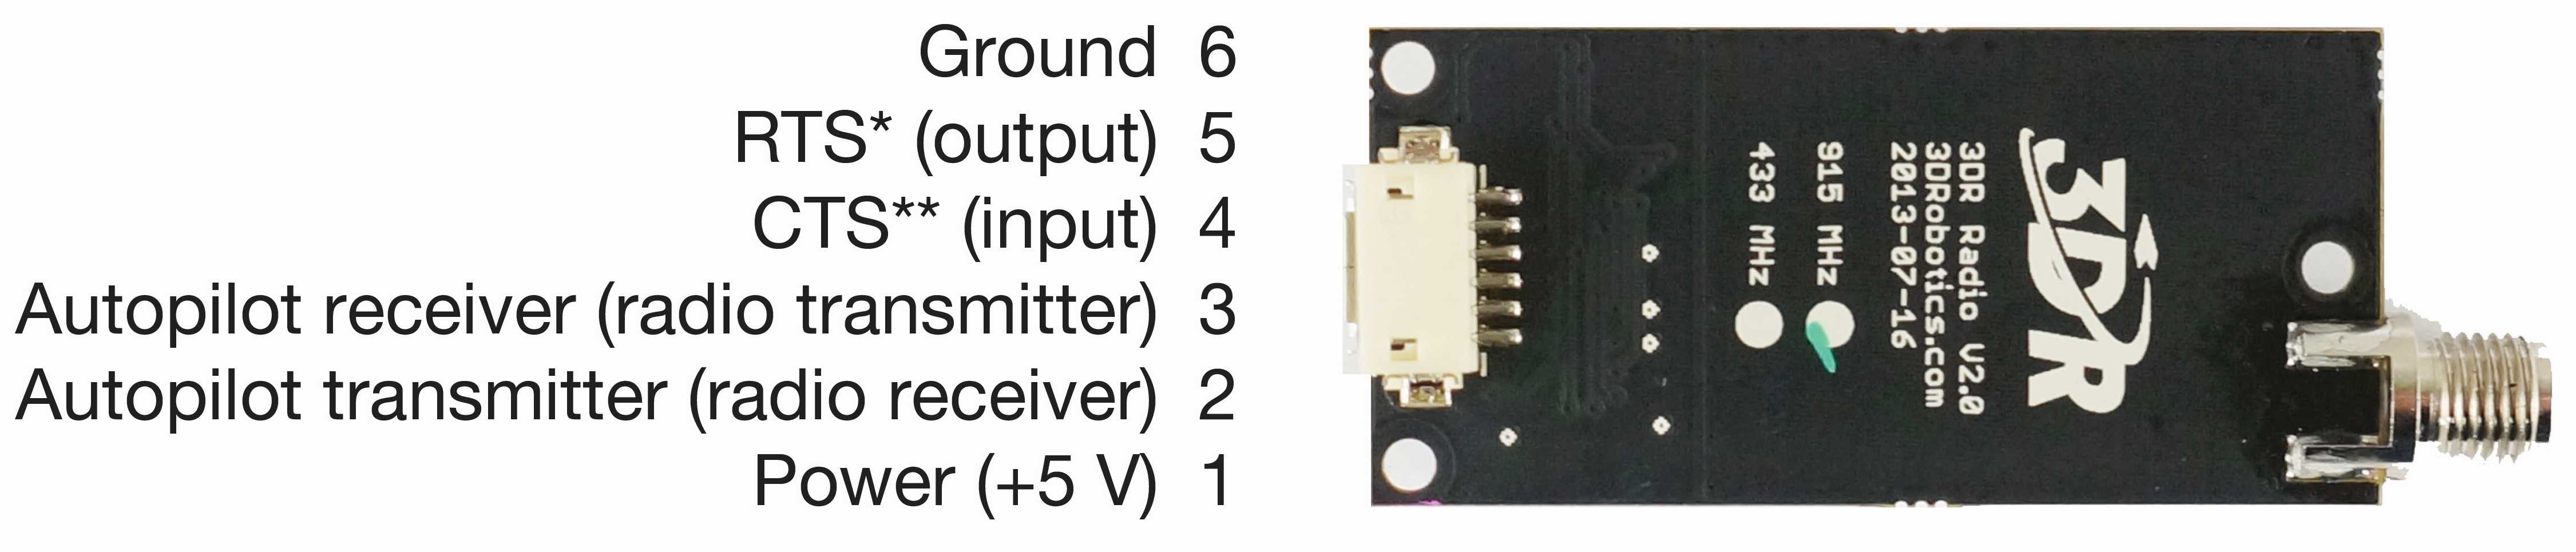 3DRobotics Radio PinOut |
Here is the 3DR Radio module pinout for reference. The RTS and CTS connection won't be needed for this application. |
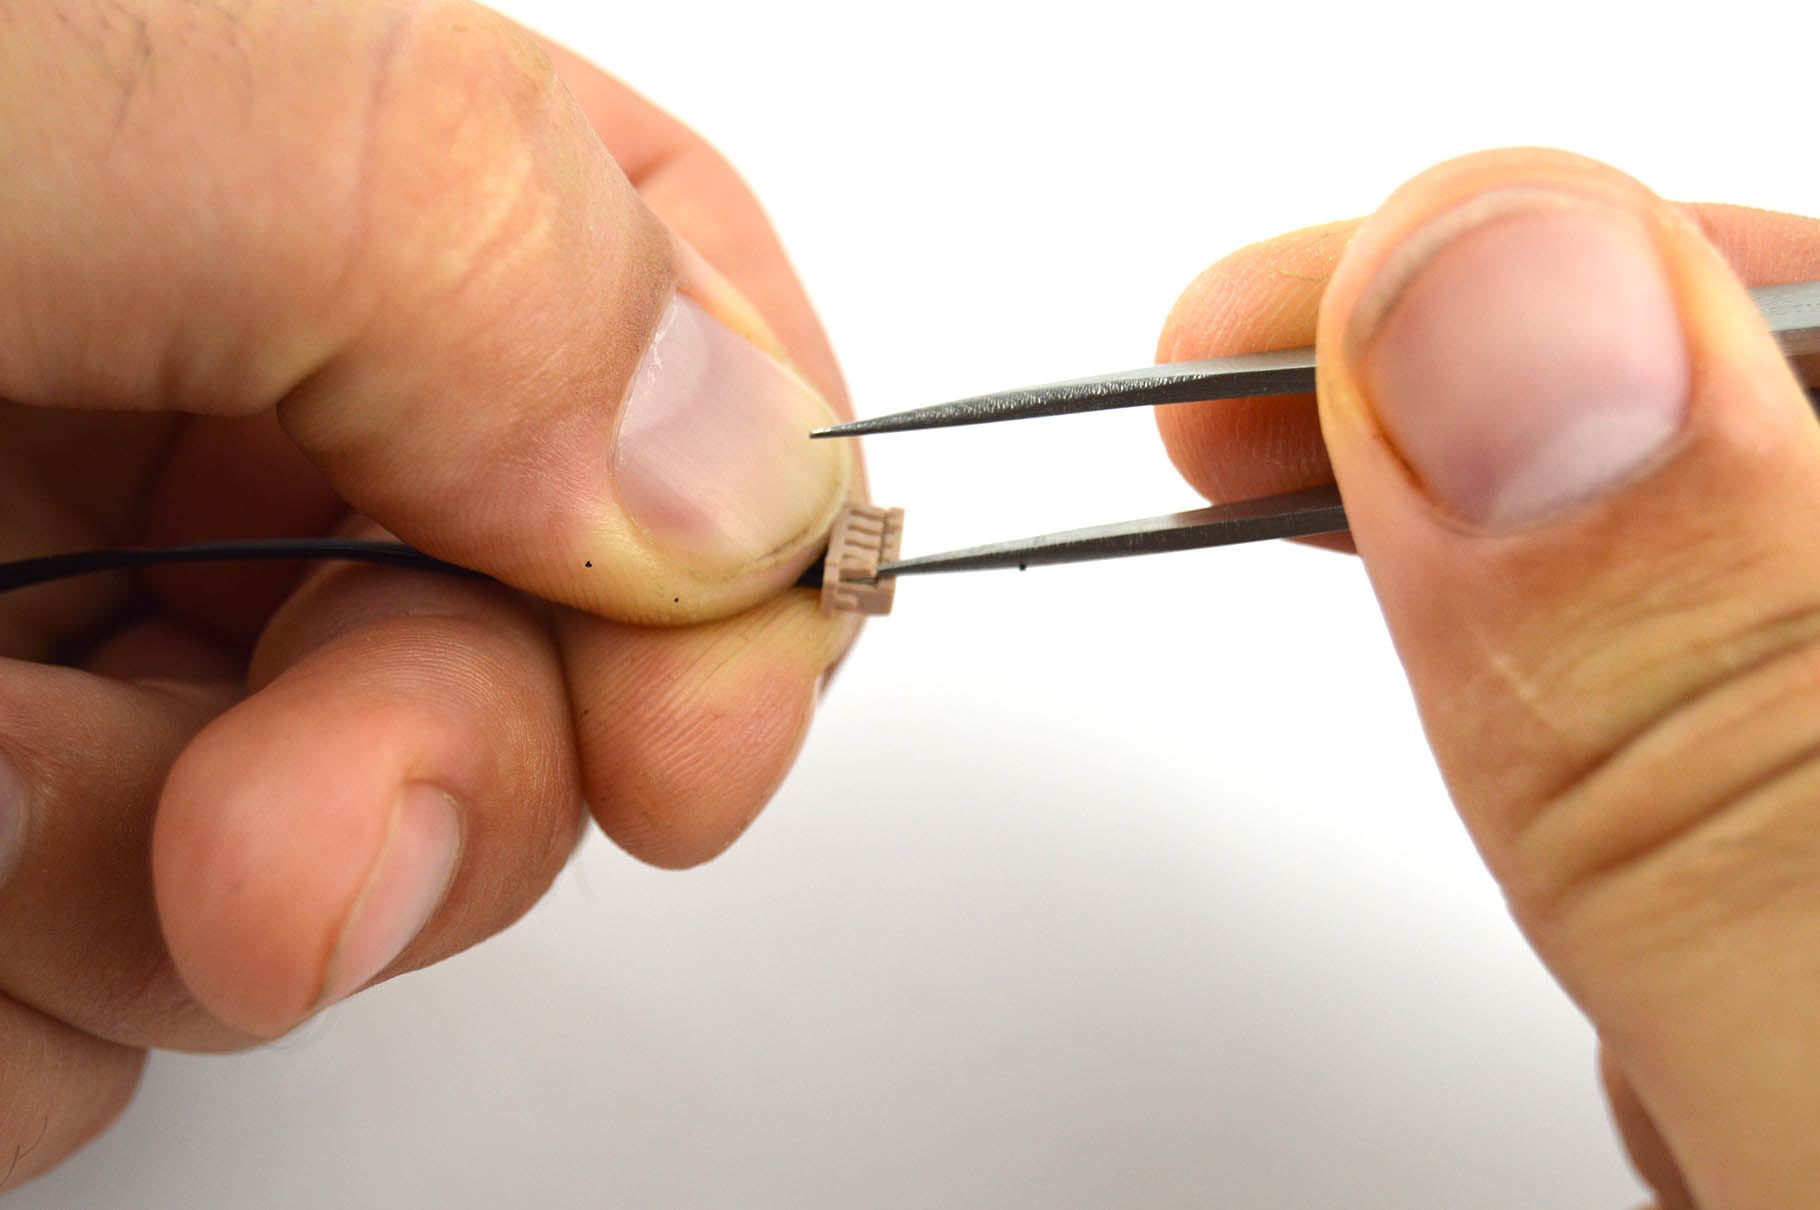 3DR Radio - Pin Removal 3DR Radio - Pin Removal |
There are two cables provided with the 3DR Radio Set and we will only need one of them. We will use the one with a five pin connector on one end and a six pin connector on the other. Remove the five pins that are inside the five pins connector and leave the six pins side as they are. To remove the pins, you can use a pair of tweezer with a fine tip or an X-Acto (be careful not to hurt yourself or cut the plastic). Insert the tool under the plastic tab and pull the pin out by pulling the wire, this is supposed to be very easy so if you apply too much force it's either you don't have the plastic tab high enough or your retaining it with the tool. Don't pull too hard because you can break the wire. |
 3DRobotics Radio to Quadrino Nano PinOut 3DRobotics Radio to Quadrino Nano PinOut |
Insert the pins in the Molex connector (#0510210400) as per the following drawing. The remaining wire needs to be isolated, you can use shrink tube over it or some electric tape. |
FCT Software Setup:
Those 3DR Radios are set at 57600 from factory so you have to load your Quadrino Nano with this baudrate.
 FCT - 57600 Baudrate Settings |
You can choose the serial port speeds in the "Misc" tab of the Options page. Once that's done you can flash your Quadrino Nano. |
EZ-GUI Setup:
In the EZ-GUI application, you now have to change the settings. Swipe right until you see the "Config" tab then click on "SETTINGS". In the first page you have to choose the "USB/Serial Port" option then the "FTDI..." drivers and finally set the baudrate to 57600. Click the top right arrow until you get the "Additions" settings and check the "3DR Radio Support". You can now exit the setting with the "back" key of your phone, it will show "Settings Saved".
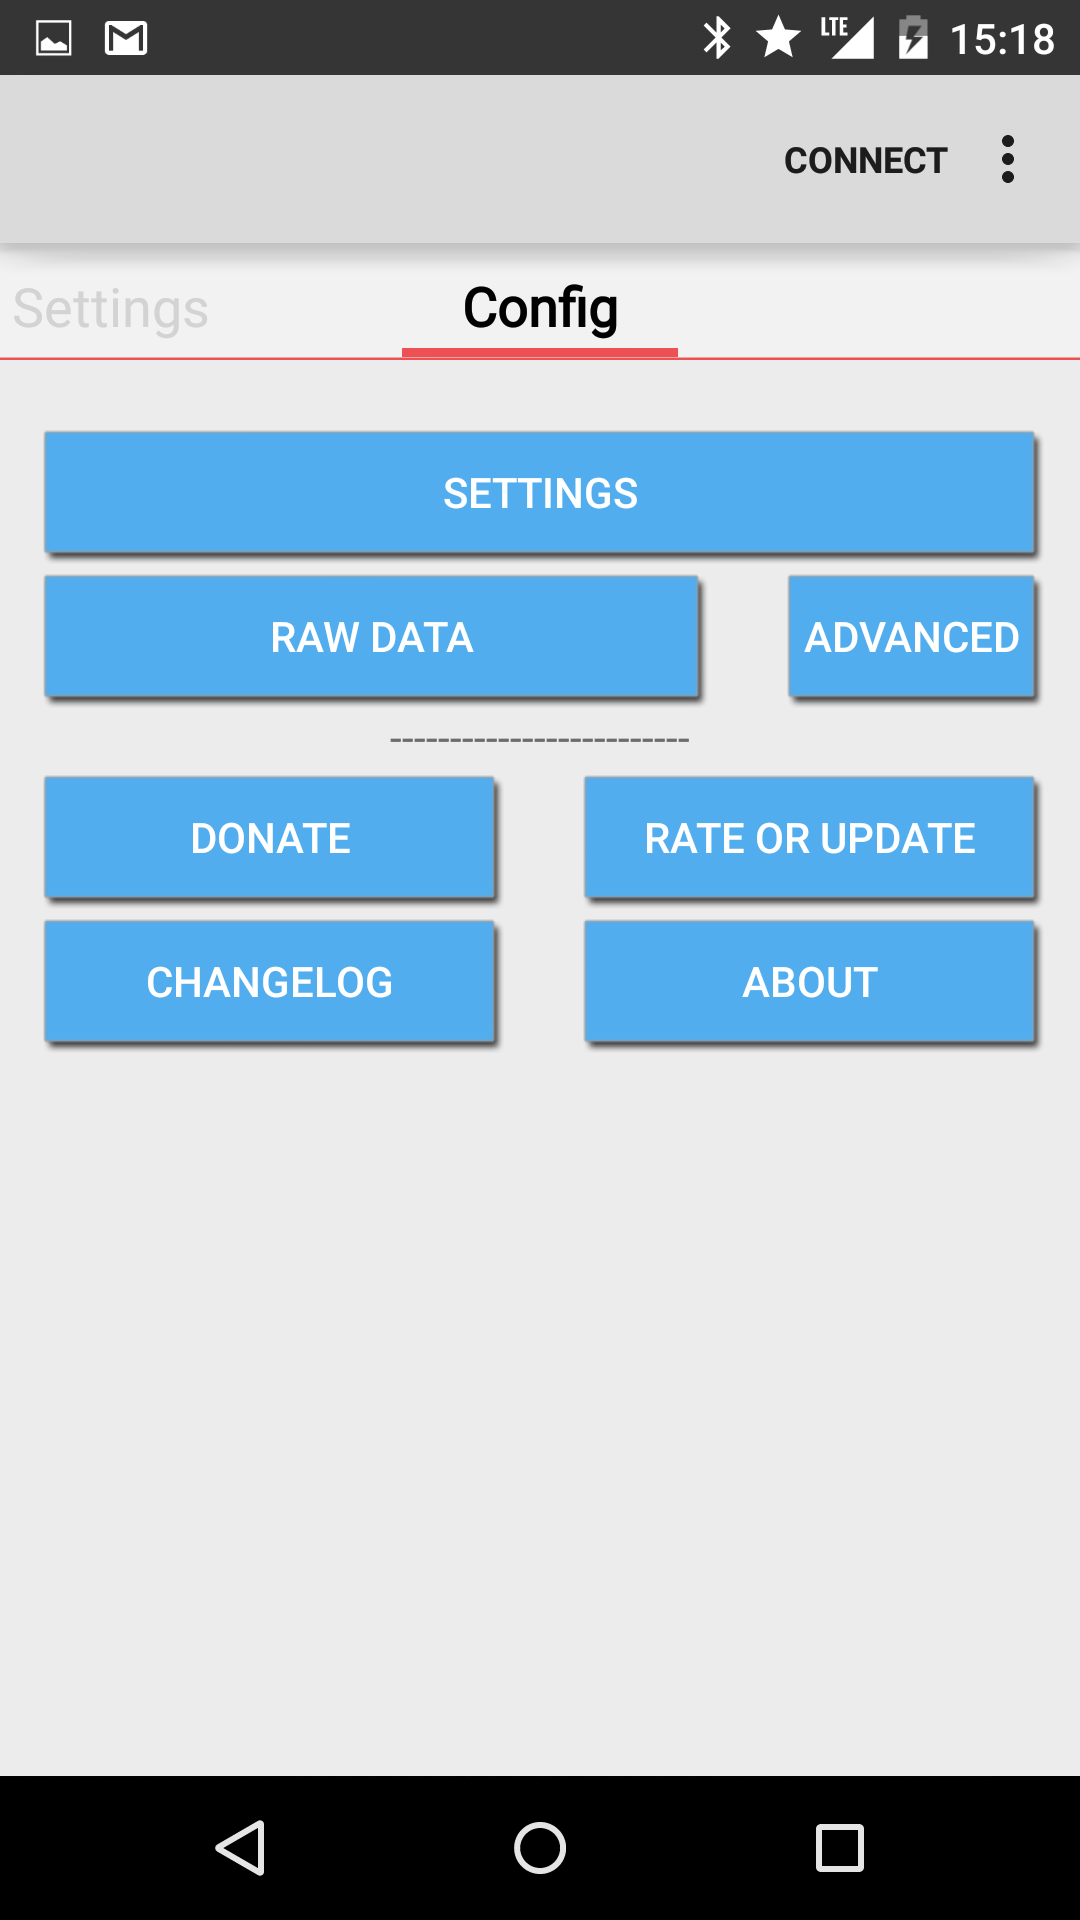 1 - Configuration 1 - Configuration |
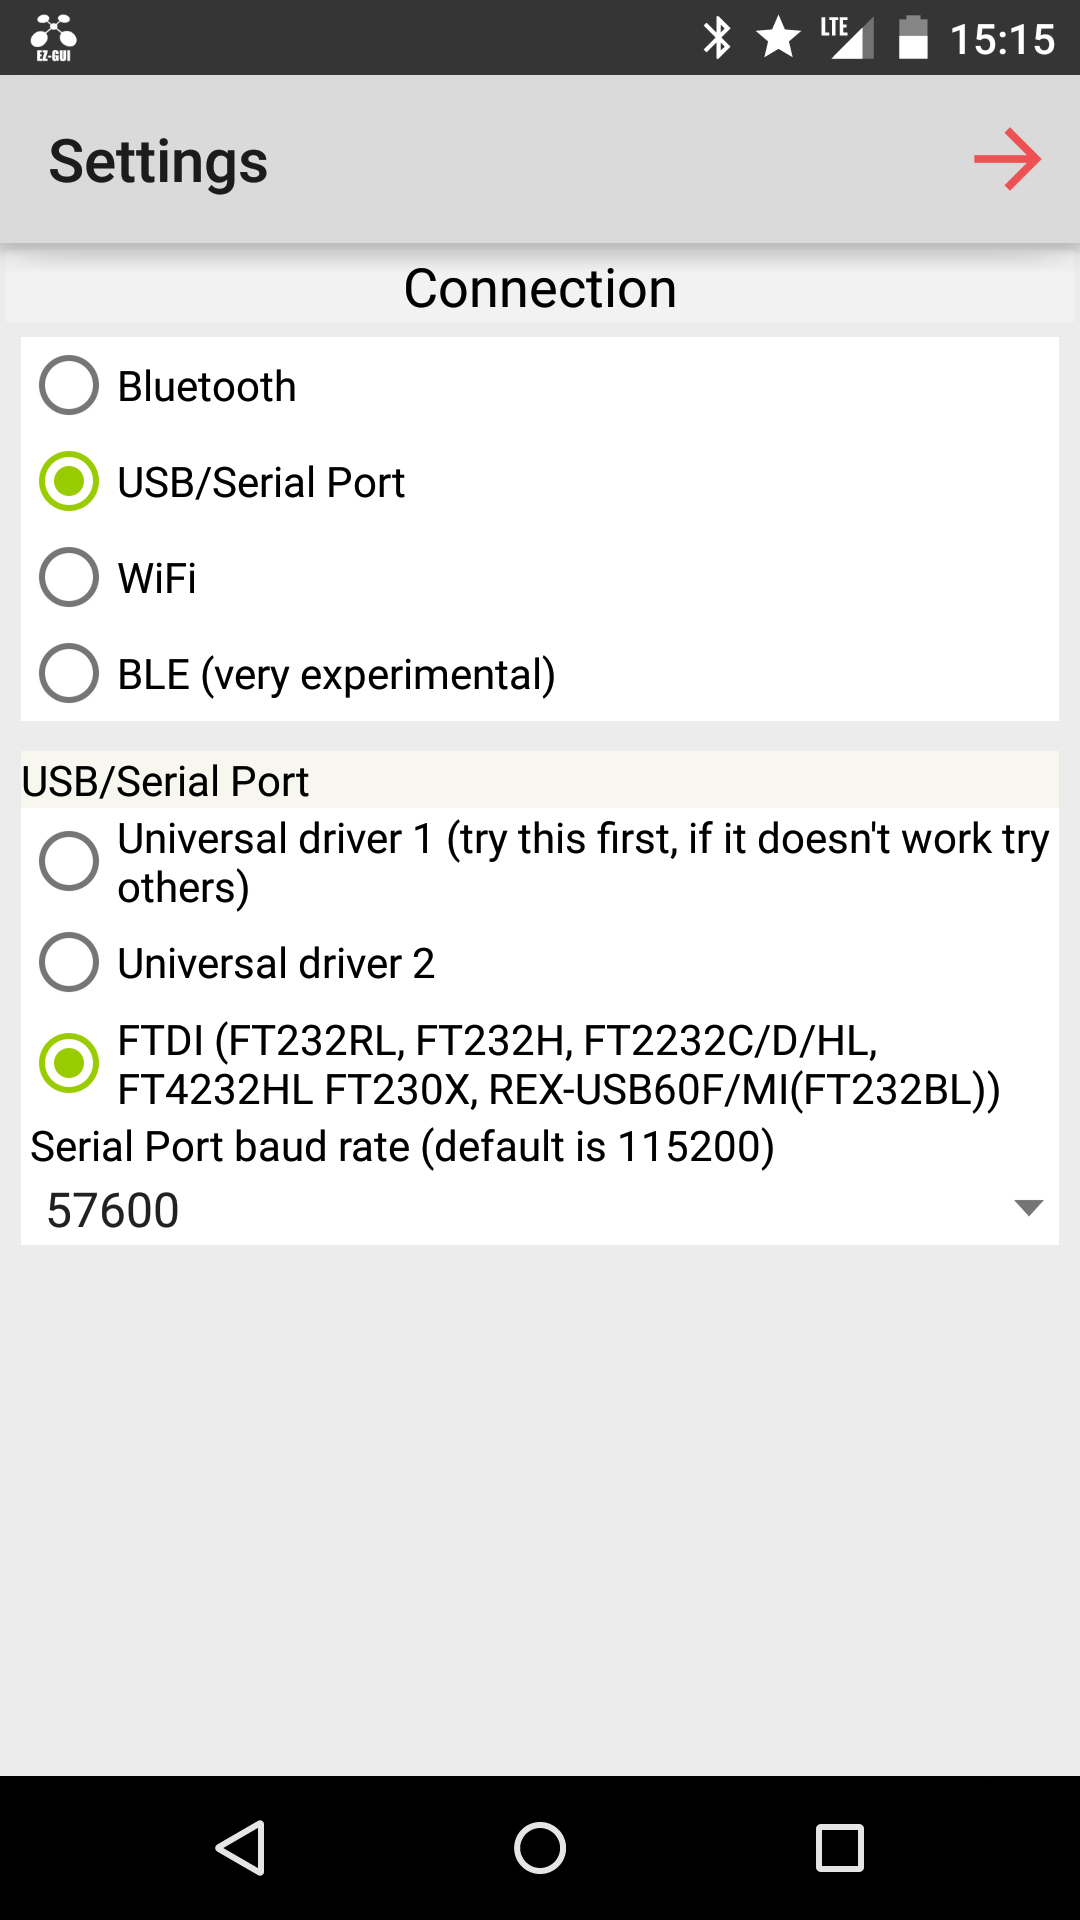 2 - Connection & Driver 2 - Connection & Driver |
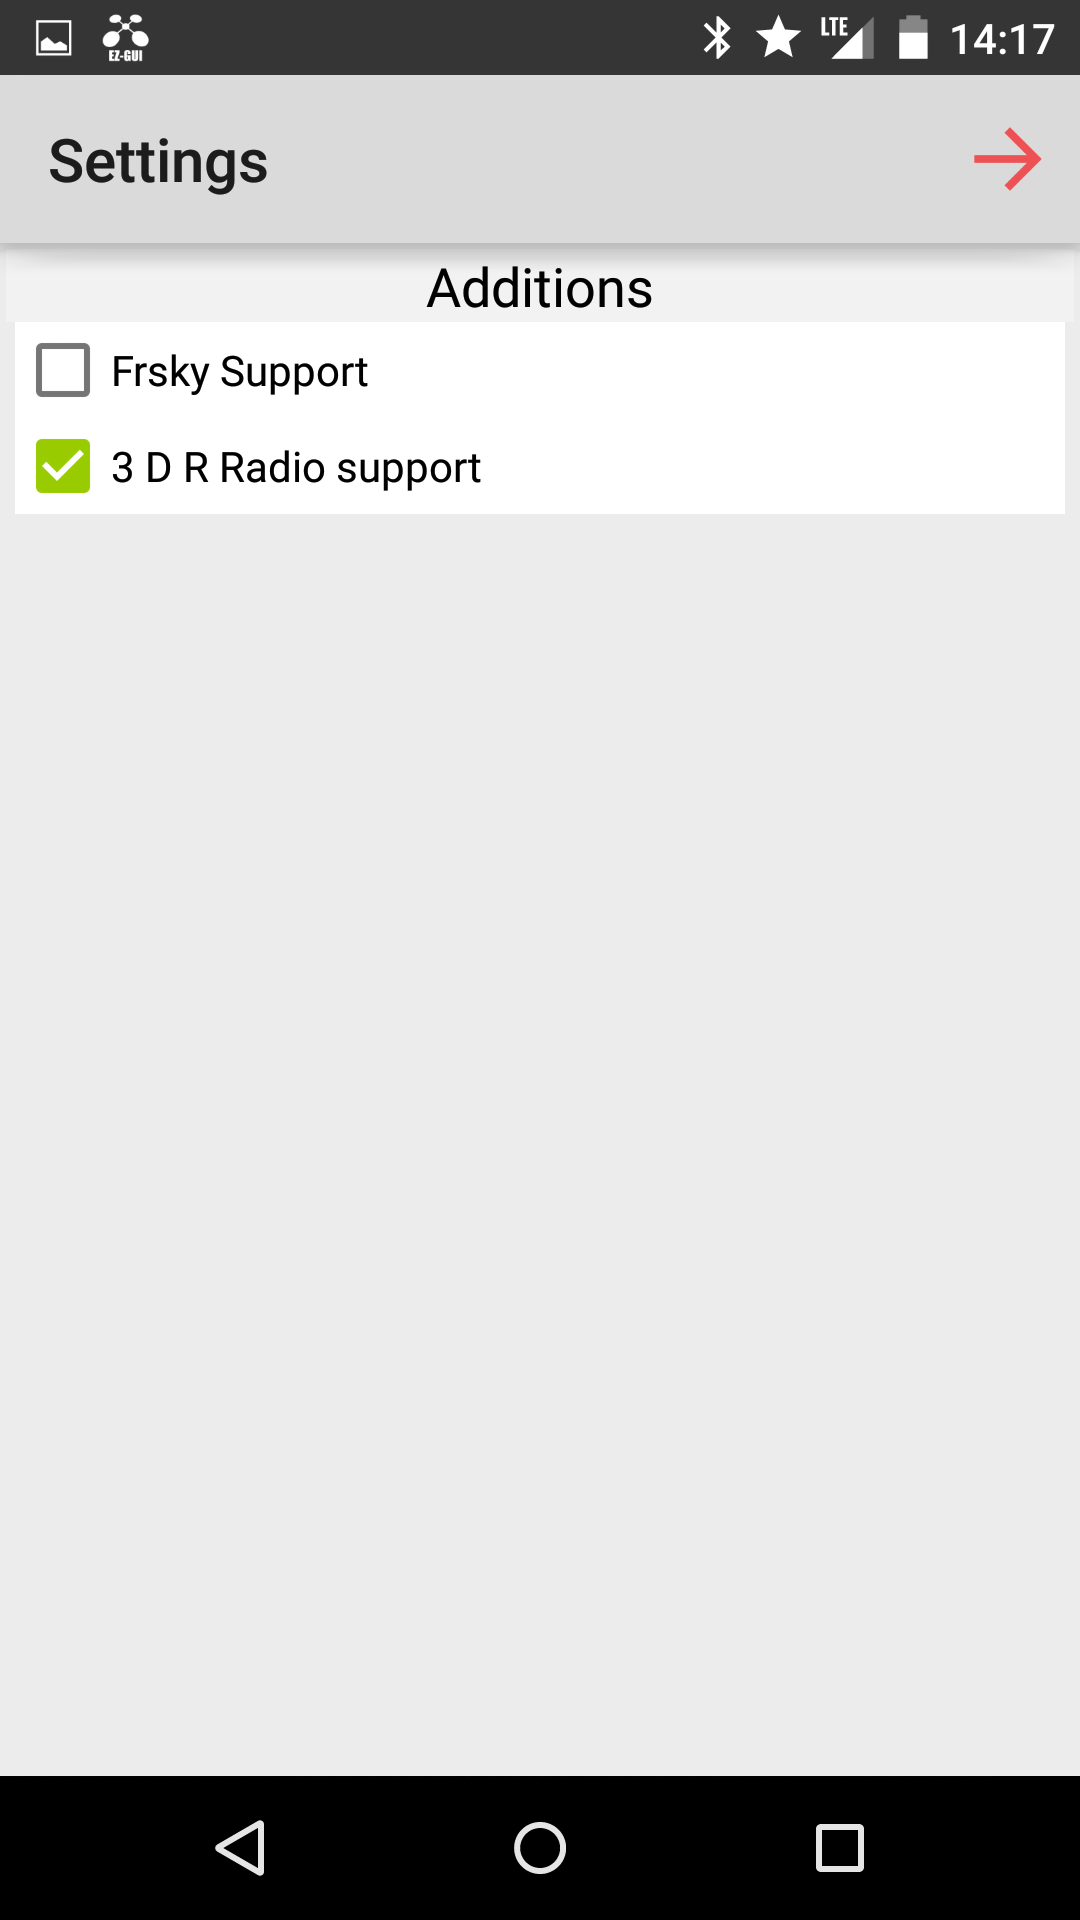 3 - Enable 3DR Radio 3 - Enable 3DR Radio |
Thanks for helping to keep our community civil!
This post is an advertisement, or vandalism. It is not useful or relevant to the current topic.
You flagged this as spam. Undo flag.Flag Post
Your post is currently under review by our moderation team. The review process usually takes up to 48 business hours.
You can track your post's status in the "My Content" section of your profile. Once approved, it will be published and visible to others.

Thank you for contributing to our community!