LIDAR-Lite Laser Rangefinder - Simple Arduino Sketch of a 180 Degree "Radar"

*note* : for discussing any technical issues with your LIDAR-Lite, please proceed to our forum and create a new topic here.
 LIDAR-Lite Laser Rangefinder [RB-Pli-01]
*** The LIDAR-Lite v3 is out! Go check this blog post for more details ***
Range Finding
Finding the range of an object in front of your robot is a rather simple task and has been done reliably using sonar and IR range sensors for a long time. In most cases, those two types of sensors fulfill the basic needs of the robot when it comes to distance measurement. Sonar can provide good ranging on most surfaces but they have wide detection beams that can easily be interfered with. On the other hand, IR range sensors provide a confined beam that is very small but suffers from reflective differences on varying surfaces, thus changing the distance readings. Until recently, there was no good option for projects on a hobbyist budget which needed a long range, high precision, small detection beam for distance measurement. LIDAR-Lite Laser Rangefinder [RB-Pli-01]
LIDAR-Lite Laser Range Finder
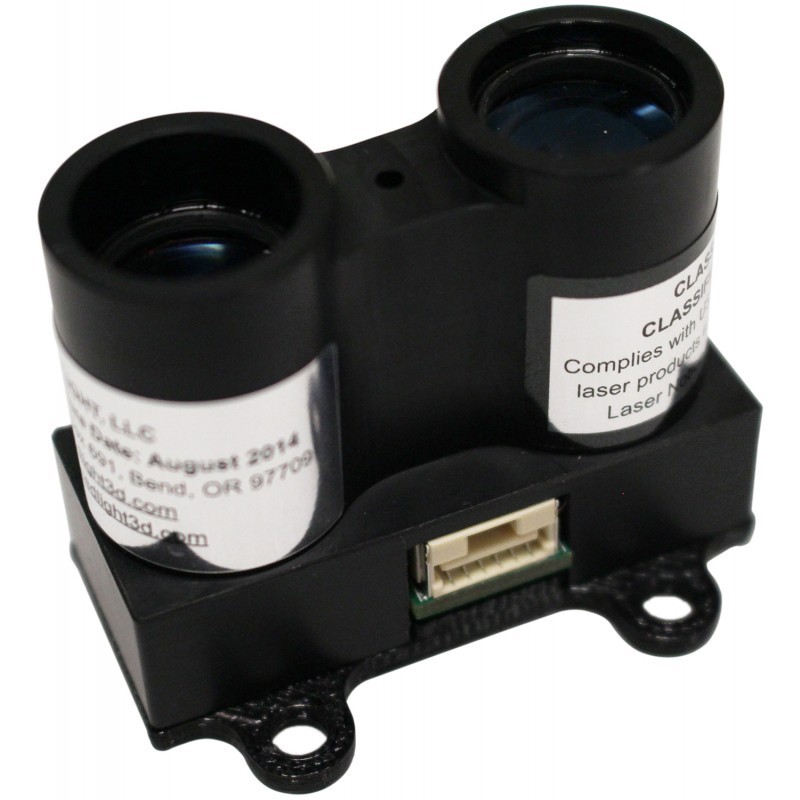
We would like to introduce you to the LIDAR-Lite Laser Rangefinder from PulsedLight. This affordable and compact laser range finder is all the robotics enthusiast with ranging needs could want! It features laser range finding for distances of up to 40m (~131 feet) with an accuracy of ± 2.5 cm (~ 1 inch) and an acquisition time under 20 ms. All of this is offered in a module that weighs 16 g (~ 0.56 ounce) and consumes less than 100 mA @ 5 V DC (under 2 mA idle). The device uses a simple I2C interface to communicate the distances measured.Arduino Example
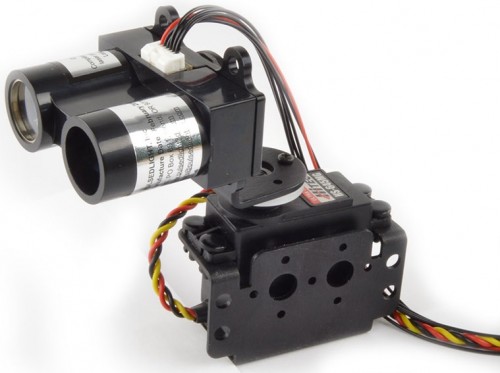
To demonstrate how easy this device is to use, we provide here a simple example of a 180 degree "radar" using the LIDAR-Lite, a small servo motor and some mounting brackets.BoM (Bill of Materials)
Here is the list of what parts were used to make this example:- Lynxmotion BotBoarduino
- LIDAR-Lite Laser Rangefinder
- HS-645MG* servo motor (alternative: HS-422 servo motor)
- Bracket** to hold the LIDAR or this one for easier placement
- Bracket to hold the servo motor
Setup
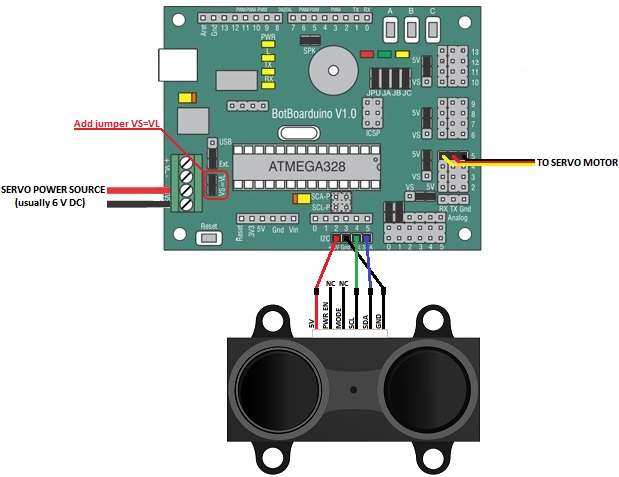
Below you can find the wiring diagram for connecting the Lynxmotion BotBoarduino to the servo motor and the LIDAR-Lite using one power source for both logic and servo. Check here for a wiring diagram using two power sources for the Lynxmotion BotBoarduino.Sample Code
You can find the source code here.Output
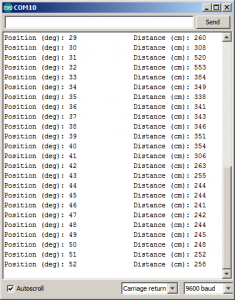
The output of the sample code is in a simple format of one line per measurement reading, indicating the angle and distance of each reading. This output is meant to be read by a human. If interfacing with another microcontroller or a computer, it is recommended to have a more compact (probably binary) format for the output with some error correction to ensure the validity of the data. Below is an example of the output of the example code. We look forward to seeing what you do with your LIDAR-Lite!Thanks for helping to keep our community civil!
Notify staff privately
You flagged this as spam. Undo flag.Flag Post
It's Spam
This post is an advertisement, or vandalism. It is not useful or relevant to the current topic.
This post is an advertisement, or vandalism. It is not useful or relevant to the current topic.
You flagged this as spam. Undo flag.Flag Post


