

Arduino Tutorials - How to Stack Wheatstone Bridge Shields


*note*: for discussing any technical issues with your Load Cell Amplifier Shield, please proceed to our forum and create a new topic here.
 Arduino Uno + 2 x RB-Onl-38 + 4 x load cells
A common question concerning our Wheatstone bridge amplifier shield since the creation of the blog post Interfacing a Load Cell With an Arduino Board is "How can we stack two shields together with three or four load cells?"
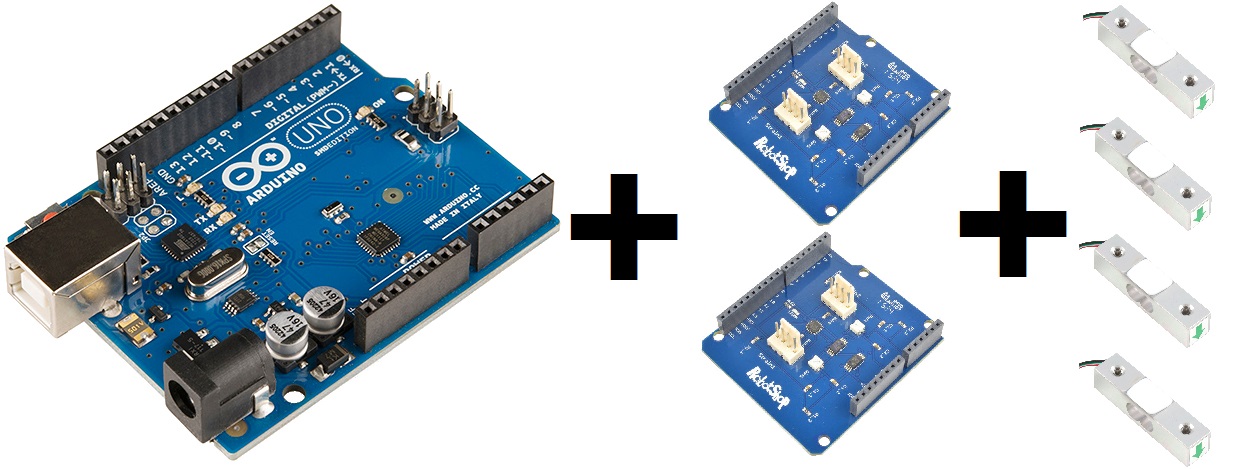
This is actually quite simple and only requires a few components:
Arduino Uno + 2 x RB-Onl-38 + 4 x load cells
A common question concerning our Wheatstone bridge amplifier shield since the creation of the blog post Interfacing a Load Cell With an Arduino Board is "How can we stack two shields together with three or four load cells?"
This is actually quite simple and only requires a few components:
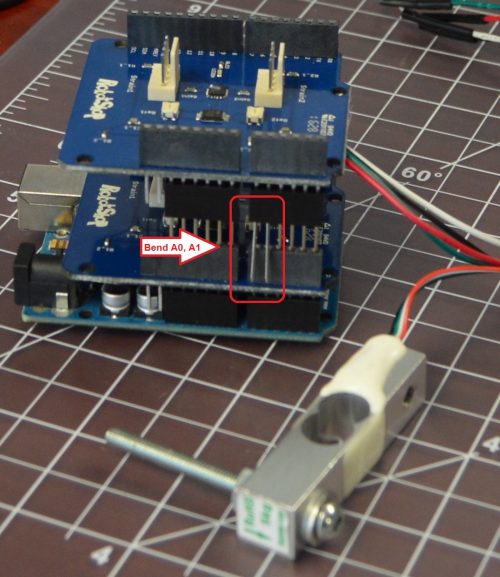 Stacking header pins bent outwards on pins A0 & A1
Use some male to female jumper wires to connect the bent pins to the top shield's female header at the A2 and A3 positions.
Stacking header pins bent outwards on pins A0 & A1
Use some male to female jumper wires to connect the bent pins to the top shield's female header at the A2 and A3 positions.
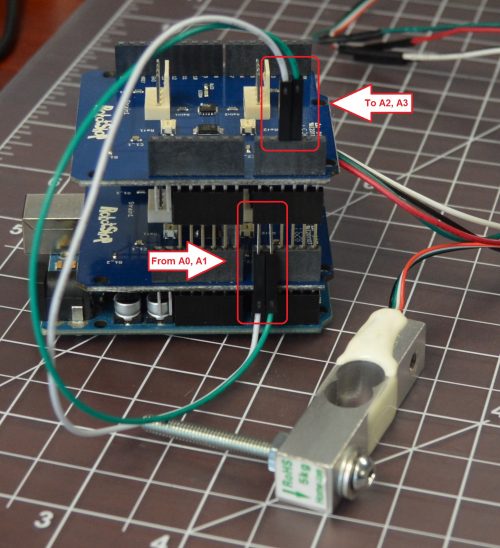 Bend pins A0 & A1 connected to top shield's A2 & A3
Finally, obtain a fresh copy of our Wheatstone bridge amplifier shield Arduino library from the RobotShop GitHub repository for this project (or download directly as a zip). It now includes an example that is ready to go for quickly testing your setup with two shields and four load cells.
Of course, since most Arduino-shield compatible microcontroller boards have also A4 and A5 pins, you could in theory stack a third shield, following the same method described above. Anyone interested in trying that out? :)
Bend pins A0 & A1 connected to top shield's A2 & A3
Finally, obtain a fresh copy of our Wheatstone bridge amplifier shield Arduino library from the RobotShop GitHub repository for this project (or download directly as a zip). It now includes an example that is ready to go for quickly testing your setup with two shields and four load cells.
Of course, since most Arduino-shield compatible microcontroller boards have also A4 and A5 pins, you could in theory stack a third shield, following the same method described above. Anyone interested in trying that out? :)
 Arduino Uno + 2 x RB-Onl-38 + 4 x load cells
- An Arduino Uno or other Arduino shield compatible microcontroller board, such as the BotBoarduino
- Two RobotShop Wheatstone bridge amplifier shields
- Three or four 4-wire load cells
- Some stacking headers, such as RB-Ite-58, RB-Spa-697, RB-Spa-928, RB-Fee-27 or RB-Ada-08
- Some male to female jumper wires, such as RB-Cix-18 or RB-Dfr-96
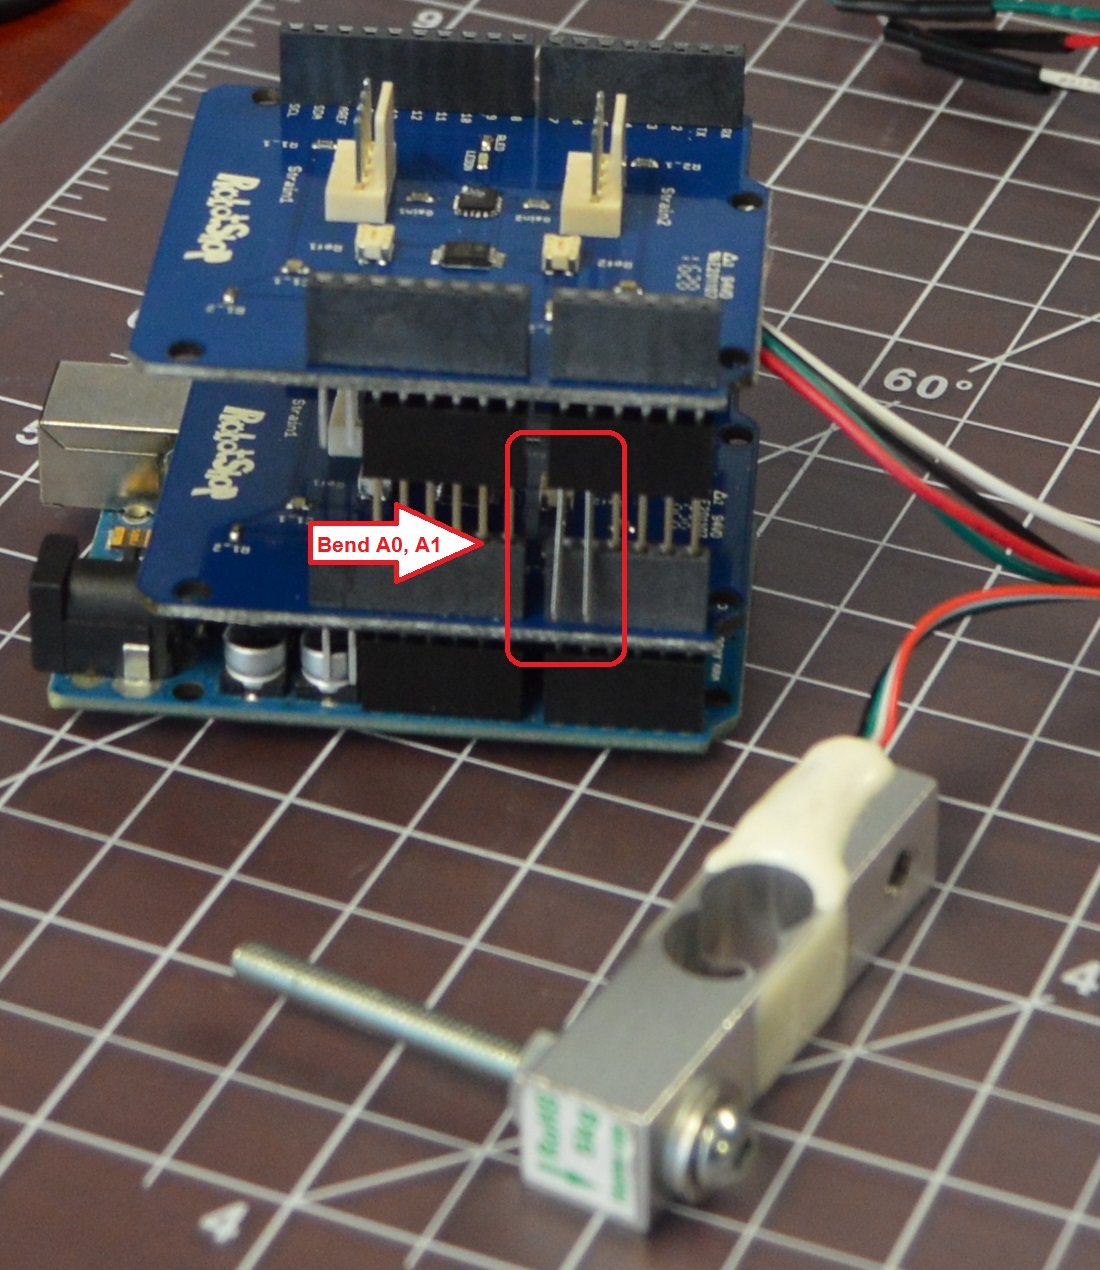 Stacking header pins bent outwards on pins A0 & A1
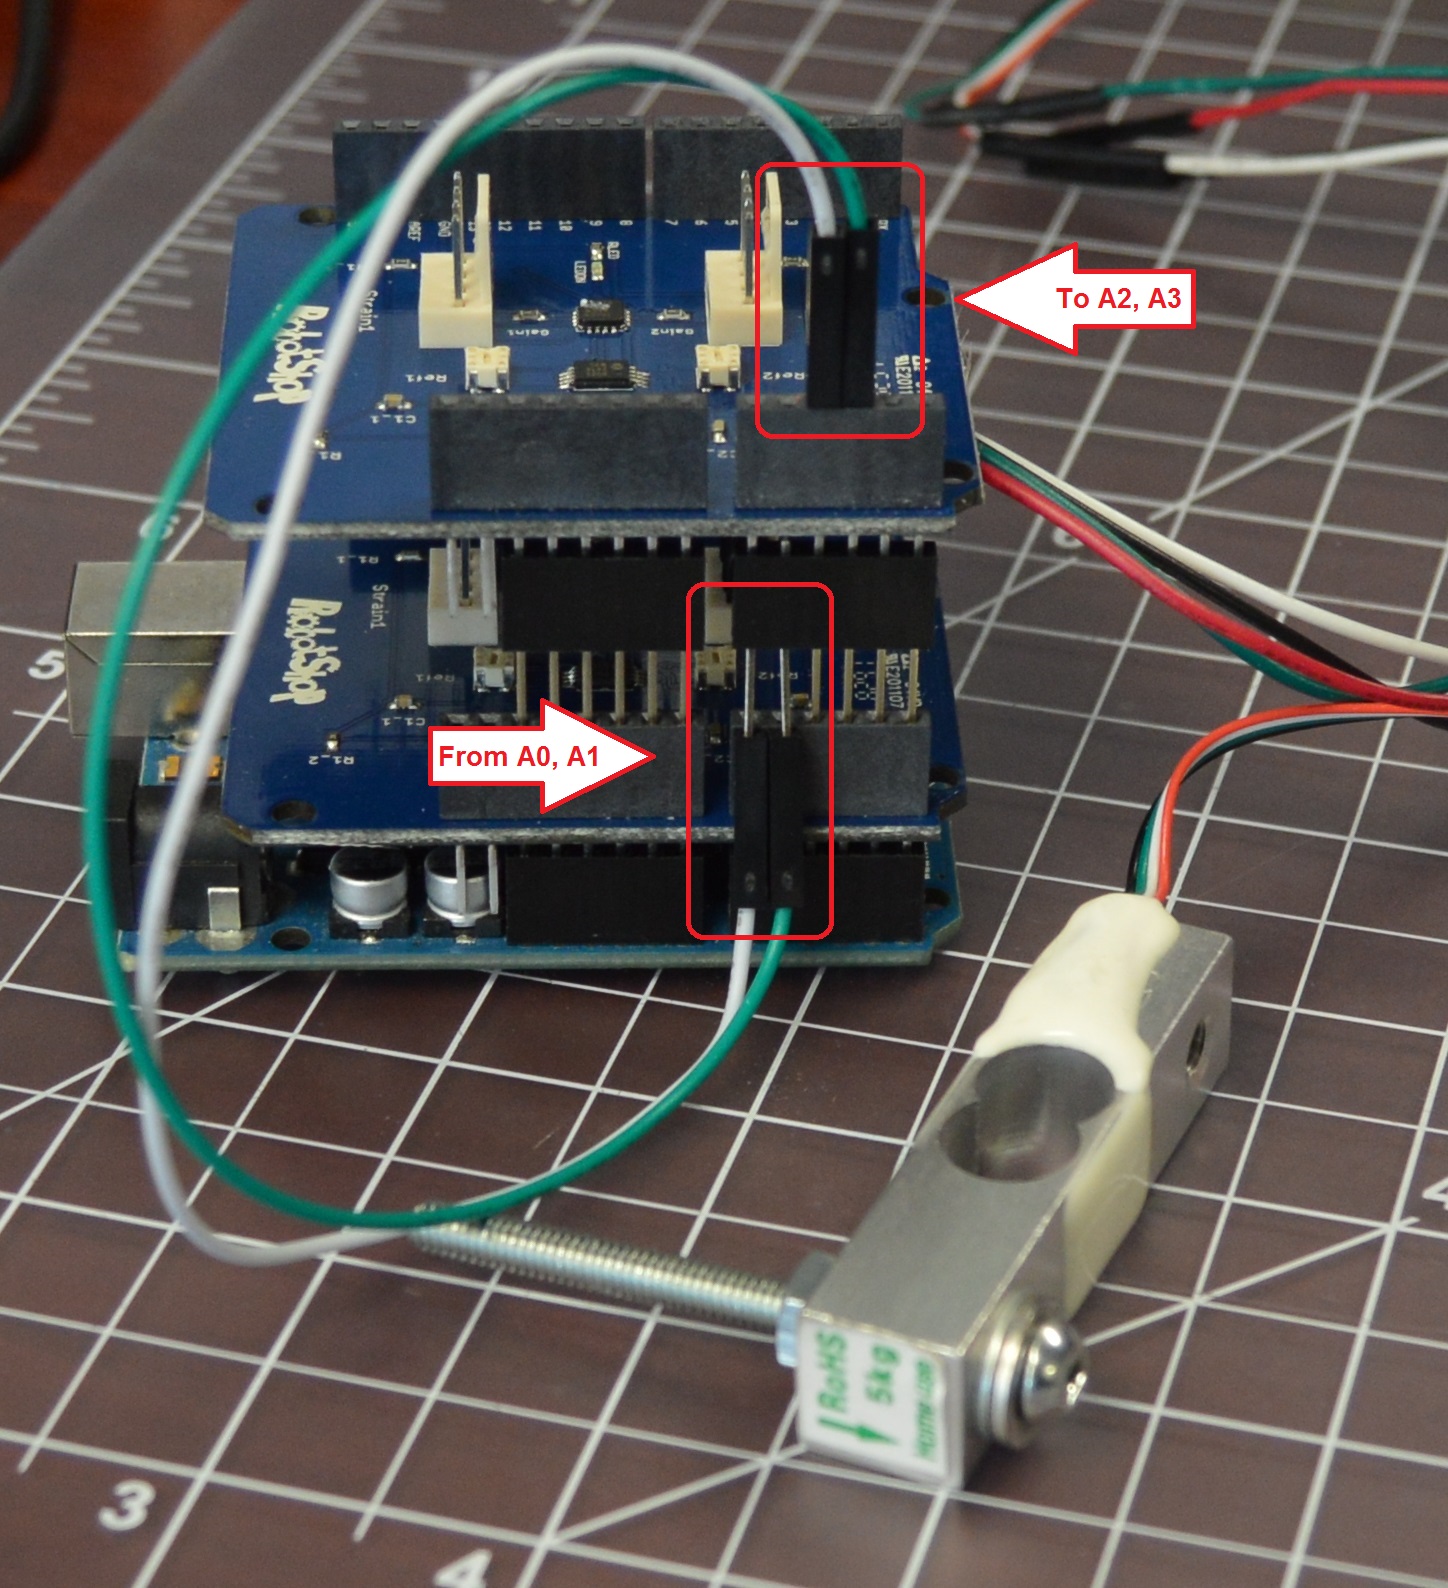 Bend pins A0 & A1 connected to top shield's A2 & A3
Thanks for helping to keep our community civil!
Notify staff privately
You flagged this as spam. Undo flag.Flag Post
It's Spam
This post is an advertisement, or vandalism. It is not useful or relevant to the current topic.
Report Reason
This post is an advertisement, or vandalism. It is not useful or relevant to the current topic.
You flagged this as spam. Undo flag.Flag Post
✅ Your Post Has Been Submitted Successfully!
Your post is currently under review by our moderation team. The review process usually takes up to 48 business hours.
You can track your post's status in the "My Content" section of your profile. Once approved, it will be published and visible to others.

Thank you for contributing to our community!