

How to enable or disable auto-centering on a remote


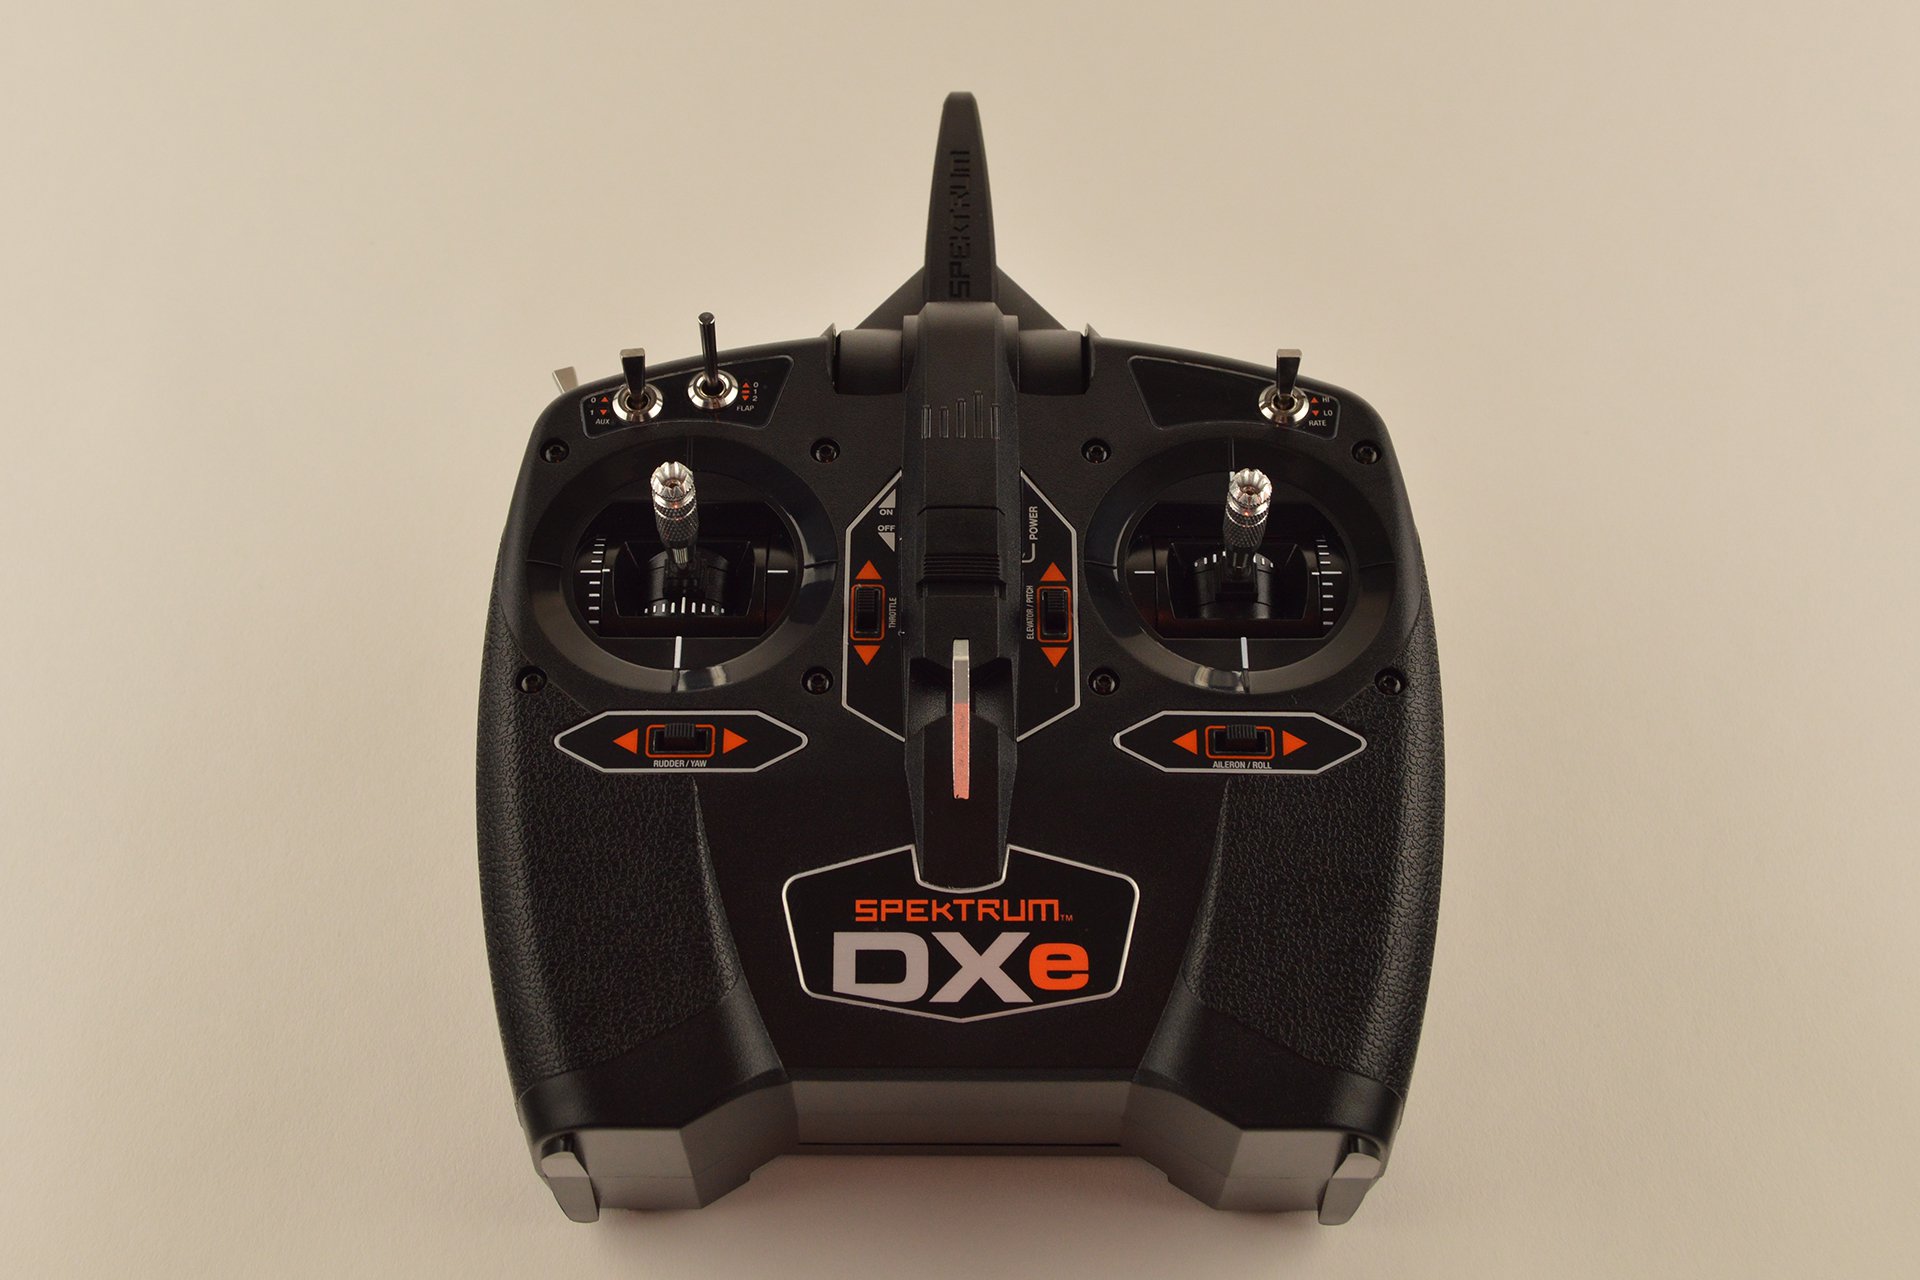
You might find yourself one day with an RC remote control with the auto-centering of a joystick enabled and wanting to enable or disable it. This is a very easy thing to change as you'll see here. To illustrate this post, we used a Spektrum DX E remote, but the concept can be applied to many (though not all) RC remote controls. The Spektrum DXe has auto-centering on all but one of the three joystick axes (the exception being throttle, which tends to be found on the joystick on the left). In the past, additional parts needed to be purchased in order to add centering to the throttle joystick, but Spektrum, like a growing number of RC manufacturers, includes the parts already inside the remote.
 How to disable/enable auto-centering on a remote
 Step 1
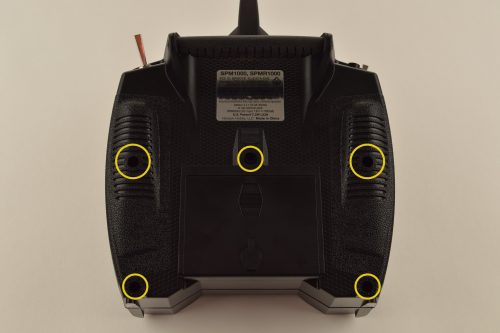
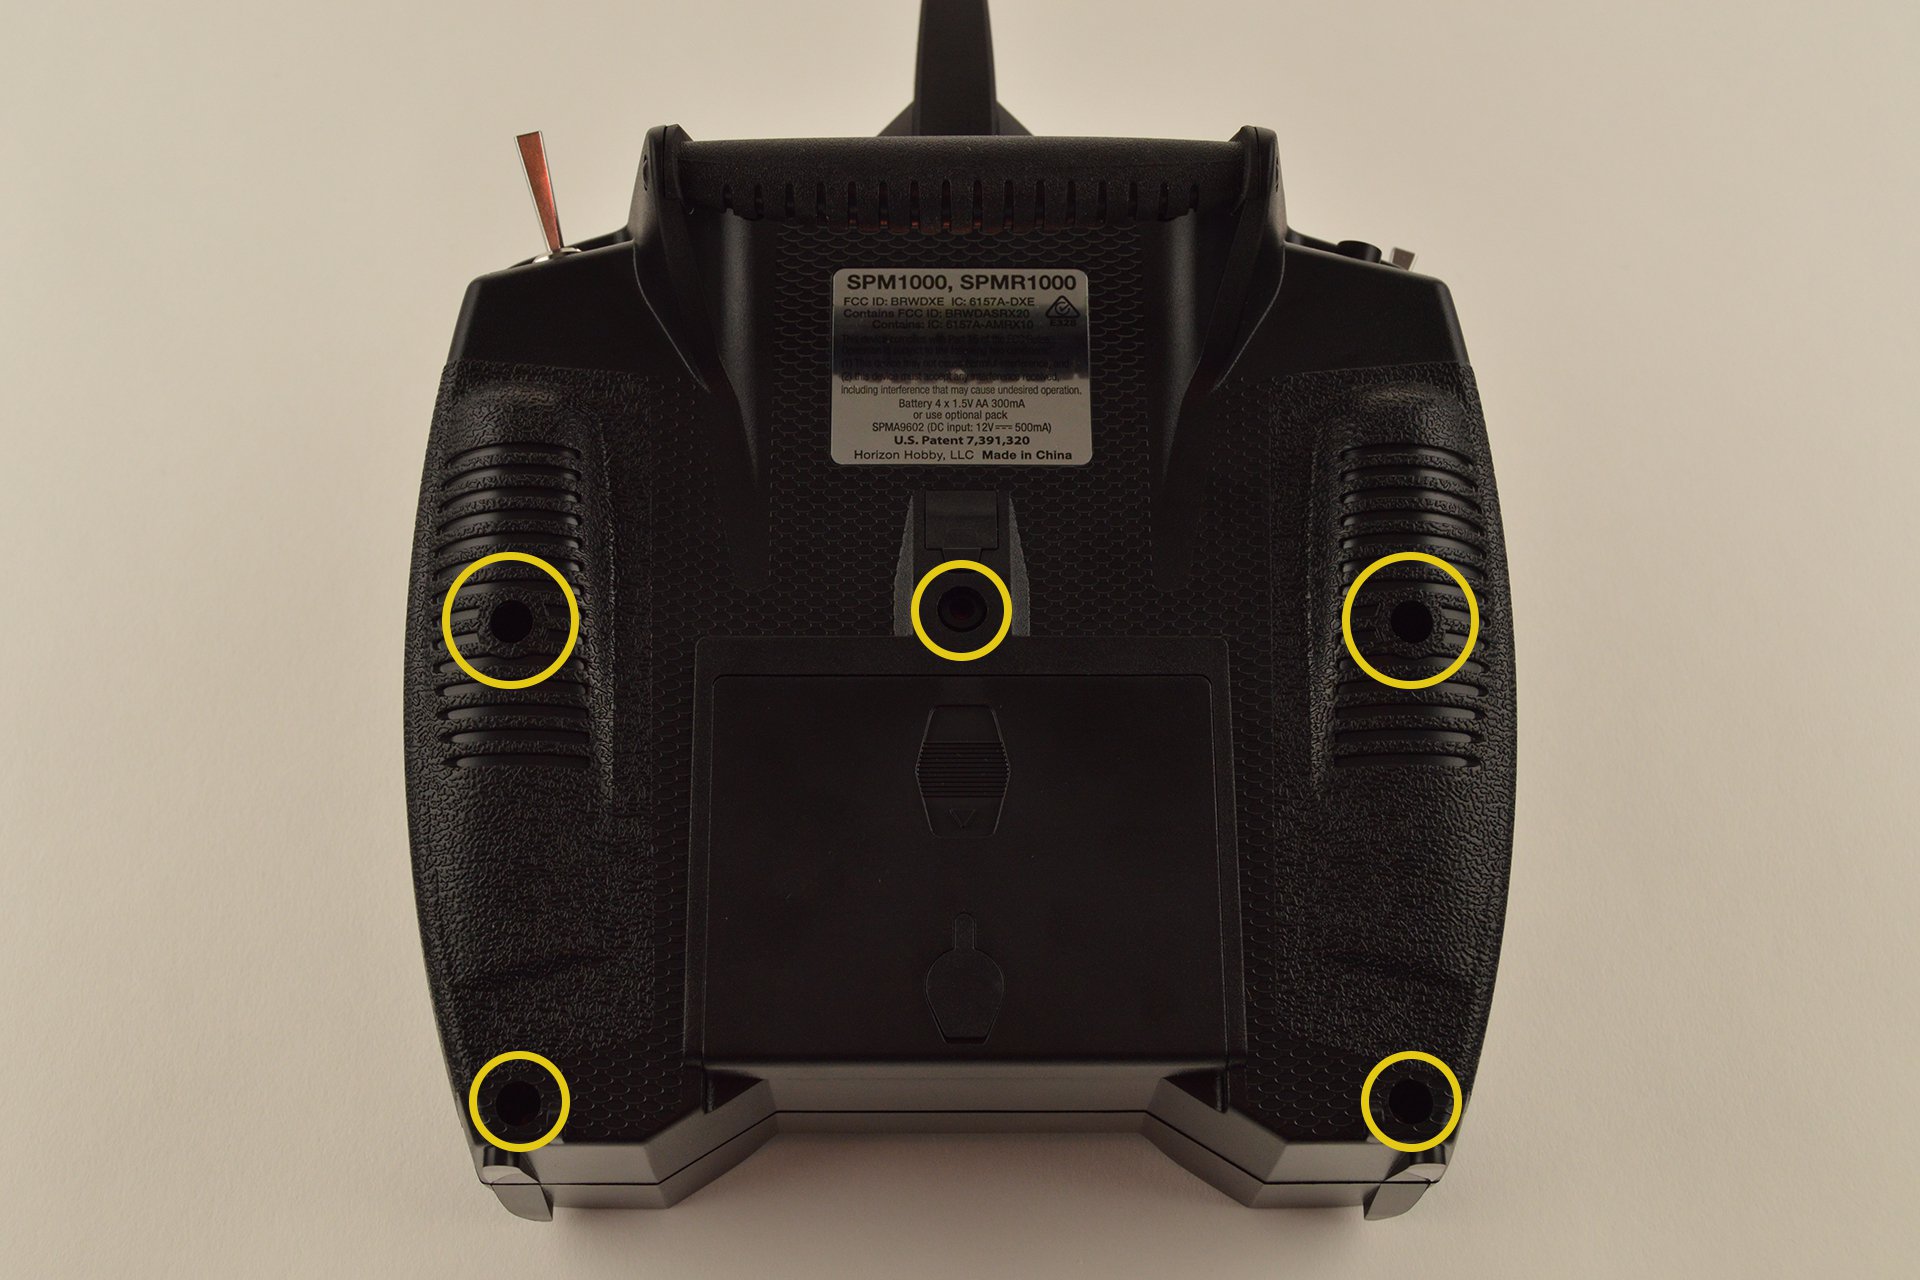
The first step will be for you to locate the screws holding the two halves of the controller together and unscrew them. Most tend to be Phillips head screws and are quite recessed. Be sure not to strip the head and store them safely aside for the rest of the tutorial so you don't lose any of them.
Step 1
The first step will be for you to locate the screws holding the two halves of the controller together and unscrew them. Most tend to be Phillips head screws and are quite recessed. Be sure not to strip the head and store them safely aside for the rest of the tutorial so you don't lose any of them.
 Step 2
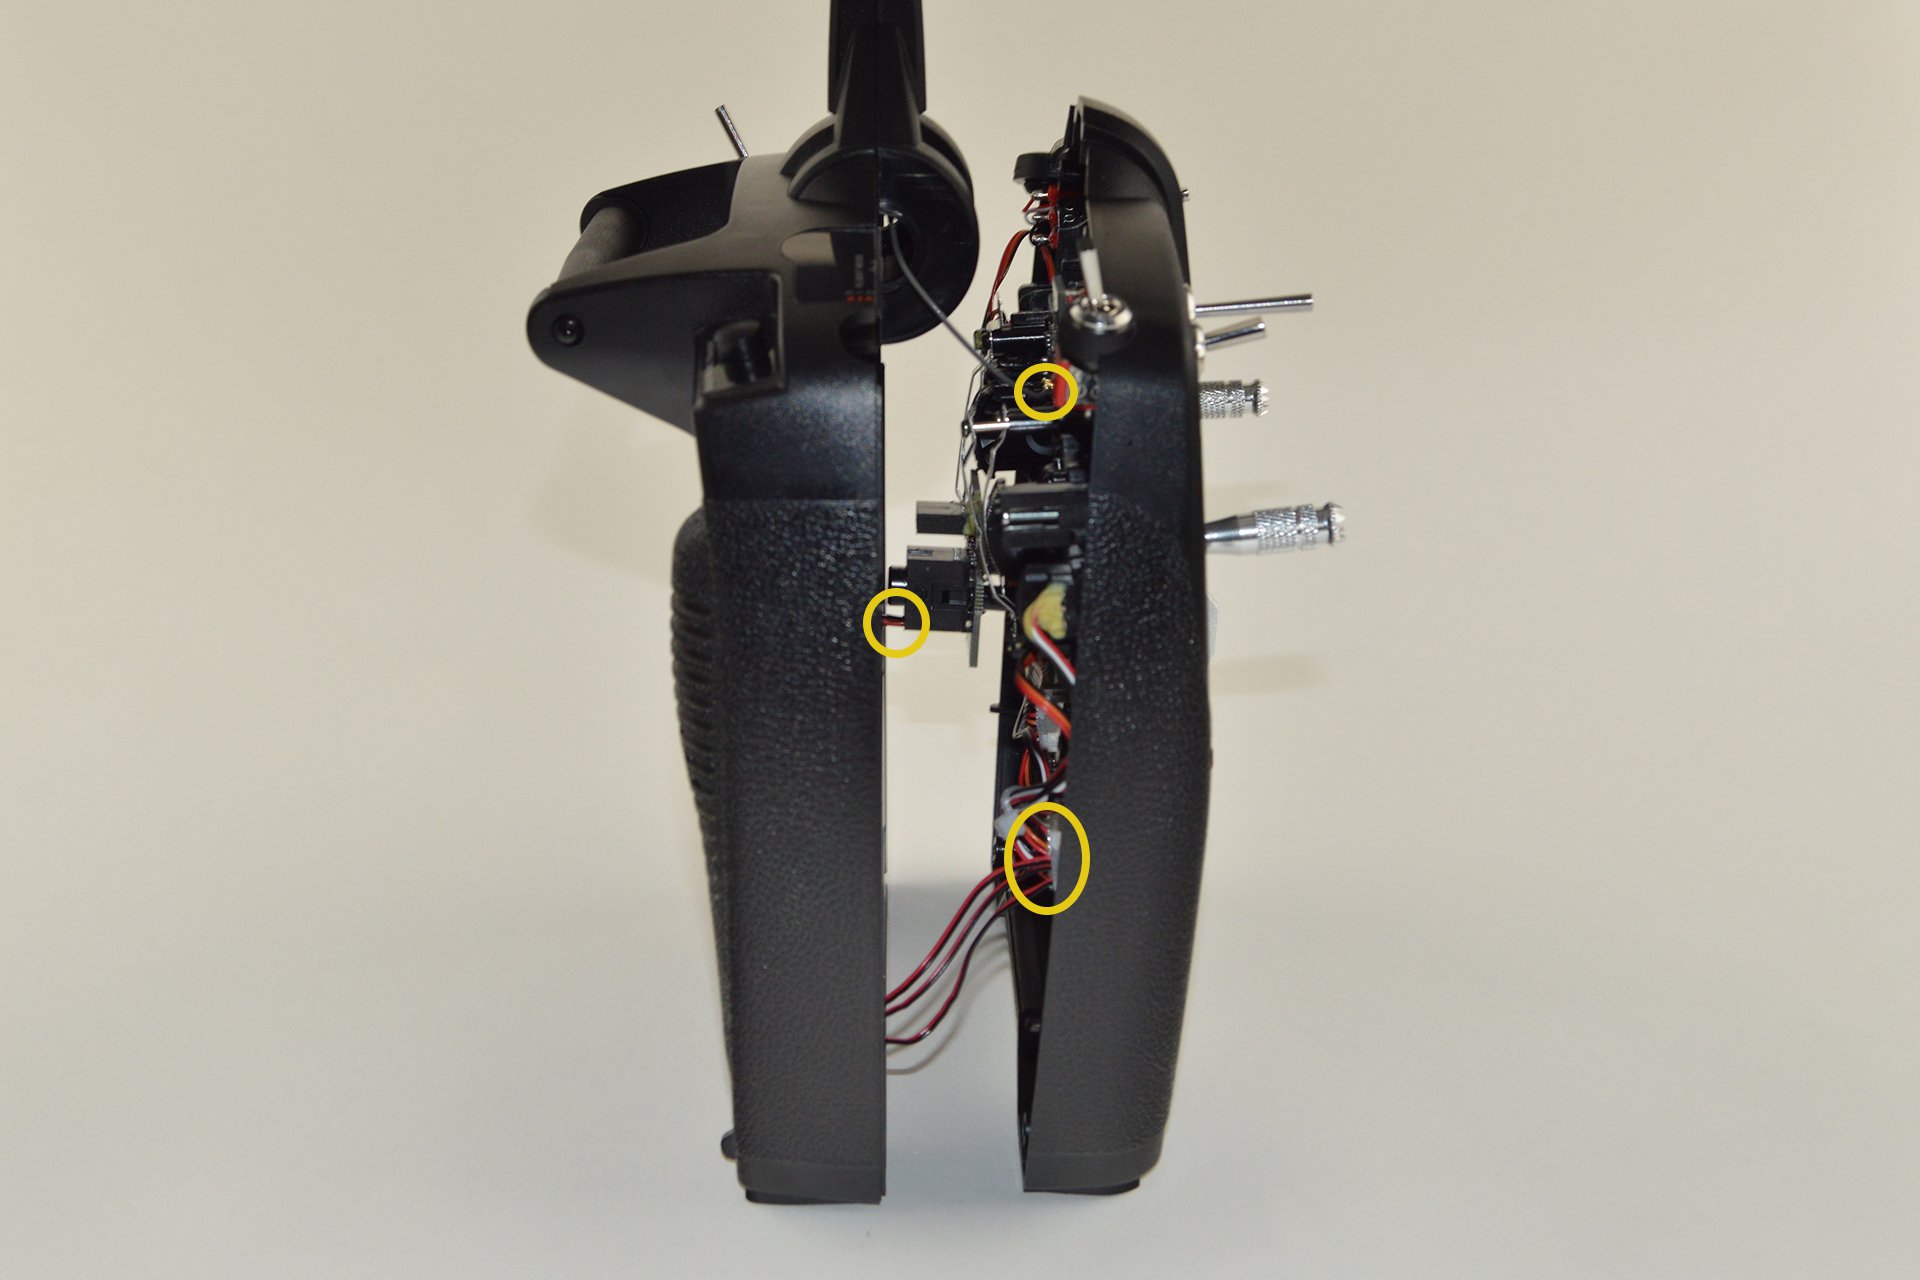
Once you have removed all the screws and stored them safely, carefully separate the top and bottom of the remote. As you can see on the image above, there are 3 cables plugged from one half to the other. Be very gentle to avoid causing any damage. Do not pull on the wires as there is not a lot of slack.
Step 2
Once you have removed all the screws and stored them safely, carefully separate the top and bottom of the remote. As you can see on the image above, there are 3 cables plugged from one half to the other. Be very gentle to avoid causing any damage. Do not pull on the wires as there is not a lot of slack.
 Step 3
Now that you have access to the inside of the controller, locate the aforementioned cables. Make sure you remember which one goes where. One end of the cable should have a connector (as opposed to being soldered to the board) which can be removed.
Step 3
Now that you have access to the inside of the controller, locate the aforementioned cables. Make sure you remember which one goes where. One end of the cable should have a connector (as opposed to being soldered to the board) which can be removed.
 Step 4
Carefully remove the cables from the connectors. The uFL connector used for the antenna is quite small. Don't force any of them. We suggest using a plastic spudger for this step (if you have one).
Step 4
Carefully remove the cables from the connectors. The uFL connector used for the antenna is quite small. Don't force any of them. We suggest using a plastic spudger for this step (if you have one).
 Step 5
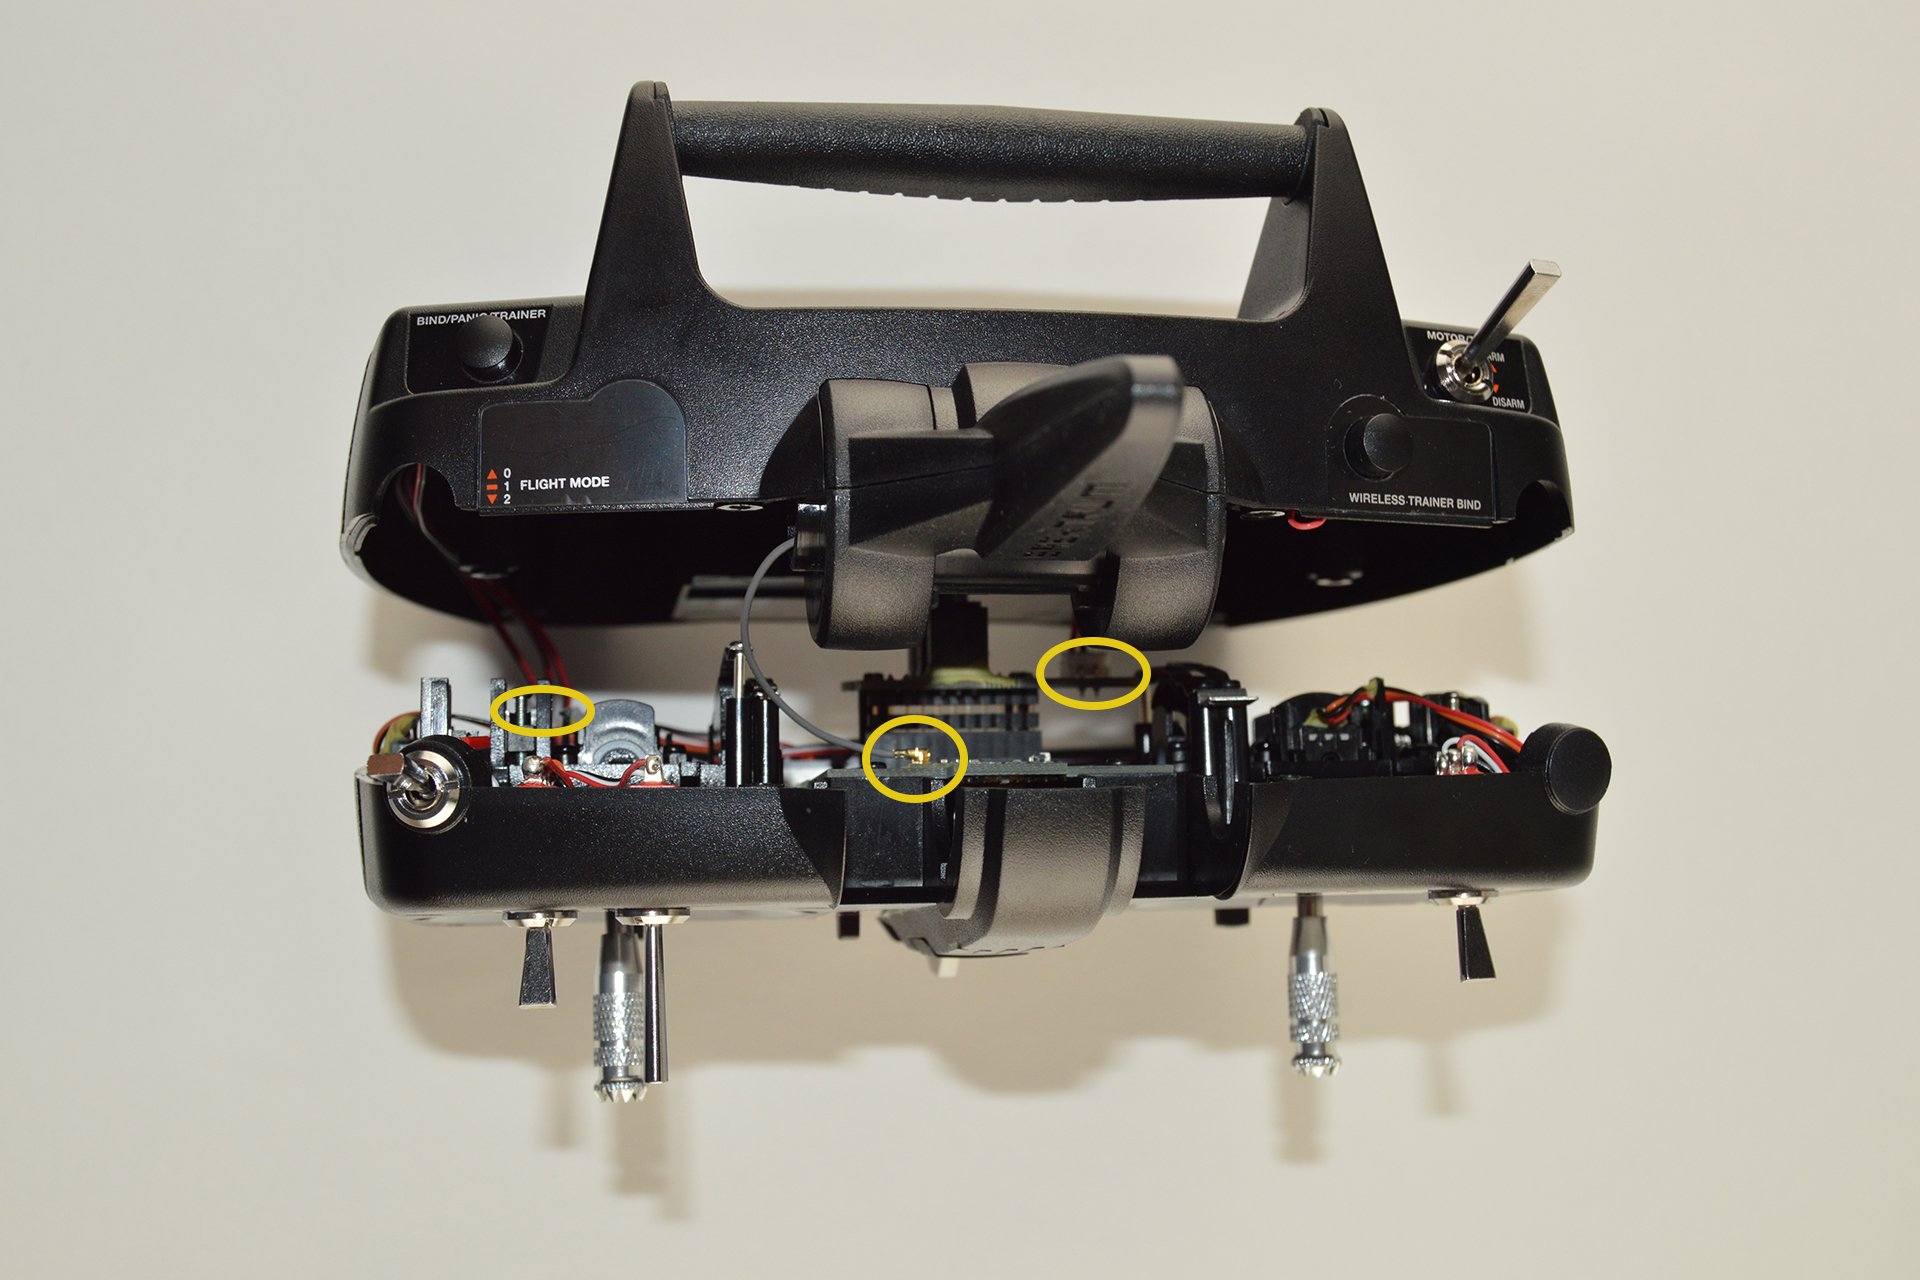
Now that the cables are disconnected, you should have two fully separated halves of the controller. On the top part of the remote control (the one that holds the joysticks), locate two screws next to the joystick as in the image above (circled in yellow). The first screw circled at at the bottom is applying pressure to a plastic rod. Move the joystick on the left up and down to see what is happening "behind the scenes" and then compare it to what happens on the right. Releasing this screw allows the rod to contact the two pins. Tightening this screw presses against the rod, moving it away from the pins, so that the joystick does not self-center. Therefore if the joystick does not self-center, the black plastic rod is being pushed away from the two centering pins. The second screw provides more or less pressure between the rod and the pins once the centering screw is in place (the rod contacts the pins). Tightening this second screw (the one circled in yellow towards the top increases the force of the spring causing the return to center.
Step 5
Now that the cables are disconnected, you should have two fully separated halves of the controller. On the top part of the remote control (the one that holds the joysticks), locate two screws next to the joystick as in the image above (circled in yellow). The first screw circled at at the bottom is applying pressure to a plastic rod. Move the joystick on the left up and down to see what is happening "behind the scenes" and then compare it to what happens on the right. Releasing this screw allows the rod to contact the two pins. Tightening this screw presses against the rod, moving it away from the pins, so that the joystick does not self-center. Therefore if the joystick does not self-center, the black plastic rod is being pushed away from the two centering pins. The second screw provides more or less pressure between the rod and the pins once the centering screw is in place (the rod contacts the pins). Tightening this second screw (the one circled in yellow towards the top increases the force of the spring causing the return to center.
 How to disable/enable auto-centering on a remote
Step 1: Unscrew the back of the remote
 Step 1
Step 2: Carefully separate the two halves
 Step 2
Step 3: Locate the cables to disconnect
 Step 3
Step 4: Disconnect the cables
 Step 4
Step 5: Adjust the centering screws
 Step 5
Step 6: Do the previous steps in reverse order
Once you achieved the desired play of the joystick (either self-centering or not), you just need to follow the steps in the reverse order: connect the cables to their appropriate plugs, close the controller enclosure, and screw it back together. Was this tutorial useful to you? Let us know in the comments or share it on social media!Thanks for helping to keep our community civil!
Notify staff privately
You flagged this as spam. Undo flag.Flag Post
It's Spam
This post is an advertisement, or vandalism. It is not useful or relevant to the current topic.
Report Reason
This post is an advertisement, or vandalism. It is not useful or relevant to the current topic.
You flagged this as spam. Undo flag.Flag Post
✅ Your Post Has Been Submitted Successfully!
Your post is currently under review by our moderation team. The review process usually takes up to 48 business hours.
You can track your post's status in the "My Content" section of your profile. Once approved, it will be published and visible to others.

Thank you for contributing to our community!