

Chapter 7: How To Replace Roomba 500 Series Main Brush Casing Gears

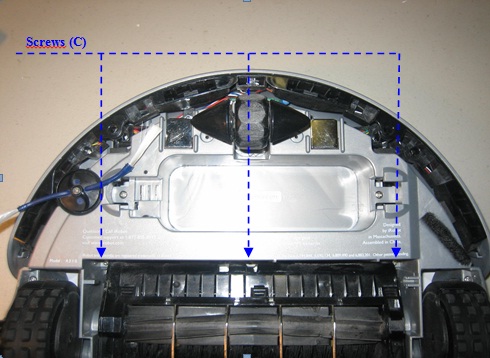
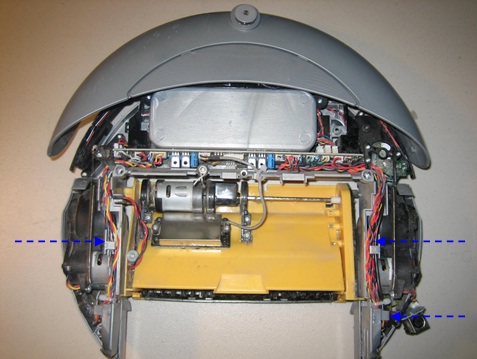
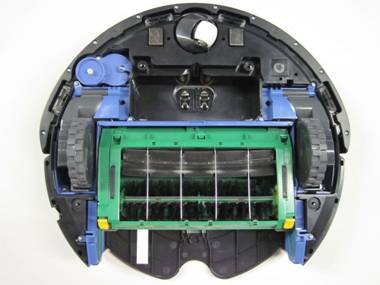
This repair guide explains how to replace (or clean and lubricate) the main brush casing gears on a 500 series Roomba. For details on how to first disassemble your Roomba, please see Roomba 500 Series Servicing and Repair Guide Chapter 3: How to Open Up Roomba. Some of the 500 series Roombas are pictured below:  7 How to Replace Roomba’s Main Brush Casing Gears 7.1 How to Remove the Old Main Brush Casing Gears Roomba replacement brush casing gears can be found at RobotShop. 7.1.1 Start by flipping the robot on its back with the bottom cover removed.
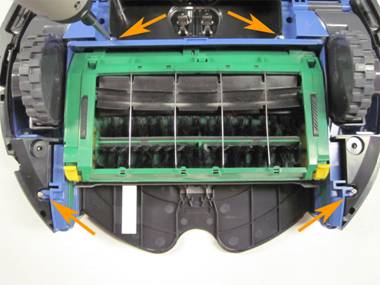
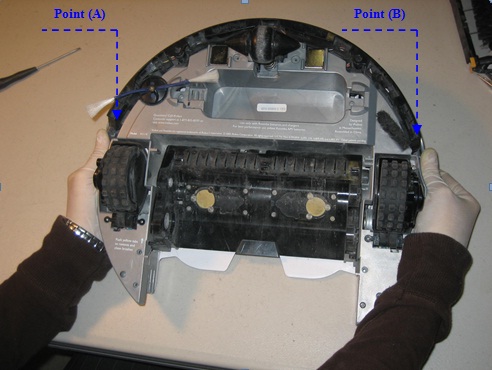
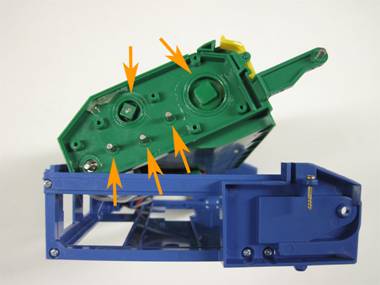
7.1.2 Loosen the four screws holding the brush deck in place, shown by the orange arrows.
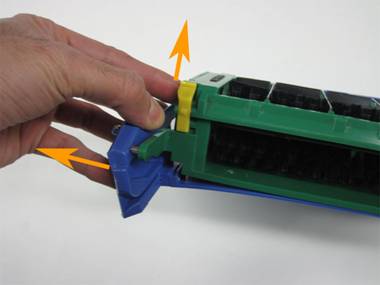
7.1.3 Firmly grip the brush deck module. You can grab it by the brush guard or even by grabbing its blue ‘frame’ at the sides, down where the dustbin goes.
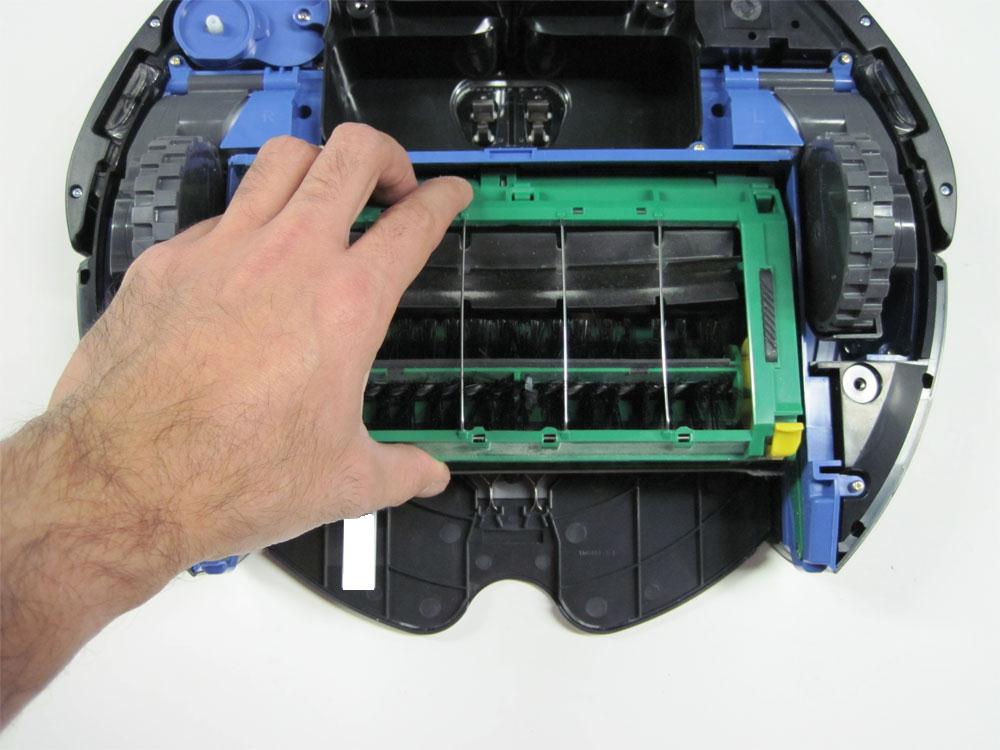
7.1.4 Pull up to remove the brush deck module from the Roomba.
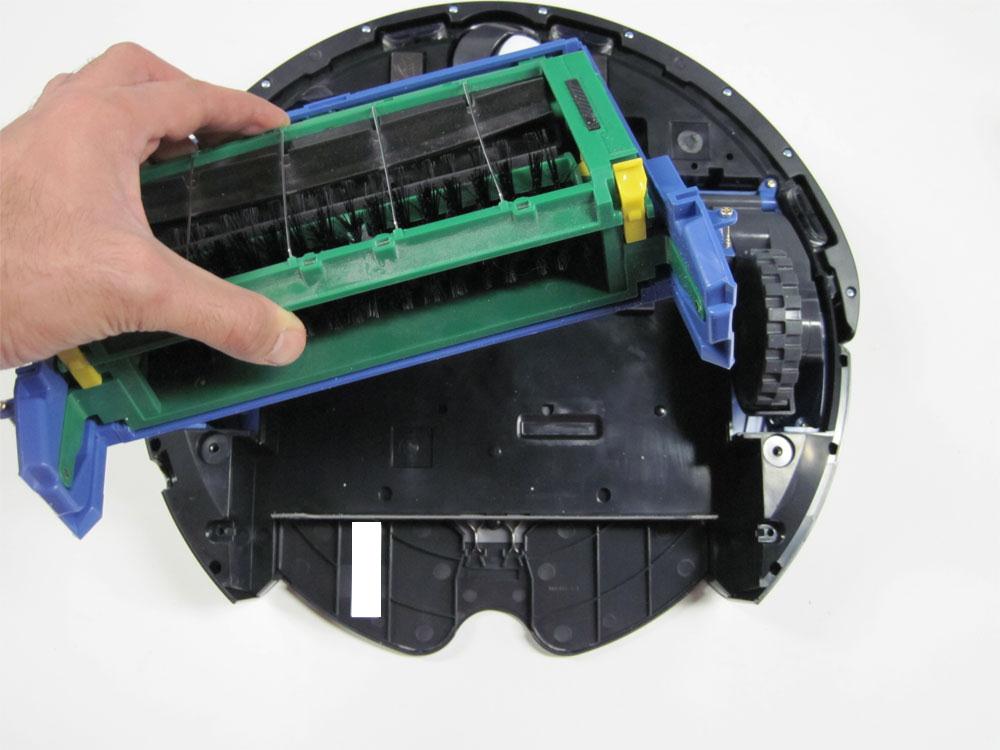
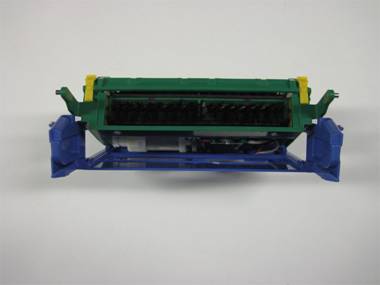
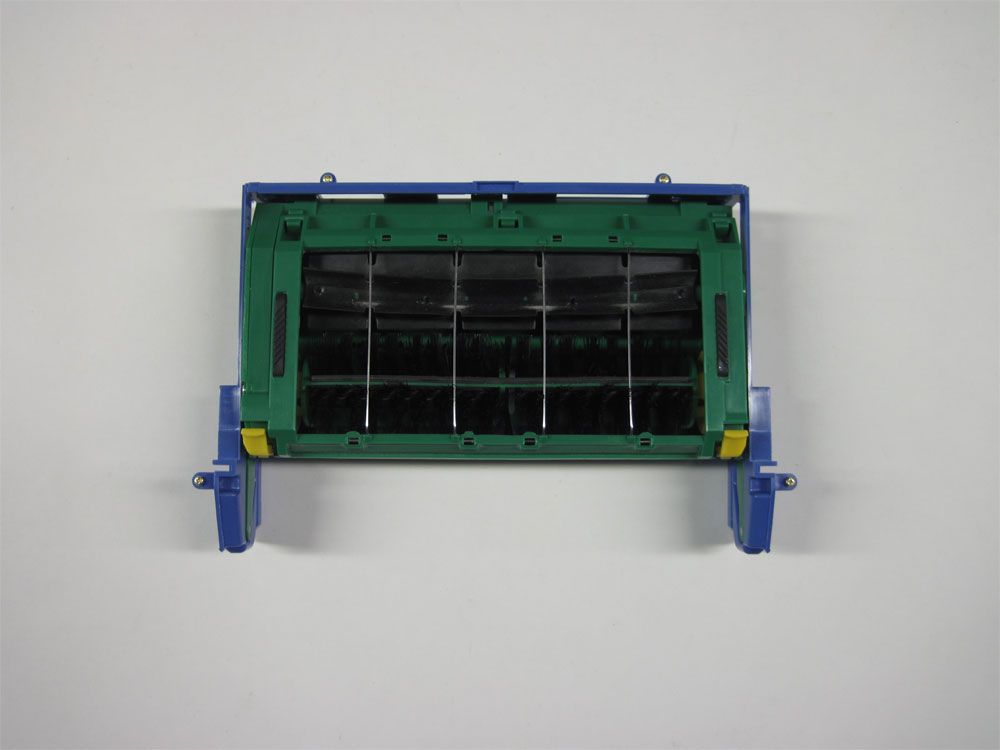
7.1.5 View of casing removed from the Roomba.
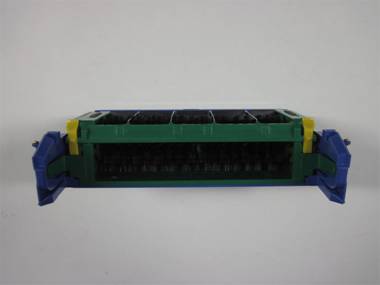
7.1.6 Stand the brush deck module on end to make it easier to get access to casing.
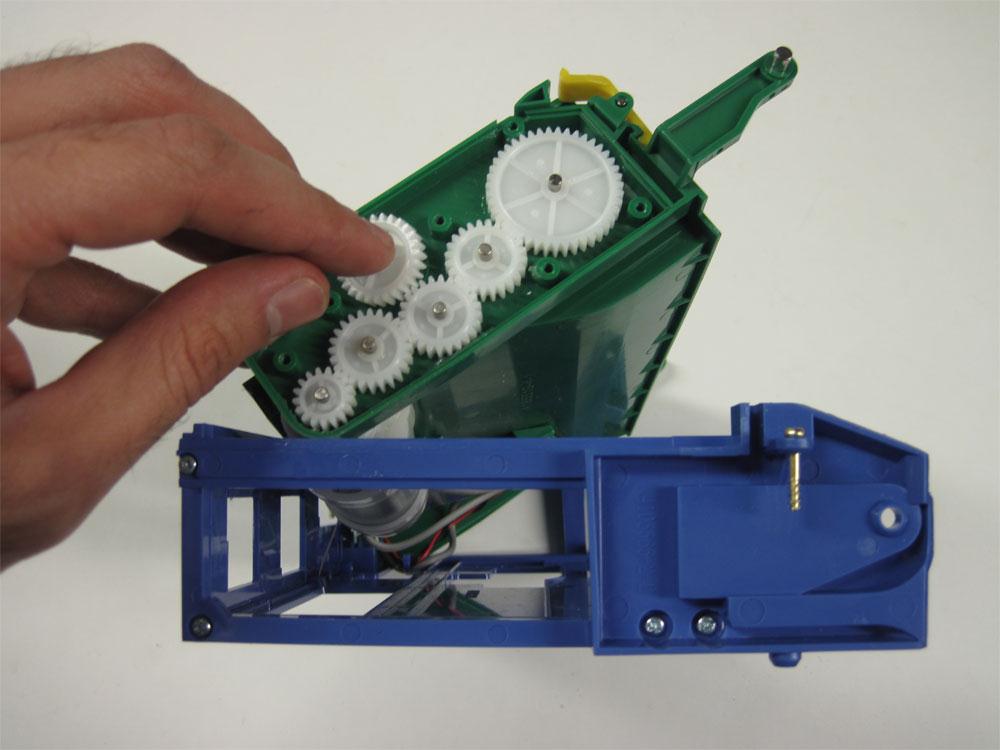
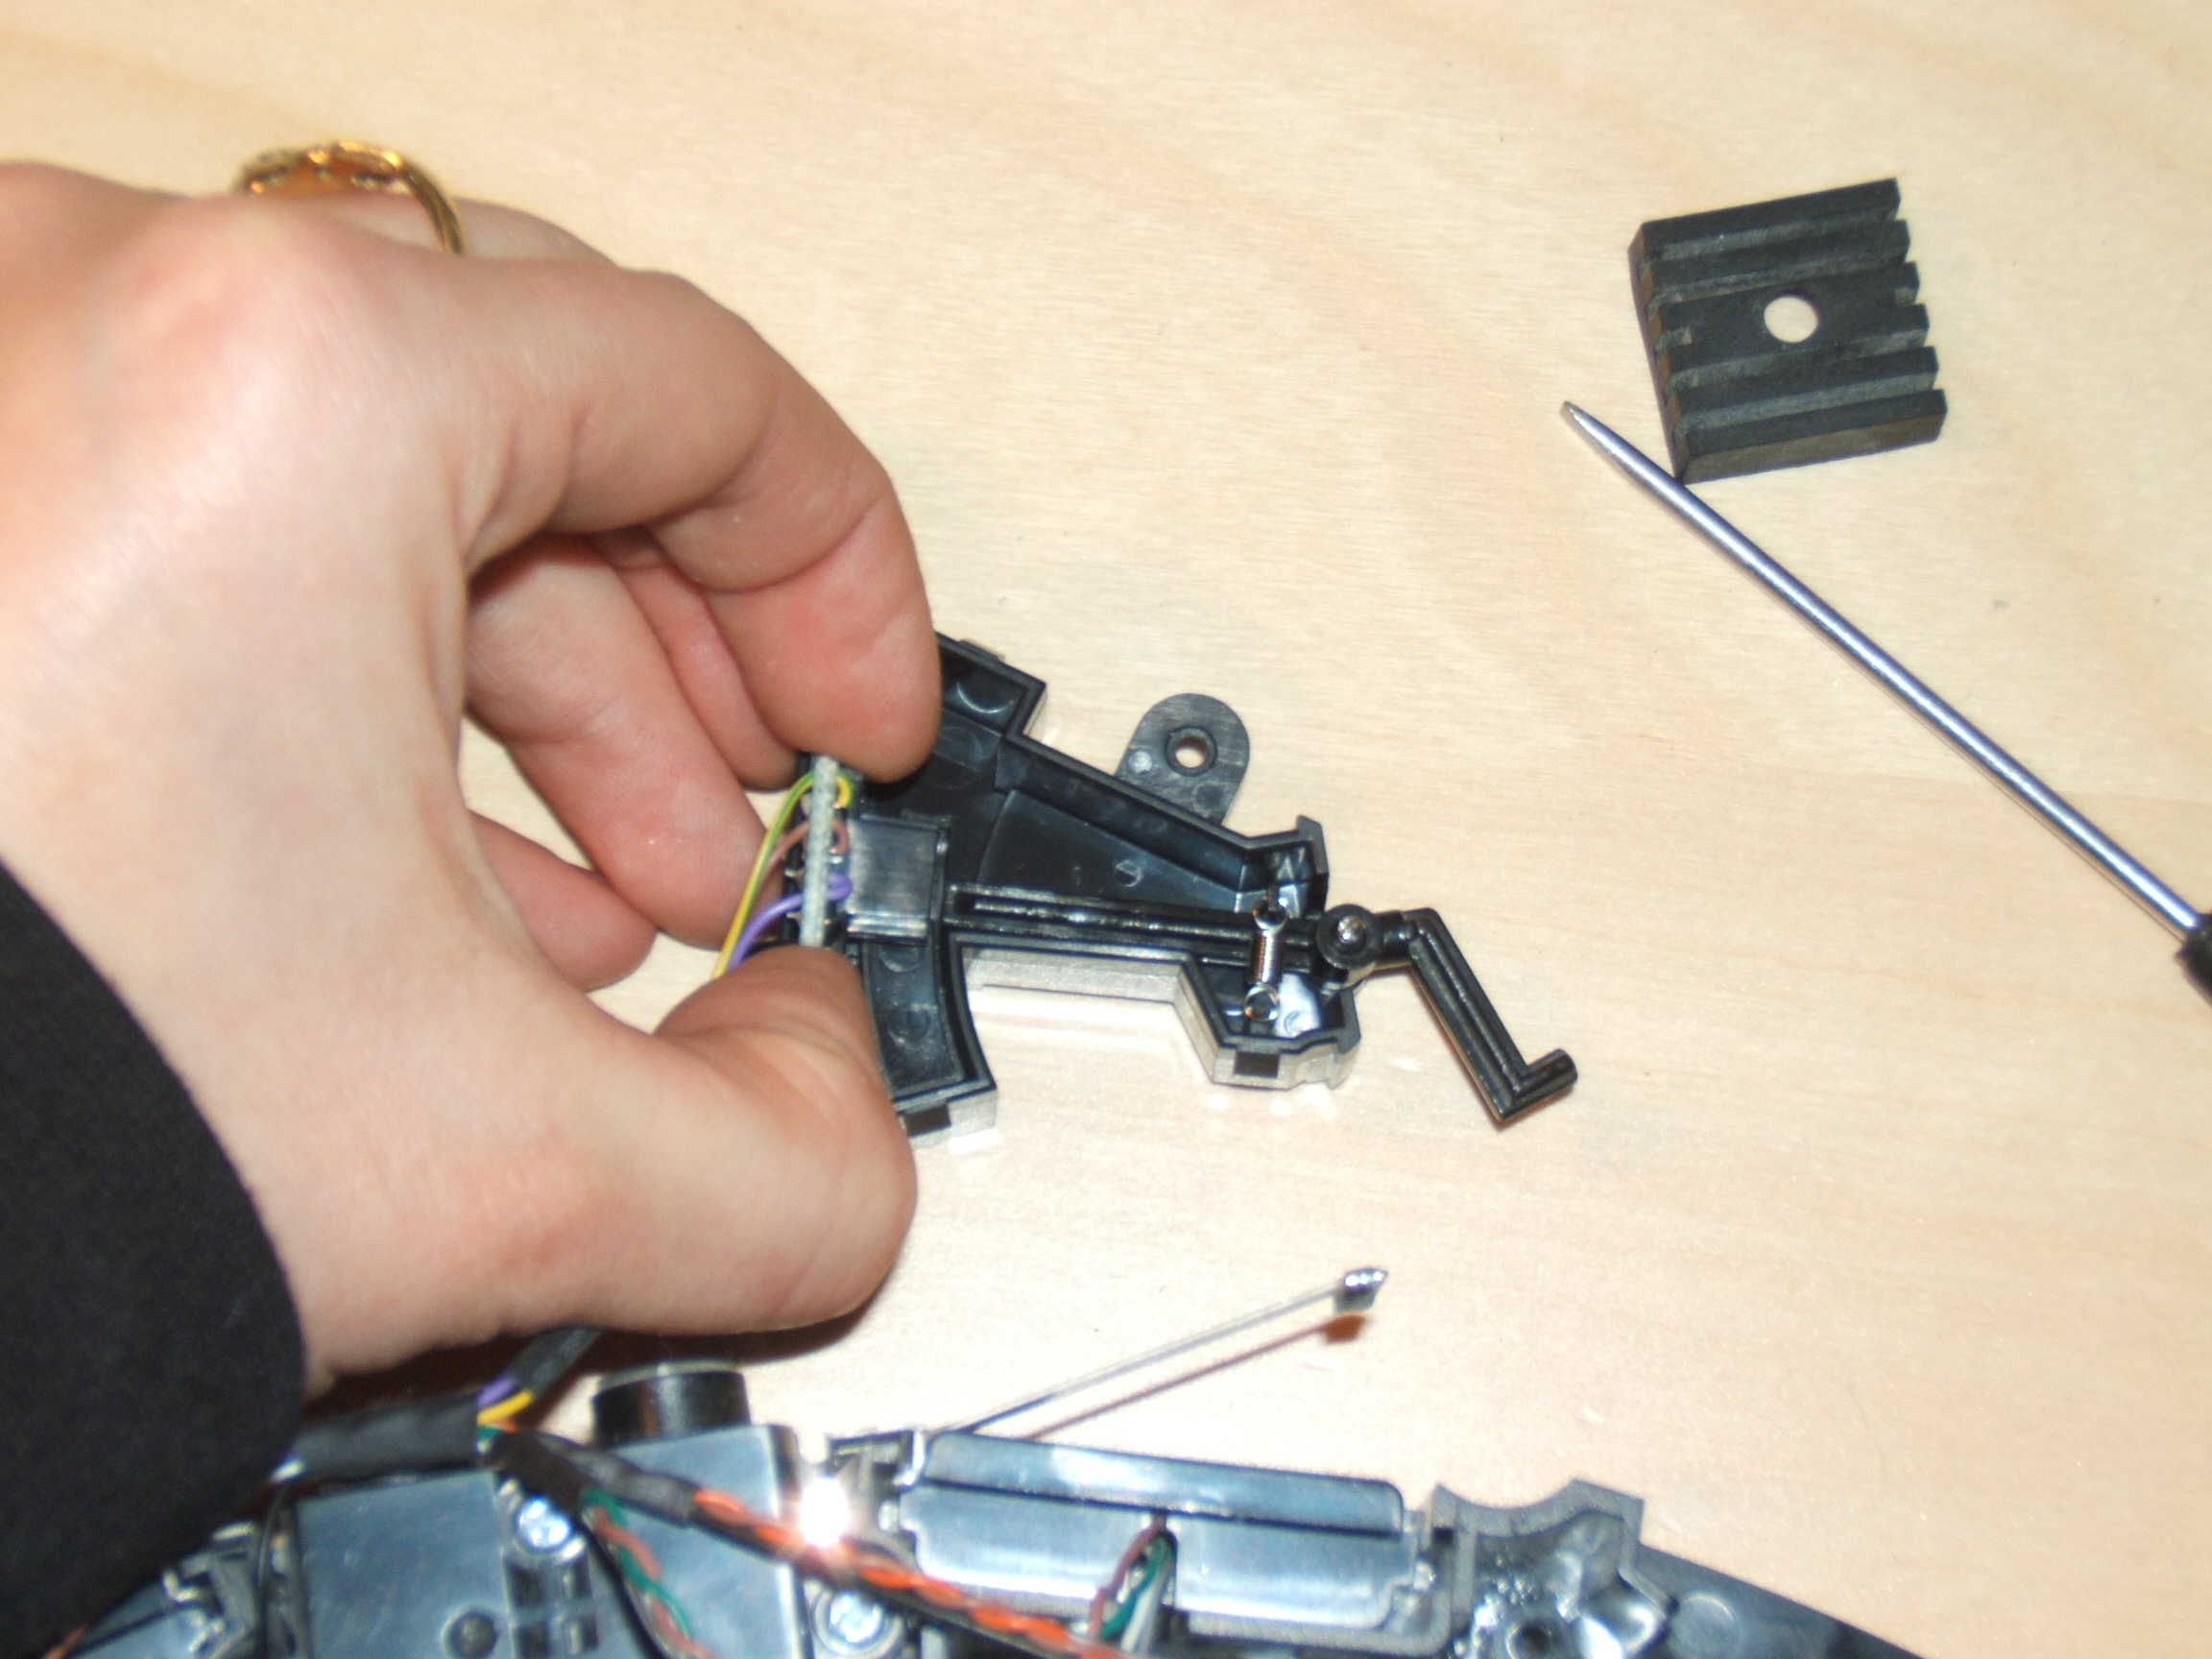
7.1.7 To release the casing from its blue frame, pull the left side of the blue frame outward with your thumb, while lifting the green casing up with your index finger.
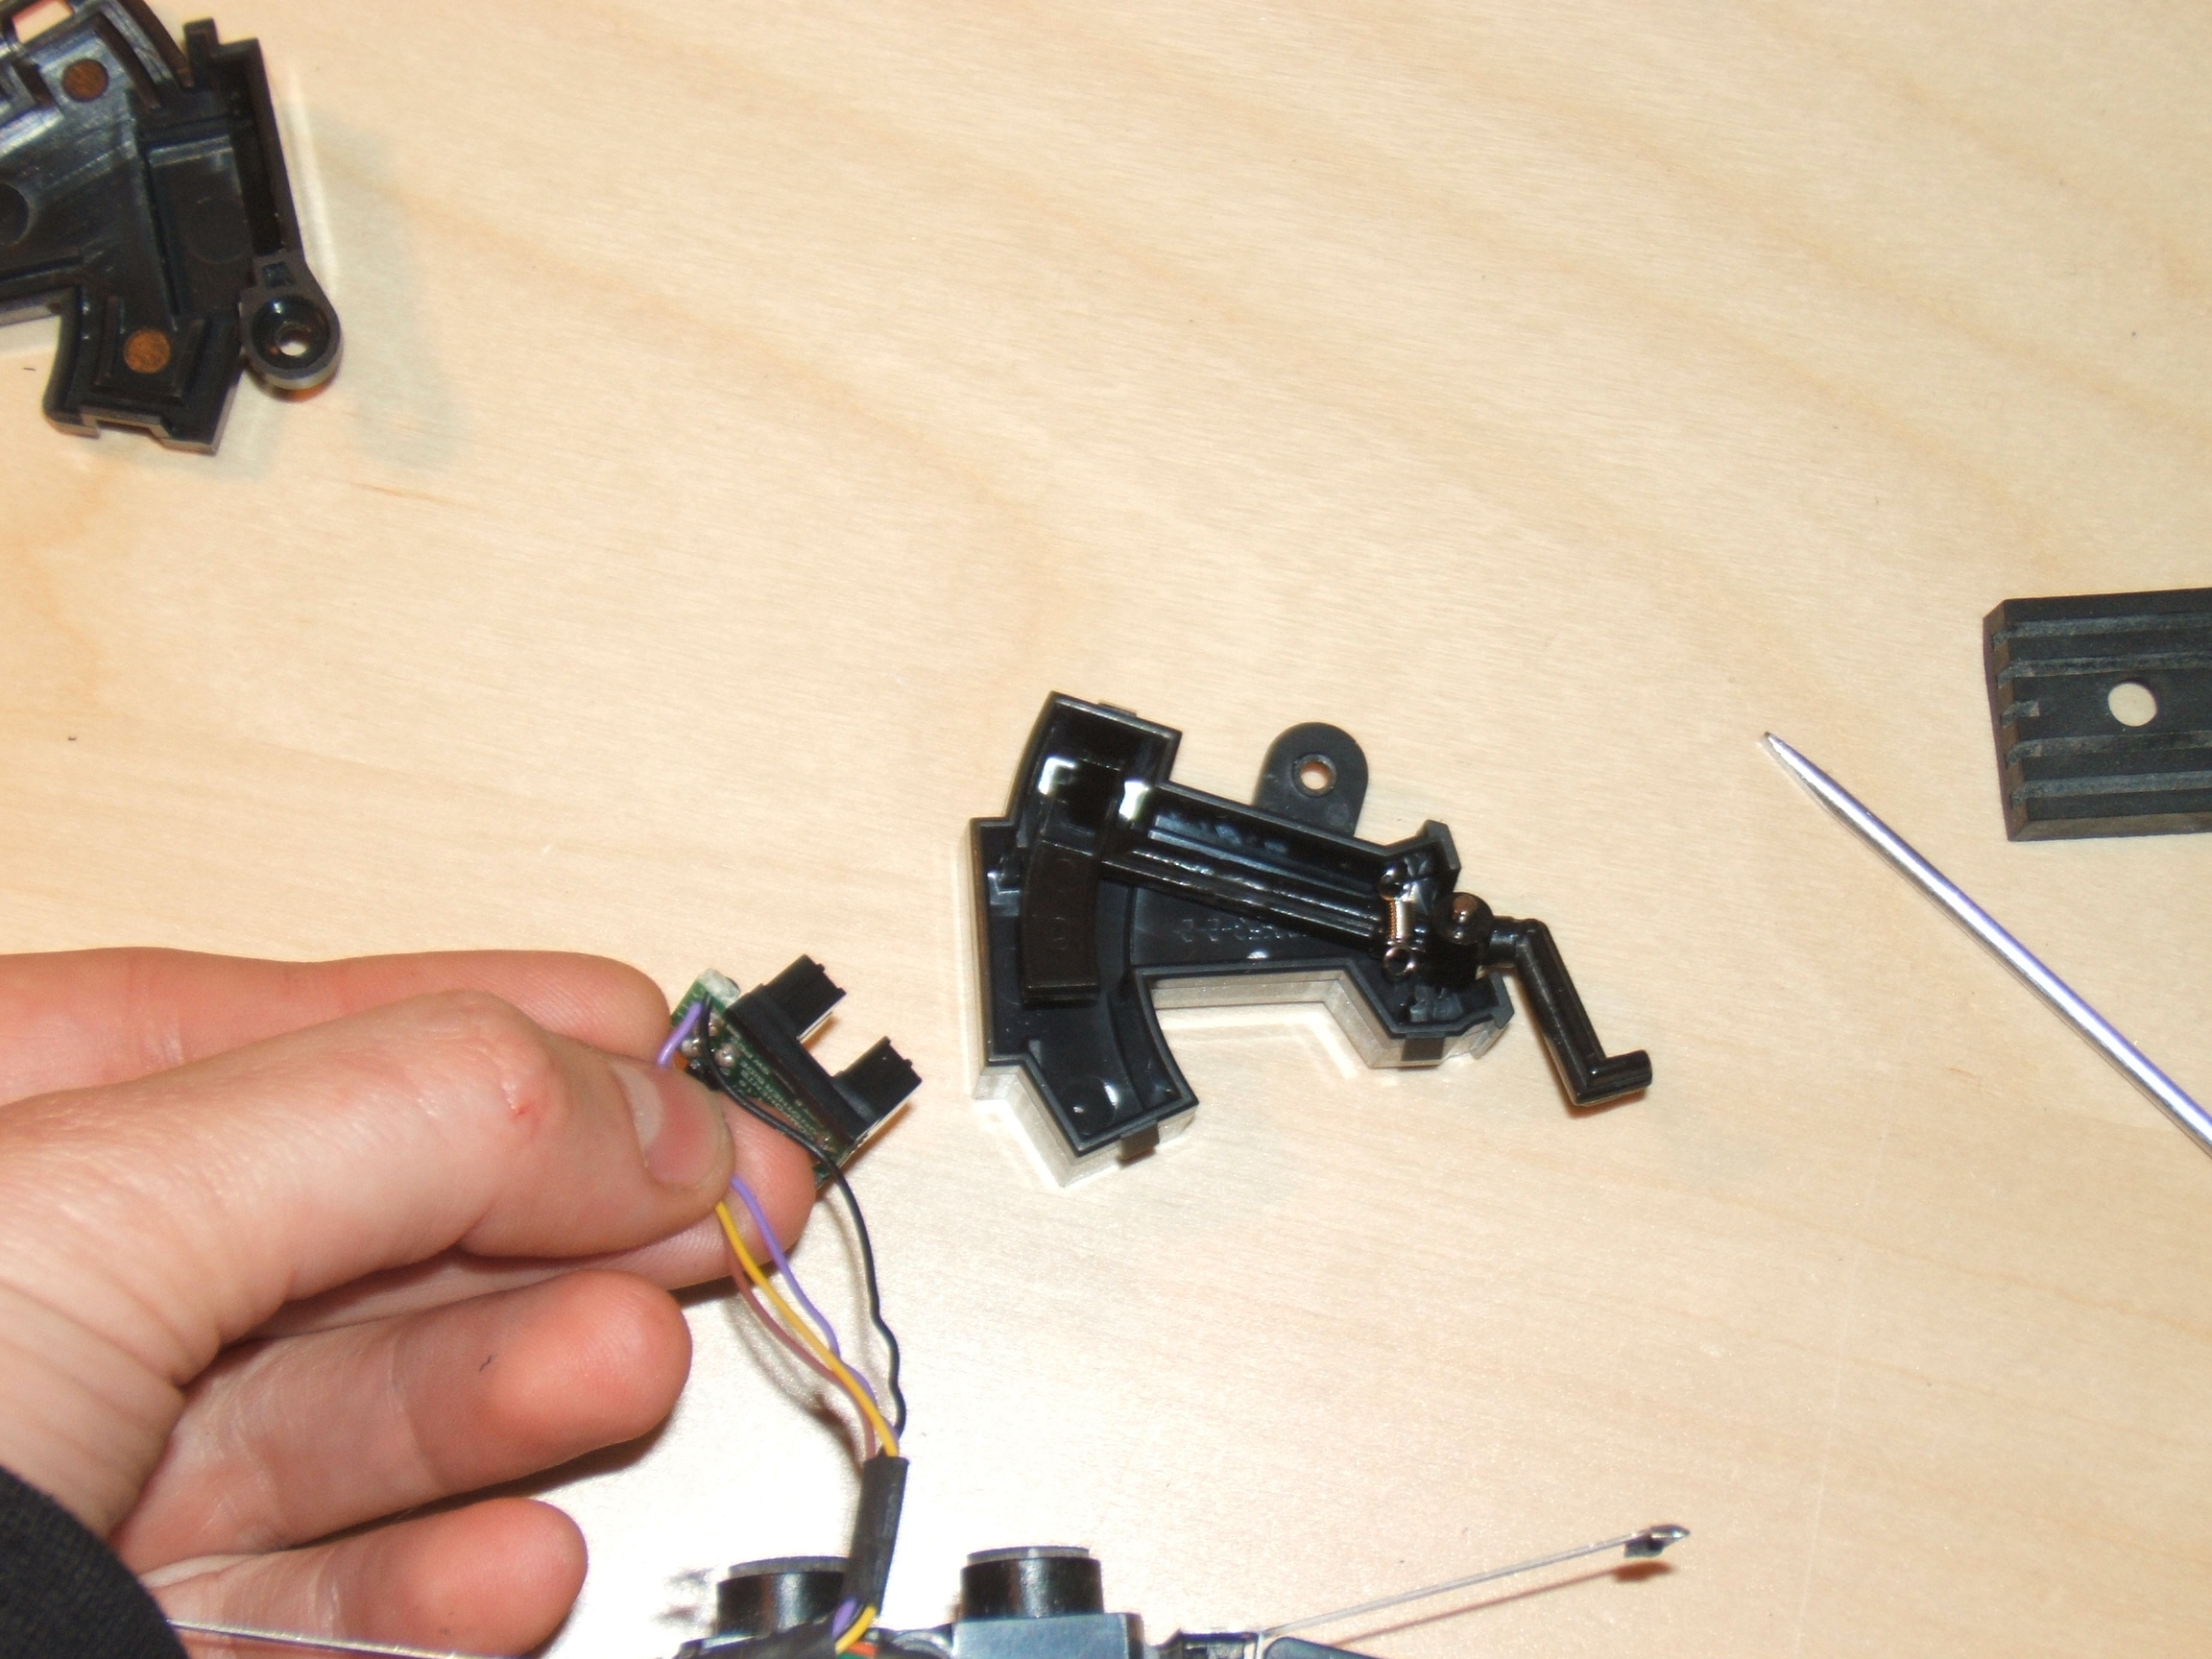
7.1.8 Do the same thing with the right side of the casing.
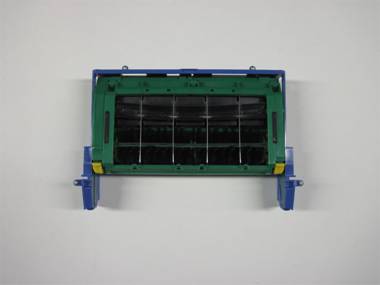
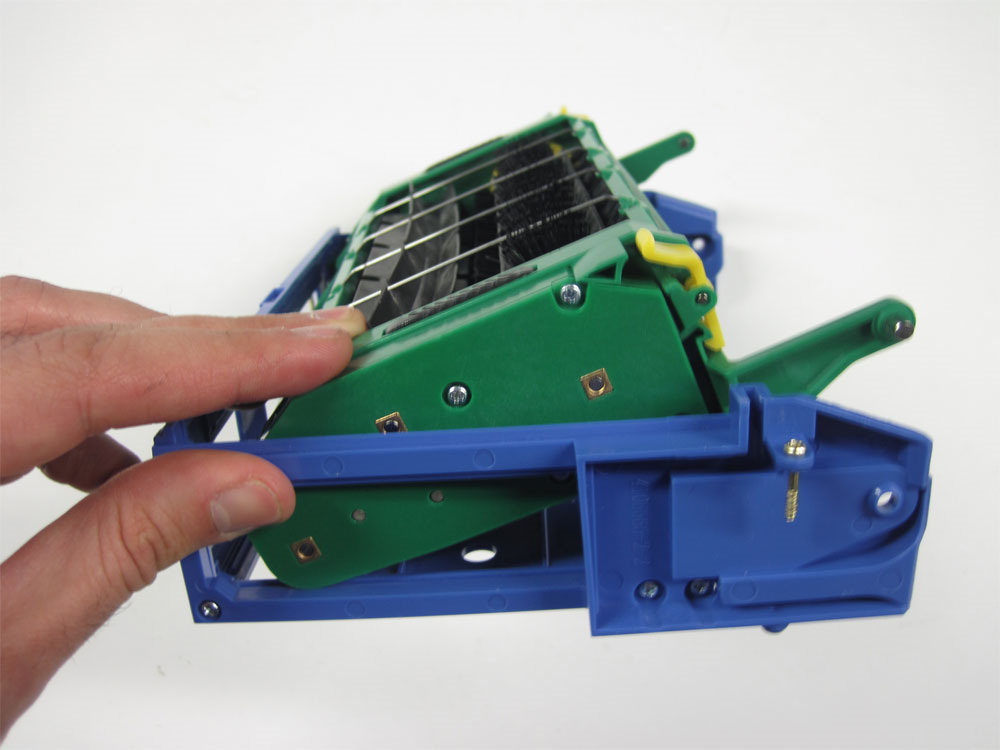
7.1.9 The brush deck module should look like this now, with the casing hinges released from the blue holder.
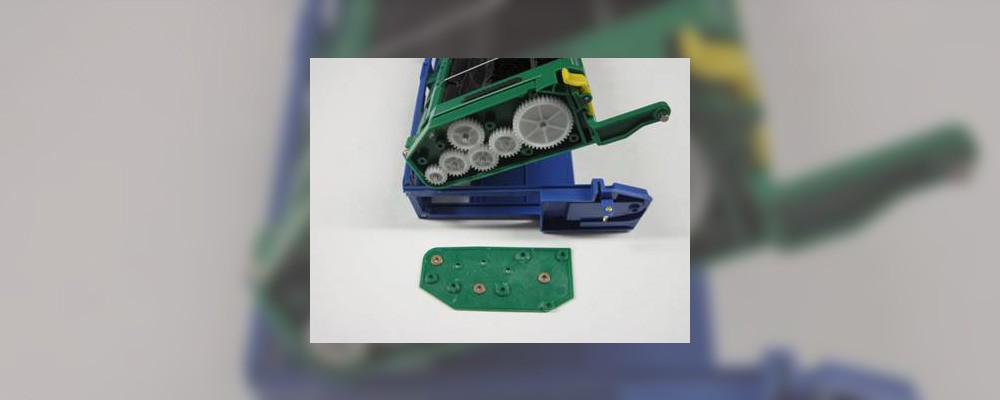
7.1.10 Lift up the left side of the casing so that the casing gear cover is fully visible.
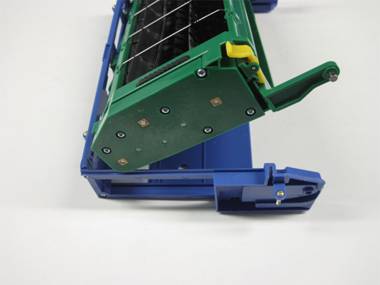
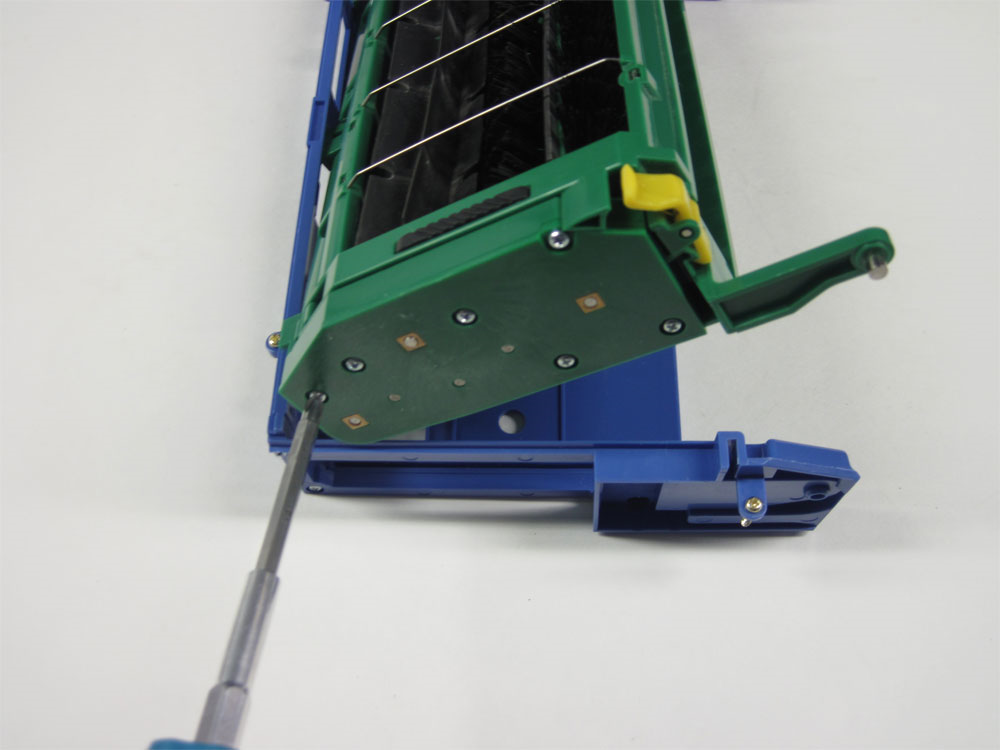
7.1.11 Remove the six screws holding the casing gear cover in place.
7.1.12 View of casing with gear cover removed. Notice that the casing we’ve taken apart is clean and new.

7.1.13 Most casings however, will look like the image below, and will need a thorough cleaning of the casing, gears, and cover regularly performed. In some cases, the gears are too worn and must be replaced.
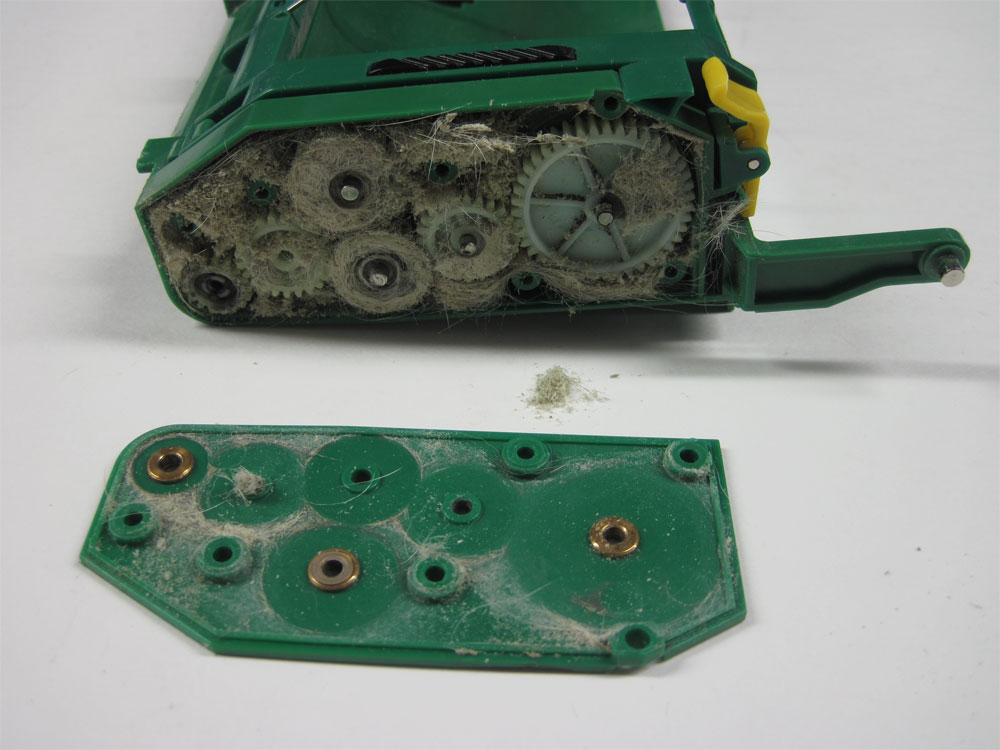
7.1.14 Remove the casing gears and clean out the bare casing by vacuuming out the build up debris and wiping it down with a clean cloth. More stubborn debris and build-up may need to be scraped off. Please note to remove any hair/dirt that has accumulated on the gear shafts, or around the openings for the brush pegs, shown by the orange arrows.
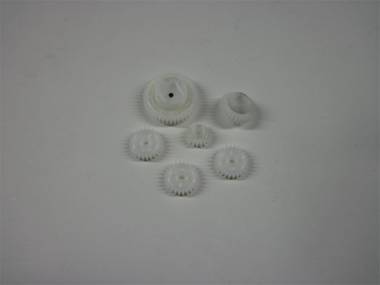
7.1.15 View of casing gears. You will need to either replace the gears with a new set, or clean the old ones. Make certain to clean in between each gear tooth and along the top and bottom to remove any dirt built up. A stiff brush may be useful, or even a flatheaded screwdriver if any scraping is required.
7.2 How to Install the New Main Brush Casing Gears 7.2.1 Using either a new set of gears, or having cleaned the old ones, place the gears into the casing. If necessary, apply lubricant to the gears at this point.
7.2.2 Put the casing gear cover back in place.
7.2.3 Put back the screws and tighten them until the cover is flush with the casing.
7.2.4 Push the left side of the casing back down into the blue frame.
7.2.5 Reinsert the green casing’s hinges into the blue frame by pushing down and inward with your thumbs on the green hinge posts, while pulling outwards with your fingertips on the blue frame.
7.2.6 View of brush deck module after being reassembled.
7.2.7 Drop the brush deck module into Roomba. Be careful to make sure it is aligned properly. It may need to be moved from left to right, or jiggled slightly in place, to get it to settle into position.
7.2.8 Once the brush deck module is in place, tighten the four screws, shown by the orange arrows.
7.2.9 You have now successfully replaced/cleaned your Roomba’s main brush casing gears.
For details on how to reassemble your Roomba, please see Roomba 500 Series Servicing and Repair Guide Chapter 3: How to Open Up Roomba Roomba replacement parts can be found at RobotShop.
Thanks for helping to keep our community civil!
This post is an advertisement, or vandalism. It is not useful or relevant to the current topic.
You flagged this as spam. Undo flag.Flag Post
Your post is currently under review by our moderation team. The review process usually takes up to 48 business hours.
You can track your post's status in the "My Content" section of your profile. Once approved, it will be published and visible to others.

Thank you for contributing to our community!