Chapter 2 coming soon: Maintenance
This repair guide explains how to perform general disassembly on the
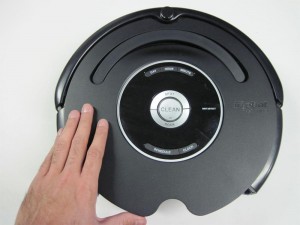
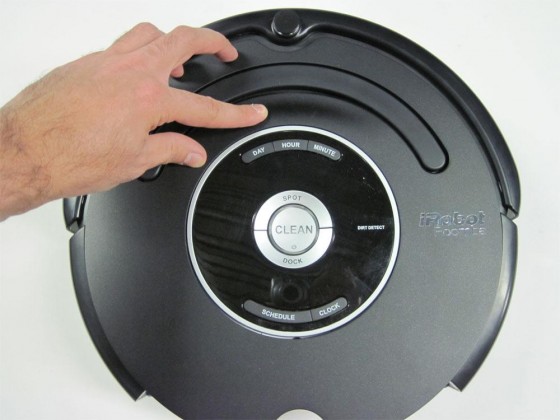
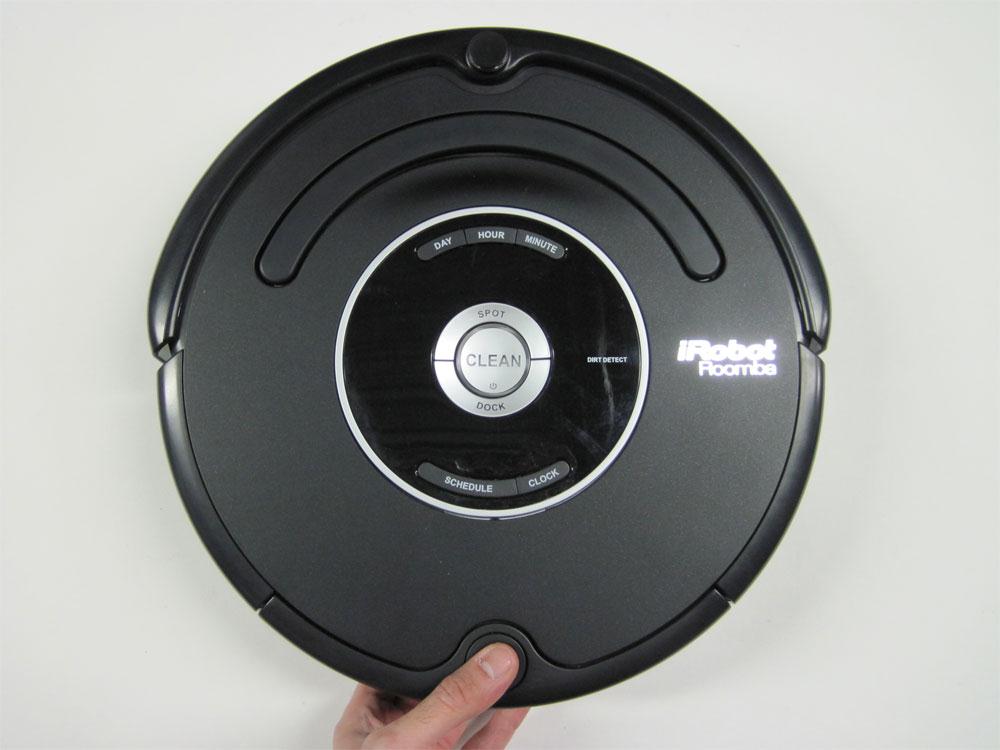
Roomba 500 series robot vacuum. It is suggested to consult this guide when attempting any other repairs, as it will explain how to open up the frame to begin the repairs. Some of the 500 series Roombas are pictured below:
 3 How to Open Up Roomba
3.1 How to Disassemble Roomba
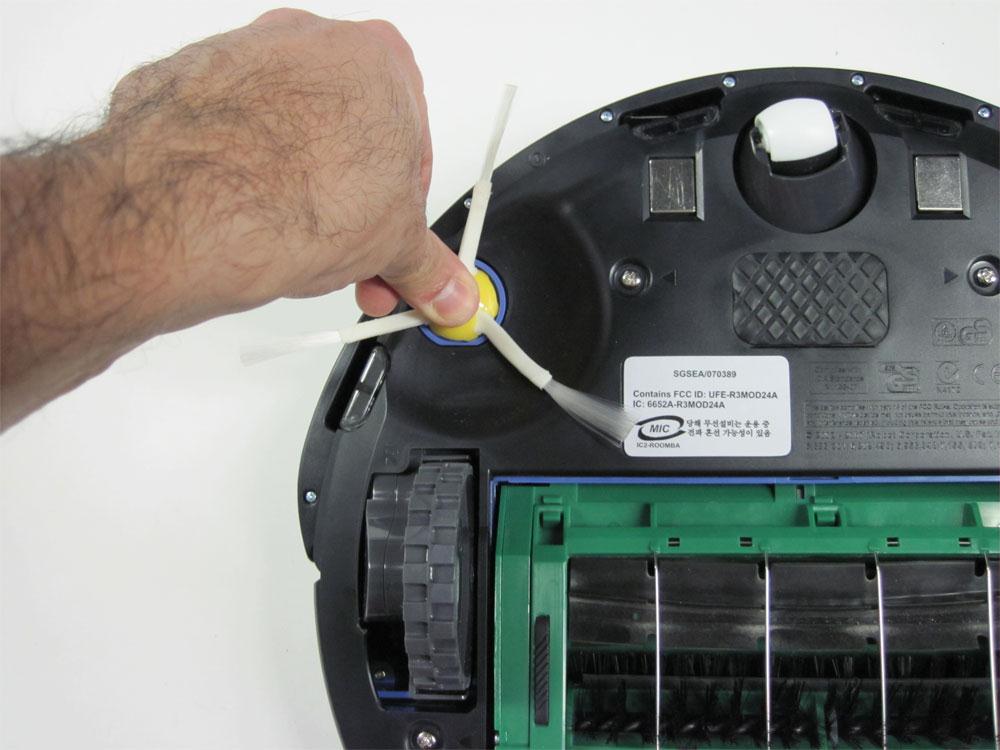
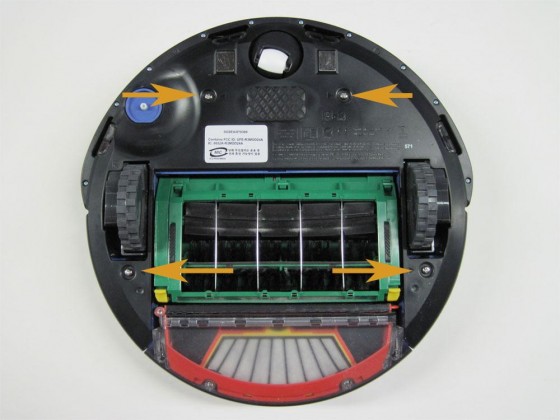
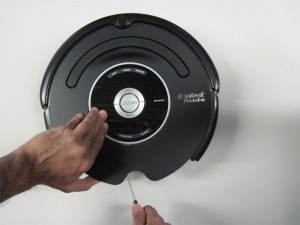
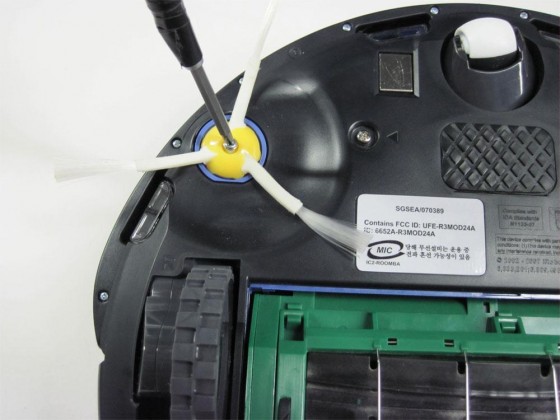
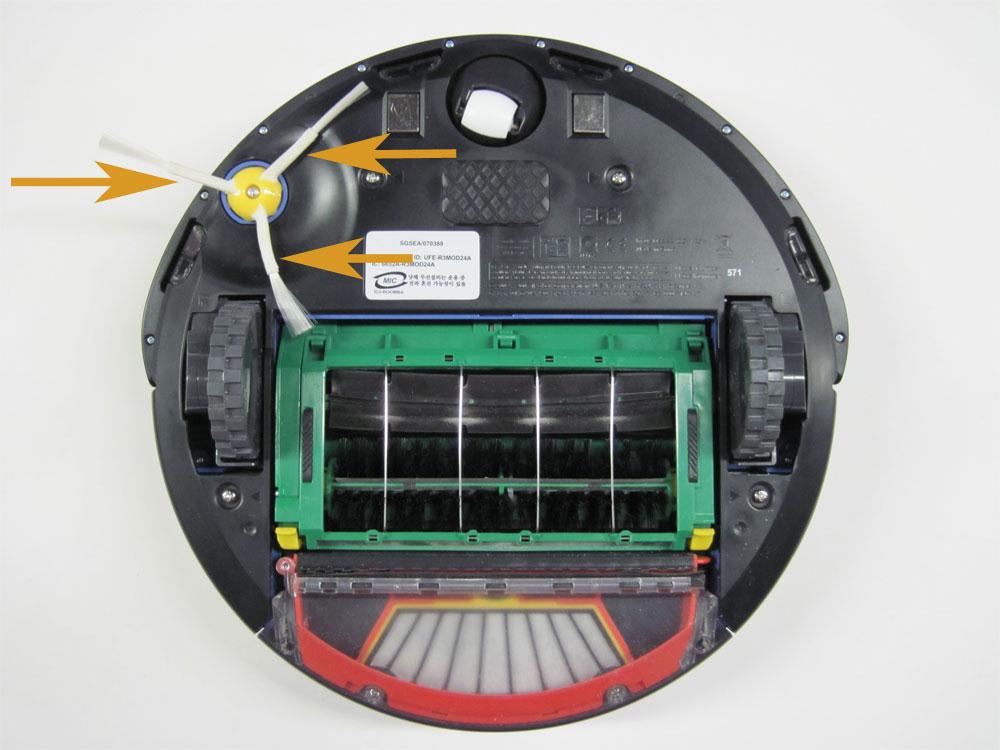
3.1.1 Start by flipping the Roomba on its back and removing the side brush screw, shown by the orange arrow.
3 How to Open Up Roomba
3.1 How to Disassemble Roomba
3.1.1 Start by flipping the Roomba on its back and removing the side brush screw, shown by the orange arrow.

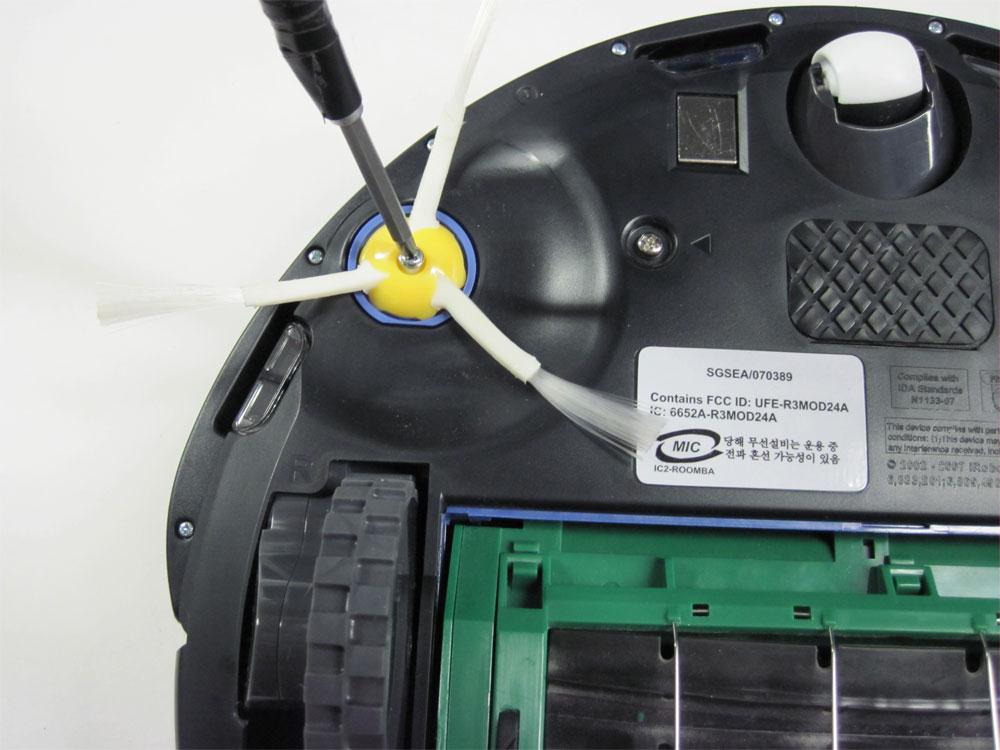
3.1.2 Once the screw is removed, you can grab the side brush by any two of its three brushes and pull up away from the robot.
3.1.3 The brush should gently snap out of place.
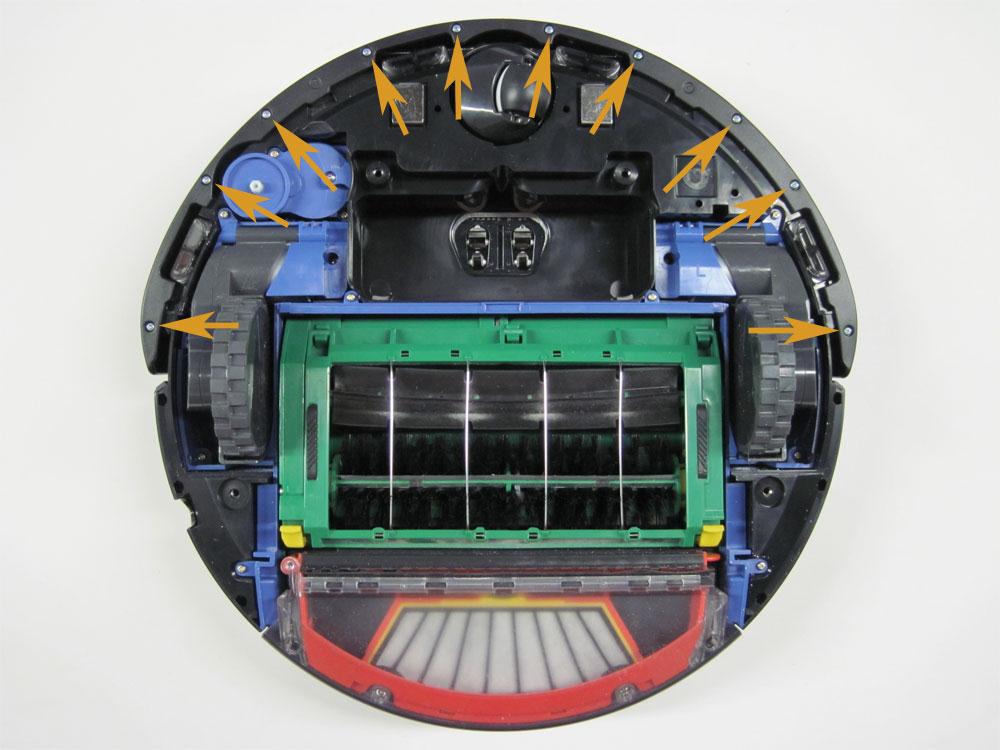
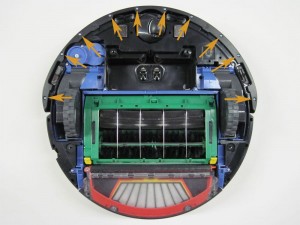
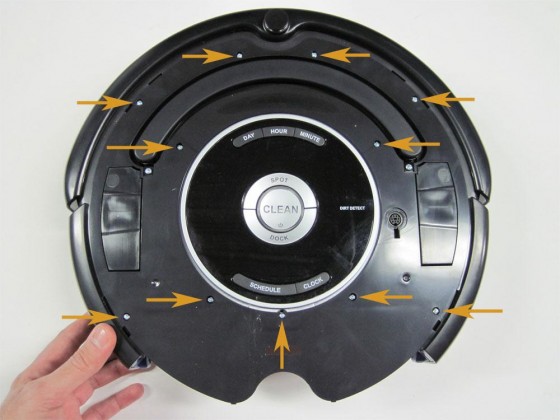
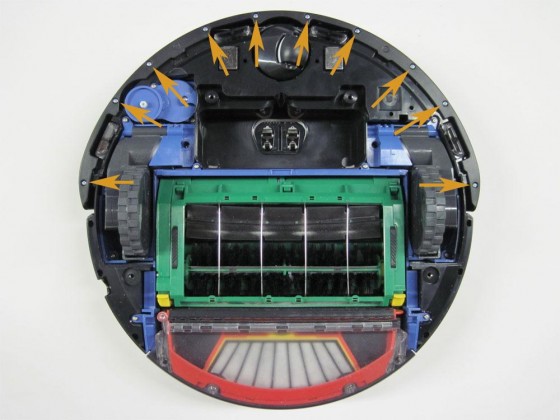
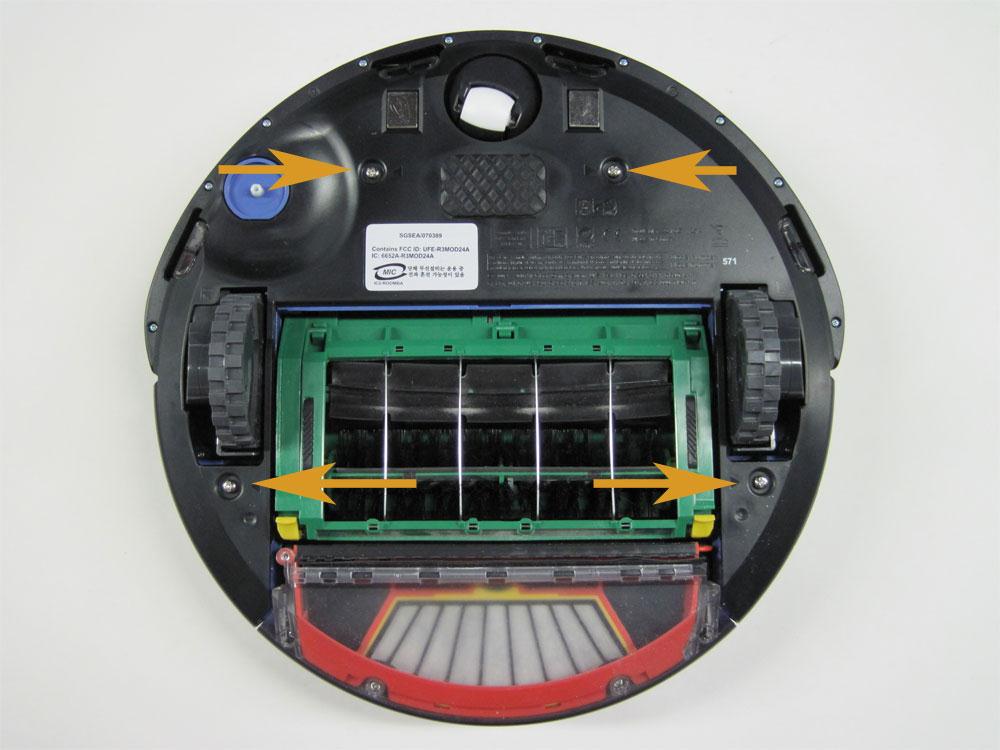
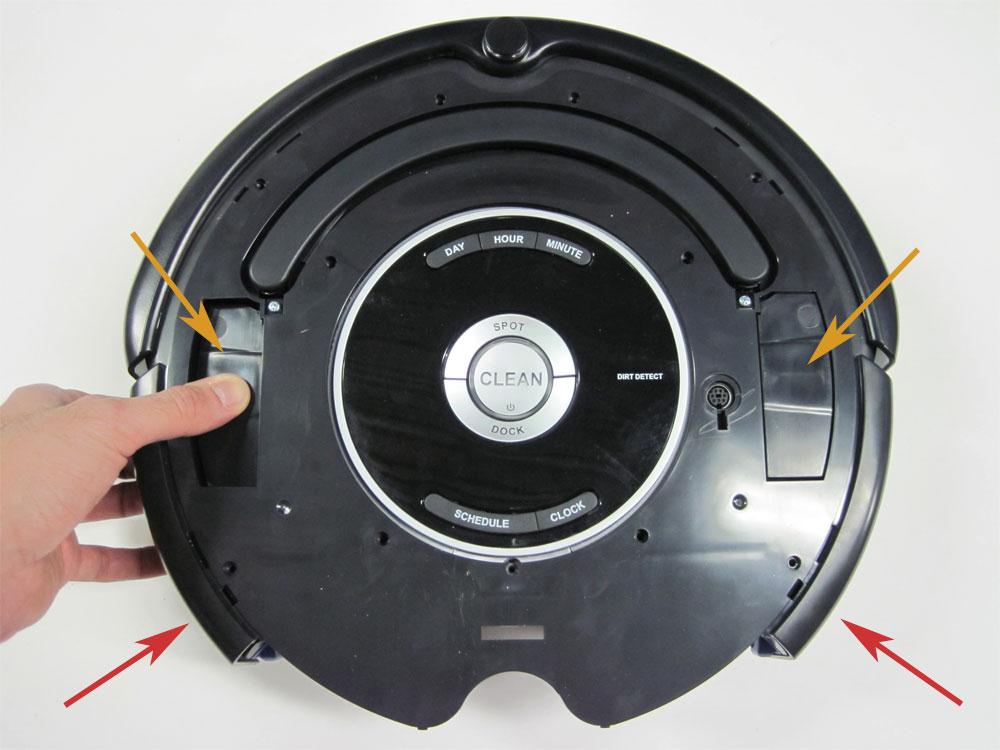
3.1.4 Loosen the four screws holding the bottom cover in place.
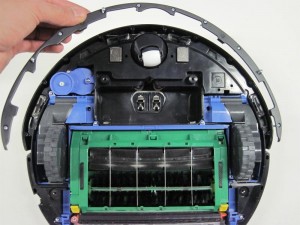
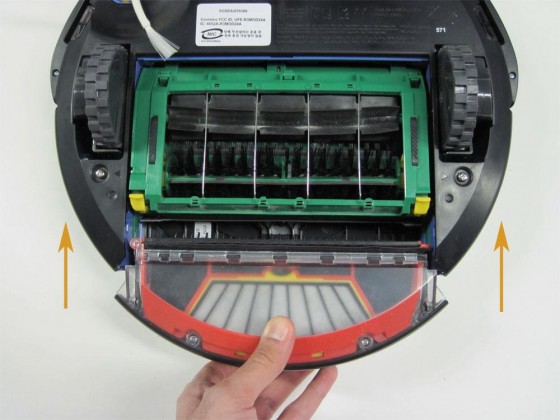
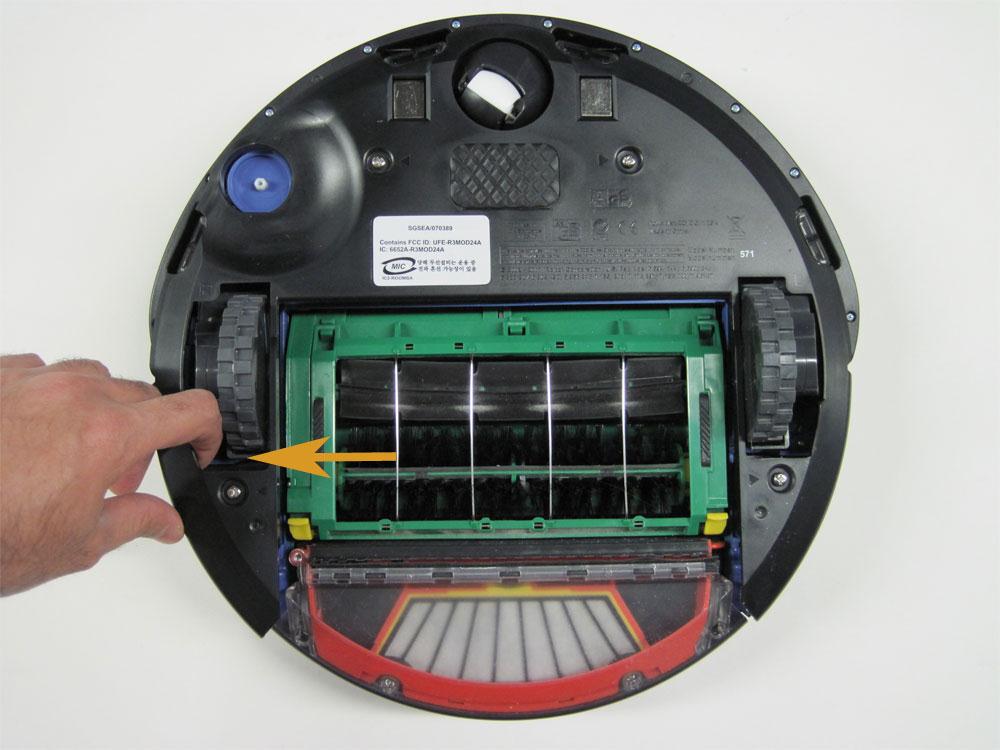
3.1.5 Once the cover is loose, using one of your fingers, hook the bottom cover near the openings for either drive wheel…

3.1.6 …and remove the bottom cover from the robot.

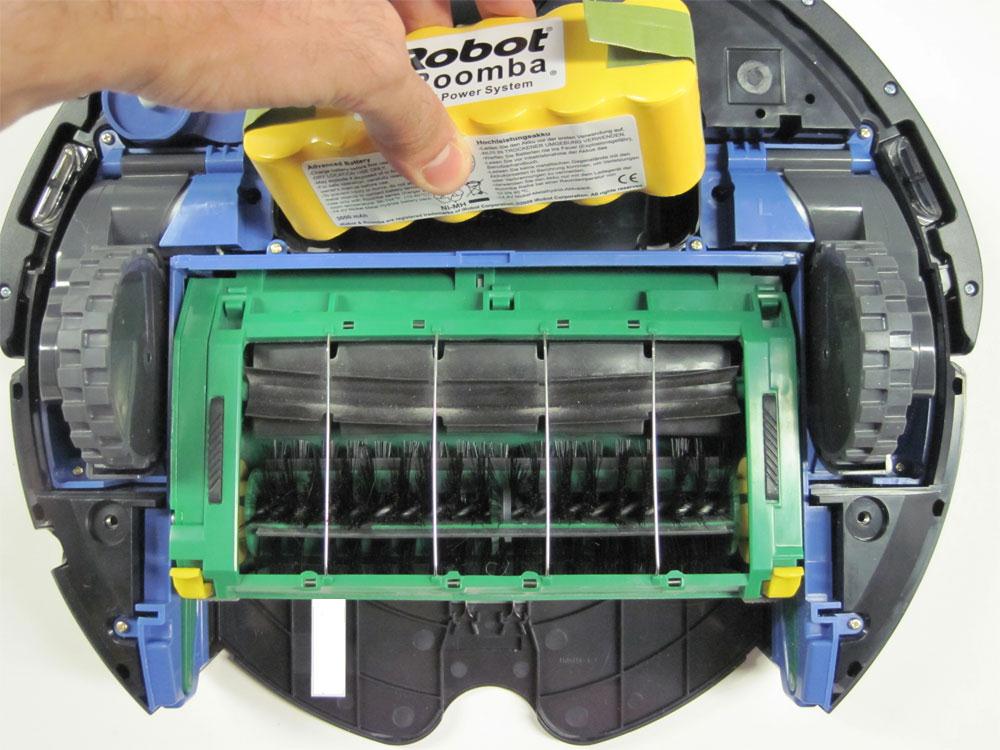
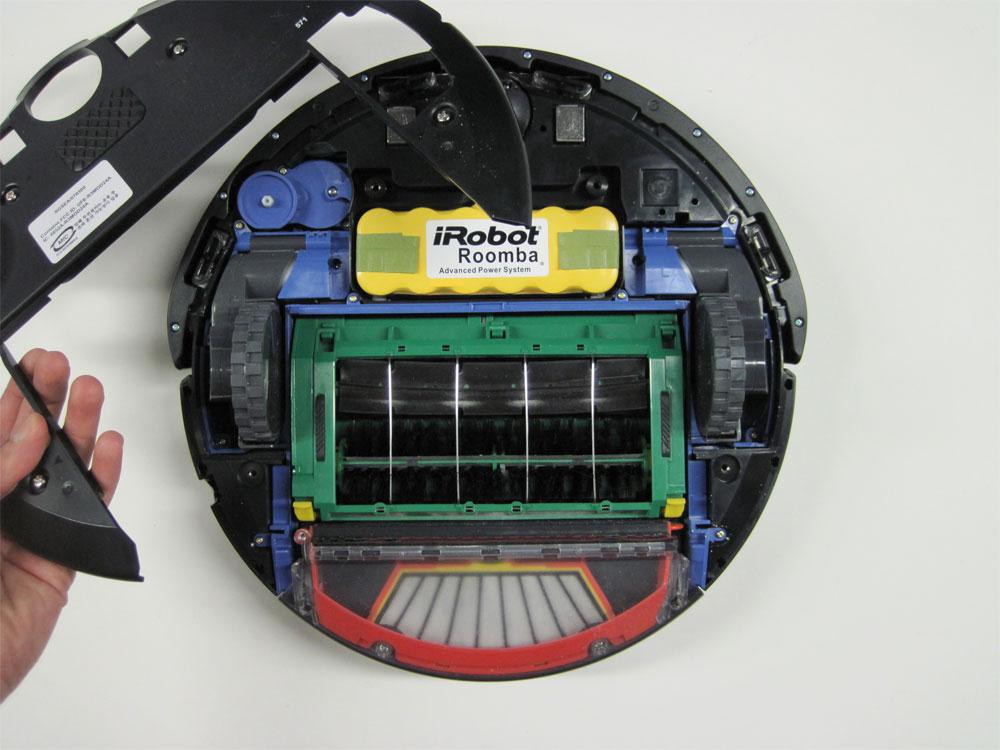
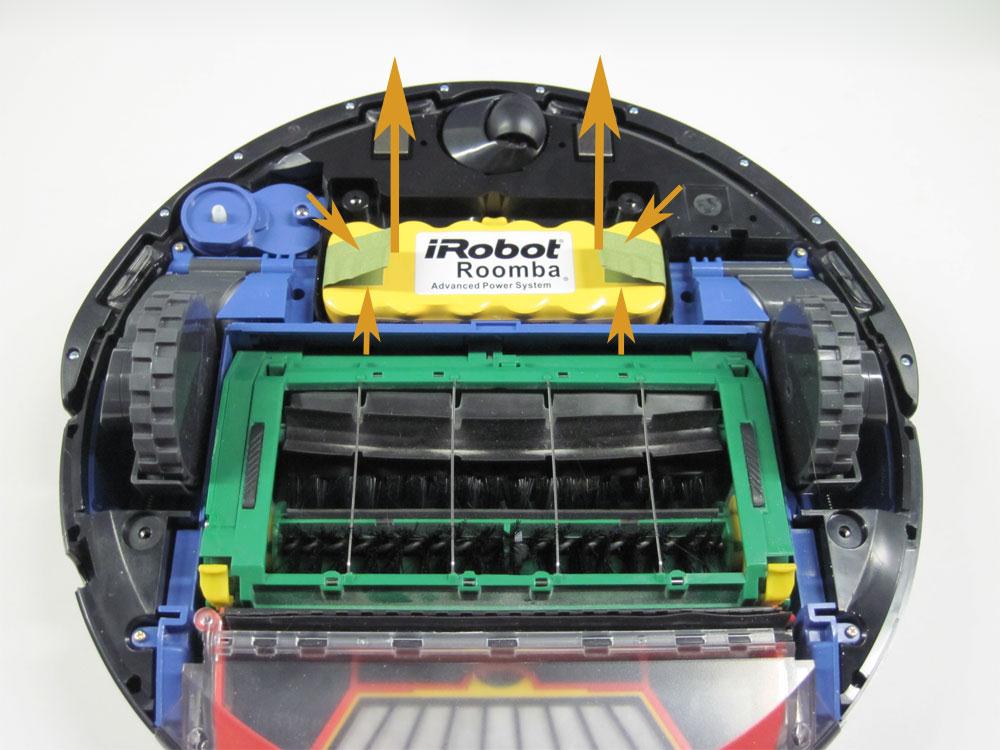
3.1.7 Now remove the battery, lifting it out of the robot using the pull tabs on each end of the battery.

3.1.8 Loosen the 10 screws that hold the front bumper’s bottom trim piece in place.
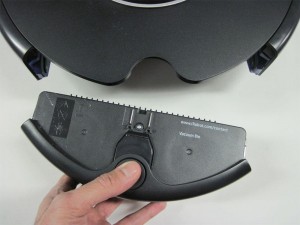
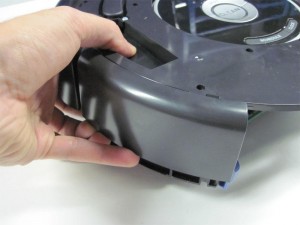
3.1.9 With the screws loose, now remove the bumper’s bottom trim piece from the robot.
3.1.10 Flip the Roomba back on it’s wheels.

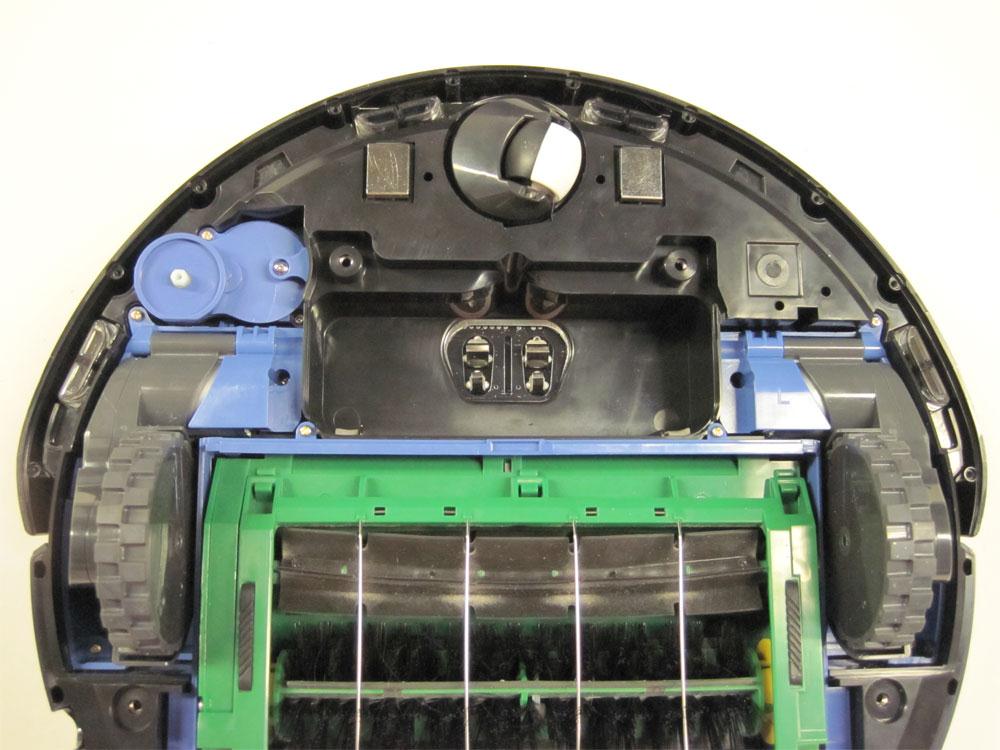
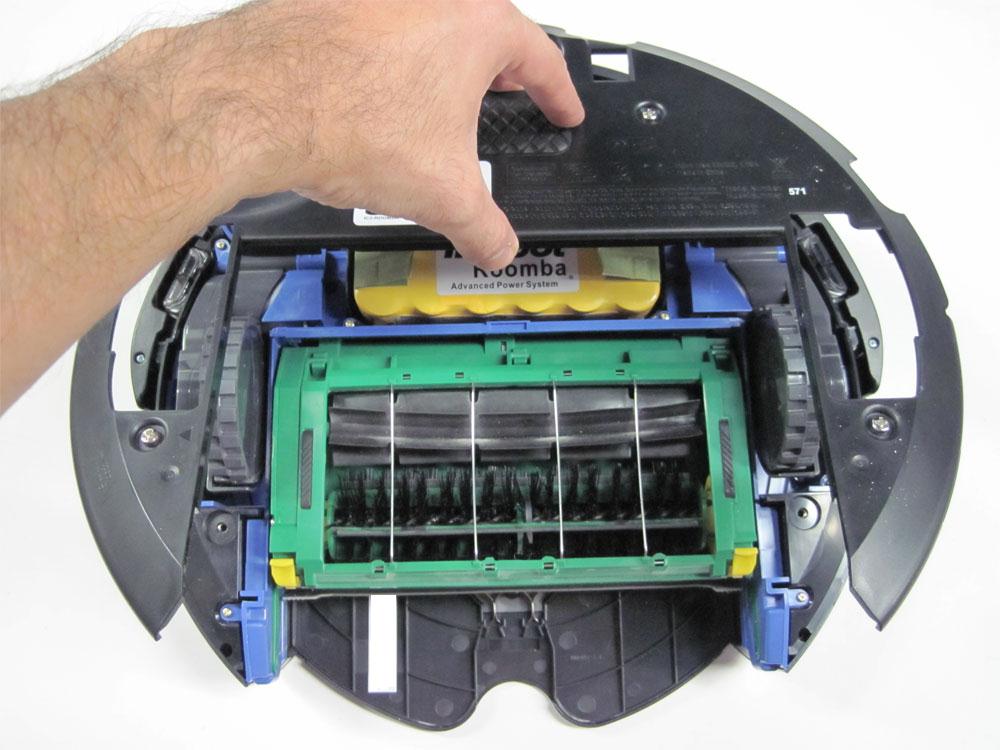
3.1.11 Remove the dustbin.
3.1.12 Remove the faceplate from the Roomba. Starting at the bottom where the dustbin goes, lift up the edge of the faceplate, and insert a long screwdriver (or similar tool) into the gap. Then, while holding the Roomba in place, lift the handle end of the screwdriver like a lever to un-clip the faceplate from the Roomba.
3.1.13 Remove the 11 screws in the Roomba’s top frame.
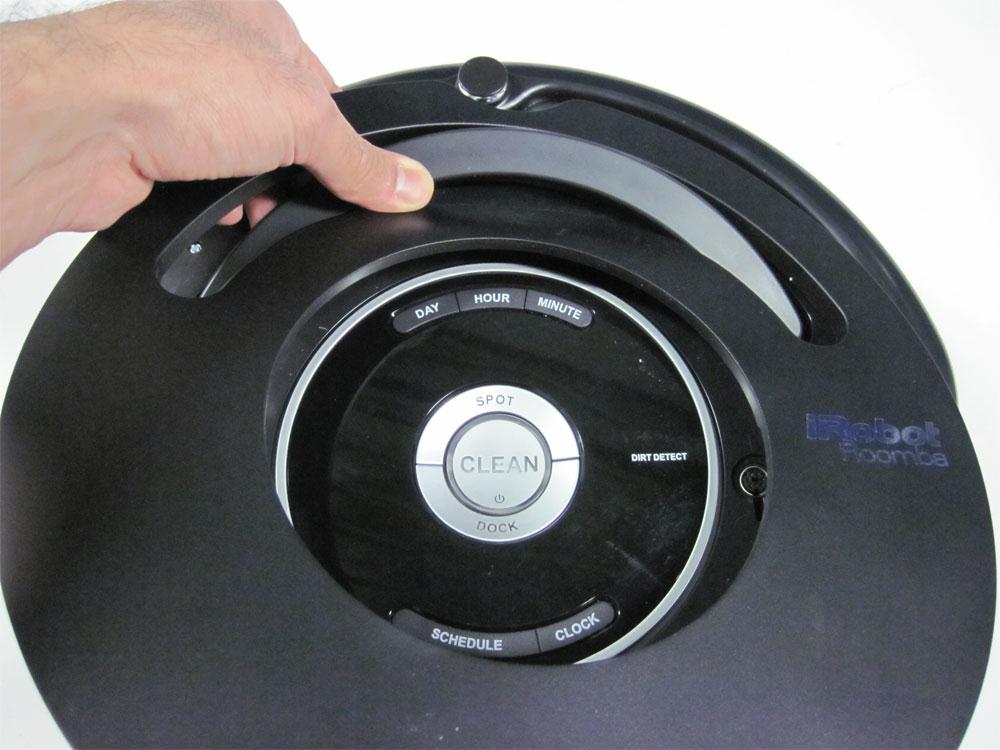
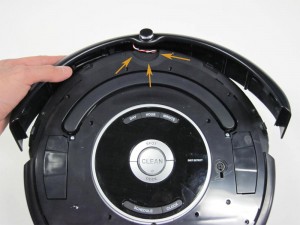
3.1.14 Loosen the top cover from the robot by lifting the edge of the cover up, while pushing down on the main frame with your thumb, as pictured.
3.1.15 Do this for both sides of the robot, pushing down on the frame with your thumb (orange arrows), and lifting up the bottom edge of the cover with your finger tips (red arrows).

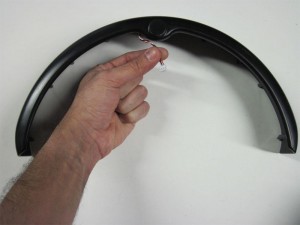
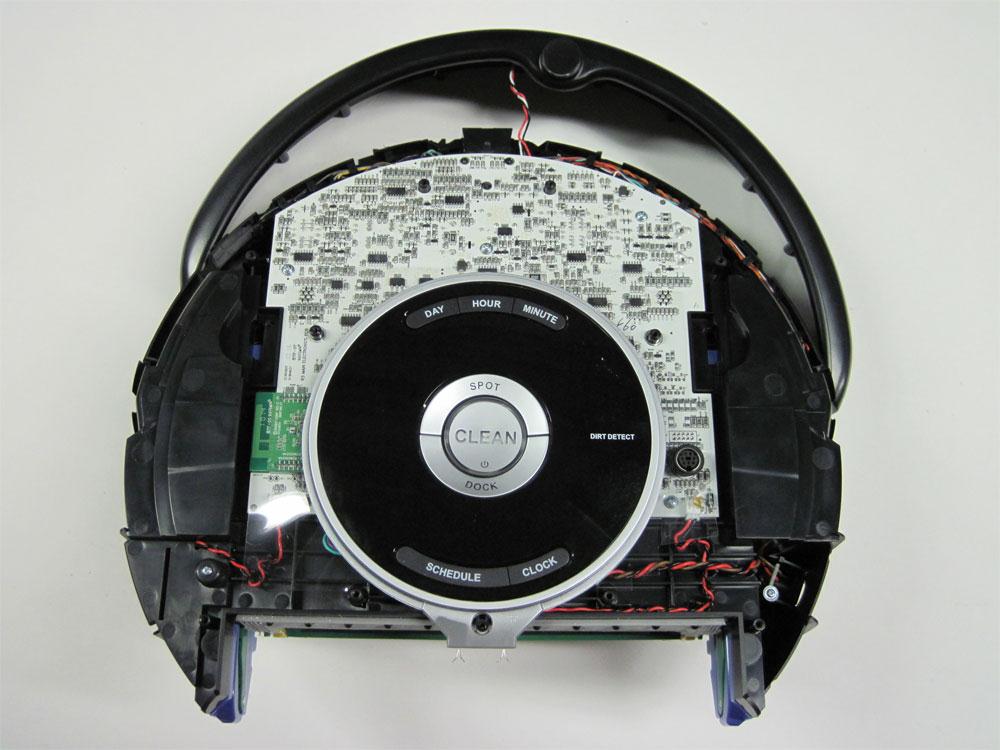
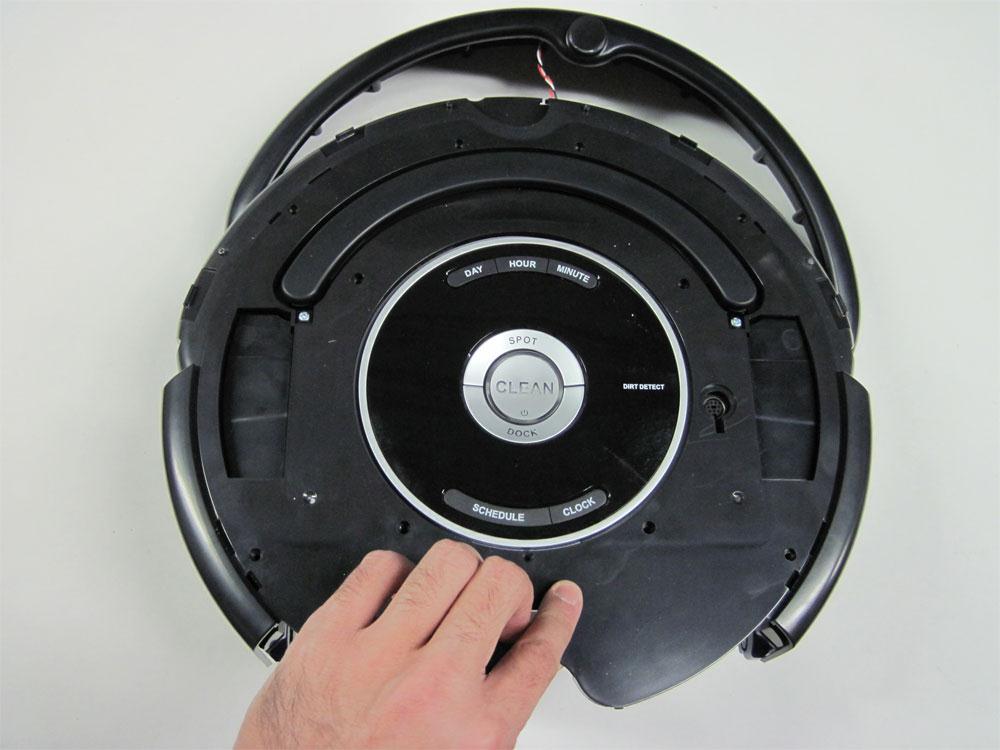
3.1.16 Once loose, the cover will lift up from the back.
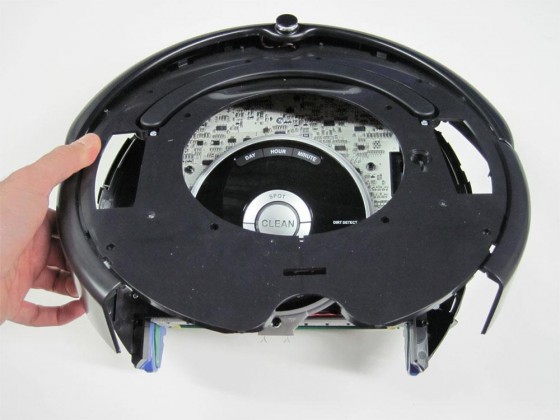
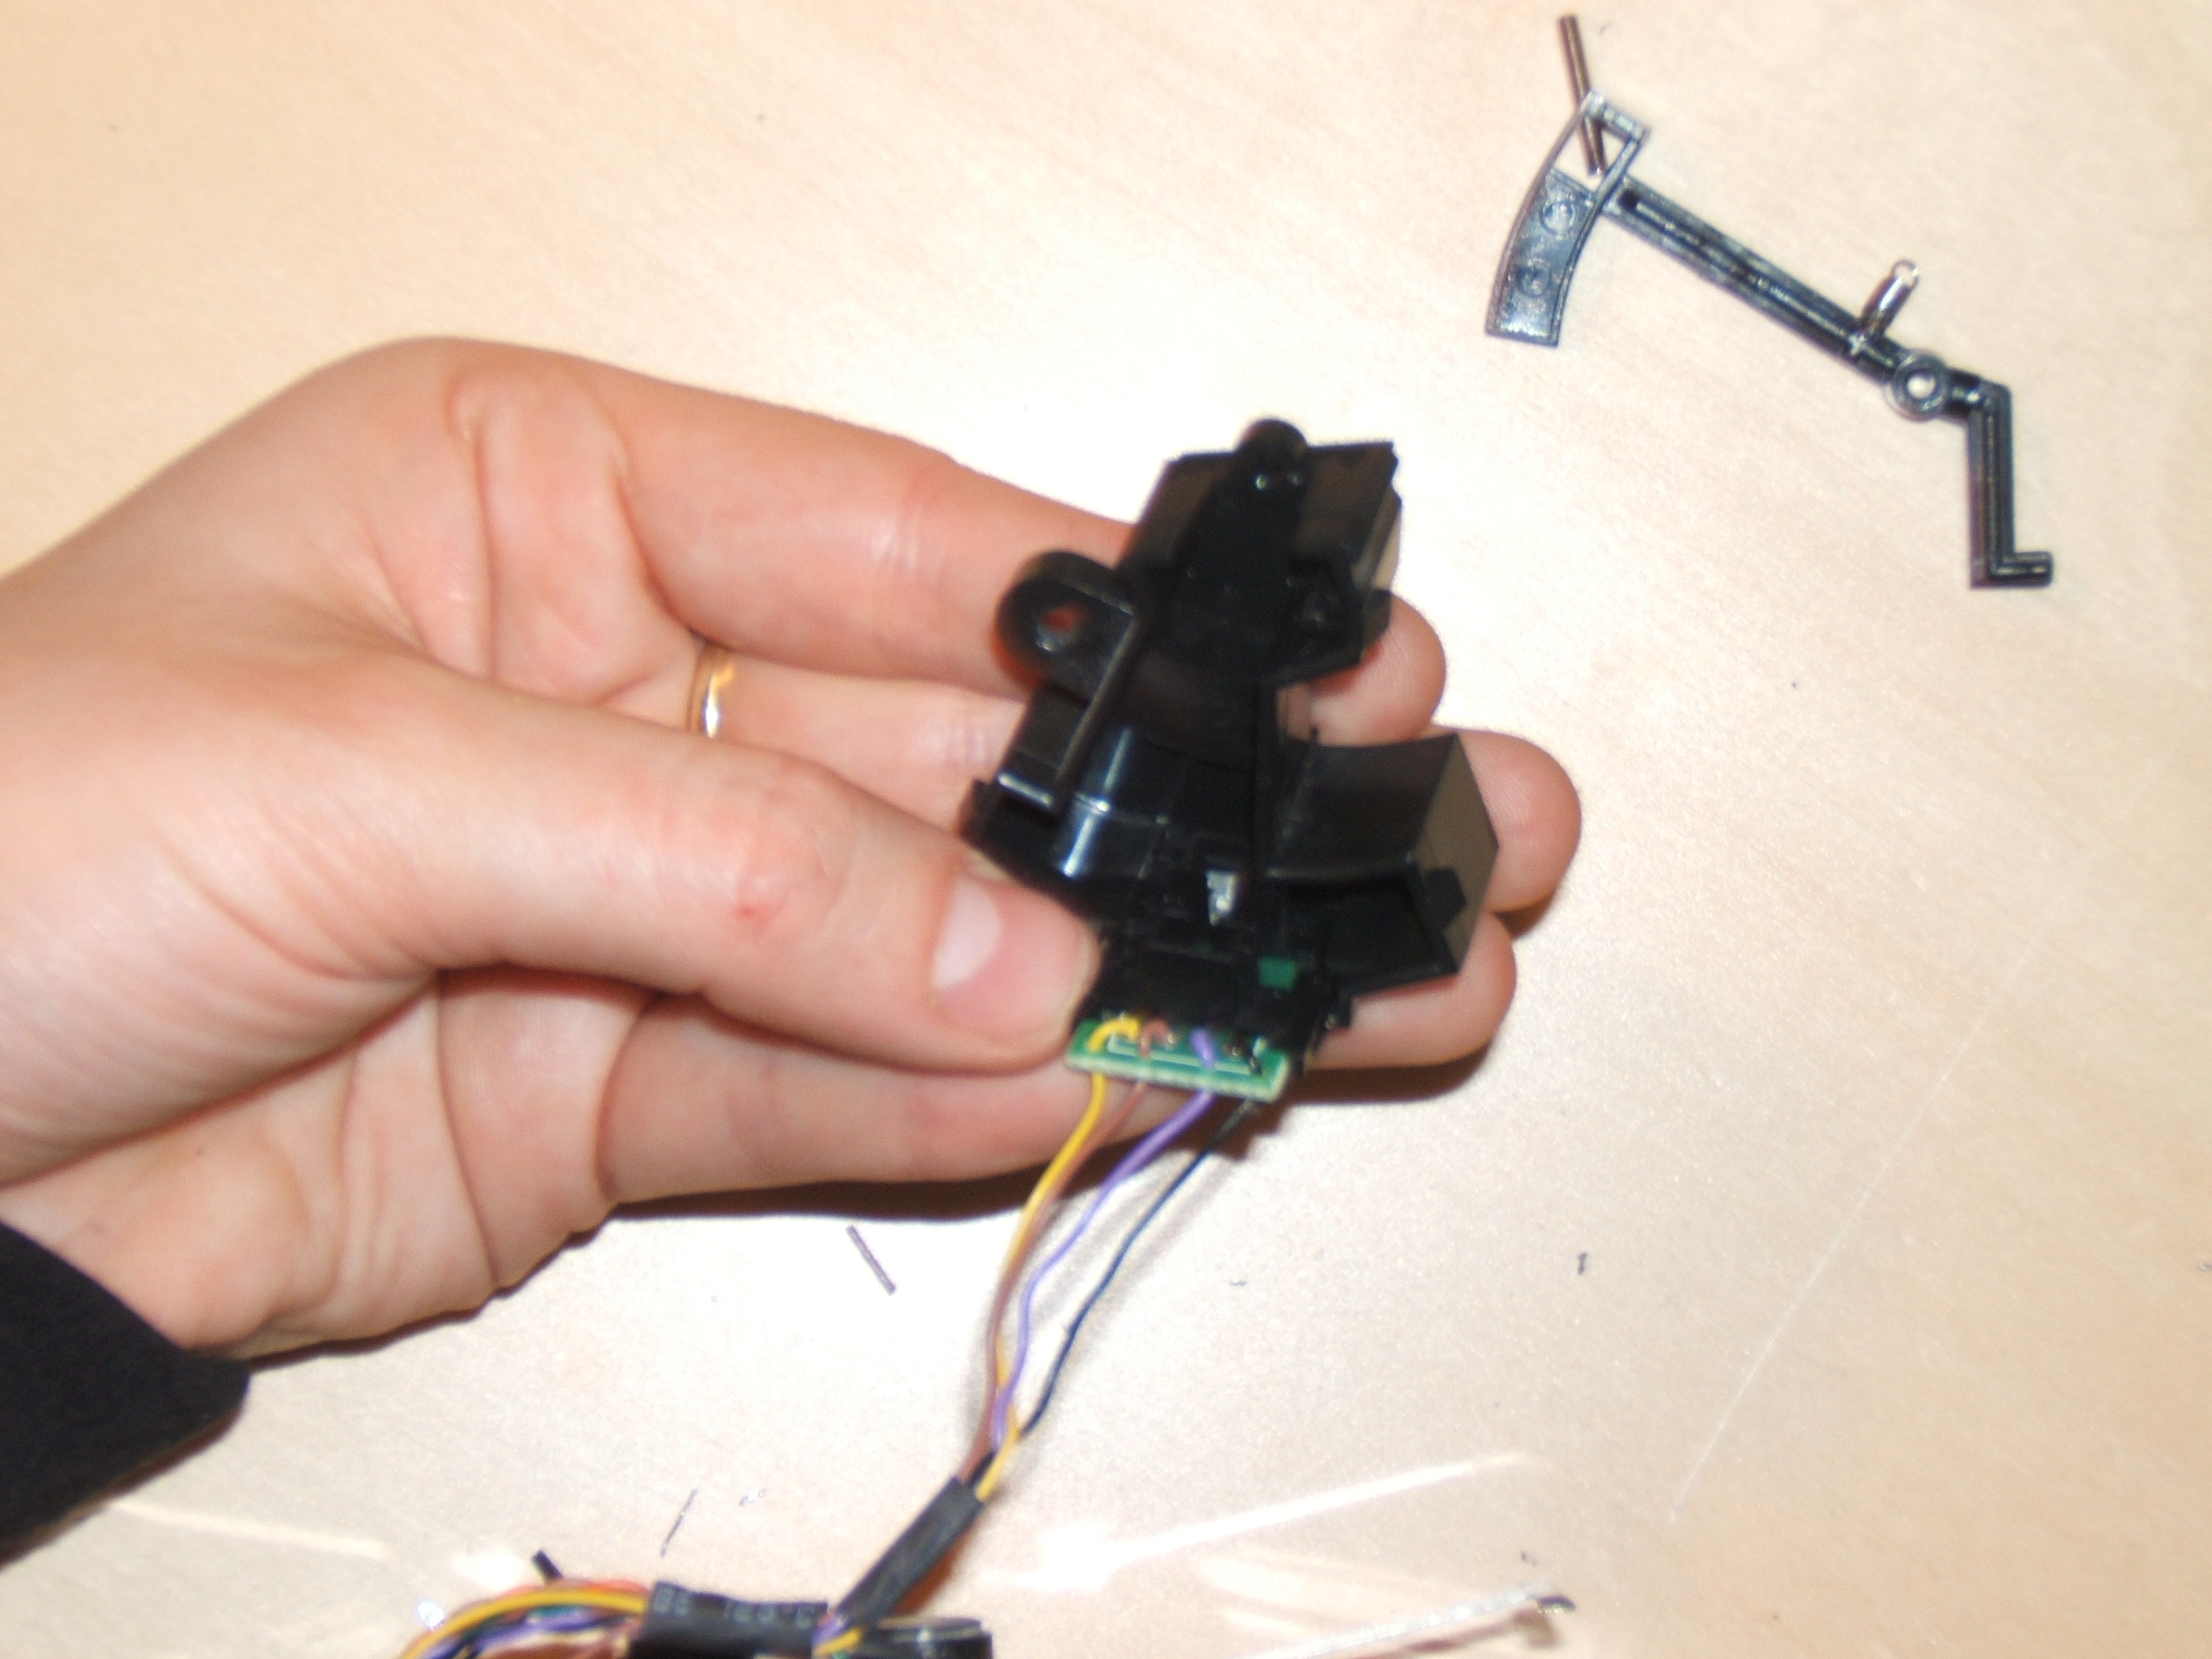
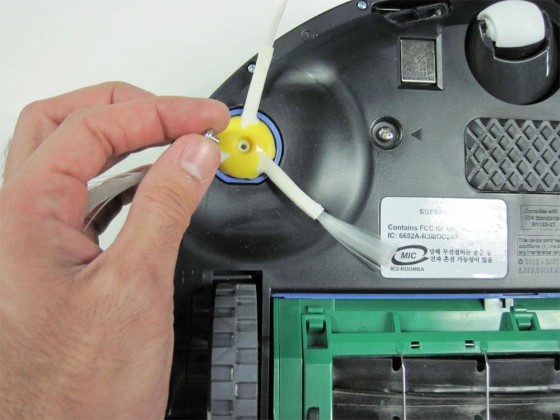
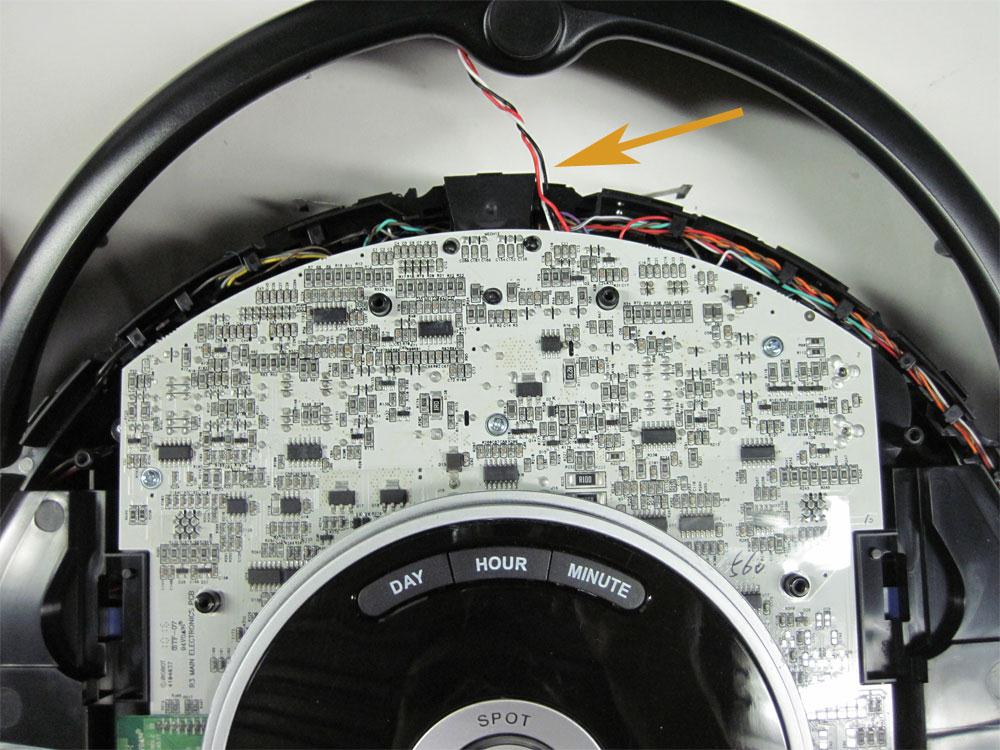
3.1.17 Unhook and remove the bumper wire from the top cover to remove completely the top cover from the robot.

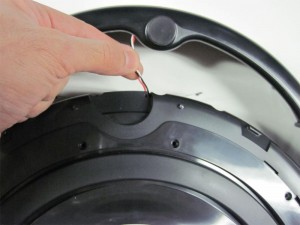
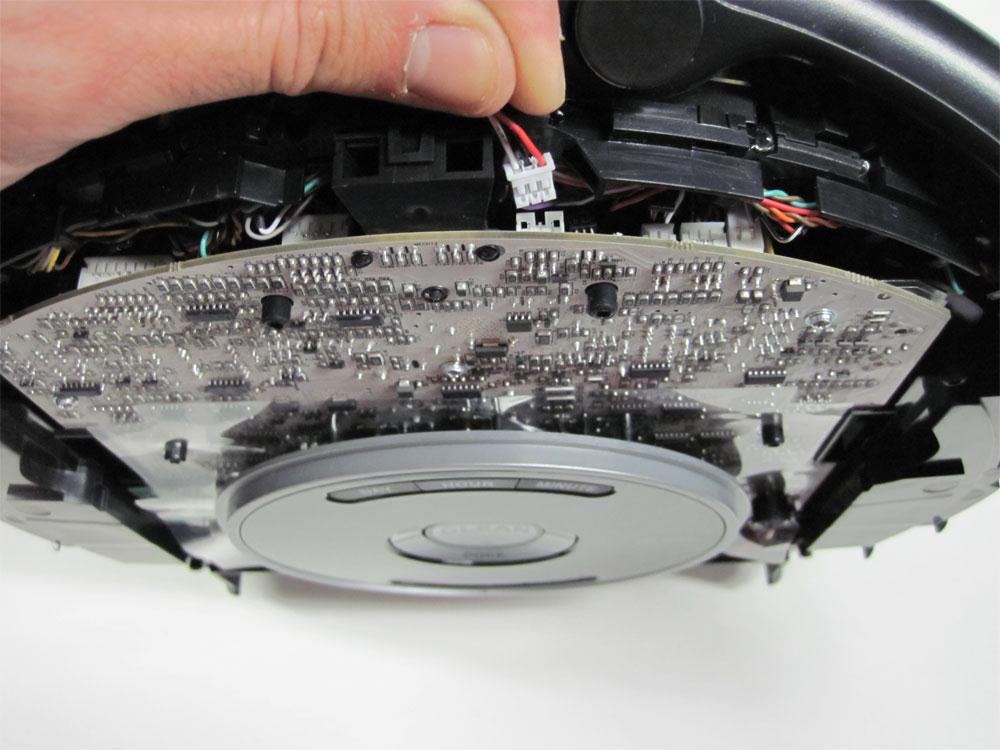
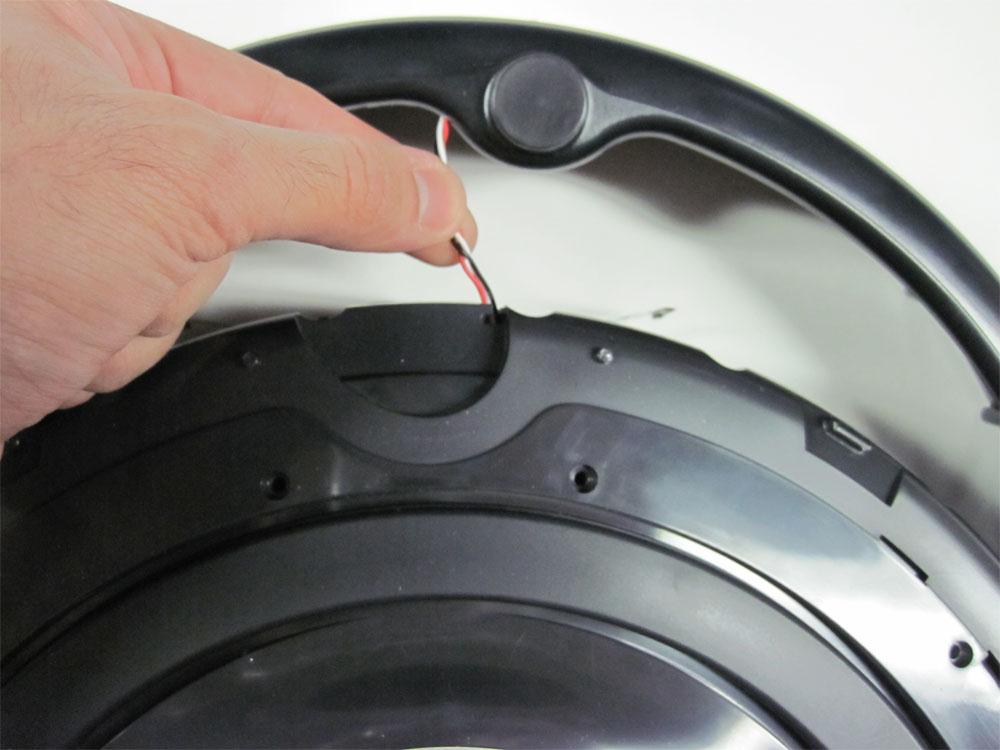
3.1.18 Once the top cover has been removed, the bumper wire remains to be removed.
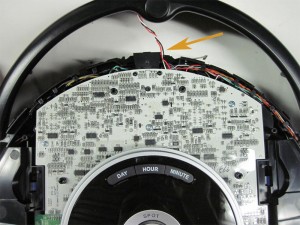
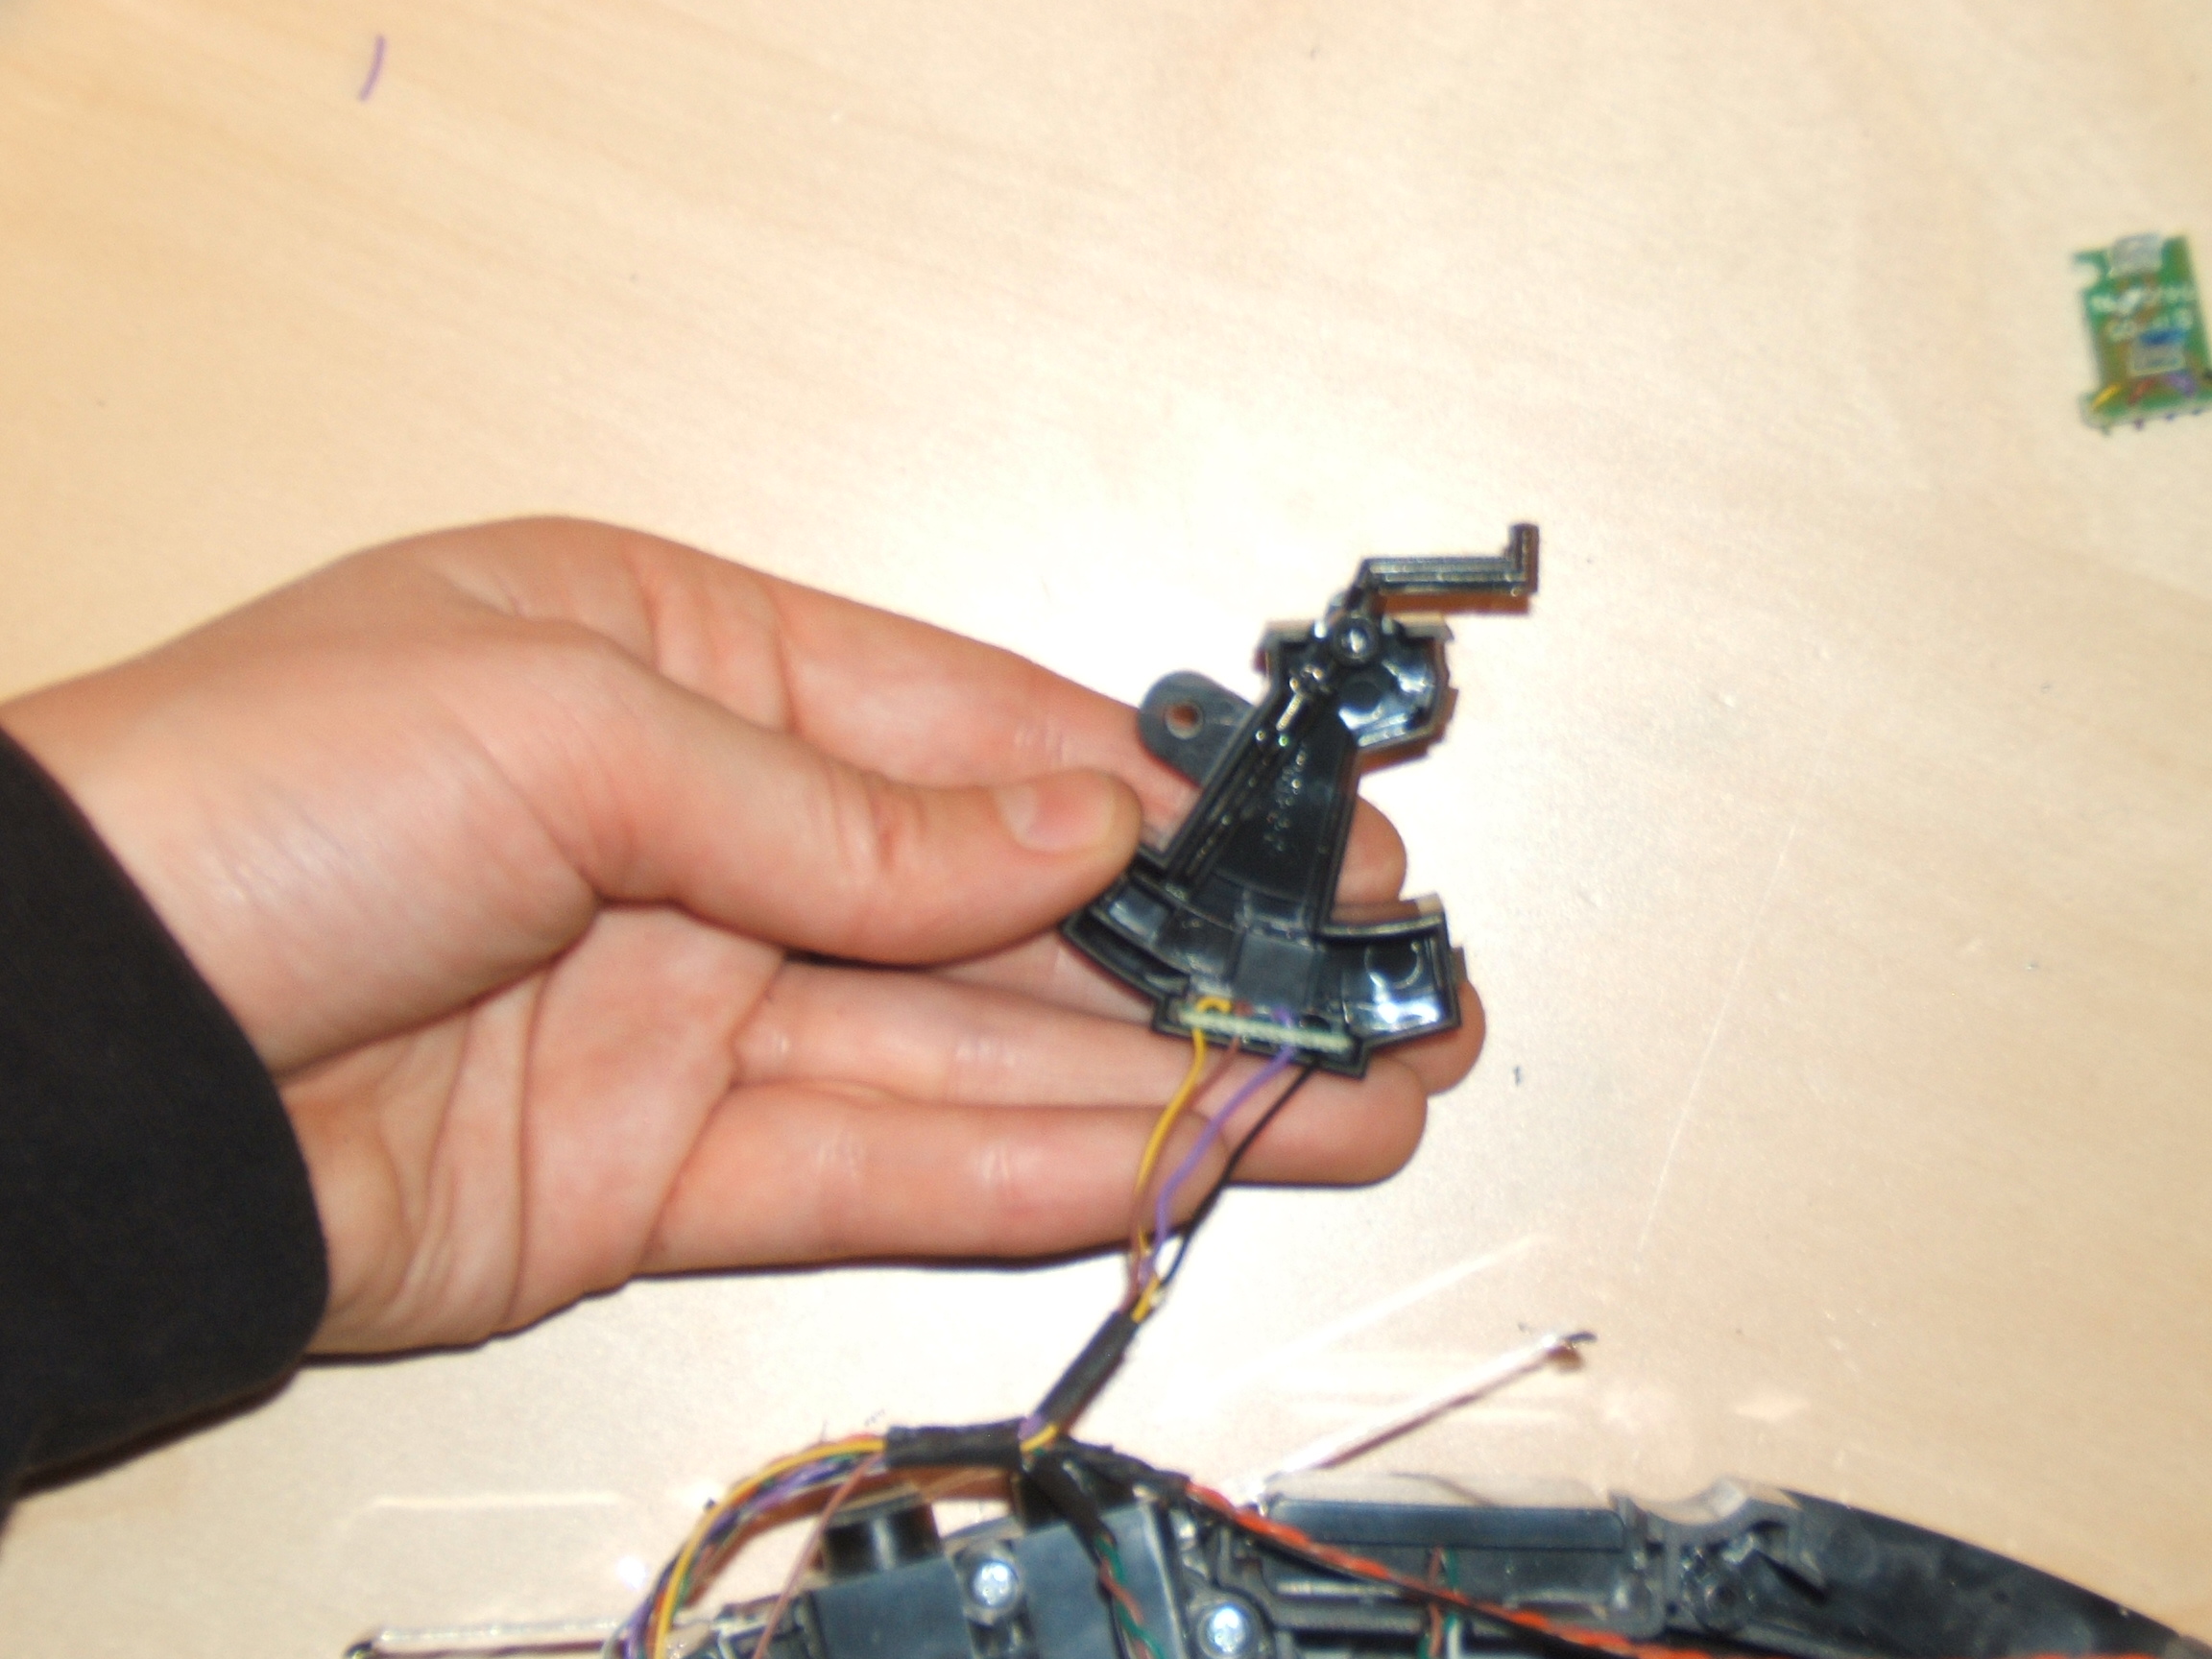
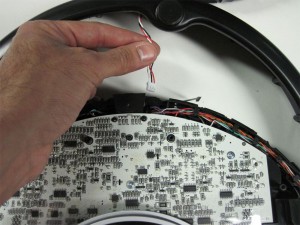
3.1.19 Gently pull on the wires until it disconnects from the motherboard.
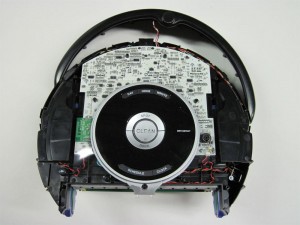
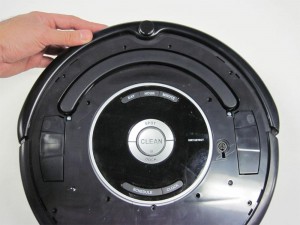
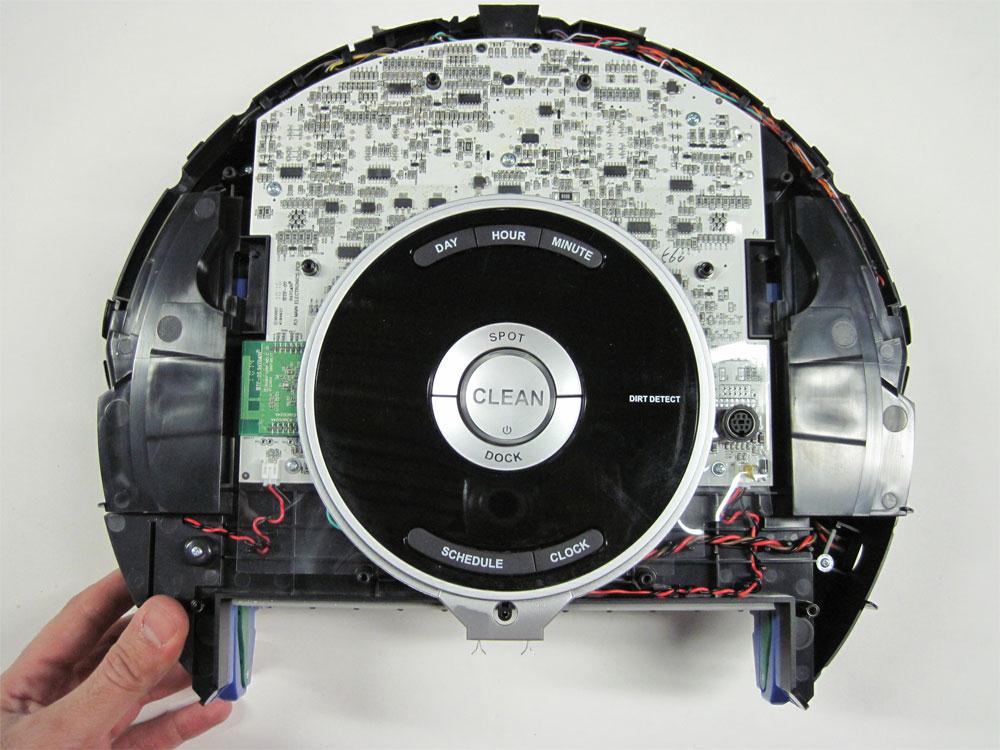
3.1.20 You have now successfully completed the general disassembly of your Roomba.

3.2 How to Reassemble Roomba
3.2.1 To begin reassembling your robot, you will need to first reconnect the front bumper.
3.2.2 Reinsert the bumper wire connector into its socket.
3.2.3 Due to the angle, the connector may be difficult to install all the way without bending backwards the socket on the motherboard. You may want to carefully use a flat-tipped screwdriver (or similar tool) to gently push the connector into place, all the while pushing slightly inwards toward the motherboard to keep the socket from bending.

3.2.4 With the bumper wire connected now, leave the bumper loose in front of the main unit.
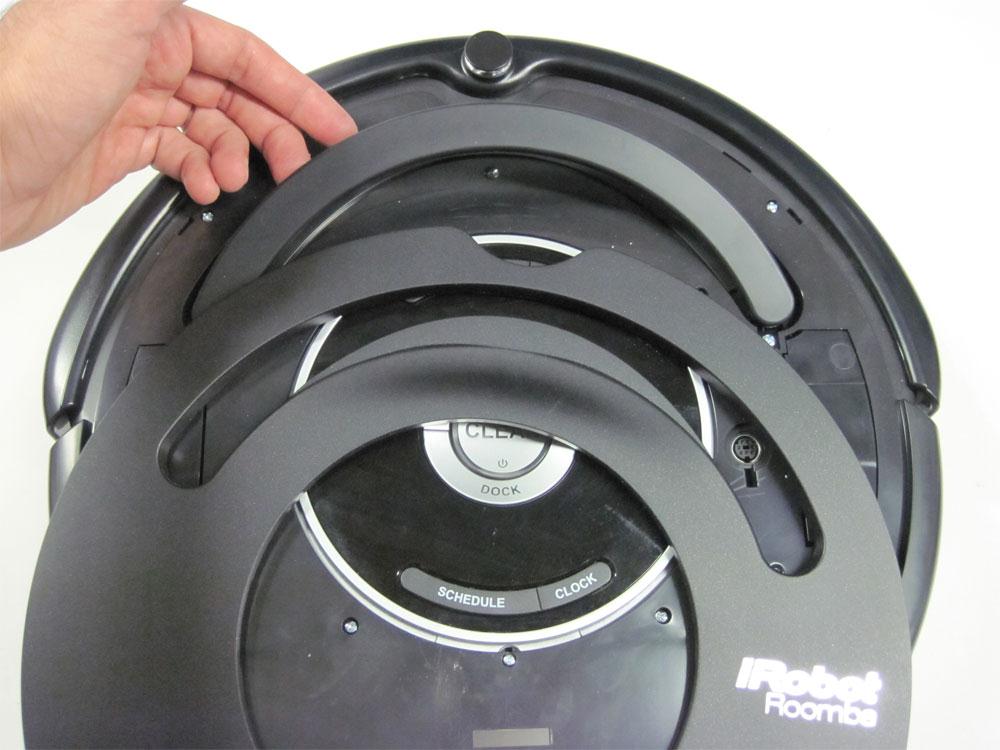
3.2.5 Now install the top frame cover, but do not press it into place. Let it sit loosely on top of the Roomba frame.

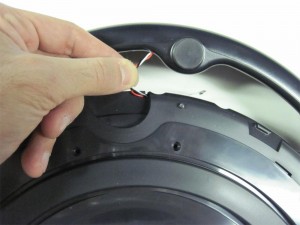
3.2.6 Untwist the wires connected to the bumper slightly, so you can see each individual strand, as shown in the picture.
3.2.7 Push the wires into the slot provided on the front end of the top cover. The opening for the slot is small, so you may have to push in one wire at a time.
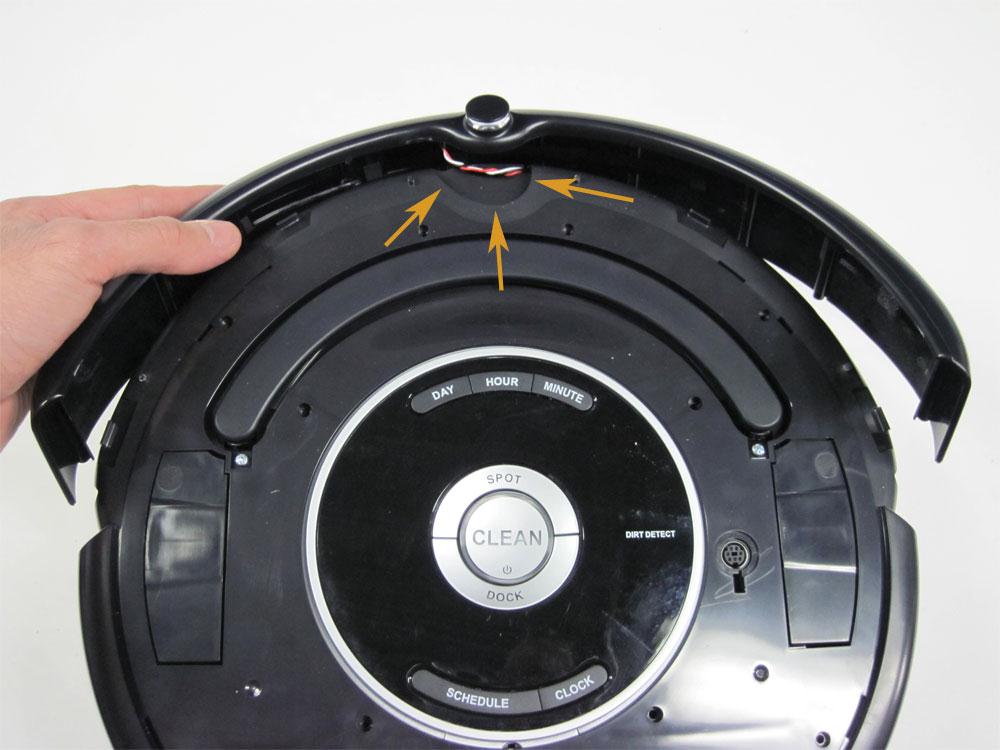
3.2.8 Push the top cover down into place on the frame. Position the wiring for the bumper so that any slack in the wires curls around, following the shape of the groove on the front of the top cover, as shown by the orange arrows.
3.2.9 Place the bumper properly on the front of the unit, over the top cover.
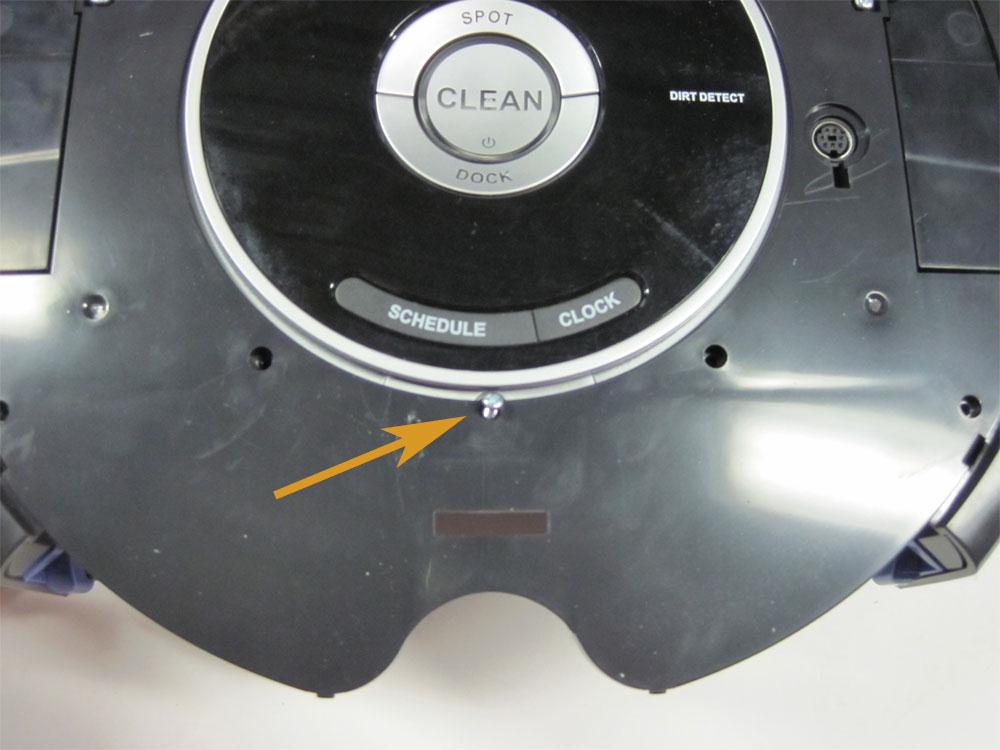
3.2.10 Insert the screw for the top cover, as shown by the orange arrow. It is the only screw of its size (smaller than all the others) that was removed from the top cover.

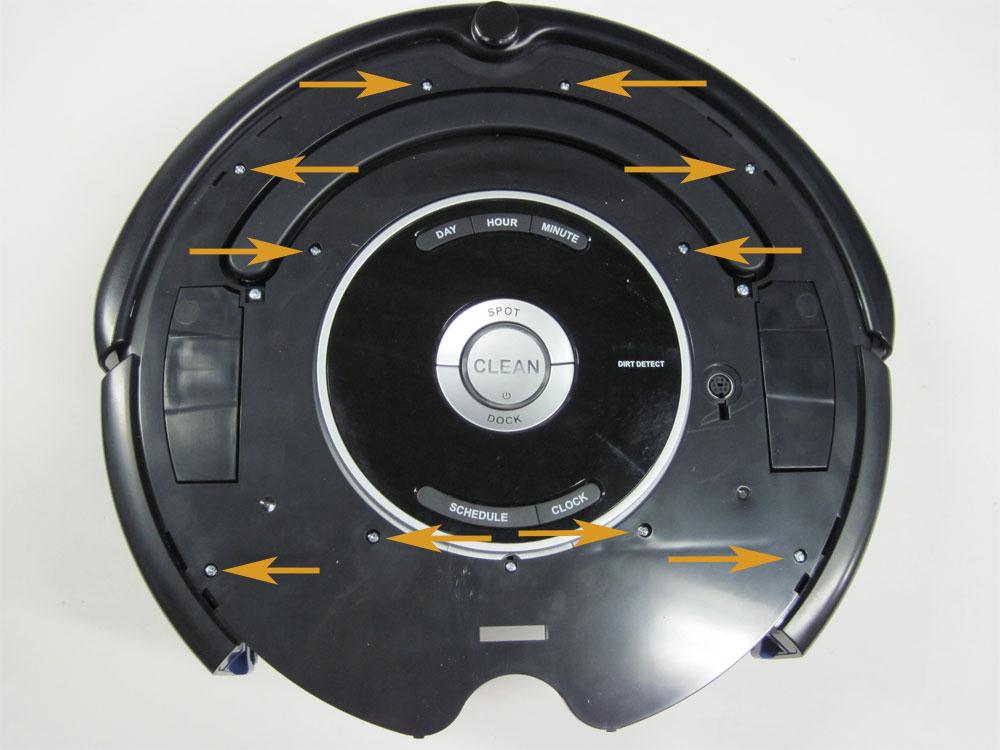
3.2.11 Insert the remaining screws for the top frame cover, as shown by the orange arrows.

3.2.12 To install the face plate, first lift the front handle.

3.1.13 Push the curved tab underneath the handle, while slipping the front edge of the faceplate over the top of the handle.

3.2.14 Push the faceplate down so it’s flat against the top cover.
3.2.15 To fasten the front end in place, push down firmly on the top/front part of the faceplate until you feel/hear it click into place, or until the faceplate is flush with the top of the robot.
3.2.16 Do the same for the bottom half of the faceplate. Push down firmly on the bottom left and right corners of the faceplate until you hear/feel it click into place, or until the faceplate is flush with the top of the robot.

3.2.17 Turn the Roomba over on its back.

3.2.18 Place the front bumper’s trim piece down on the bumper’s underside, lining up the screws with the bottom of the front bumper.

3.2.19 Screw in the 10 screws, shown by the orange arrows.
3.2.20 Insert the battery into its slot.

3.2.21 Place the bottom cover onto the Roomba.

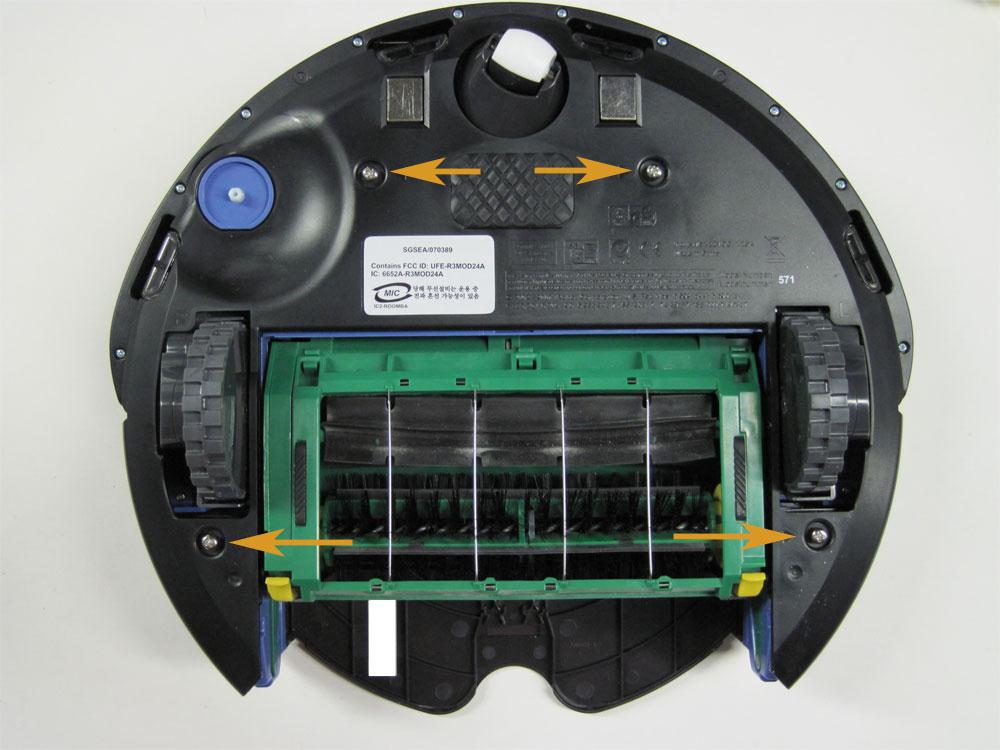
3.2.22 Tighten the bottom cover’s four screws until the cover is no longer loose.

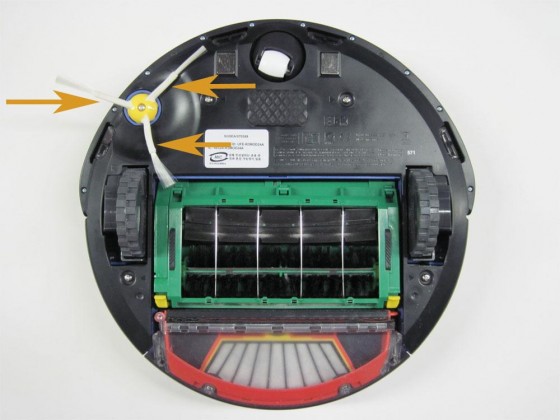
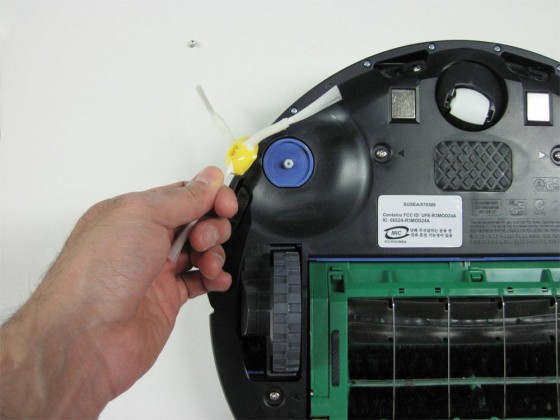
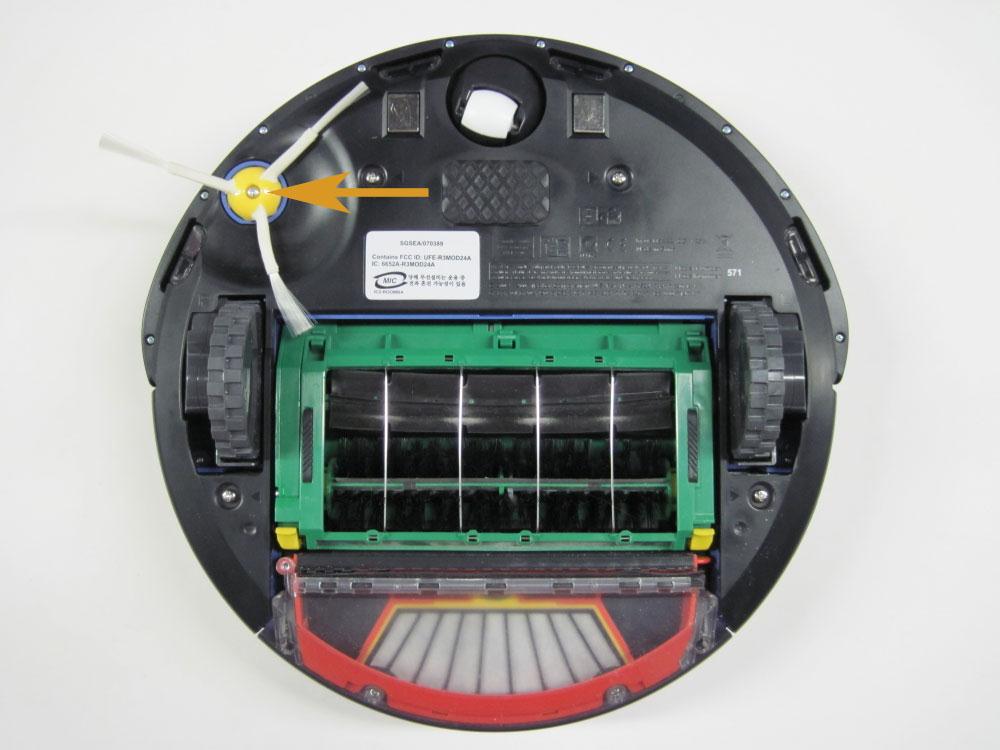
3.2.23 Line up the hexagonal opening on the side brush with the corresponding shaft on the robot, then push the brush down firmly until it snaps into place.

3.2.24 Only once the side brush has been clicked into place properly should you insert the screw into the center of the brush.
3.2.25 Fasten the screw in place until tight.
3.2.26 Install the dustbin.
You have now successfully reassembled your Roomba.
Roomba replacement parts can be found at RobotShop.


 3 How to Open Up Roomba
3.1 How to Disassemble Roomba
3.1.1 Start by flipping the Roomba on its back and removing the side brush screw, shown by the orange arrow.
3 How to Open Up Roomba
3.1 How to Disassemble Roomba
3.1.1 Start by flipping the Roomba on its back and removing the side brush screw, shown by the orange arrow.


 3.1.19 Gently pull on the wires until it disconnects from the motherboard.
 3.1.20 You have now successfully completed the general disassembly of your Roomba.

 3.2.4 With the bumper wire connected now, leave the bumper loose in front of the main unit.
 3.2.5 Now install the top frame cover, but do not press it into place. Let it sit loosely on top of the Roomba frame.
 3.2.6 Untwist the wires connected to the bumper slightly, so you can see each individual strand, as shown in the picture.
 3.2.7 Push the wires into the slot provided on the front end of the top cover. The opening for the slot is small, so you may have to push in one wire at a time.
 3.2.8 Push the top cover down into place on the frame. Position the wiring for the bumper so that any slack in the wires curls around, following the shape of the groove on the front of the top cover, as shown by the orange arrows.