

Carlitos' Project: RGB LED Mood Cube

This is the first in a series of electronic or robotic DIY projects. These projects are accompanied by instructional videos that will help you trough the many steps involved in completing the task at hand. For this first iteration, we are making an RGB LED Mood Cube.
Glowing colour-changing objects are always cool. So why not make your own? Mood lights have been around for some time and, while it is cool to have a colour changing light, it would be even cooler to have something more complex and geekier. An RGB LED Mood Cube seems to be the way to go.

In this project, we are going to build a 4x4x4 RGB LED cube that can be used to display cool colourful patterns. This project should be straight-forward and the most significant difficulty will be soldering all the connections for the cube structure and the 64 LEDs (since they are RGB, this means 256 joints for the LEDs alone!). In short, if you are looking to have a cool mood-light and get razor-sharp soldering skills, this is the right project for you.
Below you can see the video of the LED cube being put together and the final result.
If you need more information or you simply prefer written instruction, here you will find the full list of materials, tools, instructions and documents required for the build.
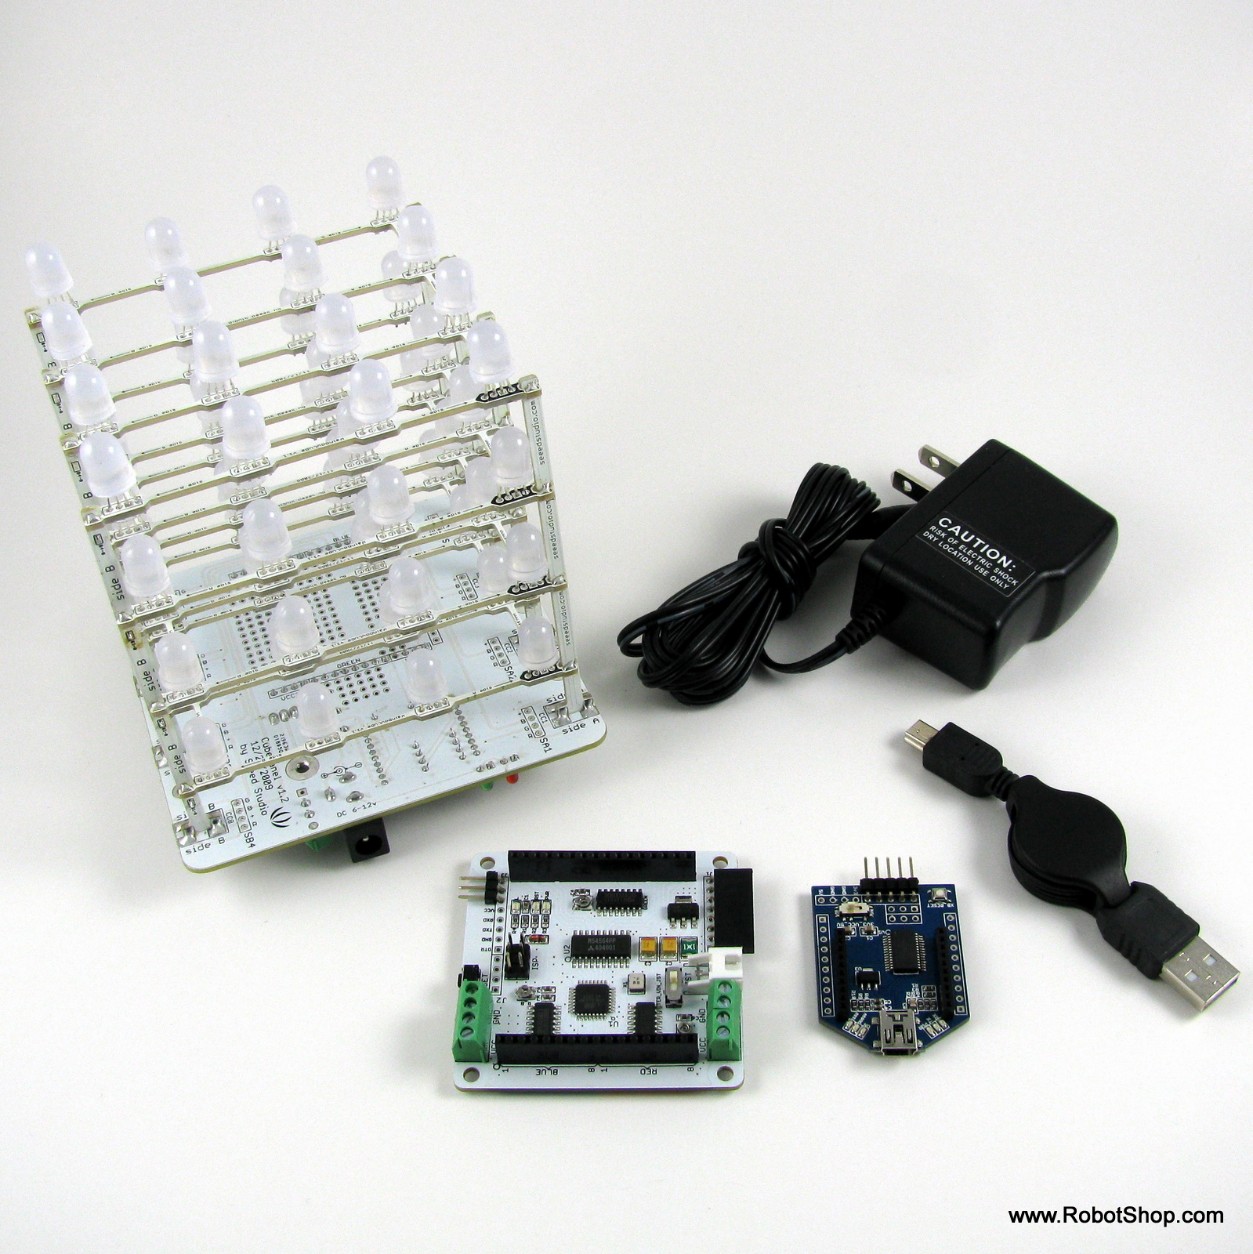
Materials
An LED Cube Kit. Provides the LEDs and all the structure required to create an LED cube.
A Rainbowduino. It is a special Arduino built to control up-to 192 LEDs.
A UartSB (USB-to-serial adaptor). A USB to serial interface that is used to program the Rainbowduino (or for serial communication in general) trough a USB port.
A USB Cable. A cable to hook-u the UartSB to the Computer
A 9V Wall Adapter. A power supply that will power the cube once the assembly and programming are done.
Tools
A Wire Cutter. It will be used to cut the leads off components.
A Soldering Iron. In order to solder all the (many) connections, a soldering station might be preferable since it provides steady and reliable temperature control that allows for easier and safer soldering (you have less risk of burning the components if the temperature is set correctly).
A Third Hand. This is not absolutely required, but it is always useful for holding components and parts when soldering.
A Flat Head Screwdriver. This will be used for un/tightening terminal blocks
A computer . It programs the Rainbowduino using the Arduino IDE.
Putting it Together
The first step is to assemble the LED cube kit. This kit is much easier to put together than the more common way of constructing an LED cube using the LED leads as the supporting structure.
The kit includes all the parts required to hold the LED together and takes care of all the complex wiring. Full instruction on how to put the cube together are available in PDF format.
Once the cube is assembled, we need to drive it in order to display cool stuff in it. For this, we use the Rainbowduino, an Arduino clone created specifically for driving massive amounts of LEDs. The cube fits directly on top of the Rainbowduino, and can provide power to it by using the included JST cable. When connecting both modules together, it is important to make sure the "Green" male headers from the LED cube match the "Green" female headers on the Rainbowduino. Also, it is important to set the Rainbowduino switch to “JST”.

Now that all electrical connections are done, we need to write some software in order to make it display cool stuff in our new cube. We took the liberty of modifying, cleaning and updating the plasma code readily available for the Rainbowduino. This new code should display a nice smooth wave as of colours that propagates softly though the cube. The code can be downloaded from here: Rainbowduino-RGB-LED-Matrix-Plasma.zip.
In order to upload this code to your Rainbowduino, you will need to use the Arduino software, so, if it is not already done, it has to be installed. Also you will need to install the USB-to-Serial adaptor drivers.
Once the code and the Arduino software are downloaded and installed, simply unzip the code and open the .pde sketch file found inside of the unzipped folder using the Arduino software. Then, upload the sketch to the Rainbowduino using the USB-to-serial interface.
 and USB Cable")
Now that the Rainbowduino is programmed, simply remove the USB interface, plug-in the power adapter and admire the light show!


 and USB Cable")

Additional Programming and Hacking
Of course, colourful lights are pretty and everything, but for those of you who would like to program your own patterns and animations, there are functions in the provided code that allow you to set the LEDs individually. You could also add some sensors and make the cube interactive. There are even some Xbee headers that could be used to send information to the cube remotely from a nearby computer Using an Xbee module.

On the physical side, you can make a cover for your cube out of paper, plastic, fabric or whatever other materials you have on hand (make sure the material is translucent though)
Finally, at the end of the construction, you will have many RGB LEDs and a bunch of male and female headers left-over. Make sure you put them to good use in your next project.
Getting Your Own LED Cube

For those of you wishing to make their own cube, you can use your own parts and buy the missing materials separately or you can get all the components in a convenient kit at RobotShop.

You are also invited to share your results and experience in the RobotShop Forum and by simply leaving a comment below.
Thanks for helping to keep our community civil!
This post is an advertisement, or vandalism. It is not useful or relevant to the current topic.
You flagged this as spam. Undo flag.Flag Post
Your post is currently under review by our moderation team. The review process usually takes up to 48 business hours.
You can track your post's status in the "My Content" section of your profile. Once approved, it will be published and visible to others.

Thank you for contributing to our community!