

Use Xilinx FPGA and ARM Cortex M3 to control DC Motors

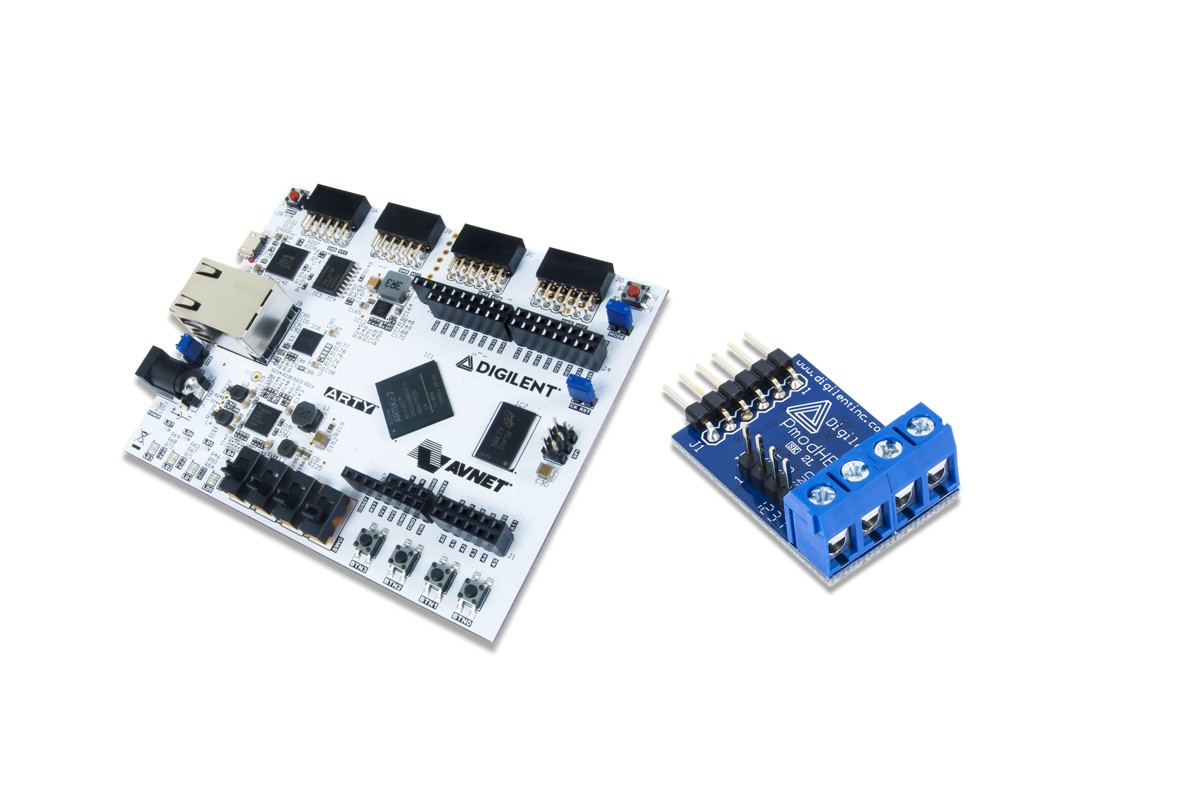
After Adam loads the ARM Cortex M3 on Digilent Arty A7 (see blog post "Running ARM Cortex M1 or M3 on Xilinx FPGA"), he uses the Arty A7 and Pmod HB3 H-bridge module to control two Brushless DC Motors and drive the motor in both forward and reverse direction. Here is the project summary. The step-by-step guideline is available at Digilent project page.
Development Environment and IPs
Now that we have downloaded the Xilinx Vivado Design Suite, we still need another software and IP. We need ARM Keil MDK to create software. We can download the evaluation copy at ARM Keil page. We also need to have the Digilent Vivado library mapped in as an IP repository. The library can be downloaded at Digilent Github. We can learn how to map the IP at Digilent Wiki page.
Hardware Design Update
The PmodHB3 uses the PmodGPIO interface which two GPIO signals, namely direction (DIR) and enable (EN), to drive the PmodHB3.

We need to update the Vivado Project by
- Add PmodGPIO IP core from the Pmod library
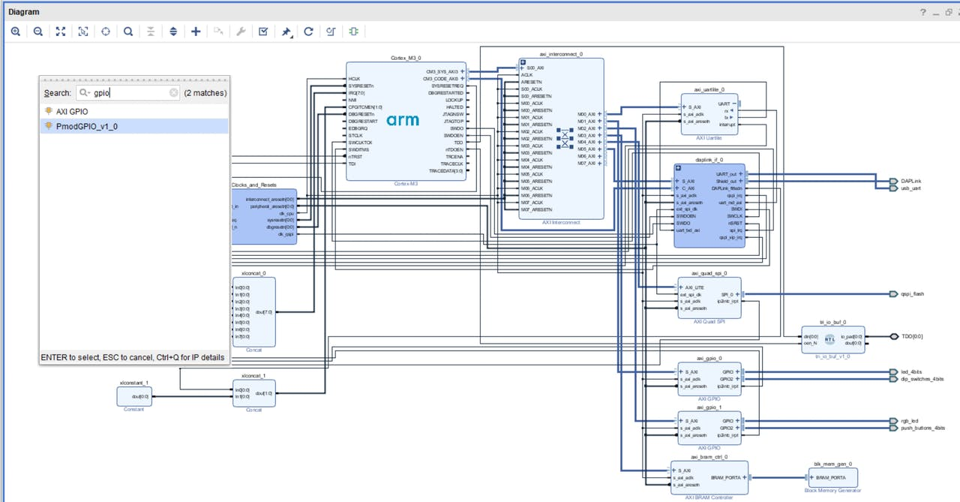
- Run the connection automation to connect Pmod GPIO IP into the system

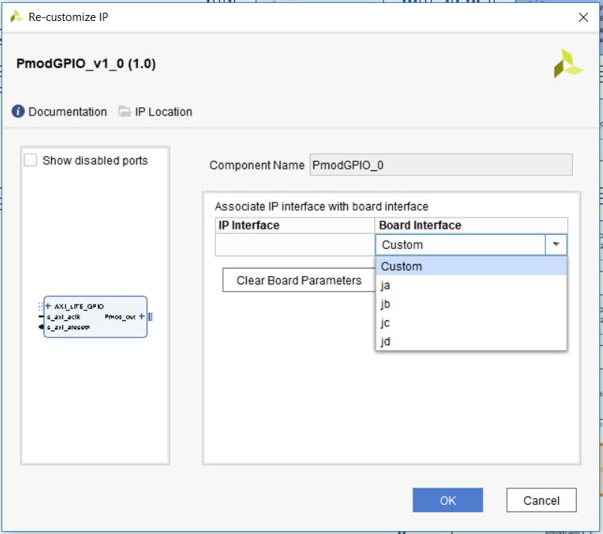
- Assign outputs by double clicking on the PmodGPIO IP block and selecting the correct Pmod position from the drop down menu
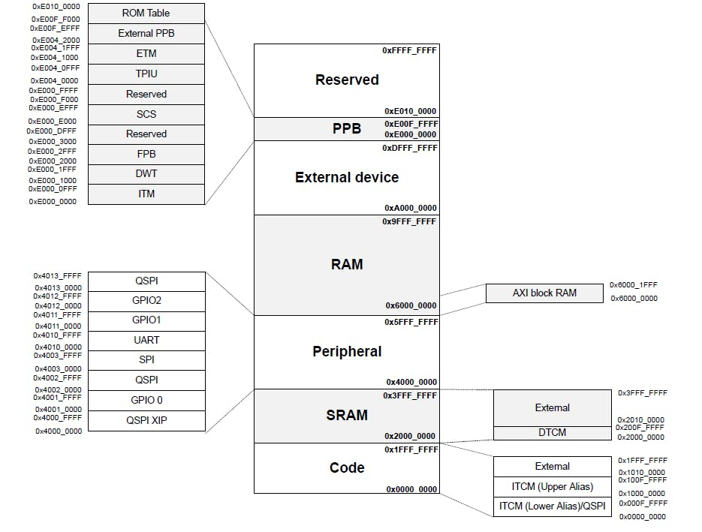
When we add in IP cores in the ARM Cortex M3, we need to ensure the address range is correct, For the GPIO peripheral, the address should be from 0x40000000 to 0x60000000 range. If new IP added is not in the correct address range, we need to manually update the address.
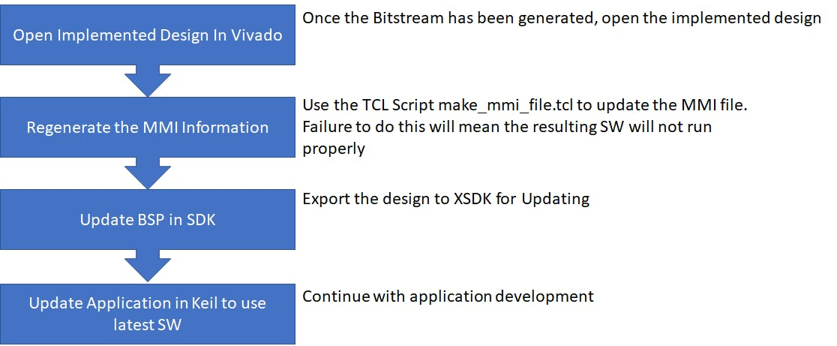
After the block is updated, we still need to follow the steps to generate bitstream and update the memory map file (MMI). Otherwise, we can't export the hardware design to the ARM Keil propery and write the software.
Software Development
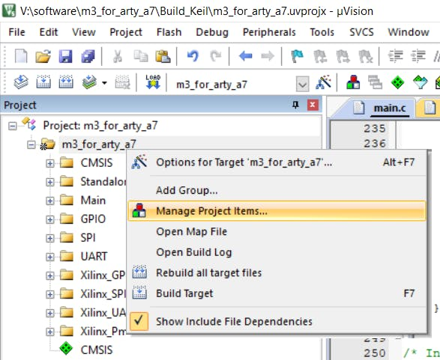
The software application is developed in ARM Keil. The first step is to pull new Pmod driver. We can click on the project and select Manage Project Items.
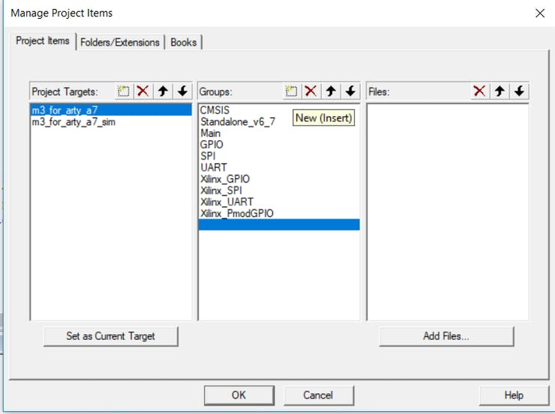
Then we can add the PmodGPIO in the pop-up box by selecting m3_for_arty_a7 (project targets tab)), New (groups tab) and the entering a name. After that, we can import Pmod GPIO driver source code and header file (files tab)
You can use the following functions from the example to control the motor
GPIO_begin(instance,base address,default value);
GPIO_setPin(instance, pin, value);
Hardware Implementation
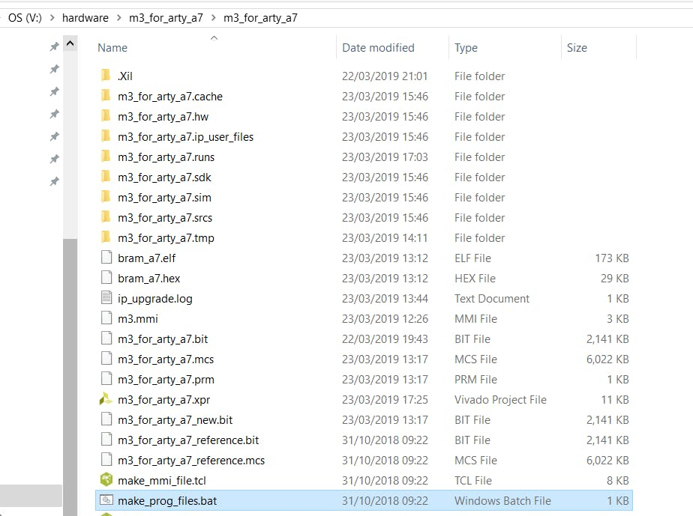
Once we have completed the software development, we need to download the design on Arty A7. When we build the code in ARM Keil, a hex and elf file are created and copied into the hardware project directory. Within this directory there is a batch script which will take these files and create a updated FPGA bit file which can be directly downloaded into the FPGA. The script will also produce a MCS file which is used for programming the Flash memory on the board such that the application is live at power up.
Similar to what we do to download the ARM Cortex M3 on Arty A7, we can use the hardware manager in Vivado to download the new FPGA bitstream on Arty A7.
Demonstration
Additional Information on Xilinx FPGA / SoC Development can be found weekly on MicroZed Chronicles.
Thanks for helping to keep our community civil!
This post is an advertisement, or vandalism. It is not useful or relevant to the current topic.
You flagged this as spam. Undo flag.Flag Post
Your post is currently under review by our moderation team. The review process usually takes up to 48 business hours.
You can track your post's status in the "My Content" section of your profile. Once approved, it will be published and visible to others.

Thank you for contributing to our community!