

After having read your amazing robots for 2 months, I decided to start building my own one. I would like my first robot could "walk" instead of wheels. Of course, wheel based robot is really useful and practical, and adaptable to a lot of terrains if well designed. But I just want one cute robot is OK to me.
Oh, sorry, forget to introduce myself. I’m a software engineer in a company selling CHIPs, haha. Debugging and telephone calls every day is ruining my spirit, you know, that, kind of soul for engineers. Making something interesting! Even though useless! Yeah~
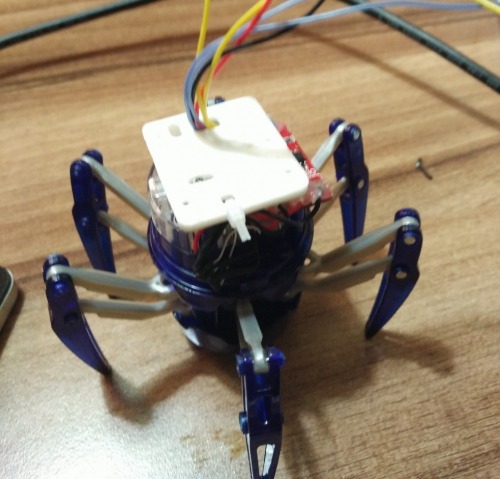
To get it started, I bought a HEXBUG robot, which looks like this. In China, we can get it at about 35 dollars. It walks in a really cute way. Actually if you want to get a mechanical design map, you can download it from VEX robot official website instead of buying a real one.
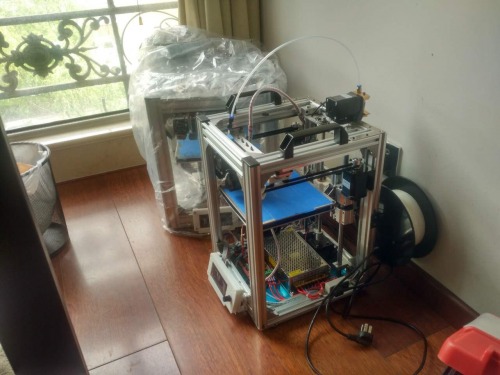
But after several hours of soldering and 3D printing work, I realized that my parts are too heavy for HEXBUG Spider as a payload. So I decided to re-design the whole skeleton from zero. Thanks to my 3D printers here.
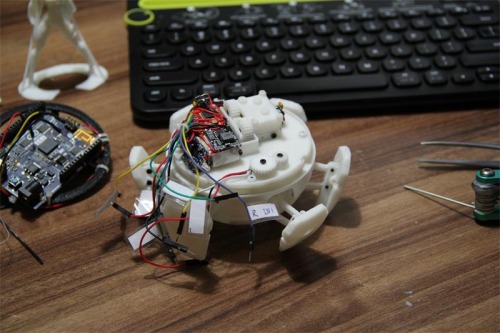
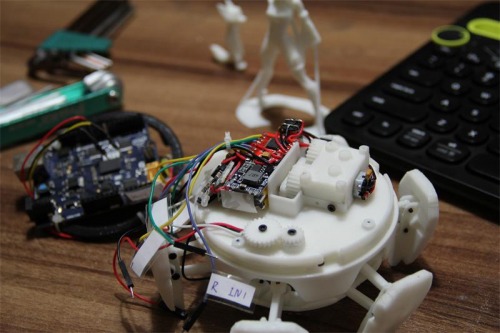
Here are several pictures of my "prototype phase" QPAKO~. I designed the 3D parts with sketch up and print them out with my 3D printers.
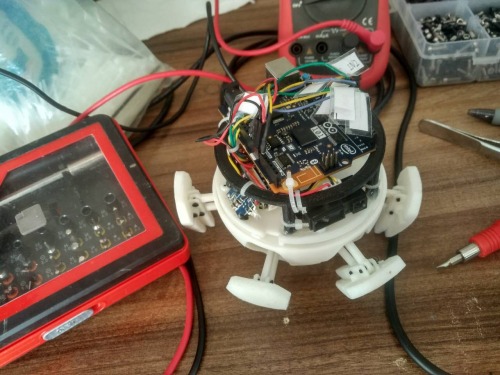


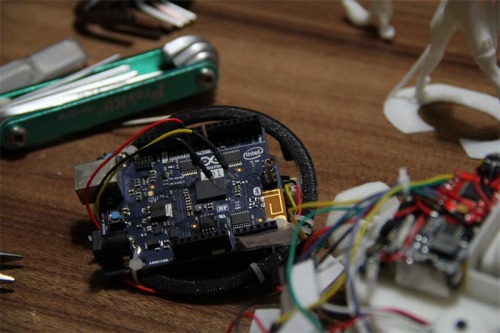
Phase 1st prototype is rather simple, since I only want to test my mechanical design and the basic hardware features: Curie 101 PWM control, Curie BLE programing, USB charger uses 5v for 7.4 2S battery pack, and so on.
I don’t want it to be too complicated, since to me this is just a starting point. It will be a small cute walking machine which can carry some MISSION payload in my back yard or in my house. I’m planning to attach my go-pro session on it and remote control it with my cell-phone. Since you know there is a BLE4.0 ip inside of Curie, so programing on Android Bluetooth to control it is rather simple. A lot of examples there all over the word.
Here is some BOM. I will upload more details in following weeks, we can build it together if you like it. Thank you.
• Li-polymer battery 3.7v 1c, without protection board x2
• 7.4v Li-polymer battery protection board x1
• Li-polymer charger board 5v input and cut at 4.2 x1
• 3.7~4.2v input -> 9v output DC-DC board x1
• Switch x1
• 2mm screws x some
• Curie Arduino 101 board ( if you don't need the NeuroMem Network inside, you can use cheaper Arduino Nano+Nr51822+BMI160 instead)x1
• TB6612FNG motor driver x1
• N20 DC motors x2
===============================update on 20160706======================================
Hi talents, I’m back again.
Today I did some tough work: adding a Hall sensor to my QPAKO spider robot. It sounds simple to a lot of people, but a little different for my condition.
Here is the thing, to let my QPAKO know how many degrees it turns, I have to give some sensor to it. Someone may reminds me that CURIE 101 has an embedded IMU sensor, which includes 3 axes GYRO and 3 axes ACCELEMETER. But after a few tests, I found that GYRO is only reliable for some very rough rotation degree sensing.
So I decided to give my QPAKO a Hall sensor and some gears to get a very accurate degree counting data, which could be used to calibrate GYRO sensor in some cases.
Here are my gears:
1. QPAKO rotation gear has 96 teeth.
2. It output to a 25-tooth gear, which glued to a 40-tooth gear.
3. Finally, the 40-tooth gear outputs to a 25-tooth gear, which has 4 magnets on it.
Err….. it seems after so much of hard work, I only got about 37 interrupts per 360 degree….
I made such a big mistake.
At least it is better than nothing, right? These interrupts can be used to calibrate GYRO!
Here are some pictures

================================= update on 20160706=====================================
Some explainations about the relationship between me and Xpider project.
Some of you may already found that Xpider project's mechanical principle is rather the same as mine. Actually we come out from one mutual project which was targetting to build a very small smart walking creature.
But afer several iterations and writing thousands of lines of code, I found that we were making it too complicated and too "robotic". Adding too much software functions to Edison, which is the computer in Xpider, makes it becomes really hard to understand.
So I decided to quit and restart another robot project: QPako, which only runs on MCU, and most sensor data is uploaded to Phone app to do advance computing. Nowadays there are smart phones everywhere and even smartwatch! You know that a 1.2 Ghz dual core android smartwatch sells only 60 dollars here in China!
With most functions implemented by phone, I hope that the final QPako's hardware could be simpler, cheaper and easier to get on EBay or even Chinease Taobao.
==============================update on 20160711=====================================
Hi great geeks, I'm back.
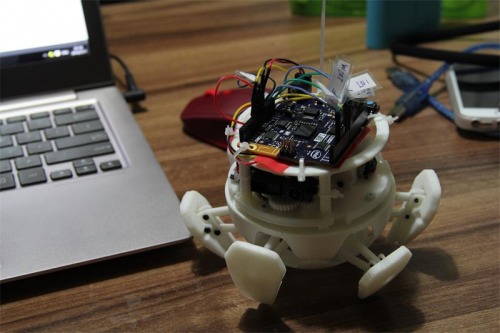
Last week I was buried in a lot of customer project's paper work, nearly got into my grave. I re-assembled my Qpako prototype and re-printed the board shell, which is 10mm taller to avoid conflicting the new "useless rotation gear".
Here is the picture, pretty acceptable :
Then I spent serval days focusing on the new phone app and the corresponding firmware on Curie 101.
I have committed the source code to the:
Android Phone App based on Qt 5.7:
https://github.com/mcsyp/qpako-blecontroller
Curie 101 source code is here:
https://github.com/mcsyp/qpako-curiedevice
I'm still working on them to make the spider:
- Easier to control. Connecting a BLE4.1 device with phone-app is very easy.
- Show the track of the Qpako on APP UI based on the integrated IMU in curie.
In the future, I hope to add some drag & drop programming UI in the APP. Trust me, programing with a phone-app or a tablet is absolutely a trend for education robot or the office desktop toy. :D
Here are some pictures:
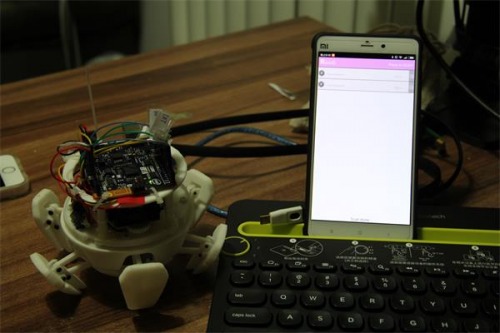
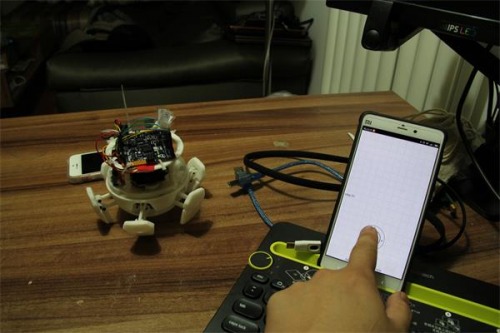
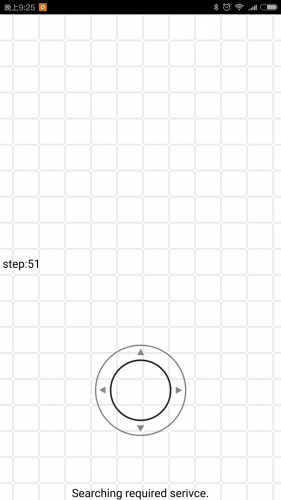
And here are the pictures of my phone-app UI. Yes, I know that they look too simple and very rough. I'm not really good at UI design. I used Photoshop CC to draw them.
I didn’t make it landscape since I want to control my spider with only one hand. :)

Here I have to say that Qt 5.7 IDE is amazing! It is so COOOOOL for Android phone-app development, actually it is also OK for IOS app, but since I don't have Macbook so I didn't have a go.
QML is really a great invention!
QML is really a great invention!
QML is really a great invention!
With the new Qt for Android, you can create your phone-app with: Java, C++ and javascript!!! Using javascript to do UI programming is amazing fast. You can put those BLE comm and logic part to C++ and leave UI to JS.
I love it even though I just use a Open Source QT5.7 (I started phone-app with 5.5).
OK, that's my update today. I will be on a business travel this week, but I will keep updating my QPako.
Thank you :)
Stay tune for next update. :D
==================================update on 20160727===============================
Today, got some problems with the IMU navigation.
As we all know, that curie has an embedded IMU, which based on BMI160 chip. So one day one of my friends told me that "Why don't you show the movement track of your QPAKO on the phone-app?"!
Good idea!
And what's more, we could just touch on the screen to move the spider bot, or even drag it to some direction on the phone UI.
Sounds pretty cooooool!
This is just a draft. :) I will implement it later.
In the app, I will drag the spider, and there will be an arrow pointing at the moving direction of it. This info will be converted into angle message, sending back to the spider via BLE.
And there will be small foot print icons showing the track of the spider.
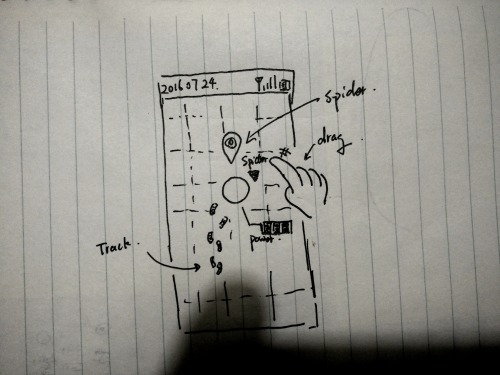
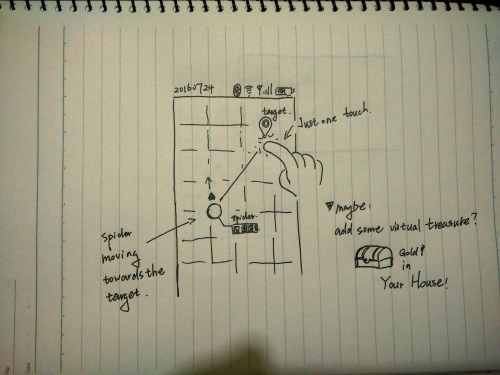
This is another form of interaction
In this UI, I just touch a point, guiding the spider to move towards it. In this way, I think the APP and the QPAKO make it looks like some game. We can also generate some treasure on the map virtually, like Poekmon App these days. Difference is that this has no AR. :(
To make it, I need 2 things: one step length and a very accurate heading angle.
Different from the other robots, QPAKO walks on the ground! Haha, that makes the distance calculation much easier. I just need the step counts of the QPAKO.
CurieIMU provides a algorithm, which proved to be OK for this usage scenario.
To get the heading angle, it is a little complicated.
As we all know, to get a heading angle from a robot, there are 2 ways:
- A very accurate encoder on the motor.
- IMU with algorithms to convert Accelerometer and Gyro data into Roll, Pitch and Heading.
Encoder here is a little big for QPAKO. A simple Hall sensor here actually is not accurate enough. About 10 degree one interrupt. Even though it will takes about 36 magnets which is a little expensive and will affect the electronic device inside a lot.
So I turned to the second method.
Madgwick example is a good start point for Curie 101. Which you can find details on this link:
https://www.arduino.cc/en/Tutorial/Genuino101CurieIMUOrientationVisualiser
For short, I got the heading angle I want, but seems a little low accurate.
In one word, it is drifting.
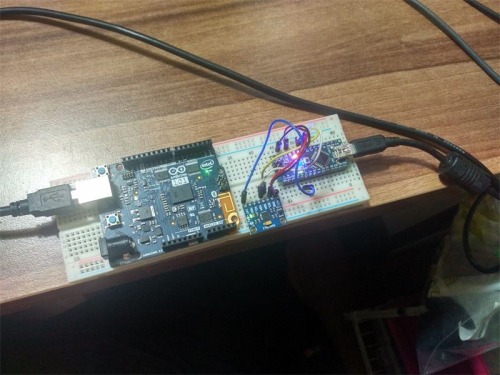
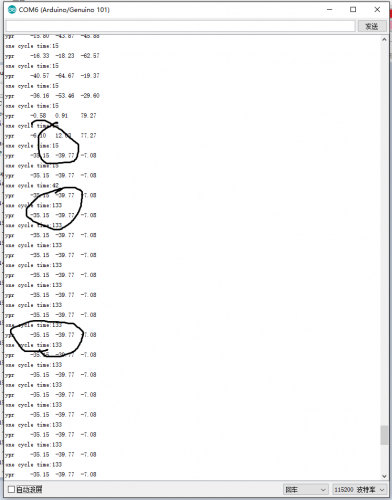
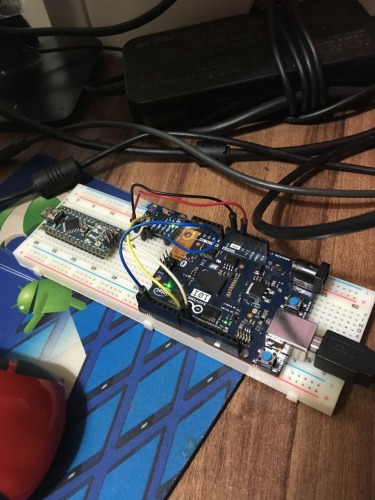
In the following picture, I made a comparison between curie101 running Madgwick(left), and a Arduino Nano with MPU6050 running DMP(right). I glued the 101 and Arduino Nano on the same breadboard.
Started the application on both of them at the same time.


Then, I rotate the board for 90 degree.
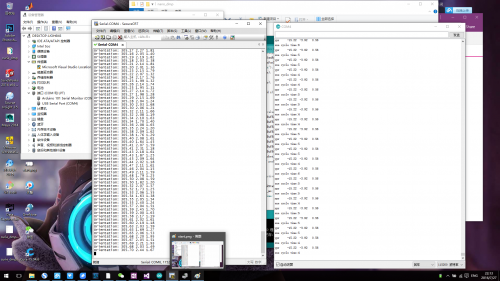
From the first picture and the last screenshot, we can see that, on curie101, it tells the board rotated for 108 degree. On arduino nano with MPU6050 running DMP, it rotates about 89.43 degree.
You can see, MPU6050 DMP is much more accurate than curie 101 with Madgwick.
To make it more accurate, can we use MPU6050 with DMP on Curie101?
Too young too simple, LOL. :)
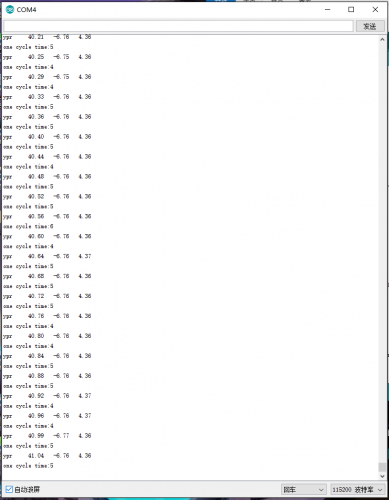
Here is a screenshot of the time cycle of Arduino Nano with MPU6050 DMP. From the screenshot, we can see it only takes 5ms to dump one data set.
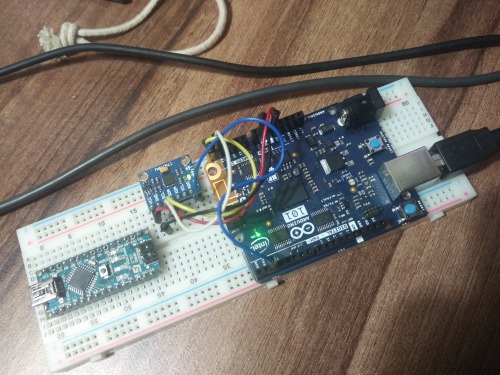
Then I connected MPU6050 to Curie 101 as the following, and port the code to it.
Guess!!
At the begging, Curie 101 takes seconds of time to establish a I2C connection with MPU6050.
Then at the beginning of DMP dump, it works ~~~err, just OK. The time cost is about 15ms per data set.

But after about 10 seconds, everything changes. It took 133ms per data set!!!!! God lord, I will dig into this latter to find out if Curie 101 is using a software i2c on A4 and A5 port.
So, it seems using MPU6050 on Curie is impossible now.
I will have to stick to Madgwick solution for my QPAKO now.
Or… maybe I should add another arduino into it??
==========================================updated on 20160828================================================
Today, I found a way to solve it and a interesting thing with Curie101. I pasted the problem on Intel Community Curie Blocks. Maybe they will reply something :)
Will show it soon to you.
But at least, my Xpider-E knows where it is heading to :)
---------------------------------------update---------------------------------------------
navigation almost complete. and this is the main UI. now the Xpider is in the center of the UI. The small arrow is the face direction of the Xpider
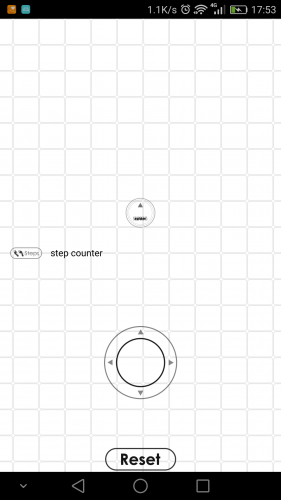
When you tap the UI, the Xpider will try to turn the direction to the target, and move to the target.

Since the UI map and Real map are not the same coordinate system, we add a temp reset button to reset the Xpider, make it in the center of the UI.
This is a companion discussion topic for the original entry at https://community.robotshop.com/robots/show/xpider-e-original-name-qpako-my-1st-walking-creature
 The shape of the bottom half reminds me MorpHex :