wiichuck-diag.png (13050Bytes)
nunchuck_tutorial.jpg (63554Bytes)
You may be asking to yourself, “Why would I want to connect my Wii Nunchuck to my Arduino board?” Good question. By attaching a Wii Nunchuck to your Arduino board, you can open a realm of projects waiting to be used. You could start a project, which uses the Wii Nunchuck to control your robot. Or, you could use the Wii Nunchuck as a sensor similar to Makezine. Heck, you could even use your Wii Nunchuck to rotate a simple servo. Enough dabble! Let me show you how to connect a Wii Nunchuck to Arduino. You will need the following parts...
-
Arduino board (duh)
-
Wii Nunchuck (duh)
-
4 pin Headers
Hardware Setup
First off, slide your 4 pin header into the 4 holes of the Wii Nunchuck Adapter. If you want a firmer connection between the headers and the Wii Nuchuck, you could solder them. I did so for mine. The last thing you need to do for hardware is to connect your Wii Nunchuck Adapter to Arduino. Here's a picture from Todbot on how to connect the Wii Nunchuck adapter to the Arduino board.

Programming Setup
To make your life easier, I tried to includ the Wii Nunchuck.pde file, but LMR won't let me. So, just copy and paste this code into a blank Arduino sketch.
#include <Wire.h>;
void setup(){
Serial.begin(19200);
nunchuck_setpowerpins();
nunchuck_init();
Serial.print("Nunchuck ready\n");
}
void loop(){
nunchuck_get_data();
nunchuck_print_data();
delay(1000);
}
//======================================================================================================================================================================================================//
//Do not modify!!!!!!!!
//======================================================================================================================================================================================================//
//
// Nunchuck functions
//
static uint8_t nunchuck_buf[6]; // array to store nunchuck data,
// Uses port C (analog in) pins as power & ground for Nunchuck
static void nunchuck_setpowerpins()
{
#define pwrpin PC3
#define gndpin PC2
DDRC |= _BV(pwrpin) | _BV(gndpin);
PORTC &=~ _BV(gndpin);
PORTC |= _BV(pwrpin);
delay(100); // wait for things to stabilize
}
// initialize the I2C system, join the I2C bus,
// and tell the nunchuck we're talking to it
void nunchuck_init()
{
Wire.begin(); // join i2c bus as master
Wire.beginTransmission(0x52); // transmit to device 0x52
Wire.send(0x40); // sends memory address
Wire.send(0x00); // sends sent a zero.
Wire.endTransmission(); // stop transmitting
}
// Send a request for data to the nunchuck
// was "send_zero()"
void nunchuck_send_request()
{
Wire.beginTransmission(0x52); // transmit to device 0x52
Wire.send(0x00); // sends one byte
Wire.endTransmission(); // stop transmitting
}
// Receive data back from the nunchuck,
// returns 1 on successful read. returns 0 on failure
int nunchuck_get_data()
{
int cnt=0;
Wire.requestFrom (0x52, 6); // request data from nunchuck
while (Wire.available ()) {
// receive byte as an integer
nunchuck_buf[cnt] = nunchuk_decode_byte(Wire.receive());
cnt++;
}
nunchuck_send_request(); // send request for next data payload
// If we recieved the 6 bytes, then go print them
if (cnt >= 5) {
return 1; // success
}
return 0; //failure
}
// Print the input data we have recieved
// accel data is 10 bits long
// so we read 8 bits, then we have to add
// on the last 2 bits. That is why I
// multiply them by 2 * 2
void nunchuck_print_data()
{
static int i=0;
int joy_x_axis = nunchuck_buf[0];
int joy_y_axis = nunchuck_buf[1];
int accel_x_axis = nunchuck_buf[2]; // * 2 * 2;
int accel_y_axis = nunchuck_buf[3]; // * 2 * 2;
int accel_z_axis = nunchuck_buf[4]; // * 2 * 2;
int z_button = 0;
int c_button = 0;
// byte nunchuck_buf[5] contains bits for z and c buttons
// it also contains the least significant bits for the accelerometer data
// so we have to check each bit of byte outbuf[5]
if ((nunchuck_buf[5] >> 0) & 1)
z_button = 1;
if ((nunchuck_buf[5] >> 1) & 1)
c_button = 1;
if ((nunchuck_buf[5] >> 2) & 1)
accel_x_axis += 2;
if ((nunchuck_buf[5] >> 3) & 1)
accel_x_axis += 1;
if ((nunchuck_buf[5] >> 4) & 1)
accel_y_axis += 2;
if ((nunchuck_buf[5] >> 5) & 1)
accel_y_axis += 1;
if ((nunchuck_buf[5] >> 6) & 1)
accel_z_axis += 2;
if ((nunchuck_buf[5] >> 7) & 1)
accel_z_axis += 1;
Serial.print(i,DEC);
Serial.print("\t");
Serial.print("joy:");
Serial.print(joy_x_axis,DEC);
Serial.print(",");
Serial.print(joy_y_axis, DEC);
Serial.print(" \t");
Serial.print("acc:");
Serial.print(accel_x_axis, DEC);
Serial.print(",");
Serial.print(accel_y_axis, DEC);
Serial.print(",");
Serial.print(accel_z_axis, DEC);
Serial.print("\t");
Serial.print("but:");
Serial.print(z_button, DEC);
Serial.print(",");
Serial.print(c_button, DEC);
Serial.print("\r\n"); // newline
i++;
}
// Encode data to format that most wiimote drivers except
// only needed if you use one of the regular wiimote drivers
char nunchuk_decode_byte (char x)
{
x = (x ^ 0x17) + 0x17;
return x;
}
// returns zbutton state: 1=pressed, 0=notpressed
int nunchuck_zbutton()
{
return ((nunchuck_buf[5] >> 0) & 1) ? 0 : 1; // voodoo
}
// returns zbutton state: 1=pressed, 0=notpressed
int nunchuck_cbutton()
{
return ((nunchuck_buf[5] >> 1) & 1) ? 0 : 1; // voodoo
}
// returns value of x-axis joystick
int nunchuck_joyx()
{
return nunchuck_buf[0];
}
// returns value of y-axis joystick
int nunchuck_joyy()
{
return nunchuck_buf[1];
}
// returns value of x-axis accelerometer
int nunchuck_accelx()
{
return nunchuck_buf[2]; // FIXME: this leaves out 2-bits of the data
}
// returns value of y-axis accelerometer
int nunchuck_accely()
{
return nunchuck_buf[3]; // FIXME: this leaves out 2-bits of the data
}
// returns value of z-axis accelerometer
int nunchuck_accelz()
{
return nunchuck_buf[4]; // FIXME: this leaves out 2-bits of the data
}
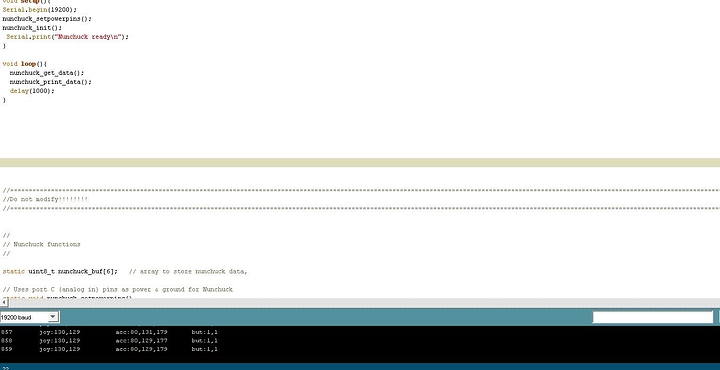
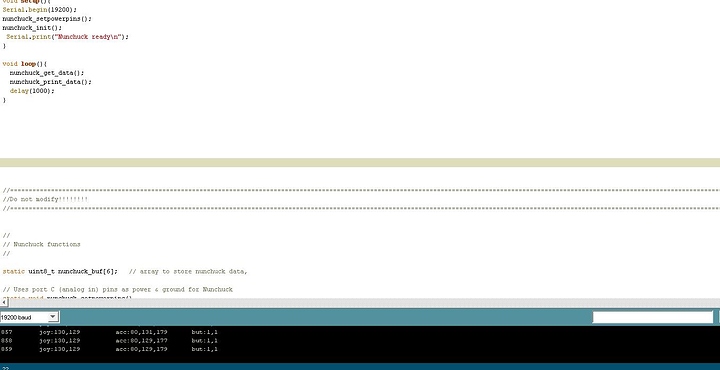
Keep in mind the source code was really from Todbot.com. He's the true genius behind this Wii Nunchuck+Arduino phenomenon.Upload the code to Arduino and go to your Serial Monitor. Make sure you configure the baud rate to 19200 inside the Serial Monitor. You should see something like this displayed inside the monitor.
The best part is that the code can be modify to suit your project needs. However, keep in mind not to modify the following...
1)#include <Wire.h>;
2)Serial.begin(19200);
3)nunchuck_setpowerpins();
4)nunchuck_init();
5) Anything below “Do Not Modify!”
Again, Todbot.com was the genius behind this Wii Nunchuck+Arduino phenomenon, not me. Well, that's it for me. I'll standby and read your questions on this little tutorial.


