

For some time now I have building robots and designing software.
This is my very first robot that uses my traditional style of Windows Software but also incorporates into it an Arduino with a Ultrasonic Sensor.
After learning of all the various sensors that are available for the Arduino and learning that I could interface it with some .NET software my eyes opened like a child on Christmas. Everything that I had wanted to do using a X86 system I found that I could now do without breaking the bank.
I bought a Nano and a Ultrasonic sensor and began playing with it and learning some of the Arduino code and experimenting.
The first project I did was to have the Ultrasonic sensor control a webcam zoom based on the distance to the object. The project turned out great and I will eventually post the project here with the software for other to try out.
So the next project I want to try was to build a bot that would navigate it way around a room using the Ultrasonic sensor.
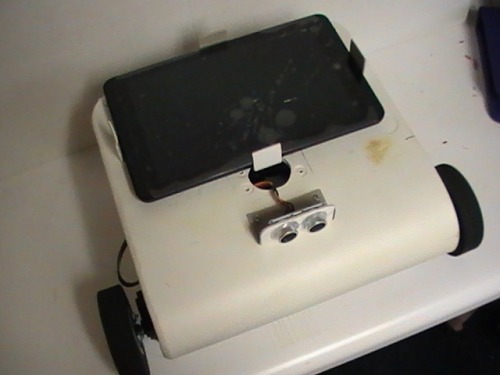
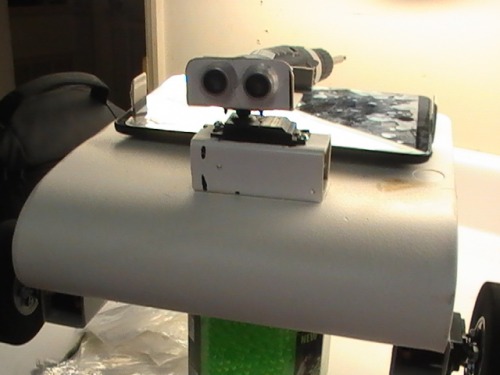
I had a rolling chasis that I had built for another robot so I decided to modify it slightly to accomodate a WIndows Tablet with WIndow 8.1.
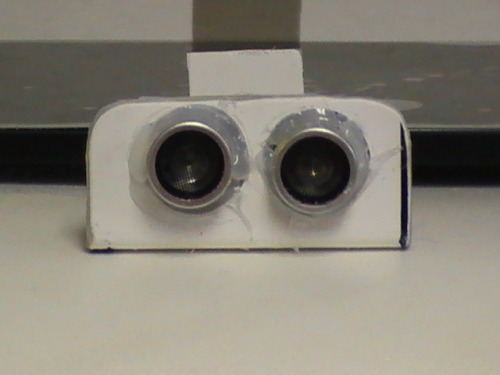
I then attached the Ultrasonic sensor and added the other electronics.
After much testing and changing of the code and adjusting the distance I got in dialed in and it will roam a room without hitting objects.
Here is a list of the items used in this projects.
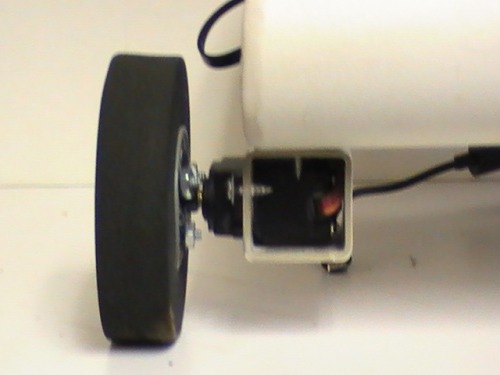
Drive Train: 2 MG995 Servos converted to continuous rotation Purchased on Ebay for $10.25
Tires: Foam Rubber tires designed for model planes purchased from local hobby shop $6.00
Chasis: 1/8" PVC Plastic cut and heated and bent to fit.
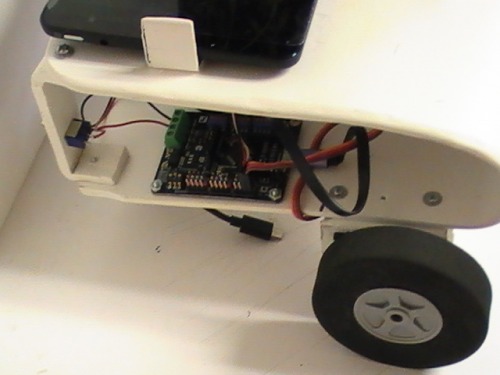
Servo Controller: Veyron Servo Control Board 24 port purchased from DFRobot for $29.00
Power Supply: 3.7v LiPo 2800 mAH flat battery taken out of old android tablet.
Computer: Dell 8" Tablet bought from Ebay with cracked screen for under $50.00 with Windows 8.1.
Pivot Wheel: Caster wheel purchased from Harbor Freight for under $3.00

I will be posting a video soon.
Much has changed since I first put this post up.
Here is a video of the bot running around.
Here is a list of the changes made.
1) Added servo for Ultrasonic Sensor
2) Changed logic behind distance detection and determination
3) Added Speech recognition
4) Added Speech Synthsis
How the bot behaves now:
It will freely roam around until it reaches a distances that is equal to or less than its given parameters. Once it stops do to distance limits it does the following. Checks to the right and measures the distance, then checks to the left and measures distance. If the left is a greater value than the right it will turn to the left and the same for the right. If it gets stuck in a corner where the distance to the left and right are the same or less than its parameter it will slowly inch its way backwards a little bit at a time checking every so often to the left and then the right looking for a clear path.
Speech recognition is being used to control modes, saying stop the bot will stop and will take 6 measurements of distance and get the average. When the word motion is said the bot will start doing measurements and if there is any change between the original measurement taken and the new ones then there is motion and it will alert you of this. Saying roam will put the bot into a free roam mode and continue roaming.
The tablet I am using has a built in microphone that is located on the side and the hole for it is about the size of a pencil lead. Once I add the webcam this will change as the webcam has a built in microphone so voice detection will be much more accurate.
On a full charge I can run the bot for about 4 hours non stop.
Once this system is proven and all the little kinks worked out then I will be putting it into a walking biped.
More changes have been made.
Added a Logitech C270 Webcam for two purposes.
1) Will be used for object detection and Facial Detection
2) It has a built in microphone that is better than the one built into the tablet.
Currently right now only the microphone portion is being utilized of the webcam.
Testing shows that the webcam microphone does a much better job in voice recognition.
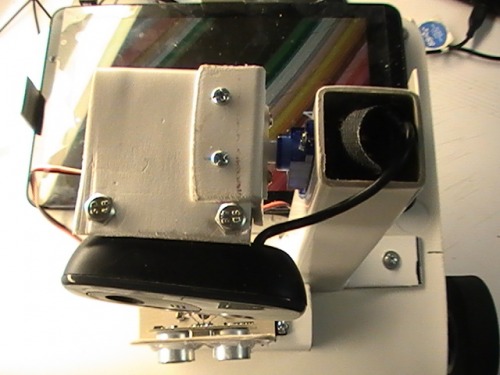
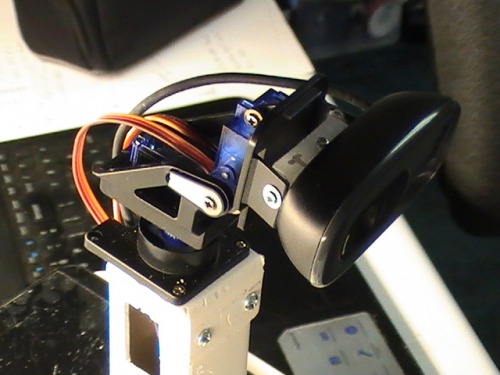
The webcam is attached to a servo to allow the camera to move up and down.


Update 4/29/2017
I have now implemented color tracking into the software.
Added a Pan/Tilt bracket for the webcam.
The software will track any color you select.
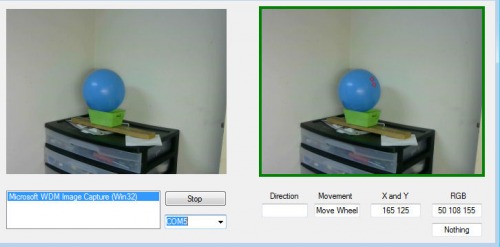
You will see in the below images I have a Blue ball setup for the bot to track.
The bot keeps the color being tracked in the center of the screen.
If for some reason the color that is being tracked is not visible the bot will move the cam back to center and then begin a search pattern until the color is located. It will continue this pattern until the color is located and then center the color on the screen.
Update 5/8/17:
Color Detection/Tracking has really progressed very nicely.
I started out with tracking all colors that are the same as the color selected.
This works fine so long as the lighting remains the same.
When the brightness of the light changes the tones of the colors change making it difficult to stay within the given color tolerance.
What I did to combat this was to detect the luminance of the object and then based on the luminance the color tolerance changes.
I did some heavy testing of this method and it work very nice.
My testing was setting up a several different lighting conditions (Lighting attached to a dimmer switch) and I also used various different shades of backgrounds.
The software is able to pick up the object regardless of the lighting except when pitch black, this is expected.
I then tried the process outside in direct lighting and then in shade and was very surprised that the system works great as the luminance changes the tolerance of color changes and is able to detect the object very nicely.
This whole process works great so long as you are using a color that stands out from the rest, such a neon green or bright red,Bright blue or Yellow.
If there is another object in the room that is the same color or close to the color then it will grab it.
I then put into affect what I will call predictive nature.
This means if the object was seen at X(160) and then has moved to X(280) and then is no where to be found, the camera will continue to move in that direction to find the object. If it can not be found then the bot goes into a search mode where it first goes backto the camera being straight ahead and then starts searching in 45 degree increments until the object is found again at which time it locks on to it and starts the process again.
I will post a new video soon demonstrating how this works.
Update 5/14/17:
While I really wanted to do a new video I was unable to because of time contraints.
Although I was unable to do a new video I did make some notable progression in the software.
I have been working more on the "Predictive Nature" of the software.
What do we mean by "Predictive Nature".
Well in this case what it is being applied to is the last know position of the object verses the current location.
So lets say that the screen size is 320x240 which means that x goes from 0 to 320.
That means that 160 is the center of the screen based upon the image size we are using.
So if the last known position is >160 that means we need to turn to the right as predictiveness tells us that the likelyhood of it going and continuing to that direction is highly. The same remains true for the X<160 to the left.
I have had to add in a small amount of what I would like to call padding so that the detection of the object to non-detection does not run together. So I gave it about 500ms.
If the object is not found within 500ms it will go into a phase of first check for the last known position and based upon this it then moves to that direction to find the object.
The bot will check in a 180 degree area before going back to the other direction.
If at any time during that check (180 degrees) it finds the object the process is reset and normal progression continues.
This is a companion discussion topic for the original entry at https://community.robotshop.com/robots/show/test-robot-chasis