Update nr3 (Feb25,2015) video added of one of the first attempts to drive a straight line of 150 cm,, with on-route calibration.
Update nr 2 (Feb 24, 2015)
I now managed to get all base components working in Java. I am now using Java SE with the jdk.dio libraries which form the basis of the GPIO capabilities in Java ME (and are available separately), so I am also using my original Java ME code again, not the PI4J based code. I only use PI4J to access the WiringPi functions for PWM motor control in software. I have put the ultrasonic sensor on two separate pins and now get reliable results. I am using servoblaster for servo control from software. So the only dedicated hardware I am using is the motor control board to protect the Pi. All components are controlled by directly setting/reading pins in software on the Pi.
Next step is to make individual components work together, starting with the motors and wheel encoders to drive straight and make controlled turns. No doubt, further challenges ahead.....
------------------------------------------------------------------------------------------------------------------------------------------------------------------------
Update nr 1 (Feb 16, 2015) on the progress achieved since first publication, especially to low level control with JAVA:
Last time all motors, sensors and switches were connected and working in a few Python test scripts and then I started JAVA programming (because I wanted to ... :-) )
I did part of the free on-line Oracle MOOCourse on JAVA ME (micro-edition) embedded and applied that learning to my programming. I first programmed all basic classes to control/read all connected sensors/motors etc and this all worked fine until I got to the servo control for the pan/tilt mechanism.
I found that it was not possible to control the servo pulse accurately from base java software. Without an accurate pulse, it is impossible to set the servo angle. I needed to use something to send an accurate pulse from software (or buy more hardware). After a lot of attempts and research, I decided to try to use the very smart servoblaster software. To control the servo, the java program has to write a command to /dev/servoblaster (for example 0=150 to send a 1.5 ms pulse and set the servo in middle position).
After further testing, research and asking for help on PI and JAVA ME forum, I unfortunately concluded the JAVA ME is too limited and cannot write to a pipe output like /dev/servoblaster. I have no other explanation why it does not work.It works from python, shell command line but not from the "crippled" JAVA ME.
So what's next? I decided to switch from JAVA ME to JAVA SE, which comes standard on the Raspberry PI. To control the PINs I decided to try the PI4J libraries, which in turn is using the WiringPi functions. This gives very good PWM motor control amongst others. I just had to rewrite the bases level JAVA classes to use the PI4J classes instead of the JAVA ME GPIO classes, a few evenings of work. (I use Netbeans as IDE connected to the PI for testing). The servocontrol worked great, the motor control as well, reading switches, IT wheel encoders etc all fine, until I tried the Ultrasonic distance sensor.
The sonar works by sending a 10 microsecond pulse first, which triggers a ultrasonic sound burst, and then the sensor listens for the return signal and provides an output, first low, then high, the low. The length of the high is used to calculate the distance.
I found that I was unable to switch fast enough from sending to listening and was missing the initial low and part of the high signals and therefore was unable to calculate the distance. Even trying this from two separate PIN did not work fast enough. Now this worked fine in python and in JAVA ME, but not JAVA SE with PI4J.
So now I have:
1) everything working in JAVA ME except servos
2) everything working in JAVA SE except sonar
I will still test further using above options. I could still try JAVA SE with the jdk.dio libraries (same libraries as JAVA ME). I could try other libraries but don't feel like rewriting again yet. In the end, I could switch to Python, which I know will work.
So, at the moment, still learning more very day...... will keep you updated.
--------------------------------------
Original post below:
--------------------------------------
Sharing my work in progress on an autonomous "search and rescue" robot. The ambition is to create a robot which explores my living room starting at a random position, then finds a victim (colored ball) and brings it home via the shortest available route that it previously explored. While doing this it will build a map of the room and send it to a laptop for display. I used caterpillar tracks because it also needs to be able to go across a thick carpet. If the batteries can support it, it will also send home a webcam image (that is already working).
In first instance I will give it a start and destination position and I will confirm arrival at the destination by pushing a switch. The ball searching and pickup will be a future addition.
A second goal is to learn JAVA while doing this. I did parts of the JAVA embedded massive online course from Oracle for Raspberry Pi as preparation.
Currently I have the mechanical and electrical part finished, except for a few resistors to finalise the circuits on the breadboard.
The robot is based on:
- the frame of a Lego crystal reaper (nr 7645) Mars Mission. I used the caterpillar tracks and the platform in between, slightly modified
- a Raspberry Pi B+ I got from my kids for my birthday (great idea, thanks !!)
- a Pirocon2 motor control board from 4tronix
- 2 Lego motors
- a sonar distance sensor which connects directly to the Pirocon2 board
- a pan and tilt mechanism with two small sensor motors for the sonar sensor
- two IR sensors with wheel encoder disks to track wheel rotation
- 4 simple tactile switches glued to some lego parts as bump sensors
- a small breadboard, wires and resistors
- a Lego 6xAA battery holder and a separate power bank. I glued a small piece of plastic to one side of the switch on the battery holder in order to prevent accidental reversal of polarity.
Some detail description:
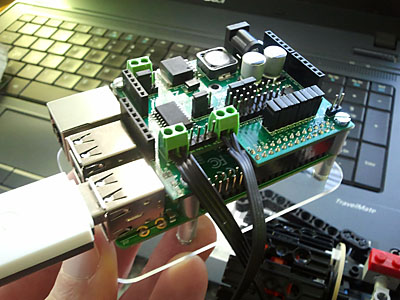
The Pirocon2 board attaches straight onto the header of the Raspberry Pi, using 4 pins for the motor control and one for the sonar Sensor. The other pins remain available or are propagated by the board. Because the motors drew so much power that it caused a full reset of the Pi, I am powering the Pi from a separate power bank (mobile phone charger) and the motors from the 6xAA batteries. The board allows for different power options. I am protecting the Pi with a plexiglas bottom shield. The old wifi dongle is rather large and gets in the way. Maybe I will replace it later.
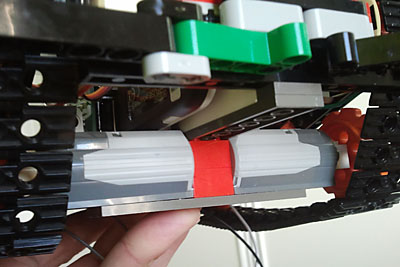
The two lego motors are connected directly to one of the wheels on each side. They have some internal gears and I am not using any additional gears (yet).
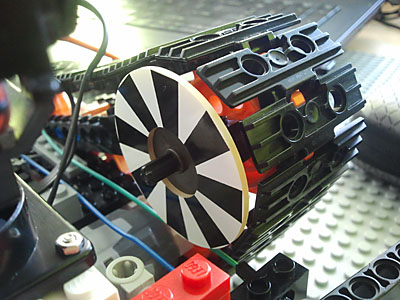
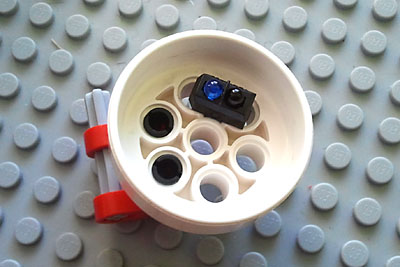
The wheel encoder discs are glued to a lego disk and attached to the top track-guidance wheels. The IR sensors are glued inside a Lego part which acts as a sort of light cap, although I am not sure whether this is necessary since the IR sensors seems to block visible light already. Anyway it looks good and holds the sensors in place (also visible on the final image below).
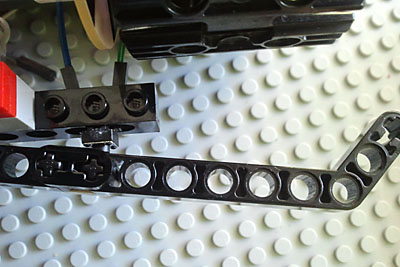
The bump sensors are simple switched with a Lego arm to push them. I reconstructed the initial arm and moved the pivot point inward so the arm does not only work on the outer edge. I am limited by the avaialble Lego parts from the attic (need to get some more..).
With the PI, the battery and power bank and the wiring it all gets a bit crowded. Need to clean up. I will do that as soon as I finish the circuit on the breadboard for the bump switches, currently waiting for the resistors to arrive. I used some python test scripts available from 4tronix for another robot (initio) to test everything separately. It all works fine. The weight is rather high (800g) and I might need to add 2 more AA batteries, that will become clear after further testing. I try to upload a small video soon.

Now I can start JAVA programming. This I expect will take a lot of time......

This is a companion discussion topic for the original entry at https://community.robotshop.com/robots/show/search-and-rescue-robot


