P2 controlled Jeep 1/8 scale

first id like to thank robotshop the the product an having a forum for help

I’m using a lynxmotion ps2 wireless controller, to controller a old monster truck jeep
i scrapped the circuit board an replaced it with a arduino uno. & at the moment I’m using a L289P shield
as the motor driver. 1 motor for forward an backwards, & a Servo for the steering
everything seems to run fine on its own idk if the ps2 analogs are the problem but ill show the serial print for it.
but when i try an talk to the servo i get nothing from the controllers analog when i shift it left to right.
i used a couple different sketches but idk if its something I’m doing wrong while modifying them ill post 1 example

note; that the orang green an brown are the servo wires hooked up on the L289P shield
servo output: an the ps2 controller wires are the 2 yellow brown an blue wire witch
are hooked up on the Lp298P shield pins

[code]#include <PS2X_lib.h> //for v1.6
#include <Servo.h>
PS2X ps2x;
int PS2 = 0;

Servo myservo;
int pos = 0;

int offset = 0; // put this with the other global variables (above the void setup() function).
int steer = 127; // put this with the other global variables (above the void setup() function).

void setup() {

PS2 = ps2x.config_gamepad(13, 11, 10, 12, true, false); //Настройка выводов: (clock, command, attention, data, true, true)
myservo.attach(9); // attaches the servo on pin 9 to the servo objec //ESC on sigital pin 3
}
void loop()
{
steer = ps2x.Analog(PSS_RX); // read right joystick

if (ps2x.Analog(PSS_RX)) { // trim right
offset += 1;
}
if (ps2x.Analog(PSS_RX)) { // trim left
offset -= 1;
}

steer = steer + offset; // incorporate trim into steer command
if (steer > 180) steer = 180; // enforce upper limit
if (steer < 30) steer = 30; // enforce lower limit

myservo.write(map(steer, 0, 255, 30, 180)); // write steer command
}[/code]

1:FF 43:73 0:5A 1:FF 0:FF
OUT:IN Configure
1:FF 44:F3 0:5A 1:0 3:0 0:0 0:0 0:0 0:0
OUT:IN Configure
1:FF 43:F3 0:5A 0:0 5A:0 5A:0 5A:0 5A:0 5A:0
OUT:IN
1:FF 42:73 0:5A 0:FF 0:FF 0:80 0:7F 0:80 0:7F 0:0 0:0 0:0 0:0 0:0 0:0 0:0 0:0 0:0 0:0 0:0 0:0
OUT:IN
1:FF 42:73 0:5A 0:FF 0:FF 0:80 0:7F 0:80 0:7F 0:0 0:0 0:0 0:0 0:0 0:0 0:0 0:0 0:0 0:0 0:0 0:0
OUT:IN Configure
1:FF 43:73 0:5A 1:FF 0:FF
OUT:IN Configure
1:FF 44:F3 0:5A 1:0 3:0 0:0 0:0 0:0 0:0
OUT:IN Configure
1:FF 43:F3 0:5A 0:0 5A:0 5A:0 5A:0 5A:0 5A:0
OUT:IN
1:FF 42:73 0:5A 0:FF 0:FF 0:80 0:7F 0:80 0:7F 0:0 0:0 0:0 0:0 0:0 0:0 0:0 0:0 0:0 0:0 0:0 0:0
Found Controller, configured successful pressures = false
rumble = false
Try out all the buttons, X will vibrate the controller, faster as you press harder;
holding L1 or R1 will print out the analog stick values.
Note: Go to http://www.billporter.info for updates and to report bugs.
DualShock Controller found OUT:IN

3 pressed
OUT:IN
1:FF 42:73 0:5A 0:FB 0:FF 0:80 0:7F 0:80 0:7F 0:0 0:0 0:0 0:0 0:0 0:0 0:0 0:0 0:0 0:0 0:0 0:0
OUT:IN
1:FF 42:73 0:5A 0:FF 0:FF 0:80 0:FF 0:FF 0:FF 0:0 0:0 0:0 0:0 0:0 0:0 0:0 0:0 0:0 0:0 0:0 0:0
OUT:IN
1:FF 42:73 0:5A 0:FF 0:FF 0:80 0:7F 0:80 0:7F 0:0 0:0 0:0 0:0 0:0 0:0 0:0 0:0 0:0 0:0 0:0 0:0
OUT:IN
1:FF 42:73 0:5A 0:FF 0:FF 0:80 0:7F 0:80 0:7F 0:0 0:0 0:0 0:0 0:0 0:0 0:0 0:0 0:0 0:0 0:0 0:0
OUT:IN
1:FF 42:73 0:5A 0:FB 0:FF 0:80 0:7F 0:80 0:7F 0:0 0:0 0:0 0:0 0:0 0:0 0:0 0:0 0:0 0:0 0:0 0:0
R3 pressed
OUT:IN
1:FF 42:73 0:5A 0:FB 0:FF 0:80 0:7F 0:80 0:7F 0:0 0:0 0:0 0:0 0:0 0:0 0:0 0:0 0:0 0:0 0:0 0:0
OUT:IN
1:FF 42:73 0:5A 0:FB 0:FF 0:80 0:7F 0:80 0:7F 0:0 0:0 0:0 0:0 0:0 0:0 0:0 0:0 0:0 0:0 0:0 0:0
OUT:IN
1:FF 42:73 0:5A 0:FF 0:FF 0:80 0:7F 0:80 0:7F 0:0 0:0 0:0 0:0 0:0 0:0 0:0 0:0 0:0 0:0 0:0 0:0
OUT:IN
1:FF 42:73 0:5A 0:FF 0:FF 0:80 0:7F 0:80 0:7F 0:0 0:0 0:0 0:0 0:0 0:0 0:0 0:0 0:0 0:0 0:0 0:0
OUT:IN
1:FF 42:73 0:5A 0:FF 0:FF 0:80 0:7F 0:80 0:7F 0:0 0:0 0:0 0:0 0:0 0:0 0:0 0:0 0:0 0:0 0:0 0:0
OUT:IN
1:FF 42:73 0:5A 0:FB 0:FF 0:80 0:7F 0:80 0:7F 0:0 0:0 0:0 0:0 0:0 0:0 0:0 0:0 0:0 0:0 0:0 0:0
R3 pressed
OUT:IN
1:FF 42:73 0:5A 0:FB 0:FF 0:80 0:7F 0:80 0:7F 0:0 0:0 0:0 0:0 0:0 0:0 0:0 0:0 0:0 0:0 0:0 0:0
OUT:IN
1:FF 42:73 0:5A 0:FB 0:FF 0:80 0:7F 0:80 0:7F 0:0 0:0 0:0 0:0 0:0 0:0 0:0 0:0 0:0 0:0 0:0 0:0
OUT:IN
1:FF 42:73 0:5A 0:FF 0:FF 0:80 0:7F 0:80 0:7F 0:0 0:0 0:0 0:0 0:0 0:0 0:0 0:0 0:0 0:0 0:0 0:0
OUT:IN
1:FF 42:73 0:5A 0:FF 0:FF 0:80 0:7F 0:80 0:FF 0:0 0:0 0:0 0:0 0:0 0:0 0:0 0:0 0:0 0:0 0:0 0:0
OUT:IN Configure
1:FF 43:FF 0:FF 1:FF 0:FF
OUT:IN Configure
1:FF 44:FF 0:FF 1:FF 3:FF 0:FF 0:FF 0:FF 0:FF
OUT:IN Configure
1:FF 43:FF 0:FF 0:FF 5A:FF 5A:FF 5A:FF 5A:FF 5A:FF
OUT:IN Configure
1:FF 43:41 0:5A 1:FF 0:FF
OUT:IN Configure
1:FF 44:F3 0:5A 1:0 3:0 0:0 0:0 0:0 0:0
OUT:IN Configure
1:FF 43:F3 0:5A 0:0 5A:0 5A:0 5A:0 5A:0 5A:0
OUT:IN
1:FF 42:73 0:5A 0:FF 0:FF 0:80 0:80 0:80 0:80 0:0 0:0 0:0 0:0 0:0 0:0 0:0 0:0 0:0 0:0 0:0 0:0
OUT:IN
1:FF 42:73 0:5A 0:FF 0:FF 0:80 0:80


Hi,

The best things to do is to break your issue down into small problems that can be verified independently to ensure all modules are working.

Here are a few points to consider:

  1. Test the PS2 independently. To do so, perform the following:

]Remove anything from the Arduino Uno (including the L298 shield). Only have the PS2 adapter connected to it./:m]
]Remove any PS2X library version you have currently in your Arduino > libraries folder./:m]
]Import (in the Arduino IDE) the following library from the Lynxmotion GitHub (download as .zip)./:m]
]Modify the library’s .h file to uncomment the two debug #defines (here and here)./:m]
]Compile and upload the example code to your Arduino Uno./:m]
]Open the serial monitor and see if pressing buttons changes the values displayed on screen./:m]
2) Test the L298 shield on your Arduino Uno independently (remove the PS2 connections and anything else from it). As far as we know, most shields for the L298 expose the interface directly, which is not a servo-type pulse input. Therefore, using the Servo library seems a bit weird, to be honest.

You may want to perform a test using only a digital high / low (maybe alternate every second?) and see if the motor moves properly during those times.

Once those two components work properly individually, then you can integrate and see what else shows up.

Let us know if both #1 and #2 works or if you face any issues. If you do, please post as many details as possible and pictures of the test setup.

Sincerely,

Thank u for the feedback an I did happen to get them working I do have pics an vids, an I did run into a little problem, forward an backwards are not accurate not powerful enough to moves the car while it’s on the ground

Left an right works fine with the controller, but sometimes the controller will loose signal with the receiver when I’m close, further more if I push forward the motor will hesitate an jidder left an right before moving forward, it also acts up when I push the analog the opposite way I have videos but for some reason the messenger won’t let me upload them

An for the record I got it working right after I made the first post, I would’ve loved it if the forum would have helped me. U have been a help by replying the the feed back Gave recently were great feedbacks unfortunately I got rid of the shield an brought a “H BRIDGE L298N”… the post I just made is the problem I’m having,

Hi,

Unfortunately, there is no simply way to directly solve such issues (integration issues) without ensuring first that all the components are working directly.

Let us know how that goes!

Sincerely,

Everything works fine independently

Then the issue lies in the integration (which is often the case).

The first step would be to make a detailed list of all changes (electrical, connections, code, etc.) that are done to integrate the two setups together.

The key is in one of those changes causing interference with the two parts working properly.

Sincerely,

I’ll definitely try what your proposing & again I appreciate the feedback
You’ve been a great help from the beginning. An still are I am thankful for that

Very good. We await more details to help you with this process.

Sincerely,

if u could give some advice on a safety command…as far as if the controller disconnects the motors will stop right now i don’t have that in place
but my code did change from the first one i posted

here it is

Hey,

Well, that is a very good point! :slight_smile:

First of all, before you can check the PS2X object, you have to update it (typically at the start of your loop), using something like this.
If you do not run this command, the object is not updated.

Following this, you can then read the buttons and analog values from the object, as seen in the example code.

You use read_gamepad(), you can call the version with two parameters (boolean, byte), which returns a value (boolean) concerning the process. If the read worked, you can tell from the return value. This way, you can detect disconnection/lack of data and instead of reading the object state (buttons, sticks, etc.), you can instead send a stop moving signal (or other things, like “keep as-is”) until you get a proper read again.

Sincerely,

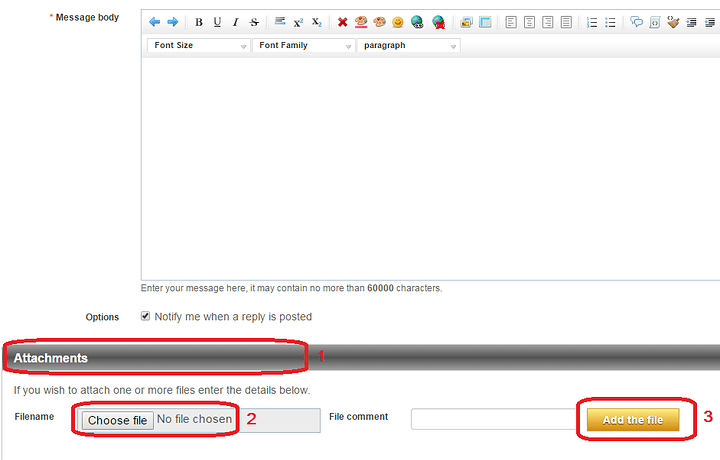
P.-S.: You mention “here it is” in your post but nothing is there afterwards and no attachments. Please see the attached image about how to add one to your post (which you can edit).

I’ll post pictures,should be consistent with my post

If there way anyway to be more grateful for your feed back I would, seeing that I’m only limited to thank u through the internet. I’ll try again to upload the recent progress I’ve made but I’ll give u a run on we’re I’m at. The project is not so much about me trying to have a rc car to play with but to have the know how, to utilize these things in many different ways. An can be beneficial seeing that no one around me personally is not in this type of field. So again I appreciate your feedback.

Right now I have a regular rc motor that originally came with the car
I’m going to upgrade that with a 1/10 scale brushless rc motor an 60 amp esc
An a 2cell lipo battery…with that being said
Right now I’m using a

1:H bridge
2:servo for steering
3:brushed motor for back and forth
4:arduino uno
5: ps2 lynxmotion
6: breadboard for grounding
7: I have a 7.4v 6cell that came originally with the truck but I need a new charger
So I’m forced to use a 6v in witch idk if that’s A problem.
Witch powers the h bride
8: I use a portable phone charger to power the arduino an
Controller, I’ll also power the servo off of the arduino if need be
Witch is then powered by the portable 5v battery
Everything runs smooth independently.
Once integrated I run into these minor problems.
1: ps2 lynxmotion controller disconnects for a few seconds with
The movement of the joysticks sometimes.
2:motor runs but stalls, an jidders left an right before executing its commands.
3: doesn’t look like much power is being fed to the motor nor servo once it’s put on the ground or carpet the wheels an motor have a hard time moving , there go it messing up communication.

The motor wires are the bulgy red an black ones that go into the H bridge…
The H bridge itself has a purple ish an blue wire for power witch goes into a breadboard…the breadboard is powered by the 6v at the moment witch are the brown an white wires on the opposite side of the breadboard…there’s a ground connection from the arduino to the breadboard witch is “orange”
I also grounded the servo to the breadboard…
servo connected to the 5v on the servo
An the ps2 is connected to the
3.3v… ps2 is grounded on the arduino
An using pins 10-13…
The H bride is using pins 2-4

Many things come up… 1:it could be wires not being connected thoroughly.
2:Code not being perfect. 3:Battery supply. I’ve indulged so much I can’t catch the lil problems an errors,so much circulating in my head.

Pictures


Pictures


Pictures


Hi,

Thank you for the pictures and details.

It would also be helpful if you could post an attachment of the code you are currently using.

Sincerely,

this is the code im currently using… i did not implement the safety commands yet i been kinda having a difficulty with that
referring to your post about boolean…
an I’ve noticed the wheels do keep spinning if the ps2 controller disconnects
endgame2.ino (7.02 KB)

Hi,

Here are a few comments concerning your code:
At line 29 you have myservo.attach(9); We assume this is the Servo object that will control turning?

At lines 93-124 you left code for a Guitar Hero controller. Are you using one of these? If not, we recommend removing the code for clarity / simplicity.

At line 126 you perform a read using the read_gamepad(boolean, byte) function ps2x.read_gamepad(false, vibrate); //read controller and set large motor to spin at 'vibrate' speed This call should work as is, but the point of using the version of the function with parameters is to use the returned value to determine if the controller is still connected. Here is an example of what would help your situation: boolean value = read_gamepad(false, 0x00); if(value) { ...]do something...] } else { ...]do something else...] } We recommend that you at the very least read the value returned (boolean) and see if that is helpful (i.e.: is it different when the controller is connected/disconnected, which you can simulate by turning it off).

For the rest of the code, you may be better off isolating your input code from your output code to make everything more clear.

We hope this helps you moving forward.

Sincerely,

P.-S.: For easing sharing of code and contributions from others, we recommend that you place your code on a code-sharing / version tracking website/server, such as GitHub, BitBucket, etc. These are typically free for open/public projects. That being said, even if it is visible publicly, you still have full control of what changes are made. But, it makes it easy to share and have others propose updates/etc.

ill definitely try what u suggested… & give u a feedback
and as far as the code ill see if i can post it on GitHub
but anything to help the next person, as i was helped
an if i can give a review about your help id love to
the that to…& again anything to help the next person