

This is my latest robot, still work in progress. It will take a while until it gets finished, as I want to make it more and more complex. I intend to add every functionality I can to this robot. But here is the description:
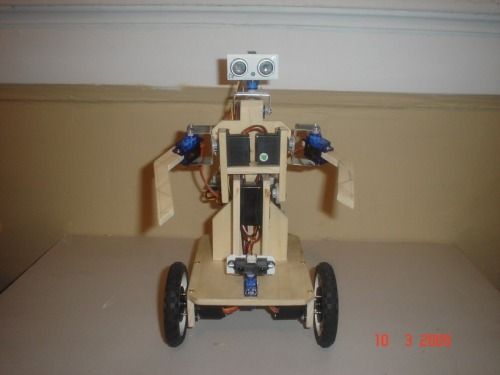
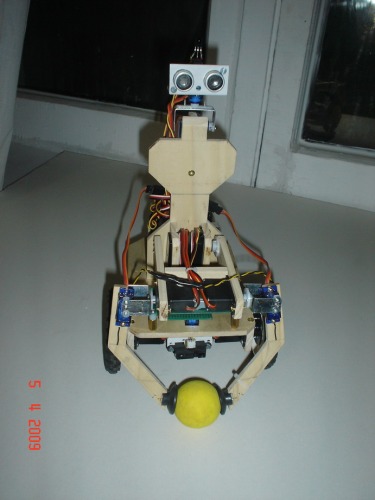
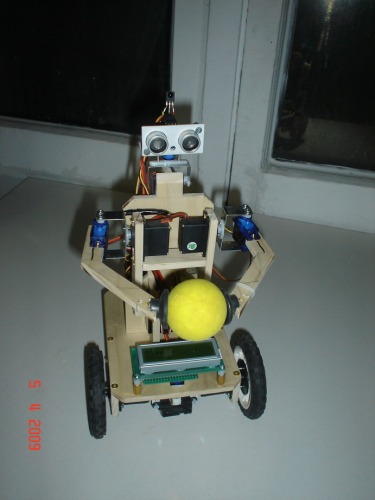
MiniEric was born because I needed a multipurpose test platform to develop code for my big butler robot (Eric). I wanted a small replica of the big robot, incorporating almost all features, like: object retrieval, interaction with humans, mapping, object recognition, text to speech, self charging, eventually voice recognition (simple commands), ability to compete in several types of robotic competitions (line, maze, fire...). Some of the features are implemented, some are on the way. I am a weak coder so I am slowly testing out bits of code, getting ideas from people on the net (I already got some from you guys, thanks a lot!). I am using the Arduino platform, the brain being a Roboduino board. I am using all pins on it so I'll have to hook up a Duemilanove over the I2C and downgrade the Roboduino as a servo controller. For the moment I am using a self made dual DC motor controller over the UART (I didn't get the I2C slave working yet) using a Tiny2313 and a SN754410 to drive a couple of Faulhaber motors with built in encoders. The robot has 8 servos: one for waist, 2 for shoulders, 2 for arms, 2 for pan/tilt head and one for a scanning sensor. On the head it has a Ping)) sensor, a thermopile array and will have an AVRcam. The sensor mounted on the scanner is a GP2D120 and is used for wall following or object retrieval. The arms can move independent (to point or wave) or together as a claw (to pick up objects). On the tip of the arms it has some suction cups that I want to attach to FSR to sense when the object is grabbed (but I could steal the ASF idea...). The robot has a 2x16 serial LCD (custom made) that I should upgrade with a graphic LCD for mapping purposes. The robot has some programmed moves (stored in the EEPROM) and is able to play a small tune or beeps. Did I mention that I hooked up an IR sensor and I can teach the robot new moves with the TV remote? The process is not so easy, but it beats the PC control method.
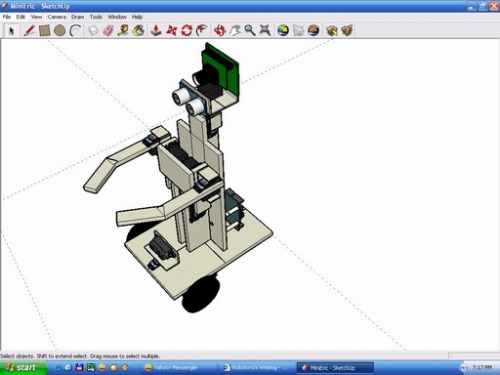
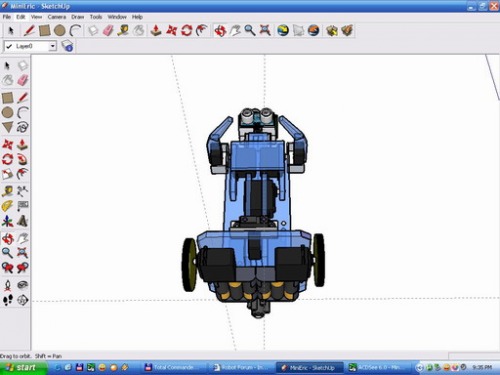
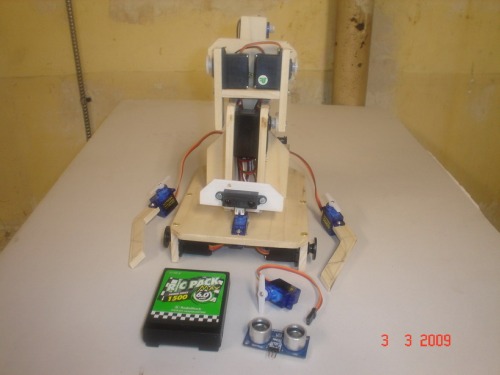
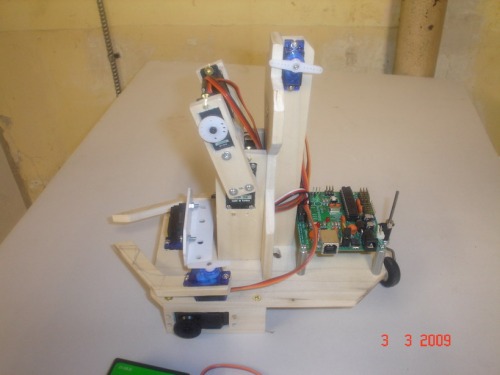
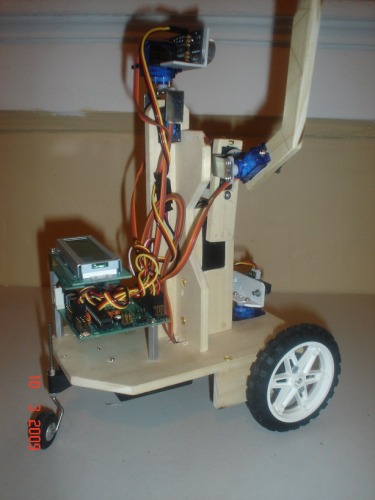
I have decided to add a few pictures to highlight the building process of this robot. I started CAD-ing it with Google Sketchup, then cut the parts from a poplar board I bought from Home Depot (it took me one afternoon to make and mount most of the parts) and used a piece of automotive (big) hose clamp to fabricate the servo brackets. I have used small wood screws (you can find them only at the hardware store in packs with tiny hinges for small jewelry boxes) but I had to drill small holes in advance so the wood would not crack. At first, I have used servos for driving, but they are too noisy for my ears, I hated it when it was running all over avoiding objects. So instead of installing a quadrature encoder, a small H-bridge and a ATtiny microcontroller inside the servo's box, I decided to get geared motors with built in encoders -> the Faulhaber motors from Electronic Goldmine. Over time, the robot has suffered many small mods and I guess it will happen again with the arms, as I am not happy with the current design. I need to re-shape them, perhaps ad one more micro servo per arm for an elbow bend or for a hand... Here are some early pictures:
I Hope you'll like it!
UPDATE: (Nov. 14th)
I have redesigned the robot's head and added 2 long range Sharp IR sensors mounted at 90deg from each other and 45deg from head axis. I also added the AVRcam and a LED bar to act as a mouth when the robot will speak. I will use a tiny to drive the LEDs using a AtoD pin to determine the voltage on the speaker, I've seen it done somewhere some time ago. I have added a color Nokia LCD to my motor controller board. I wanted to make the robot scan using the head pan servo and send through I2C the LCD commands, but it didn't work. So, I had to move over to the motor controller board the servo and the Ping sensor for testing purposes and I finally had proper results. The color on the LCD are still crap (for some reason this LCD is hard to set up properly) but I can display the distance and draw the pixels on the screen. Another weird thing, it seems that the Ping sensor's max distance is 102-103 cm, but I didn't had time to see why. After I got the scan properly displayed I have eliminated all the delays in my code and to my surprise, it scans madly fast! Then I made it scan left to right and right to left, with a second delay between directions, to be able to see the map on the screen. You can see the result in the video. I also attached the code and the NokiaLCD.lib in the zip file (change the extension from txt to zip). I had to use the SoftwareServo lib because the original Servo lib causes problems with the display. Enjoy!
Nov. 17th. Another update:
I have finally received the new R-Dev-Ino boards I've designed for the robot that will split all the functions over 4 or 5 modules. I'm using I2C for communications and I have to say I'm pleased how well that works. At the end of this week the robot will be ready for FireFighting and all that will remain will be to complete the mapping code and the vision code. Hmm, actually there are more things to do afterwards...
Nov. 27th.
After the Fire Fighting competition my next challenge is Mapping. But until then, I want to make Speech work. So far it's not intelligible, but I think I can tweak it a bit. It doesn't have to be perfect, but at least a bit better. Then I'm making the LED mouth work for a much realistic feel. When the new Nokia color LCD shield is here I'm going to continue my mapping efforts.
So here's a new video demonstrating the Voice and Speech.
Update: Dec. 31st 2009.
I have attached the code for the Speech controller that uses a Mega328 with Arduino bootloader installed, on one of my R-Dev-Ino modules. You need to download the SpeechControllerzip.txt file and TTSzip.txt library, rename the files to replace the extension from .txt to .zip, unzip and copy the library in the proper place and the SpeechController code where ever you keep Arduino sketches.
Update: Jan. 30th 2010.
I've decided to change the two HXT900 servos from my robot's neck and I got some Turnigy TGY-S3101S mini servos, a bit bigger and a bit stronger. After taking the robot apart half way to remove a body part that I needed to cut to fit the new servo, bend in weird ways the servo bracket to fit the new lenght I managed to get it all back together and it was ready for the test. I loaded the ScanMap code on the micro and my jaw dropped in awe!!! The head moved perfectly, jitter free, 180 perfect degrees and SILENT like it was some sort of a stealth robot... I poked the head to tilt it, came back smoothly, with no extra oscillations... OMG!
I also took sensor measurements every 5cm from 20cm to 250cm and had Excel come out with a new equation, so my Sharp sensors measurements went right over the Ping sensor measurements and perfectly one over the other (I have 2 Sharp sensors at 90 degrees to each other, so the measurements overlap for the middle portion). Great Gods of Robots! I am now ready to start the mapping stuff!
Play Fetch, Firefighting, navigate by map using different sensors for localisation.
- Actuators / output devices: 8 servos, 2 DC geared motors
- Control method: IR remote and autonomous, Voice Command
- CPU: 1 Tiny861 on a perf board, 1 Mega328 and 3 Mega168 each on one R-Dev-Ino board
- Operating system: Arduino
- Power source: 9.6v nicd 1000mA
- Programming language: Arduino
- Sensors / input devices: motor encoders, compass, TPA81 Devantech 8 Pixel Thermal Array Sensor, Ping))), Sharp IR sensors
- Target environment: indoors
This is a companion discussion topic for the original entry at https://community.robotshop.com/robots/show/minieric-robot
 Just need some tracks, and some uber lasers, and you’ll be on your way to controlling the world!


