


[this isn't actually a tip, it's a review, but Calculon is not an official reviewer as of press-time]
[also, Calculon doesn't have video at the moment...]
Calculon has decided he will start sharing his arduino creations on LMR. Since discovering Arduino, Calculon has been wasting all of his time with various physical computing projects, many of them successful. Calculon hasn’t deemed any of these creations worthy of LMR for the simple reason that they weren’t technically “robots”. They were always:
- Powered by USB (and thus tethered to a PC) or plugged into a wall.
- Not mobile because Calculon doesn’t have a good H-bridge shield.
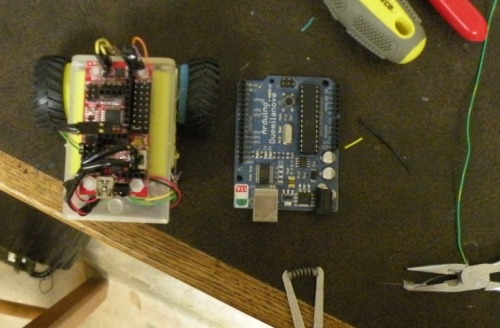
Our fine friends at Dagu are solving both of these problems with the Micro Magician Controller. It has a ton of goodies described here. What Calculon loves the most about it?
It is small, it is simple, and the h-bridge comes already built-in. Behold the 15-Minute Bot:
Fifteen-minute bot is made out of:
- batteries
- motors
- Micro M.
That’s it. This guy zips around. The A3906 Dual FET “H” bridge packs a punch. He drives around at his motors' top speed until he hits something and (because of his rear-heavy torque) falls backward like a tractor cow ...

…and must go into reverse to fix his position.
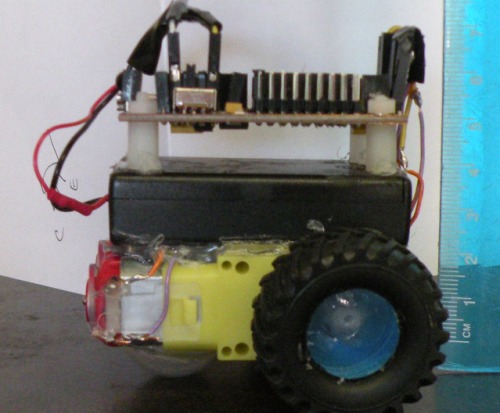
Unfortunately, Fifteen-Minute-Bot had a very short lifespan. Three AAA batteries were not enough to power the h-bridge and motors for more than a few hyperactive minutes. Behold the 15-minute-bot MK2 (aka the 12 minute bot), with AAs and slick built-in status LEDs:
- Micro M
- bigger batteries
- motors
- superfluous status LEDs.
That’s it. The A3906 Dual FET “H” bridge still packs a punch. Mk2 is now too heavy to easily “tip,” so his function will be to drive around and bounce off of walls.
Calculon downloads Oddbot’s latest MicroM library, open up the “DC motors” example, pastes it into Oddbot’s “Impact” example, and tweeks some variables. And off it goes. The entire object detection decide new directon routine takes 1ms. Combine that with with the punchy H-bridge, and this guy is fast and furious. For a few more minutes. 3x AAs are not quite enough for little guy. Too bad, because Calculon was looking forward the slick built-in status LEDs. Maybe get smaller, weaker motors? Nope, we need more power. Calculon has a 4xAA holder, to which Calculon can string another 2x …
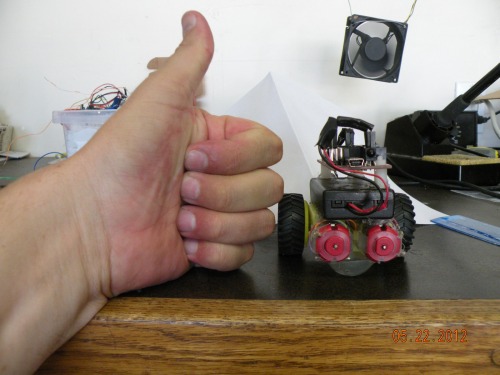
Calculon decides to skip that and goes with a 6V 1500ma LiPo hobby RC pack. Behold the Mk3:
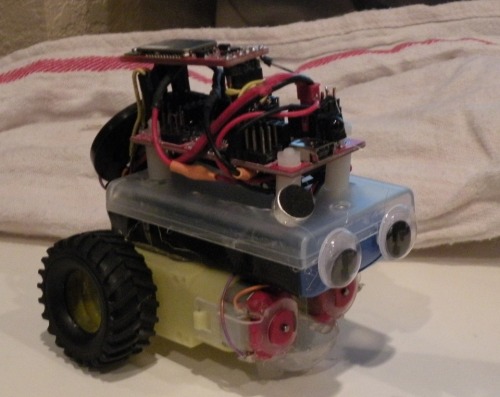
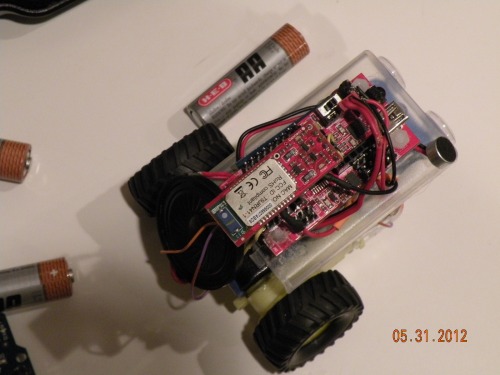
- Micro M, still attached to the previous battery holder lid.
- smaller-and-stronger batteries
- YourDuino Motors
- blueSmirf module and adapter for datalogging his travels to an android phone
- Radio Shack voice module for recording/playing silly things.
That's it. (Actually, Calculon has already removed the Voice Module because he couldn't get it to work reliably). You’ll notice that the bot has no sensors other than the accelerometer. For a simple, squirrelly bot like this one, no other external sensors are needed. Plug it in and go.
When Mk3 encounters an obstacle, he “bounces off of” it instead of backing up and measuring for the best direction. The accelerometer can indicate not only an impact, but the direction of the impact. Calculon coded Mk3 to compare the impact on the Z axis to the impact on the X axis to decide if the impact was on the left or right. A more accurate reading could be made by comparing the delta changes across all three axis, but Calculon is horrible with calculus/geometry/whatever, and is happy with the 75% accuracy of this method.
IR I/O
Calculon can’t say much about the Built-in IR receiver with Sony Protocol, other than “it works”. The bot will respond to an IR signal sent from a 08m.
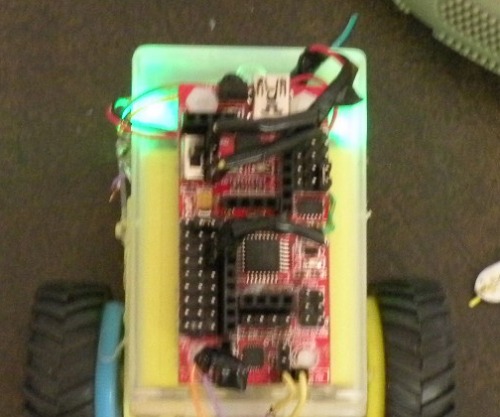
Serial I/O
In a bit of design genius, the MicroM’s Serial Pins are placed in the center of the board, away from the main servo/sensor rows. This is perfect for a blueTooth or similar Serial peripheral. (Calculon had to construct his own little plug in order to match up the TX/RX pins, and remove said module when uploading a sketch). The board is also equipped for ISP.
Digital I/O Pins
The “Androgynous” digital pin area is also useful for servo connectors, but can also take a pin or wire in the traditional Arduino fashion. Via jumper, you can choose to power your peripherals with the duino’s Vout or go direct from the battery.
Batteries
Instead of two battery pins, the MM gives you four, in case you want to put 6 or more AA batteries in a series. :)
Important battery note: The USB connection bypasses the on/off switch. Thus, the Micro will be always-on when connected (like the usual Arduino). The h-bridge requires battery power, however. This confused Calculon for a minute, until he buckled down and read the manual.
Sensors
Being a 3.3 volt Mcu, the MM can’t connect to a 5v sensor right out of the box. You must use a few resistors to separate power the sensors from the battery and still get input. Oddbot has included the necessary schematics in the user’s manual. Calculon will be using them shortly when he constructs a sensor and blueSmirf micro-shield. Stay tuned.
Summary
Once he got his power issues (which are probably the motors’ fault anyway) Calculon has been delighted with the MicroM, and recommends it to any practitioner of Arduino. With a little smart programming, you can start with a perfect prototyping platform for a mobile bot that doesn’t require an additional shield or sensors to be up and running. You can pick one up here or talk to Calculon's heroes at DAGU..
