

Inspired by many other mouse bots I want to build my own one. Some parts are already collected and ready to being used.
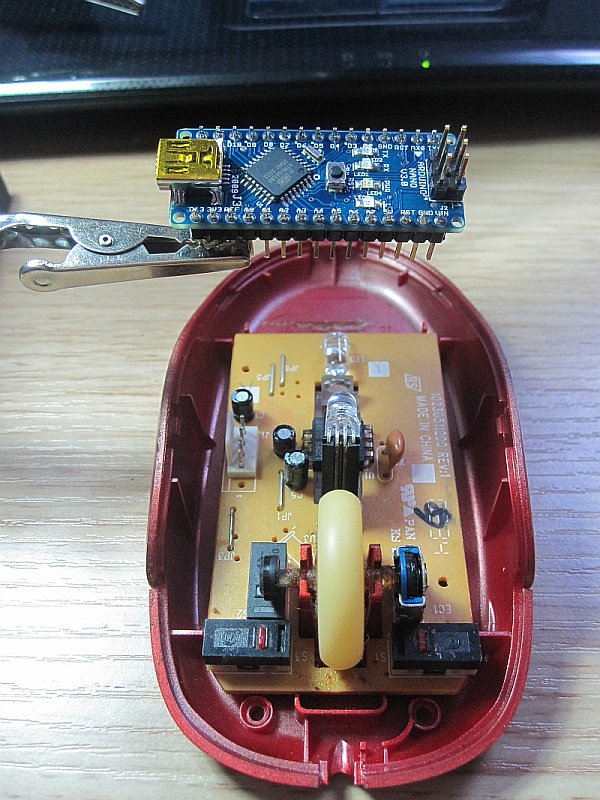
The bot should follow the light, detecting the edge of the table and change direction when a sensor (mircro switch) is triggered. I want to keep the mouse board inside to have a feedback from the mouse LED in the bottom. Still no idea how/for what to use it but it's there and why not make a use of it. Also a very fancy 3 colour LED is included.
No time to start yet but after my holiday...
UPDATE May 12 2011:
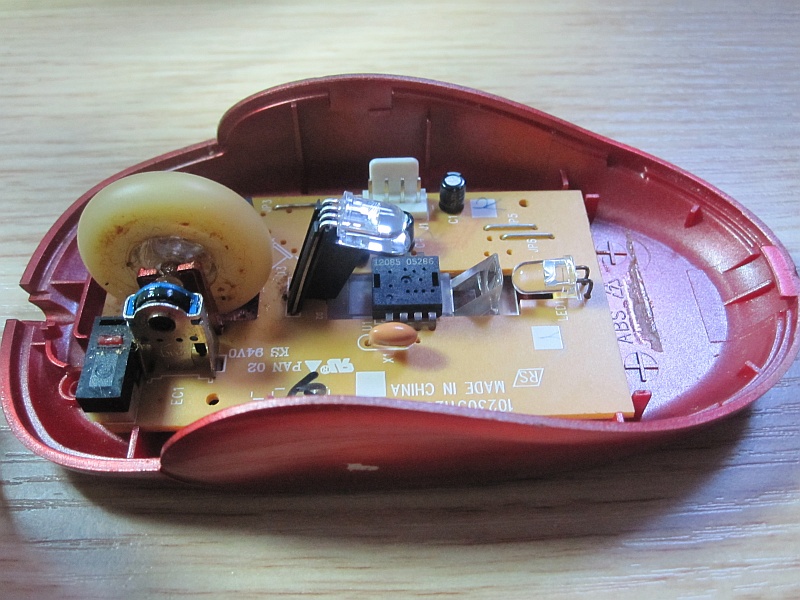
Got some time to proceed. I canceled the idea with the tracking LED since the bottom is to high above the ground to trigger it. so i rip-off out the mouse board completely.
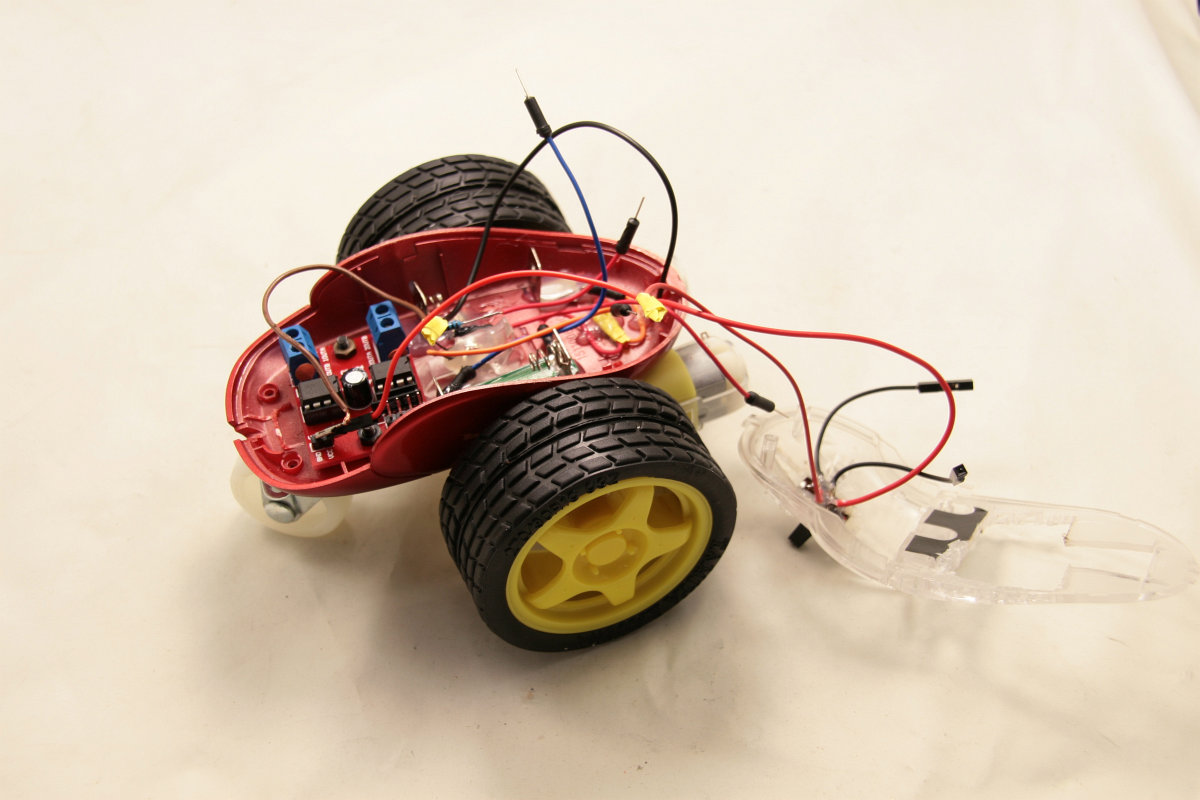
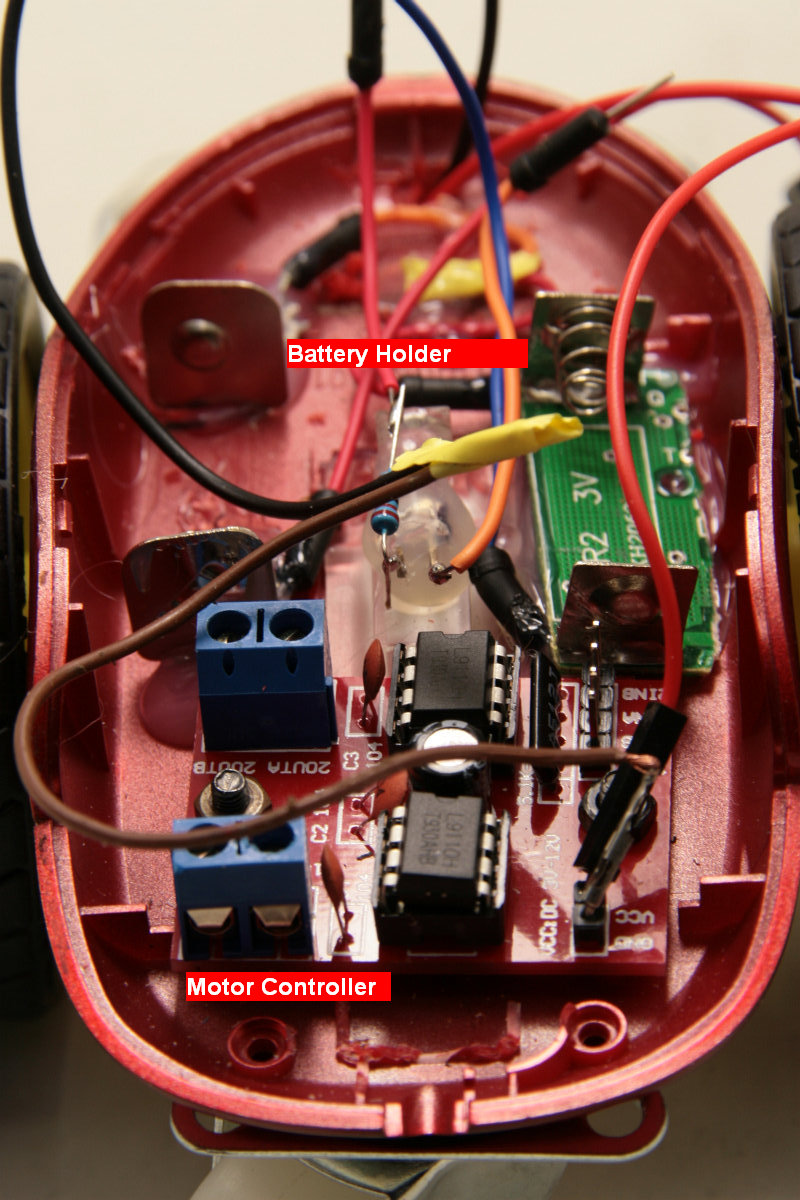
This is the currend state. The motor controller is in and two battery holders as well. One of the battery holders i glued just two metal clips of an old holder into the mouse case and the seconmd one is break out holder from a board. These two battery holders are for CR2 batteries since I have plenty of them with no other use. These are connected in serie to supply 6V for the Arduino.
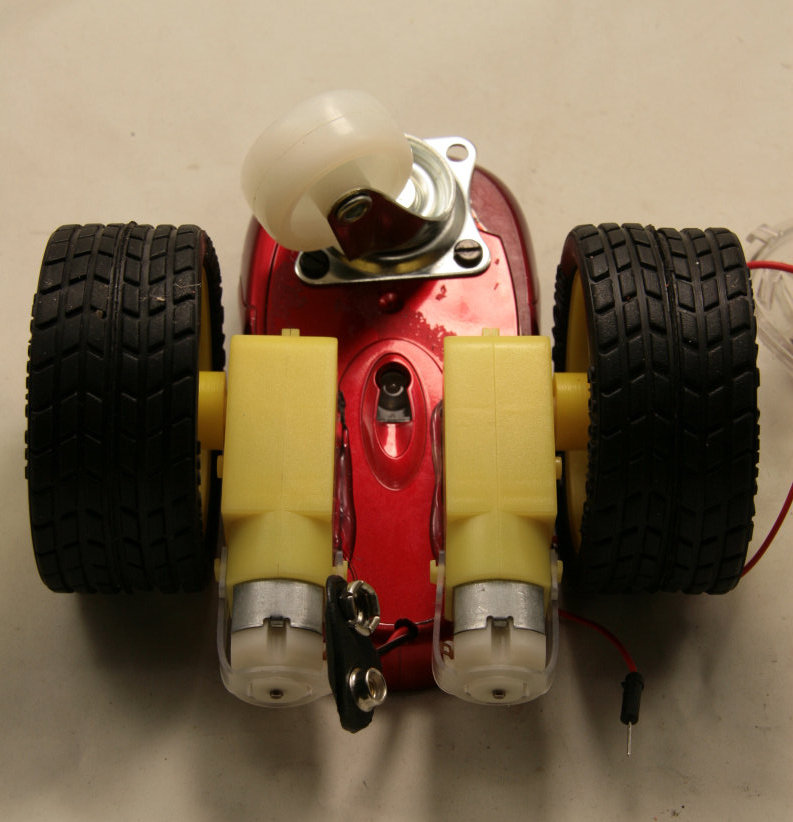
This is the bottom side with the hotglued gear motors and the back wheel. The battery clip is for a 9V battery to power the motors.
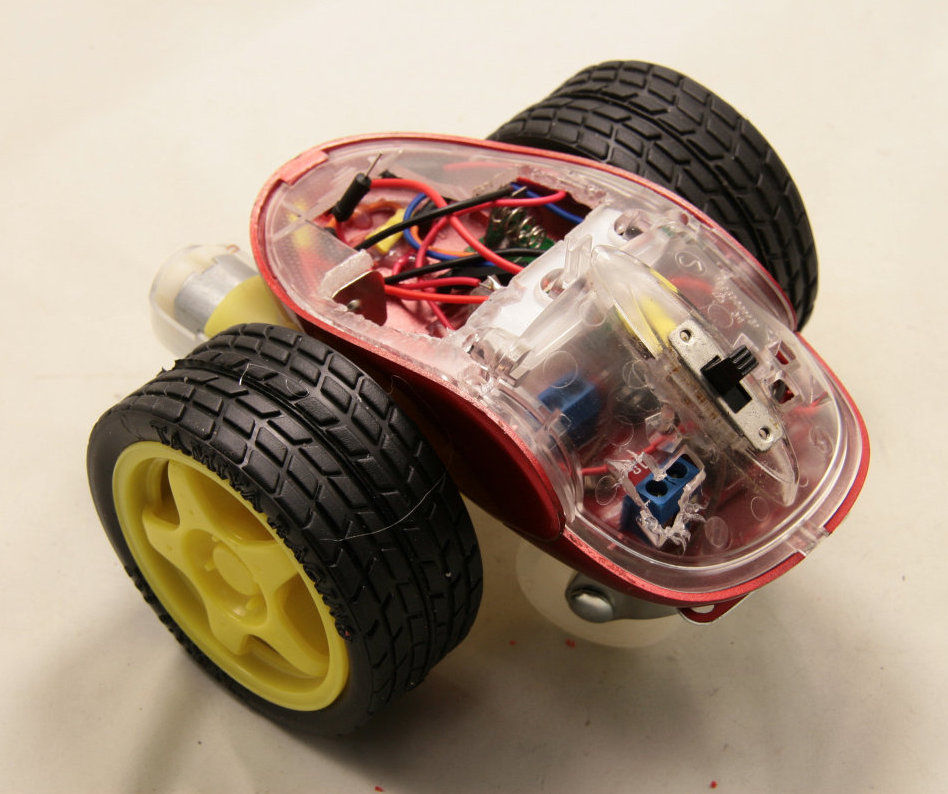
This is with the first cover (the final upper cover of the mouse is still not attached. On the backside is a switch to power on/off the Adruino and the motor power. The opening on the left (front side) is for the Arduino Nano and some head space for the batteries since the room down there is not very high...
It's not what I planned in the first place but I like it. Those big wheels and the little mouse case match perfectly.
The next thing is to attach an infrared sensor in front (also canceled the micro switch) to get an idea how to use these sensors...
UPDATE May 15:
After struggeling with the power supply i learned that the 9V block battery is not suitable to power the gear motors. I had to replace it with 4x AA Eneloop for now.
UPDATE June 6:
Well, do you also have the experience that projects not could be done as planned? Here we go, LMouseR are finished but not as expected. Even with the standard Arduino Nano I did not get all the guts under the hood, so the mouse cover is thill not closing tight. Anyway, this is the final status of LMouseR, please watchg the video.
I got 2x AA batteries as the replacement of the 9V block battery and see how slowly it moves. Kind of cool i think and I am still loving those big wheels. Maybe leter I will reactivate this project and put one power source (LiPo) in or under to get the cover closed.
UPDATE June 11:
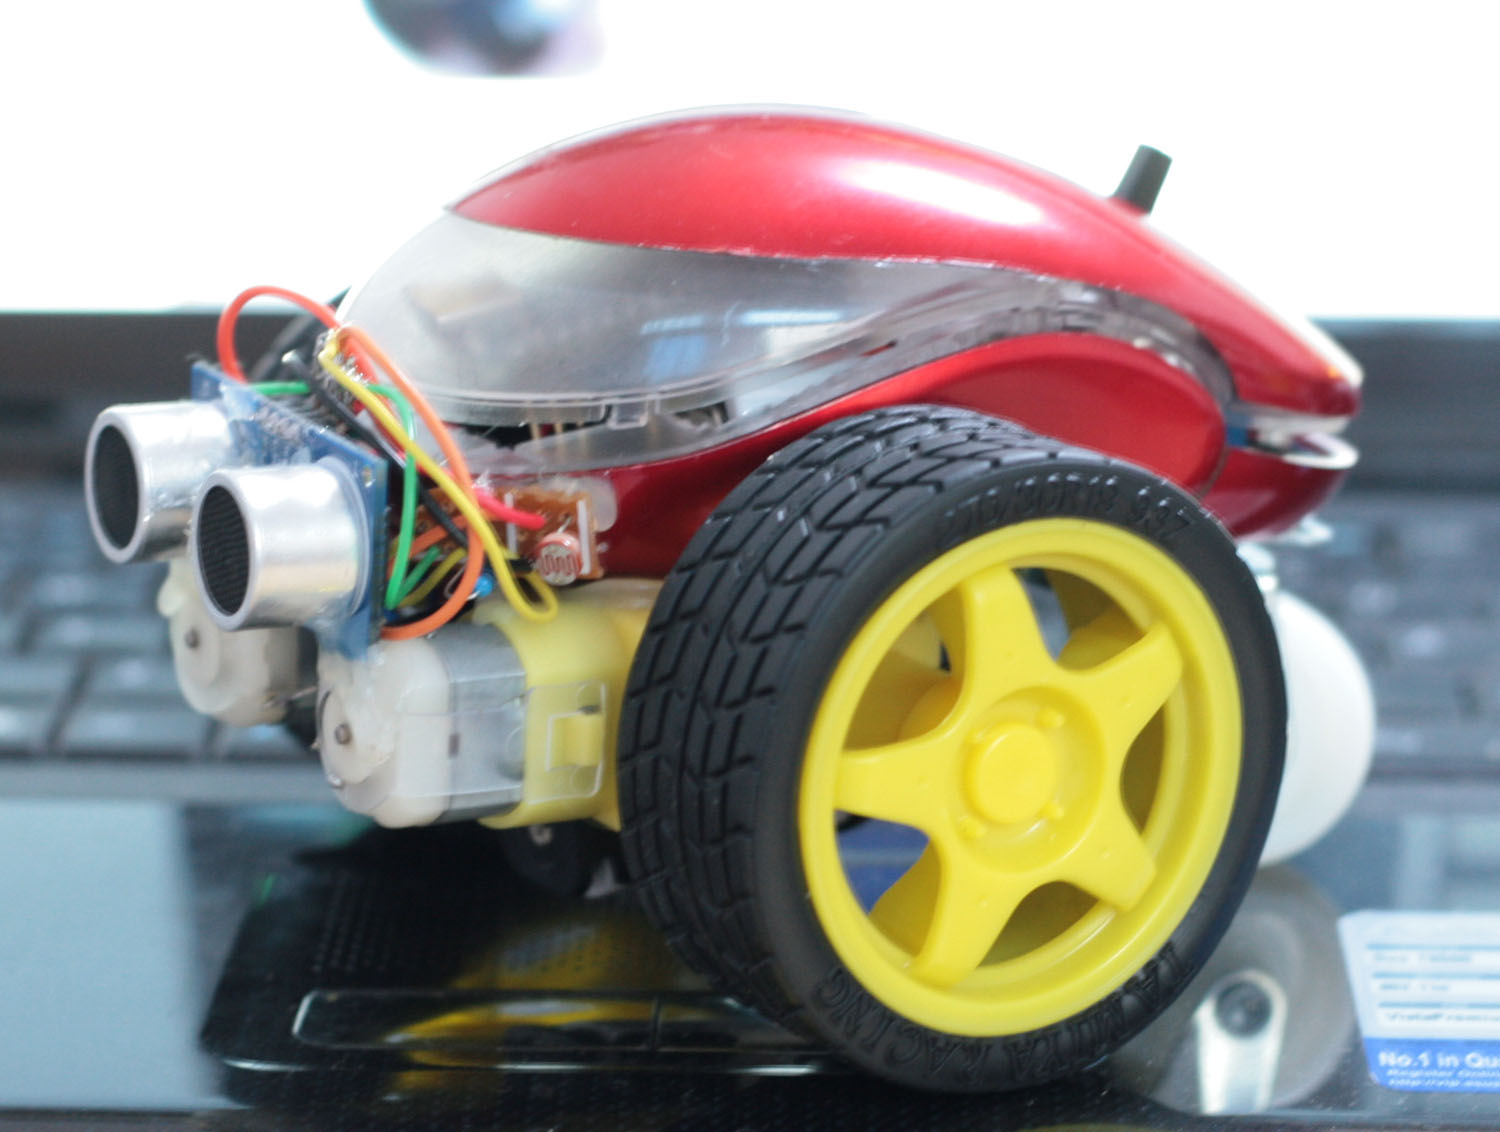
Do you know the feeling when you have something (an idea) in mind? I just reactivated the as finished considered LMouseR and put two light sensors on it. Why? OK, i found two unused photoresistors and remembered that I wanted to solder the pieces together to check how I can use it. So i just did and hotglued one to the left and one to the right front side. Then I hanged the code in the program to follow the light. Still not sensitive enough but it gives the little bot a very different behavior and motion pattern. Will try to get a video taken and uploaded by this weekend ;-)
UPDATE June 13:
As promised and on OddBot'S suggestion I changed the picture with one of the current status. I also atached the code for the upgraded version, the one with light sensors. As you can see the light sensors are just hot glued on the front side of the mouse and the mouse cover does not close thight since it's not enough space inside. Will see if I can make another one with a smaller Arduino.
Avoiding obstacles, chasing light
- Actuators / output devices: Plastic gear motors
- CPU: ATMega128
- Operating system: Arduino IDE
- Power source: 2x CR2 batteries for Arduino and 2x AA battery for motor
- Programming language: Arduino ide
- Sensors / input devices: 2x LDR, 1x SR-04 Ultra Sound
- Target environment: indoor, table
This is a companion discussion topic for the original entry at https://community.robotshop.com/robots/show/lmouser
 My target is to see how to get all this into the small mouse case.