

Introduction.
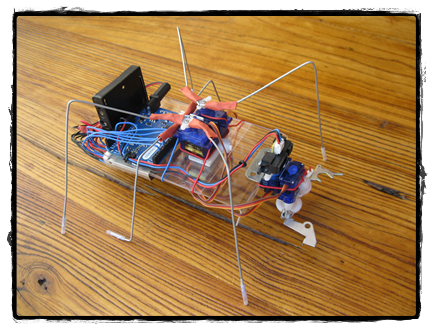
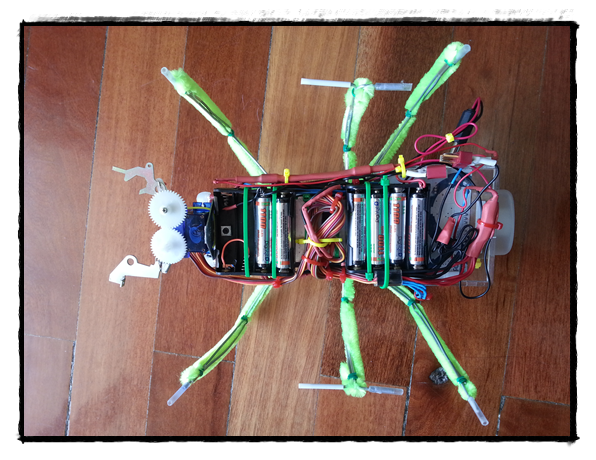
Here is LEO, it is a three servo hexapod, this is the first robot I have ever built in my life. The build of this robot has been achieved thanks to LMR and several Google searches. LMR gave me the knowledge to make this project possible. I decided to upload the LEO project in order to help other persons that, like me, are searching for information and ideas to make their own robots.
The Robot.
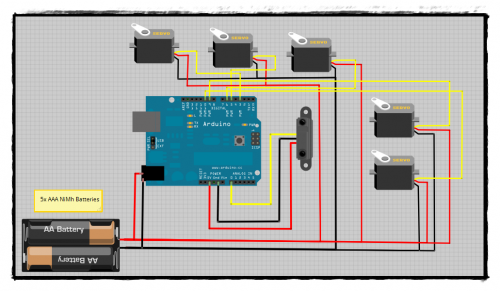
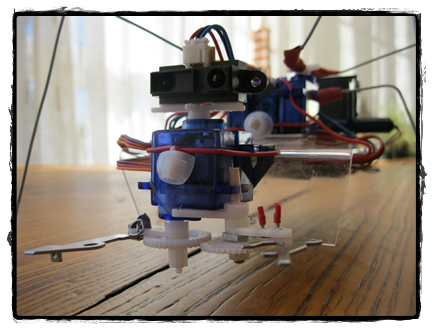
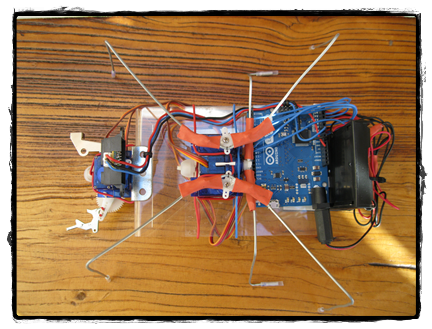
LEO is equipped with 5 servos, three of them are used for walking, another is used to move the IR sensor and the last one is powering the gripper.
As input devices LEO has a Sharp IR sensor which is used for navigation, in order to operate the gripper and other functions.
The microcontroller that is controlling all the stuff is an Arduino Leonardo with headers.
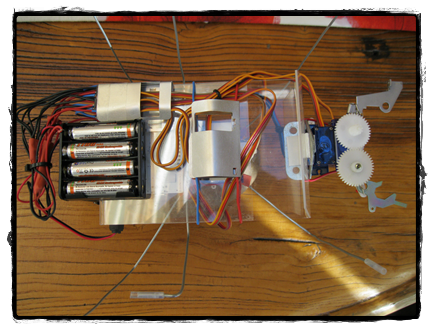
LEO is powered with five (six, updated) 1.2 V AAA NiMh rechargeable batteries, these are powering the servos directly as the diagram shows.
By the moment LEO can walk avoiding objects, grab things , sit down or track objects and go to them.
Components.
Arduino Leonardo.
2 AAA Battery holders.
5 Servos .
Sharp IR Sensor GP2Y0A21YK0F.
Updates.
If I have more time I will update the project with the code that LEO is using.
--------------------------------------------------------
That’s all. I hope you enjoy this project.
Sorry for my poor English.
Photos……
APRIL UPDATES
Update 20/04/2013
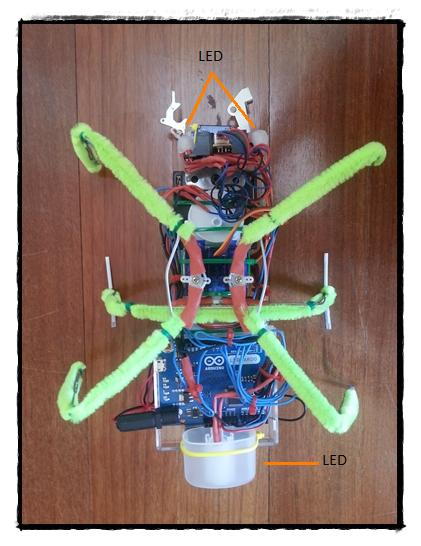
I have redesigned the robot frame with an aluminum plate and reinforced the legs (after that, some green fur :) ).
I have also moved the battery holders from the previous position to the place shown in the photos.
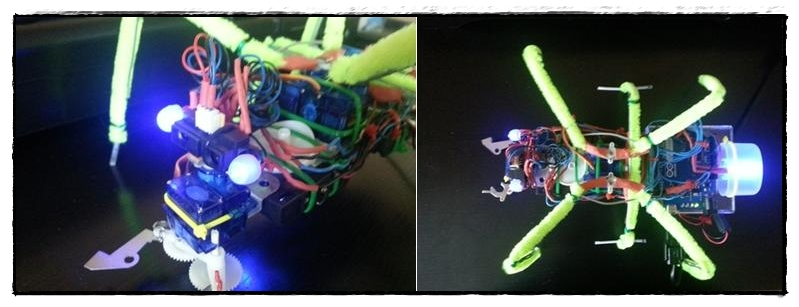
In addition, I have added 4 Blue LEDs, two attached to the IR sensor and the other two are in the body.
I had said that the code would be published soon but I am still working in the "final" code. I am trying to develop a "behaviour code" or something like that. Anyway, the final code is still in progress but the basic code ( Navigation code) will be published this week.
If you have any doubt or something like that just leave a comment.
Here are the photos:

Update 24/04/2013
Arduino Code published.
This code includes functions such as Navigation, Gripper interaction and rest intervals.
I will keep posting the next code improvements .
Comments for code improvements are welcome !
SEPTEMBER UPDATES
Update 20/09/2013
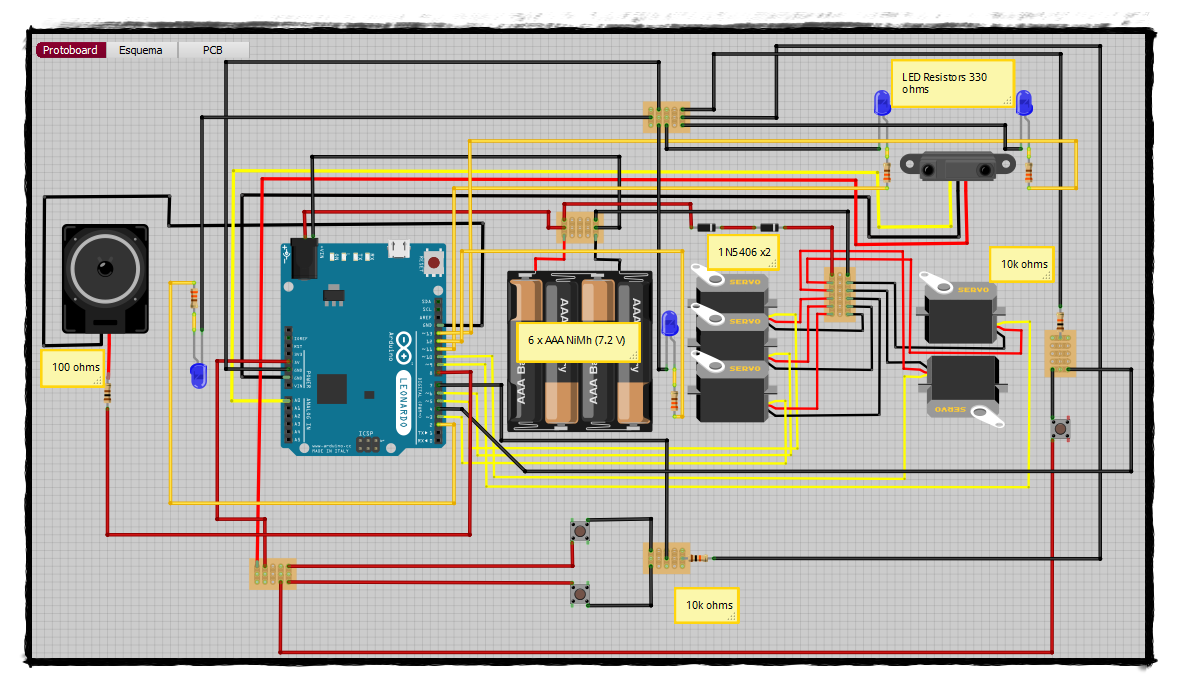
I decided to make some improvements regarding the power distribution of the robot in order to overcome several problems that I had.
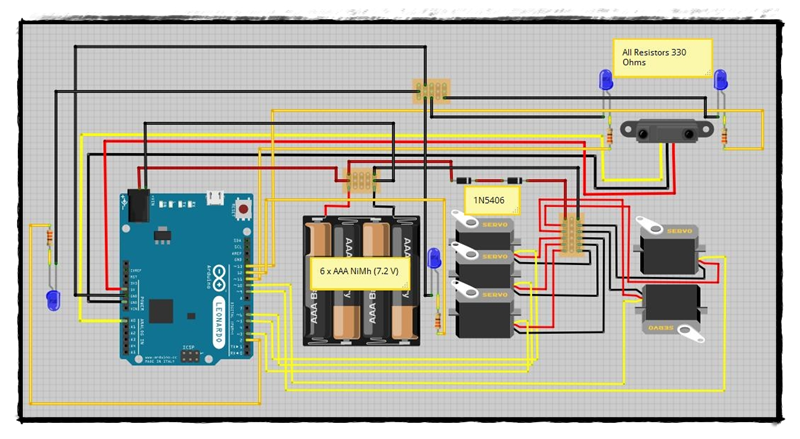
First of all, this is the updated Fritzing diagram with the LED’s and all the previous stuff that I had added. The diagram is arranged as it is distributed around the robot to make things easier.
Power supply improvement.
As the diagram above shows I have modified the power distribution of LEO.
I have added another AAA battery and as a result the total voltage is of 7.2 V.
Why?
Arduino Leonardo board .
I realised that the Arduino board was working within the voltage limit which is of 6 V and for that reason the robot stopped working after a few minutes and the capacity of the battery pack was also wasted because of the discharge curve of the cells themselves.
To cut a long story short, the batteries fully charged were around 6 volts and the Arduino board worked pretty well but when the voltage dropped below 6 volts , the board stopped working .However, the batteries were still charged with roughly the 60 % of their capacity.
The new power distribution is much better because the Arduino Leonardo board now works at 7 V more or less which is the recommended voltage, note that it is connected directly to the battery pack.
Servos .
The servos of the robot have to work between 4.2 and 6V and connecting them directly to the 7.2 V battery pack would fry them.
Trying to find a solution to reduce the voltage I found a post here, at LMR, in which OddBot describes how to regulate the voltage for our robots. I would recommend taking a look at it, specially, if you are a beginner in the hobby like me!
https://www.robotshop.com/letsmakerobots/node/3880
Anyway, in one of the answers given by him is detailed not only how to use diodes to drop some voltage but also the things that you have to bear in mind before you can use this method.
As the Fritzing diagram shows I am using two 1N5406 diodes in series. Those diodes are rated for 3A and the forward voltage (voltage drop) specified on the datasheet is of 1.2 V but as it is pointed out by OddBot in the post above this voltage varies with the current.
The range of forward voltage for my diodes goes from 0.6 V (0 A of current) to 1.2 V.

(These diodes are huge)
After that, the servos are working between 4.8 and 6 V which meet the requirements given by the manufacturer.
After the improvements.
Now the Arduino board works like a charm and the servos work within their specs. The diodes seem to work pretty well also and they get a bit hot but not too much, as I had expected.

That’s all for now. I hope you find this information useful.
If you have any doubt about something just leave a comment.
Update 25/01/2014
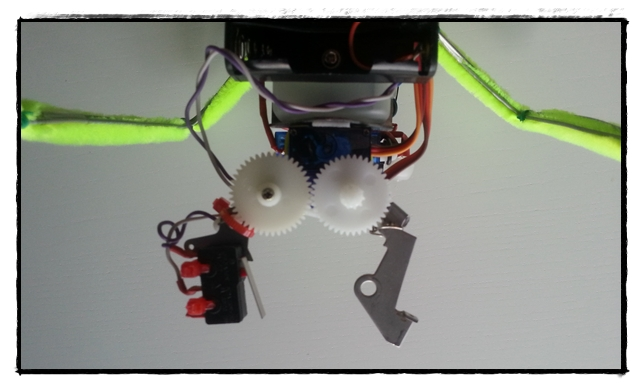
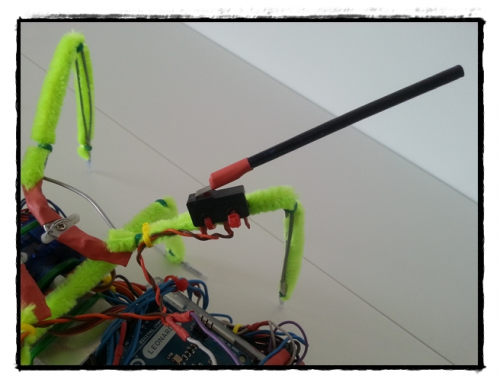
I have added two new features to the robot:
Micro switches
Two of these micro switches are attached to both side’s legs, the other micro switch is placed right in the left part of the gripper. I am using these three micro switches in order to give inputs to the Arduino board and control different functions or behaviours of the robot.
Speaker
The speaker is placed underneath and makes the robot to be funnier by playing sounds.
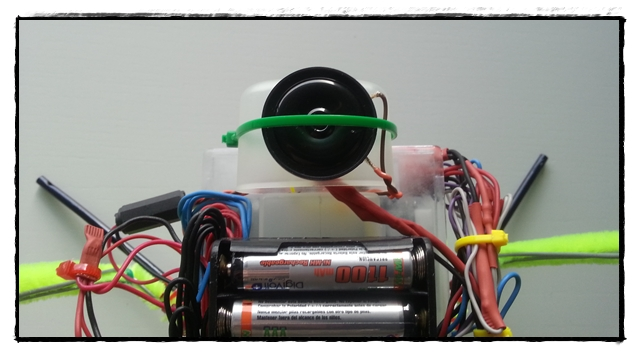
All this stuff is arranged as the diagram below shows.
The NEW and Updated code is also available for download; the txt is attached next to the old code at the beginning of the entry.
I have also added a NEW video showing the behaviour of the robot finished.
This will be the last update because I consider that now the project is FINISHED.
I hope you have enjoyed the project and learned something new.
Navigate around via IR Sensor, Object Tracking, Gripper ...
- Actuators / output devices: led's, Servos
- Control method: autonomous
- CPU: arduino leonardo
- Power source: 6 AAA Ni-Mh Batteries
- Sensors / input devices: SHARP IR sensor, microswitches
- Target environment: indoor on smooth surfaces
This is a companion discussion topic for the original entry at https://community.robotshop.com/robots/show/leo-3-servo-hexapod-based-on-arduino
