

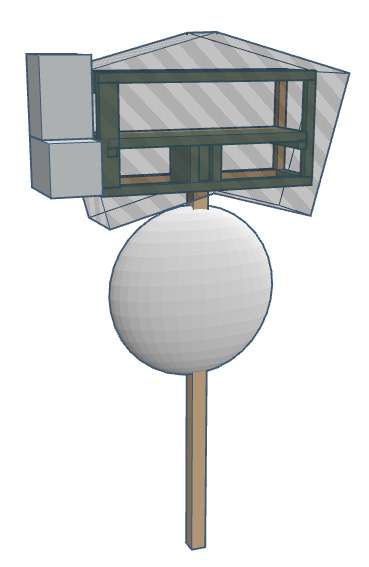
I recently created Moo-Bot, a robot cow scarecrow jumping over the moon, for a local scarecrow competition. My inspiration was from my 3 year old son singing "hey diddle diddle, the cat and the fiddle..."
The project was a lot of fun to work on with my son, and I blogged about it in full detail here:
http://www.justmeasuringup.com/blog/robot-scarecrow/
It wasn't too difficult of a project, and would love to share it with others for inspiration on their own projects this Fall.

Here's how I built this robot:
Step 1: I did a lot of research on cartoon and real life cow images to get inspiration on my model. Then I sketched out what I wanted on some paper, and went to TinkerCAD to model everything in 3D. The 3D model allowed me to get all the proportions right and was easy to convert the virtual model into a physical build.
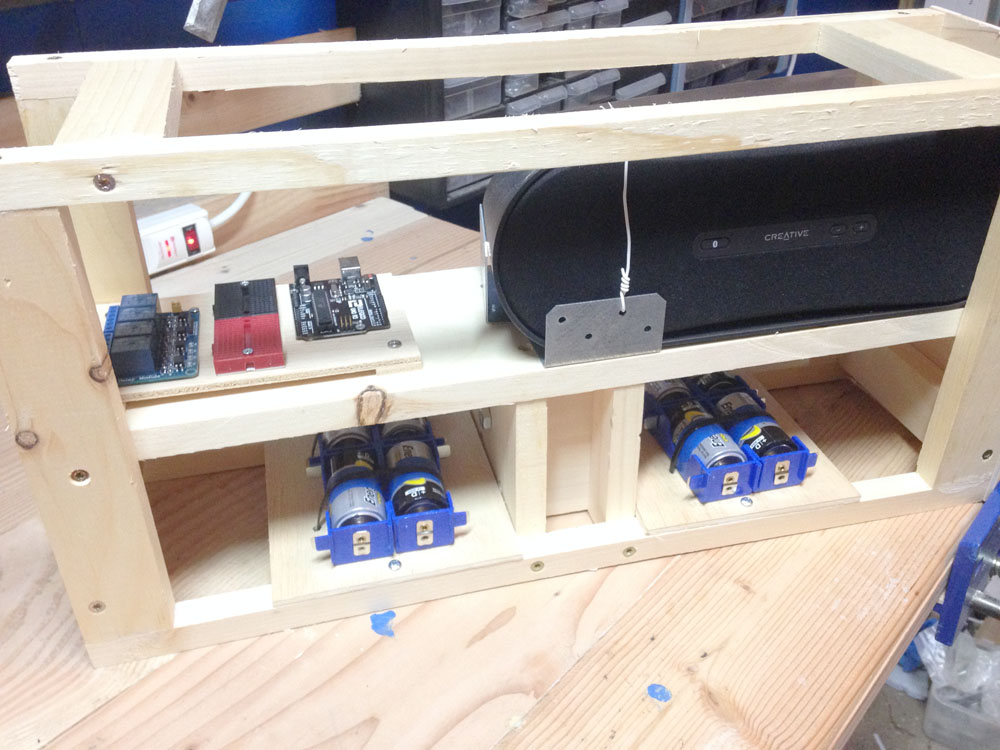
Step 2: I constructed a wooden frame for the body to support the sheel metal skin. The frame also had to be strong enough to hold the electrical equipment (large speaker, circuits and 8 large batteries)
Step 3: I added in a power toggle switch to activate the system. Once turned on, the robot was programmed to automatically sleep after 60 seconds of idleness, to conserve on batteries.
I also added in some other useful toggle switches later (one to toggle between low/high volume, and the other to turn on a stats mode where the LED eyes would show useful statistics on how people were interacting with the robot).
Step 4: I built the head next. I created a wooden frame first and then wrapped it with sheet metal.
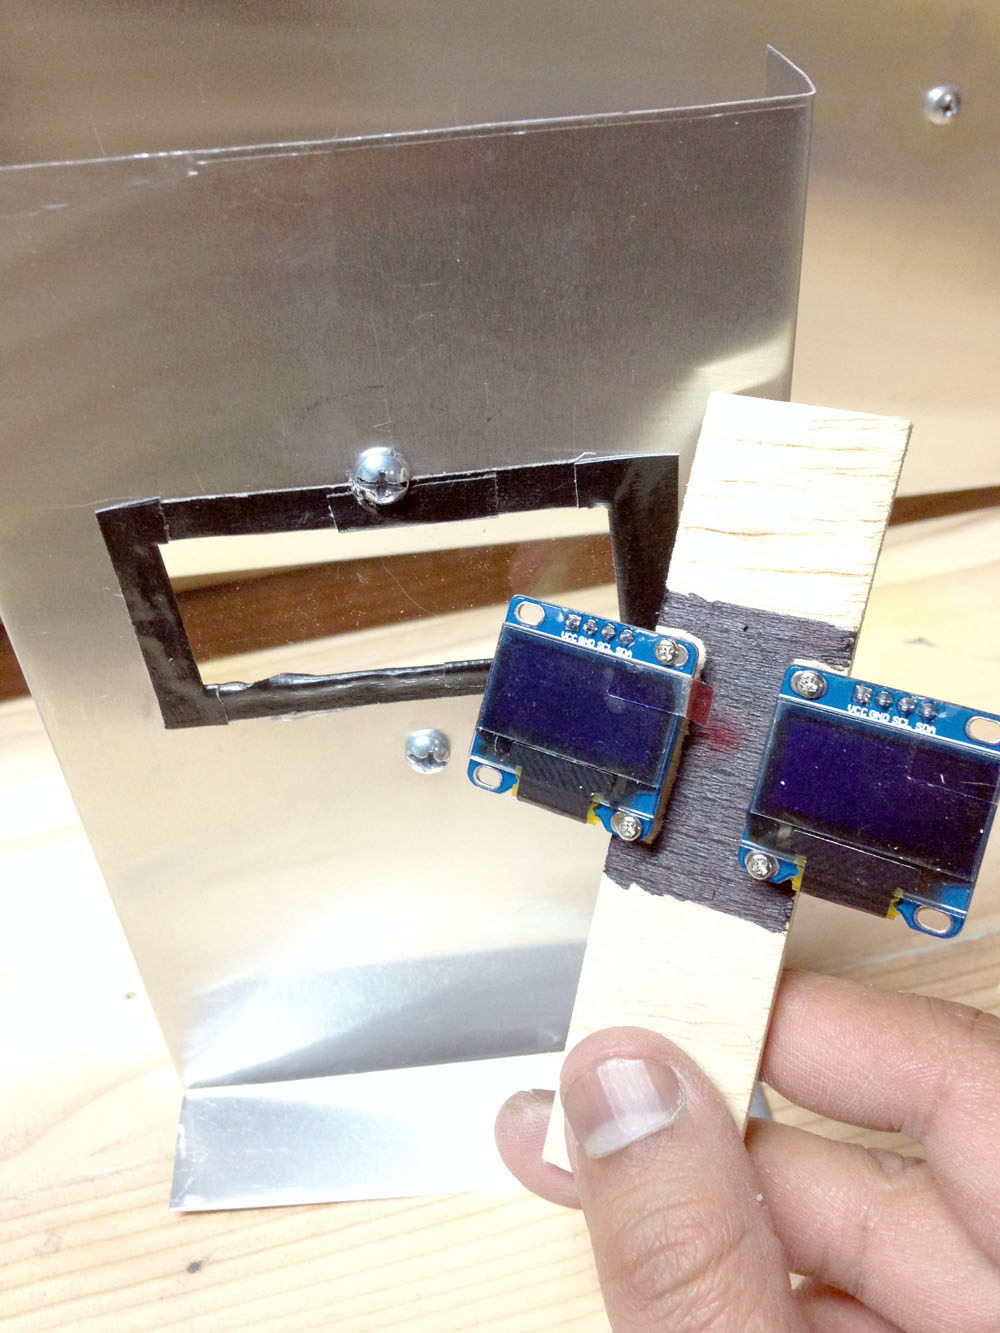
Then I cut out an eye hole, affixed a piece of plexiglass to keep rain out, and attached two LED eyes.
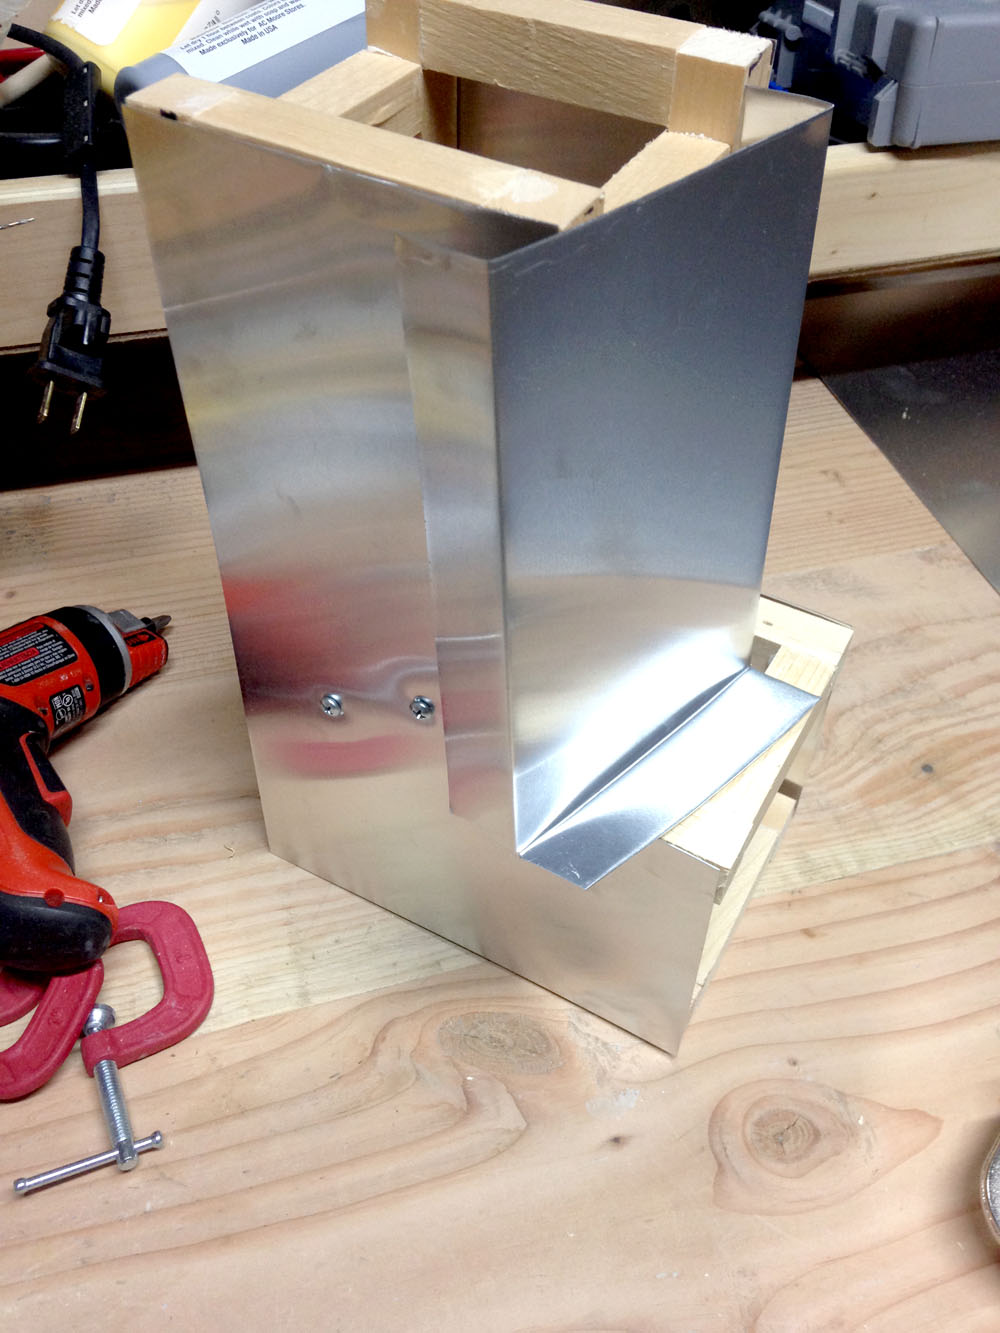
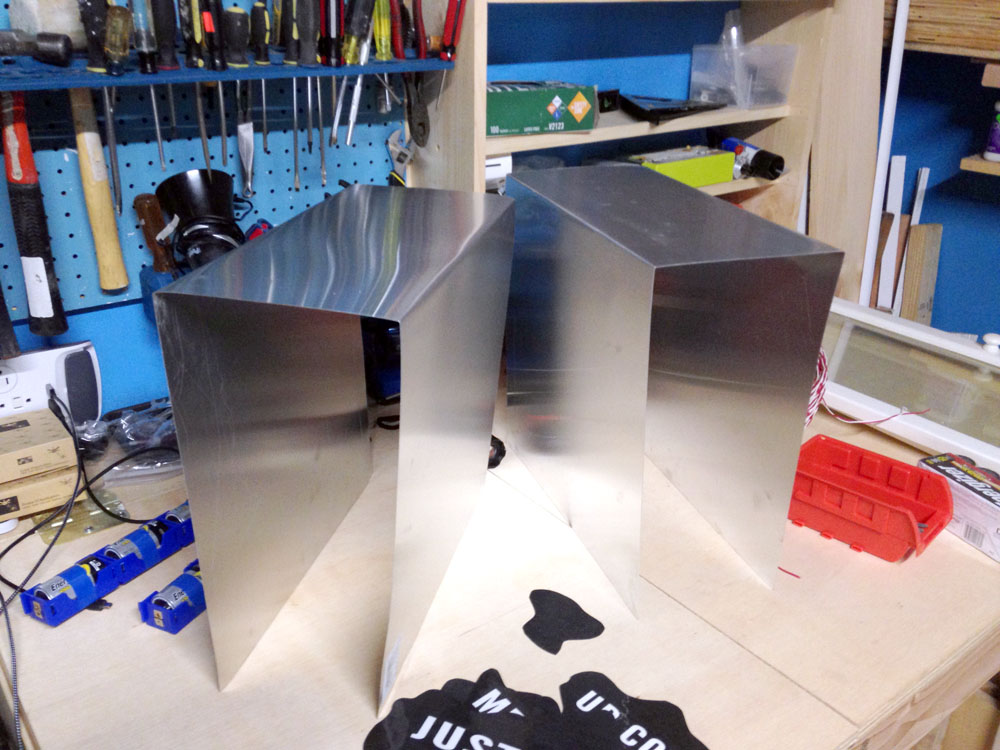
Step 5: I tackled the sheet metal for the body next. I cut two large rectangular sheet metal pieces, put it into a special folding jig I made, and produced two U shaped boxes.
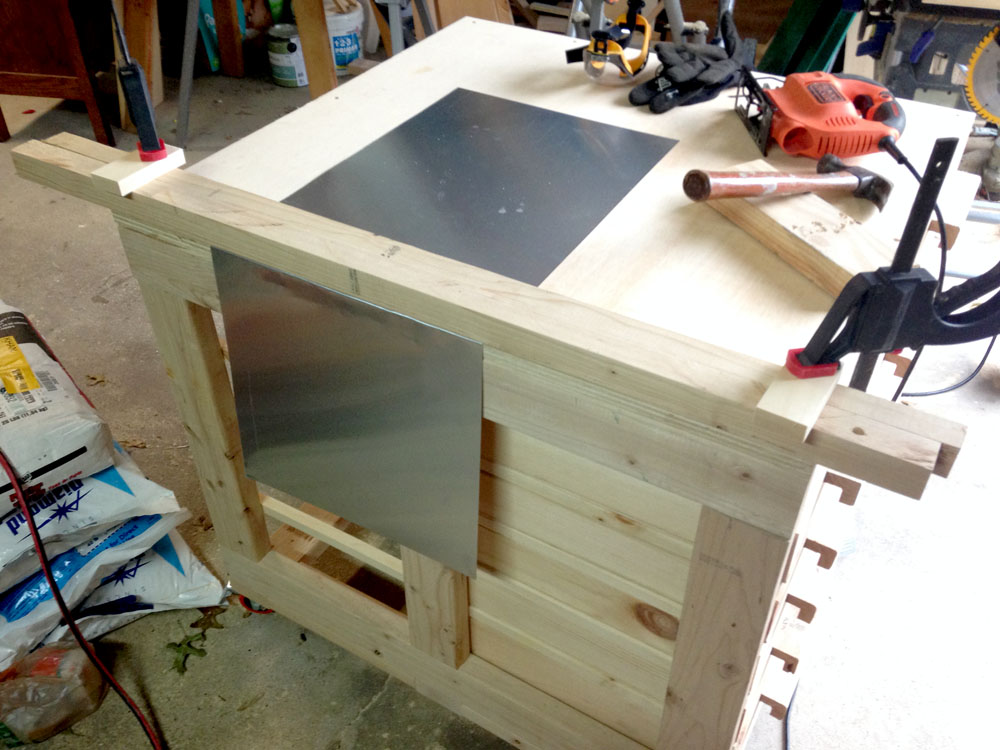
Then I connected the boxes (with screws/bolts) to form the body enclosure.
Step 6: I attached the enclosure to the body frame with screws, and cut out a large access panel on the back.
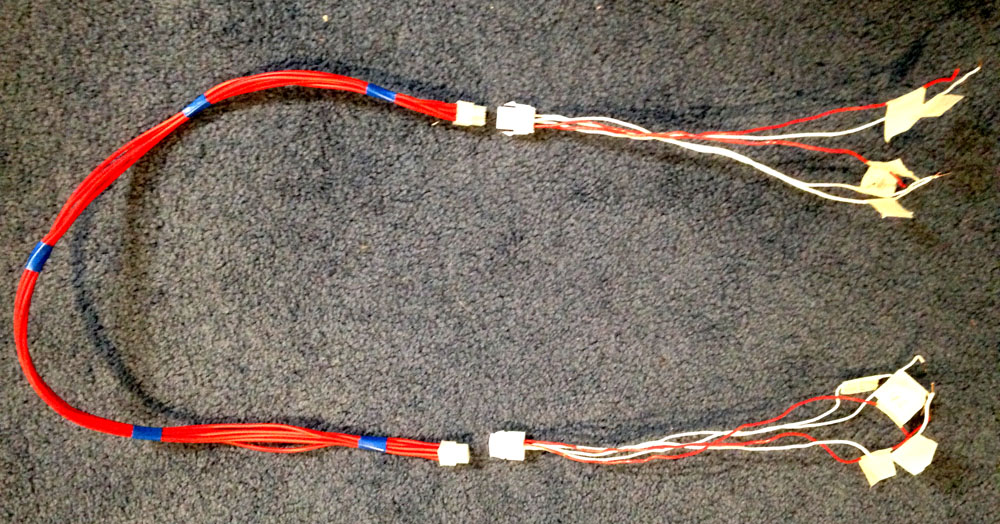
Step 7: I re-purposed some computer power supply adapters (PCIE adapters) to make a plug/play design for the head. The head literally just plugs into the body with one plug, rather than dealing with a whole bunch of wires. I really enjoyed this step.
Step 8: Next, I reinforced the scarecrow post with metal, just in case heavy winds put undue stress and tried to snap the post.
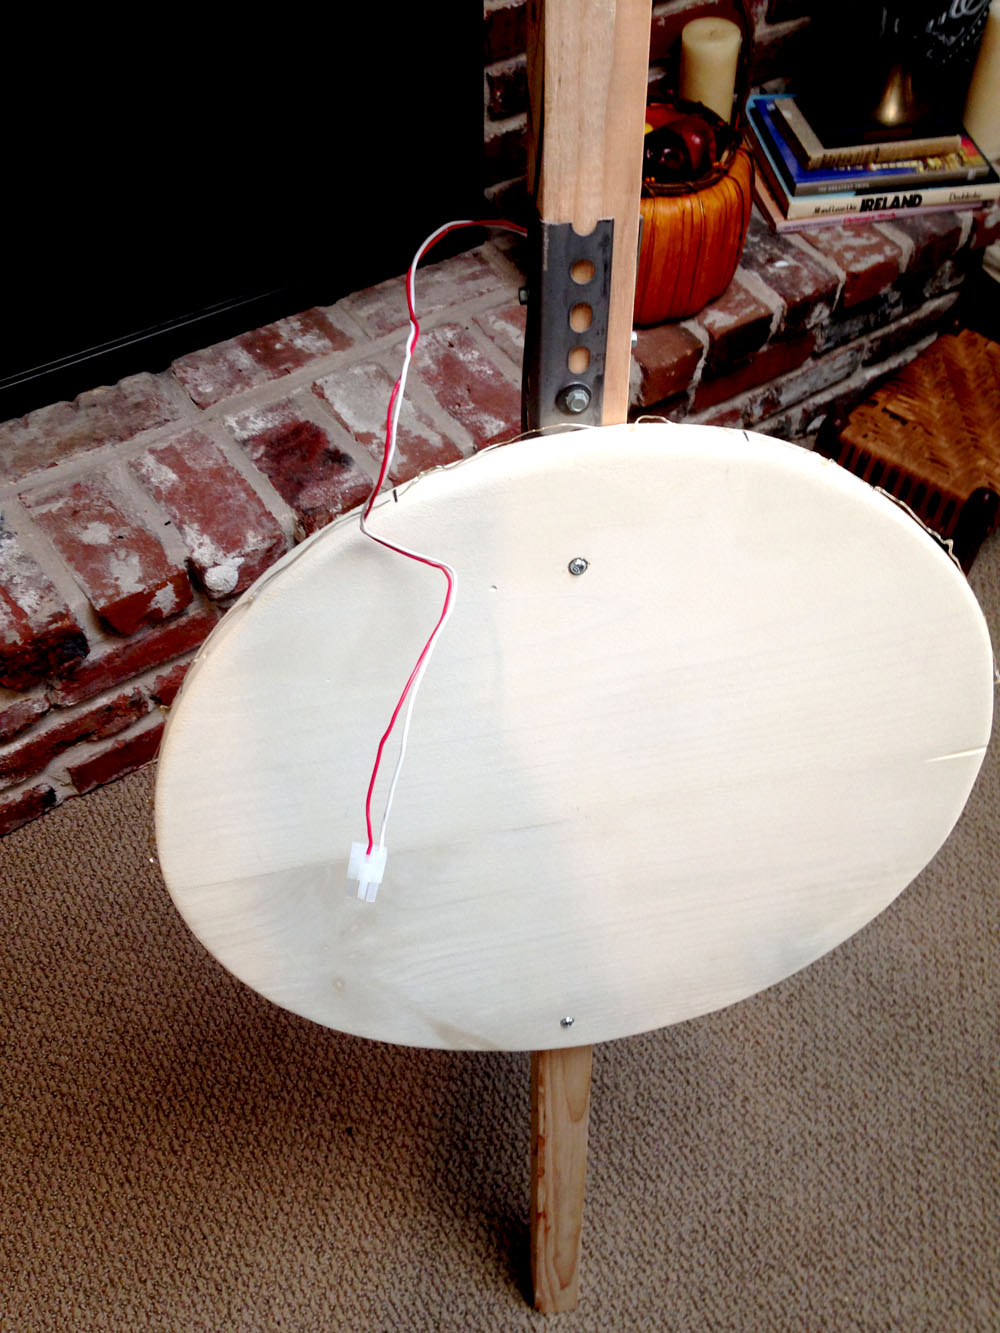
Step 9: For the moon, I joined two boards together to form an 18" square, cut a circle with my jigsaw, sanded and painted it, and attached to the post. Then I wrapped with an LED string light and make another PCIE adapter connection to plug into the body.
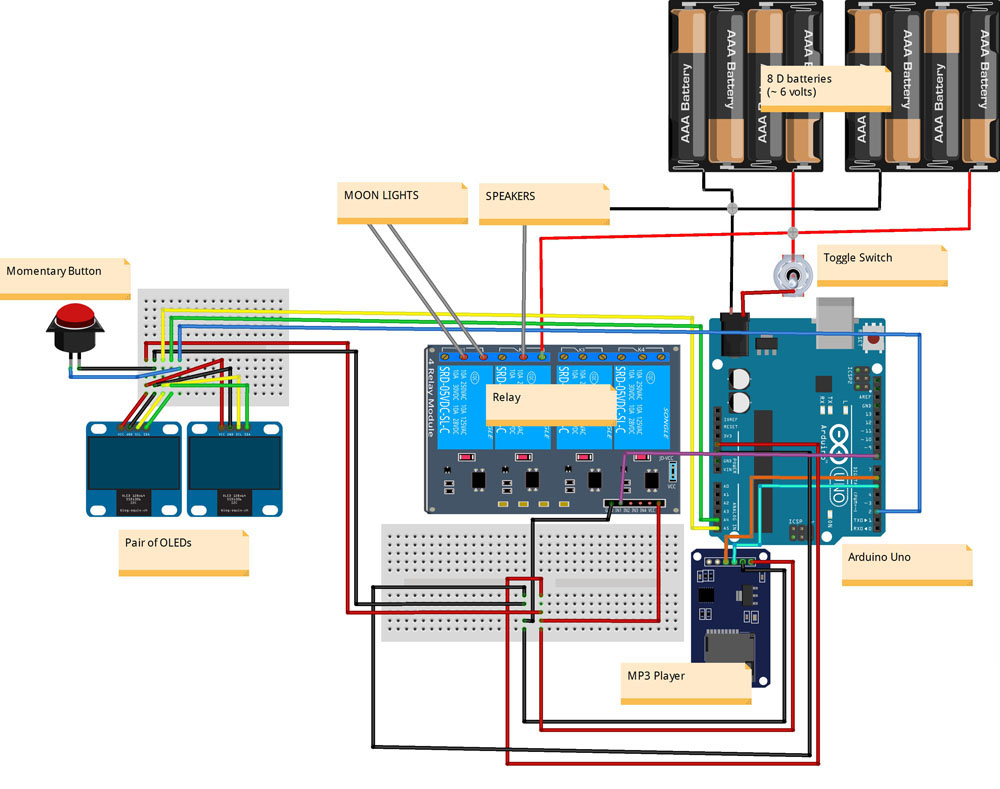
Step 10: I flushed out all the circuitry and code. An Arduino Uno powers the robot to do a variety of things, such as playing mp3s when the interaction button is pressed, animating the eyes, going to sleep, turning on LED moon lights, etc.
Here is the full circuit diagram.
Thats it! Next year's scarecrow competition will see Moo-Bot V2 with a host of awesome upgrades (animatronics?)
This is a companion discussion topic for the original entry at https://community.robotshop.com/robots/show/how-to-make-an-amazing-robot-cow-scarecrow