

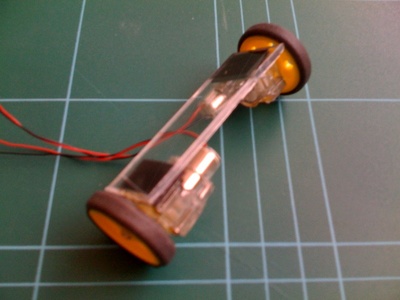
Here's the photo of my first original bot - HairyBot 1, so called due to the abundance of wires from this breadboard on wheels. It's a pretty simple setup, made up of the following principle parts:
- Arduino Nano
- GP2D120
- 2x GM10 Motors
- L293D Motor Driver
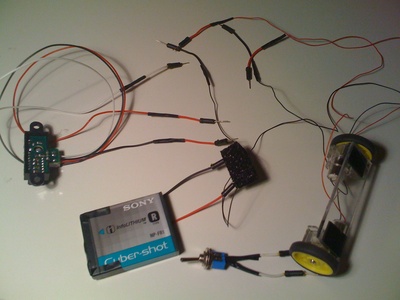
So far the software is pretty basic, since I've built everything tonight:-) It goes forward, then into reverse if it gets too close..... That's about it. The problem right now is that the motors are too weak. The 2 GM10's are powered by 3x AA batteries. I might switch to 2x GM9's or try and find a lighter power supply, or both. Then I can do a bit more programming.
I've previously built Fritsl's 'start here' robot, which had the same sensor mounted on a servo. I decided to leave out the servo, to try to keep weight down and simplify things a bit. Other than that, theaim of the bot is pretty similar, but on Arduino rather than Picaxe. One interesting benefit of this is that it forces you to start from scratch, since I had difficulty finding one place for information on the platform. Lots of tutorials, but you still have to put together the pieces yourself. It forced me to understand a bit more. There are still gaps, but it works. Kind of! I'll update when I work a bit more on it.
Update 1 (12/10/08)
After a busy month or so, I'm back on the job. Here's a pic of the wheel base I built. It's a single piece of HIPS - High Impact Polystyrene. I picked up a couple of sheets - 2mm and 1mm thick from 4D Model Shop in London. I intend to place this on the centre of the base to have a more sturdy structure. I've also rescued a 3.6V, 1000mAh LiIon rechargeable battery from an old camera which will hopefully be able to power the bot. Maybe once that's done I can call time on this bot and move onto a more permanent design. I figure HairyBots are my prototypes - I can come up with something more suitable for nicer bots.
Update 2 (13/10/08):
Spend a bit of time preparing various components for use with the breadboard by soldering pins to them. Should be much easier and more reliable to wire up now. Could do with a battery box though. Any suggestions? I'm guessing buying a plastic box in maplin and hooking something up that way - I want to be able to recharge the battery and replace it on the bot quickly and easily.
Update 3 (19/10/08):
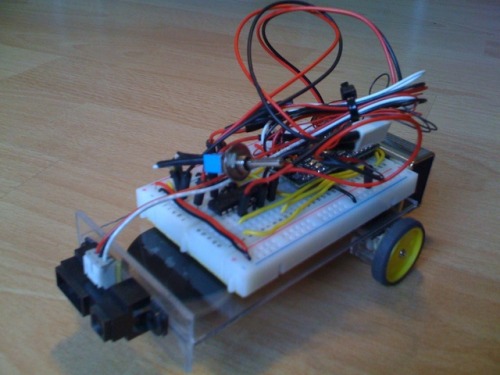
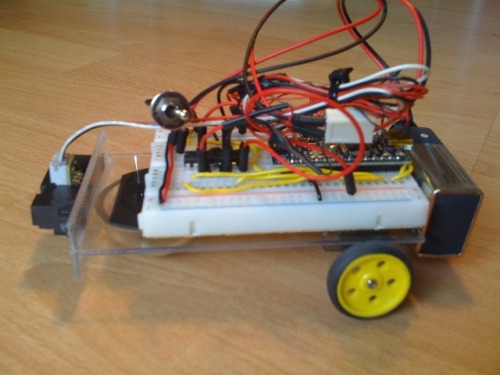
A couple of pics of thelatest version. In an attempt to have it moving more accurately (in a straight line!), I paid a bit more attention to the chassis. I found out you can cuts styrene pretty easily by scoring with a sharp knife and then snapping. Makes it very easy to create simple shapes quickly. I also attached a plastic hemisphere to the front bottom to keep it all relatively level. Not too keen on the positioning of the battery - I'm keeping it back to put some weight on the wheels (badly distributed weight was a problem initially), but I'd prefer it underneath - I may play with that next.
I'm also unhappy with the motor mounts. They're attached on a plastic bar (photo above). They'vebeen attached with double sided foam tape, but I don't feel they're secure enough. I'd like to make them a bit more solid, but still easily removed at a later date.
As for code, all I've got for now is code to move forward until an object is sensed within a certain range, then rotate in a random direction, and try again. A bit crap, but I'll do something better later :-)
Wall avoiding aimless robot
- Actuators / output devices: 2x GM10 Motors
- Control method: Arduino
- CPU: atmega168
- Power source: 3x AA
- Programming language: Arduino
- Sensors / input devices: Sharp GP2D120 IR sensor
- Target environment: indoor
This is a companion discussion topic for the original entry at https://community.robotshop.com/robots/show/hairybot-1
