

During my week of final exams I had almost nothing to do after my half-days of school, then I had a revelation, why don't I make a robotic arm. The fact of the matter was I recieved ten servos as a birthday present, and with almost no other use I thought a arm would be cool. I based my design off of a few robotic arms availible from Lynxmotion, but I think mine turned out much cooler with the neon green lexan I cut using a laser-cutter. Along with that the supports between the lexan I printed off of a 3D part printer and those look really cool too! The base of the robot is a simple electronic enclosure which I modified to allow the mounting of a single servo to allow for a rotation of the whole arm. Right now the whole arm is controlled using an Arduino Duemilanove, and with it I plan to control the whole arm with an IR remote.
For this project I used the Lynxmotion L6AC-KT as a large point of reference, but because the site does not actually give any CAD files or any dimensions of the older arm I was forced to make those decisions for myself. I used SolidWorks for the design of the whole arm assembly, this made everything go by so smooth since I could save the files as .STL or .Dxf and have a laser-cutter and FDM machine make the parts for me. Besides that the Items I used are:
1x 24x24 sheet of neon green lexan.
5x Hitec HS-422 servos
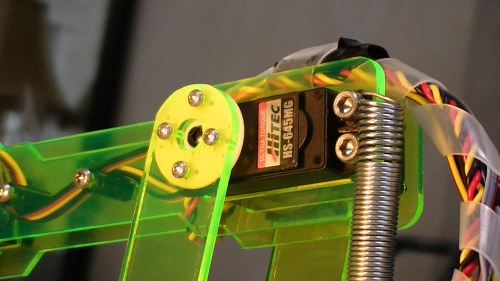
2x Hitec HS-645MG servos
1x box of 4-20 x 3/8 self tapping screws
1x box of 2-28 x 1/4 self tapping screws
some 8/32 x 1/4 socket cap screws
Laser-cutter doing its job!
Good view of the plastic supports printed by an FDM machine.
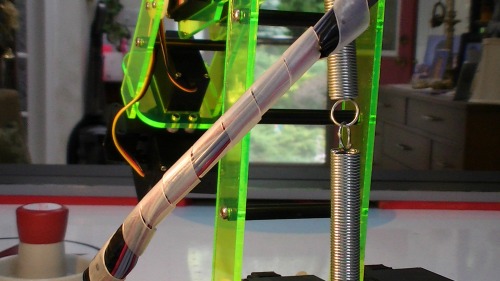
Above picture shows exactly how the lexan is attached to the servo horn.
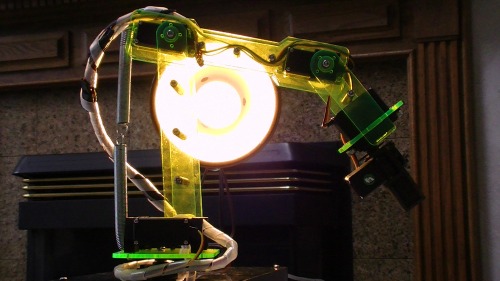
See through!
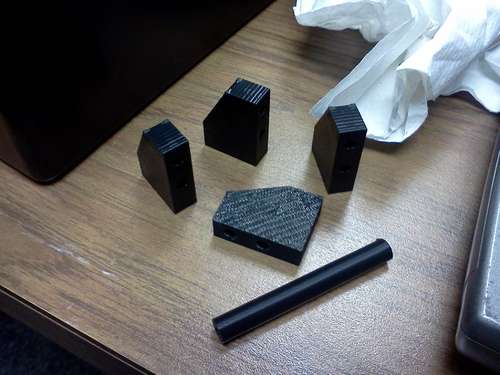
These are the parts printed by the 3D printer, excluding the servo connectors.
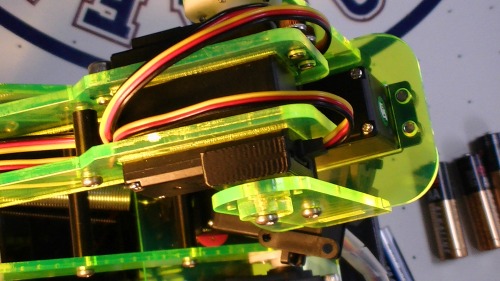
A great view of the "servo back connecter thingy"
You can see how the self tapping screw goes into the "servo back thingy" holding the lexan to the servo with a washer also made with lexan. The servo back thingy was also printed on a 3D printer and is held to the servo with some super sticky double-sided tape.
As I said, I never touched any tool on this project except a simple hand-drill, and yet the quality of this project is very high. My secret, I used a combination of laser-cutting, and 3D part printing. To print my 3D plastic parts I did work in SolidWorks creating the dimensions of the part which I saved in a .STL file and sent to an FDM machine which would drip plastic in a pattern in layers to construct a full plastic part. I mainly used this method to create supports between pieces of lexan that were not held by much other than servos. As far as using the laser cutter I used a similar process, but instead of saving the file in SolidWorks as a .STL, I saved it as a .Dxf which the laser-cutter could use as a path for cutting on flat sheets of material (i.e. lexan). One thing to highly note is that the base servos that lift the arm up, (the ones on the desk in the picture) will fight each other. In order to stop those servos from over heating and causing failure you have two options. The first option is to slot the holes in the lexan where it is mounted to the servo horn, this will allow for adjustment of the structure against the servo horn so that both servos will both be in the same position at the same time. Another method is to program both servos to go to for example 90 degrees, but take the horn off one of them. When both servos reach the correct position, screw the horn back on. Also note that I added a spring in the final design to assist the forearm in lifting.
Currently this project is finished with until I get my mobile platform completed to carry the arm.
It would also be highly appreciated if you could vote for it in the several competitions it is competing in.
Links for competitions:
Microcontroller Contest:
http://www.instructables.com/contest/micro2/
Voting begins July 5th
Make it Move contest:
http://www.instructables.com/contest/makeitmove/
Voting begins July 11th
And last but now least, The Toy contest:
http://www.instructables.com/contest/toy/
Voting here begins July 4th
Plays with things on my desk.
- Actuators / output devices: Hitec HS-422 and HS-645MG servos
- CPU: Arduino Duemilanove 328
- Power source: 6 AA batteries for servos
- Programming language: Arduino C
- Target environment: desktop
This is a companion discussion topic for the original entry at https://community.robotshop.com/robots/show/green-machine-robotic-arm

