

UPDATE okt 9
I created a 3d simulation model. See video. My plan was to use this model to reverse-engineer my cam wheels. What I want to achieve is that the legs move at a constant speed in a straight line for at least 50% of the cycle. Because the mechanism includes many non-linear transmissions between the cam wheel and the leg, I can define the leg movement as an input and then get the movement of the main driver as a result.
Currently I am not that far, in the video the main drivers (red bars) move according to a harmonic function (sinus function). I found out I need to make some changes to the design, and I am not sure if I will go through this process again, the program I used is a pain to work with (https://www.robotshop.com/letsmakerobots/simulation-leg-mechanism-with-freecad).
UPDATE okt 6, redesign again
With my bug design I have a few things in mind:
- Make it energy efficient. For this reason I want the legs, when they touch the ground, to move with a constant speed without moving vertically. With 6 legs and always 3 on the ground it also means that each leg should be on the ground for 50% of the time. This requires a high level of control over the movement of the leg.
- Make it compact and elegant.
So I made the robot walk, but I needed to adjust a lot by bending the iron lever to make it work. And it still does not have the fluid movement I have in mind.
So I made a complete redesign of the mechanism. I came up with a neat 'black box' that can be used for different designs. The six shields are the mounting plates for legs. Each shield is moved by two identical mechanisms. How it works is difficult to explain in text, I will make a video when the first version is ready.
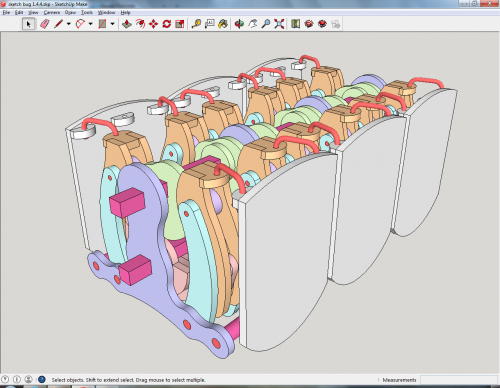
(above) the new mechanism, size 80 x 50 x 35 mm. The grey shileds are mounting plates for legs. The legs can be as thick as the size of the shields.

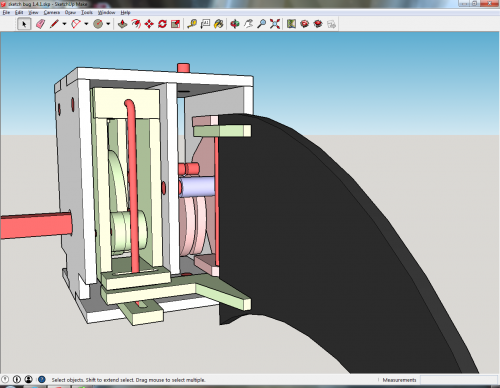
(above) one elementairy mechanism. Each leg has 2 of those. The square bar at the top is powerd by a gear motor and gives the drive. The square bar at the bottom is powered by a servo and regulates the steering, by adjusting the stepsizes of the legs on each size.
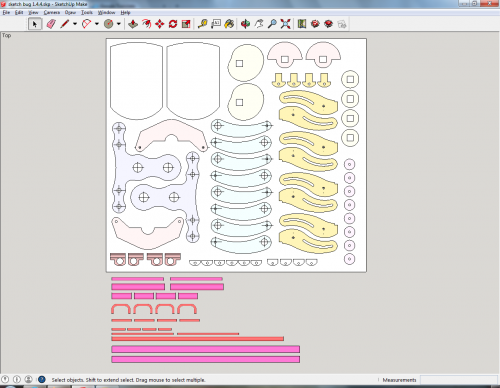
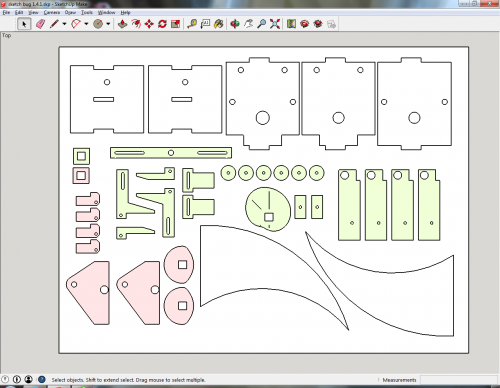
(above) the parts in 1.5mm polystyrene, brass and steel.
UPDATE okt 4, bug's first steps.
One section of the mechanism is ready. I added a couple of wheels and mounted a servo with hot glue so I could test it. Actually the servo is now a gear motor. I removed the control mechanism and the 180 degrees restriction.
After I came back from shopping, I found my wife playing with the robot. I managed somehow not to explode. She had bended the wheels and did some other minor harm. But he, let's be happy with a wife that supports this hobby :). And she made a nice cardboard face for what is actually the larve state of my insect.
Enjoy the video!
UPDATE sept 29, video added, one leg moving.
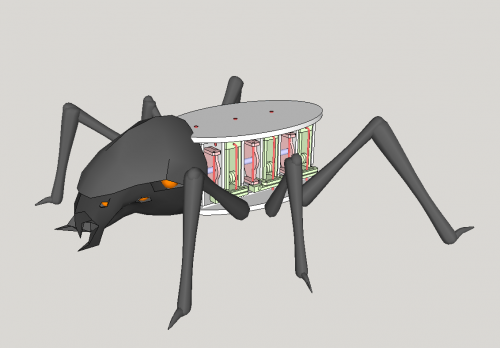
I also worked on the looks of my design. Instead of renaming 'bug' to 'bee' (because it looked a bit like that) I made it more look like a bug :). This is how it looks under the hood:
UPDATE sept 26, video 1 added, vertical leg movement ready.
Original post:
I was working on my first robot "bug" (https://www.robotshop.com/letsmakerobots/bug), for Yahmez' single motor challenge. However, with only two weeks to go I did not make it. Now without the restriction of a single motor, I decided to redesign my robot, hence "Bug 2.0".
Unlike the first Bug this one is driven by a gear motor instead of a servo. The continuous movement of the motor makes it possible to define the exact leg movement with three cam wheels for each pair of legs. There will be at least one servo for steering, plus one or two servos for moving the head and tail. More about the mechanism later.
Like the first version most mechanical parts will be made of 1.5mm polystyrene. And there are some metal axes (steel and brass) The 'cosmetic layer' will be made of 5mm foam.
This is a companion discussion topic for the original entry at https://community.robotshop.com/robots/show/bug-2-0