

BoeBot Arduino Pro Mini
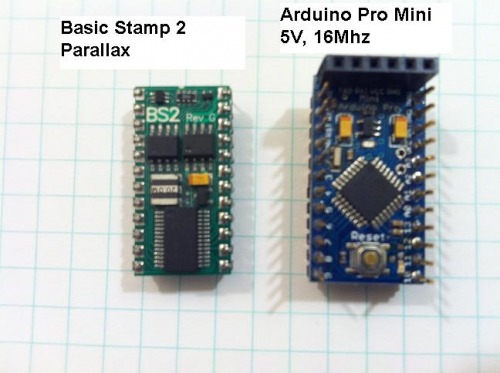
I finally decided to clean the dust off the Parallax BoeBot and decided to replace the BoeBot’s microcontroller (Basic Stamp 2) with the Arduino Pro Mini. Below are the two microcontroller boards. They are pin to pin compatible so the Arduino board is a drop-in replacement for the BS2.
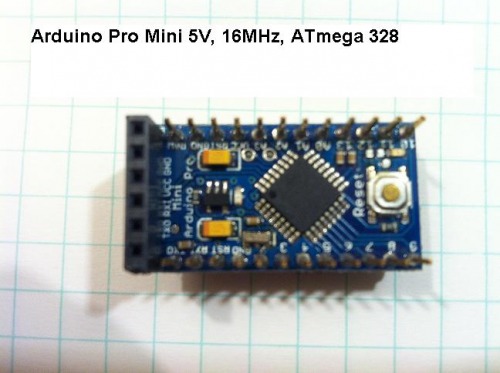
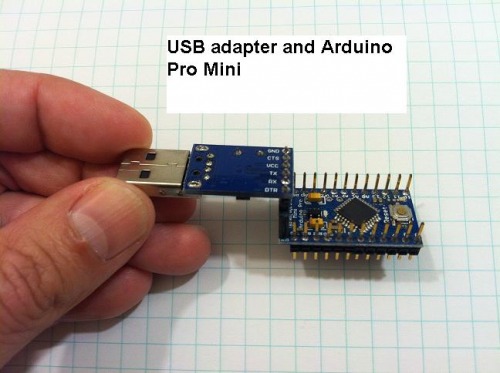
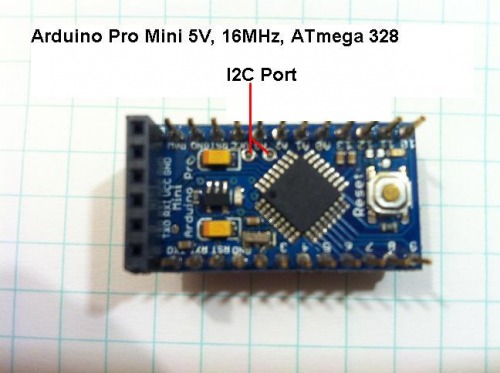
I picked the 5V, 16MHz, ATmega 328 version (make sure to use this version as the 8MHz won't be fast enough). My Arduino Pro Mini board did not come with the headers or 6 pin connector for serial interface. I had to manually solder those so get your iron hot and ready to solder.
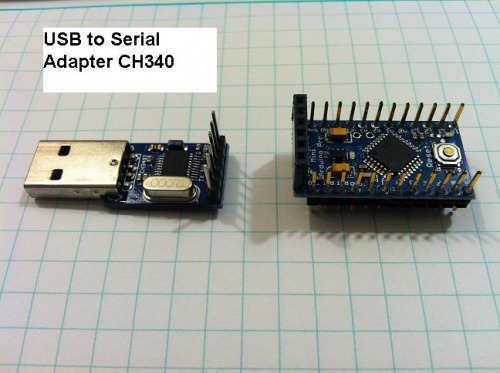
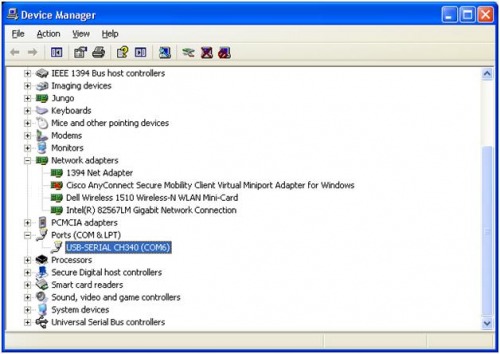
How to program the Arduino Pro Mini? The BoeBot’s serial interface does not work to program the Arduino board. Therefore, you would need a USB to serial adapter such as FT232RL or the CH340 like the one I got. Download the Window's driver for your USB to Serial adapter so that Windows recognize the new hardware (serial port).
Peripherals:
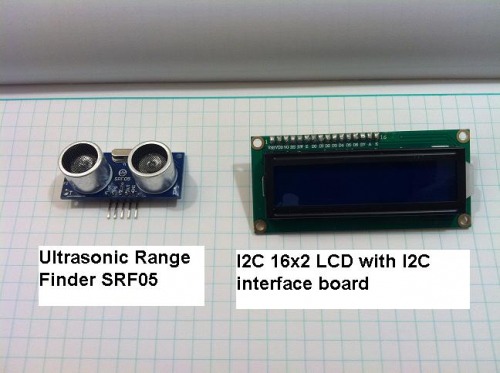
The Arduino Pro Mini has two pins for I2C connections. I used these pins to connect an I2C 16x2 LCD. Make sure you get the one with the I2C interface board, see back of LCD on picture below.
Ultrasonic Range Finder SRF04 or SRF05, I purchased the SRF05 for my robot.
Tips:
Since I bought my Arduino Pro Mini board on eBay for some reason (perhaps firmware) when I program the board using the Arduino software under Tools -> Boards. I have to select the Arduino Mini w/ATmega328 instead of the Arduino Pro or Pro Mini (5V, 16Mhz) w/ ATmega328
By default there is an onboard LED connected to output pin 13 on the Arduino Pro Mini. Download the blink LED program to test the Arduino board and USB to Serial interface.
When programming the Arduino Pro Mini board it must be performed when board is unplugged from the BoeBot. Otherwise, you would get a communication error message. This is because the serial pins TX/RX are wired to I/O pins on the BoeBot board.
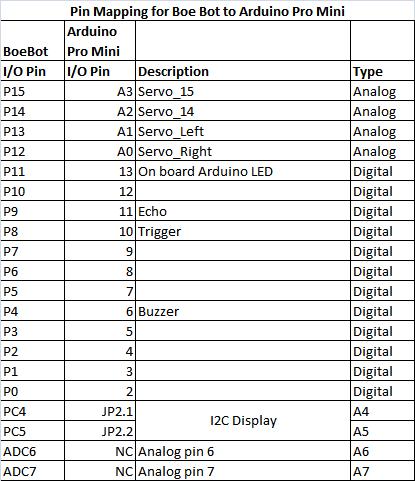
Once the Arduino board is placed on the BoeBot Socket the I/O pins marked on the BoeBot do not match the Arduino. Therefore, you need to use this table below to map the pinout.
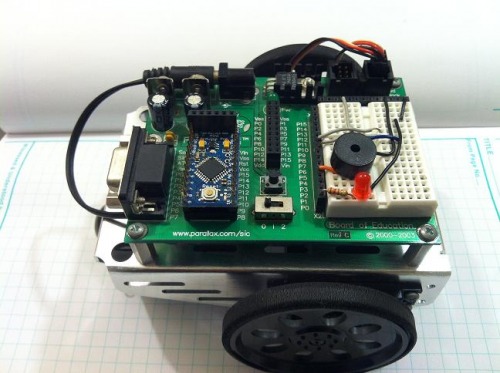
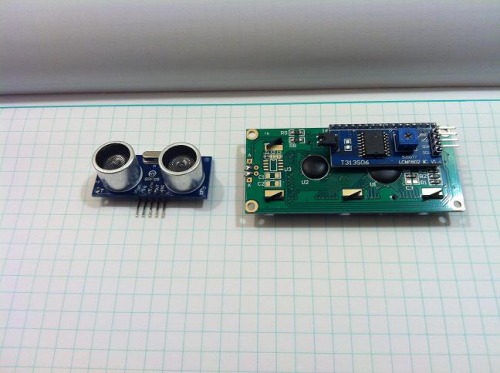
There are sufficient pins on the Arduino Pro Mini to do the same job that the BS2 could do. In addition, you have the flexibility to port over your Arduino sketches and add sensor or peripherals. The Pro Mini board has extra ports and pins that are accessible to connect the I2C display directly on the Pro Mini board, see picture below.
So bring your BoeBot back to life with a new and improved brain!
Navigate around with Ultrasound, obstacle avoidance
- Actuators / output devices: Two servos
- Control method: Autonomous.
- CPU: ATmega 328 Arduino Pro Mini
- Power source: 4xAA batteries
- Programming language: Arduino
- Sensors / input devices: SRF05 Ultra Sound
- Target environment: indoor
This is a companion discussion topic for the original entry at https://community.robotshop.com/robots/show/boe-bot-with-arduino-pro-mini