Barry, HXT900 Hexapod - Video & code added

Hi LMR,

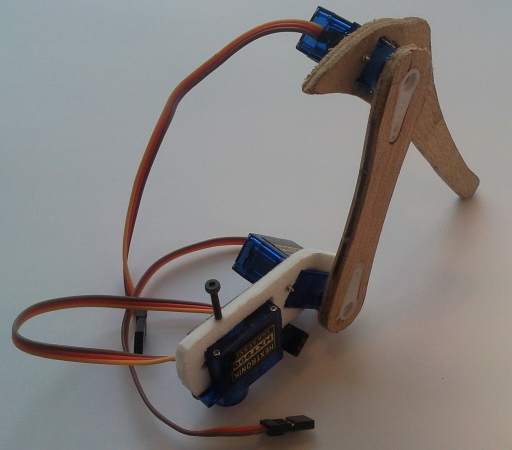
This is my latest walking robot under construction. It's an improvement over my Lollypod robot in that it uses three servos per leg rather than two. This will allow me to do inverse kinematics. I'm trying to keep the cost of this robot down as a testbed for my control program, which runs on my laptop or phone and control the robot over bluetooth.

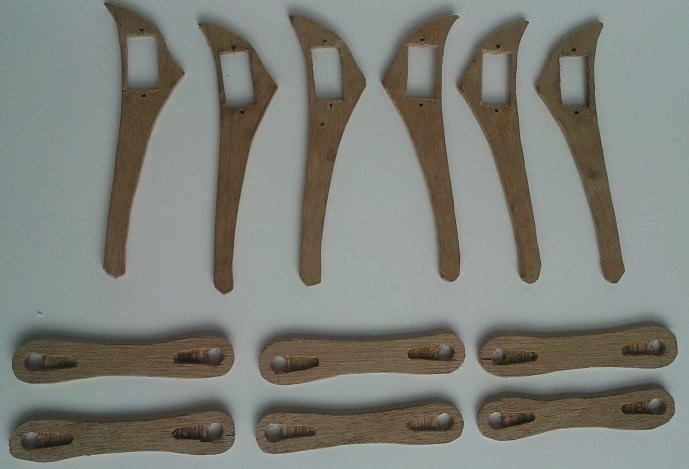
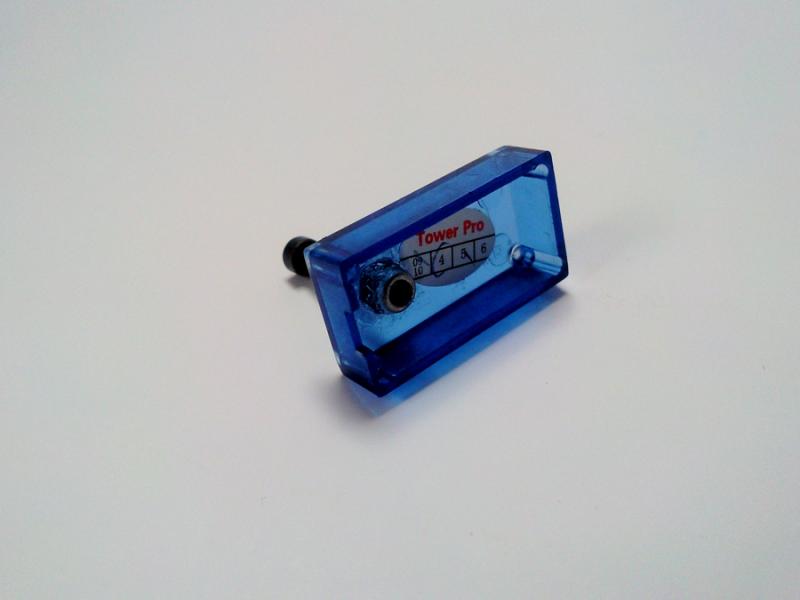
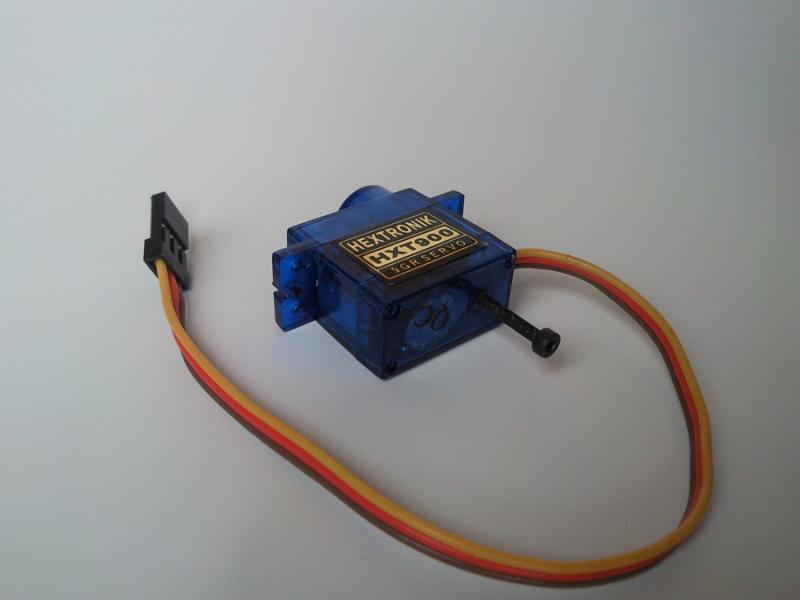
It's made from a 4mm plastic chopping board and some 4mm plywood that was lying around. So far it has cost around £100, most of this is the servo controller and bluetooth module. The servos were $3.60 when I bought them from Hobby City, they're now down to $2.99. 

Hopefully this will prove that these servos are adequate for walking robots, as most of the small ones I've seen use Hitec HS55s which are at least 3x the price.

My ultimate aim is to built a slightly larger hexapod which can carry it's brain (Windows Mobile smartphone) and use the sensors built into the phone (eg. GPS, accelerometer, compass, light sensor) to navigate autonomously.


Coxa joints


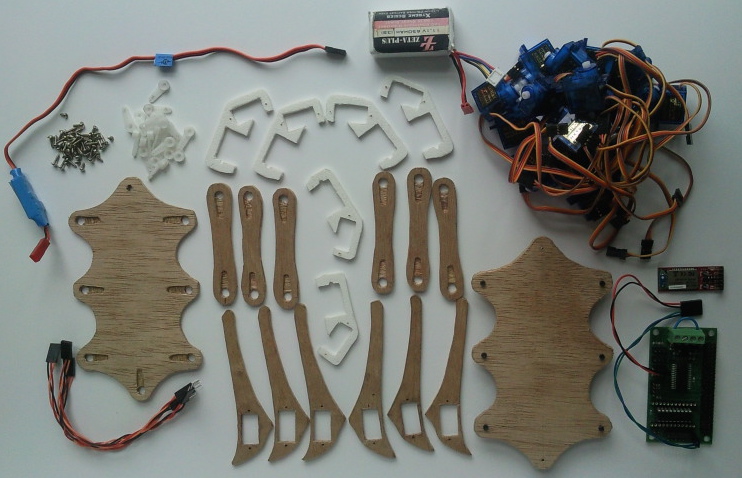
Quick update, parts mostly put together. Still need to centre all servos.


Update, 1st June:
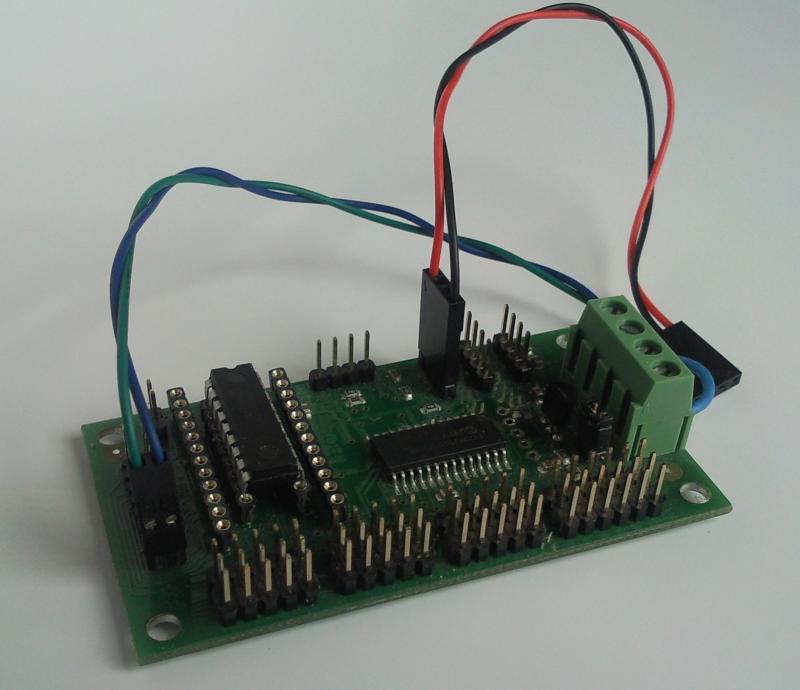
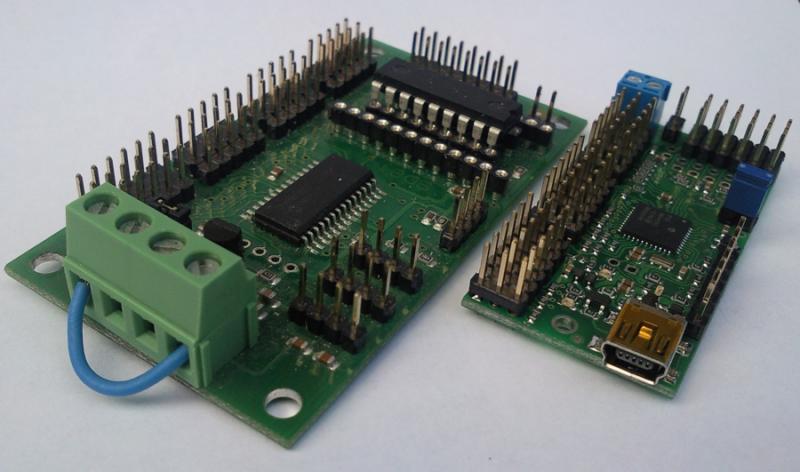
I got a Pololu Maestro 24 to improve the movements a bit. The SD21 and Picaxe combo just weren't fast enough to

update all the servos regularly enough for smooth movements. Another plus is that it's much smaller, so once I got all the servo cables tidied I was able to get the battery to fit in the body with room to spare.


I've been trying to get more and more things automated in the code, with a view to full autonomy at some point. My main function takes a speed, steplength, stepheight, pitch, roll, yaw, degrees to turn in each step, x, y, and z body shift, number of calculations to be done per step and gait type. Hopefully the 'AI' or navigation part of the code will just need to decide a speed and direction to walk in, and all the other parameter will be calculated from those.


Another update. I have the SD21 swapped out for the Maestro which works a lot better. It's walking much faster than it did previously. The limit is now flexing in the legs. Since the femur and tibia (the wooden leg parts) are only attached to the servo horn, there is some twisting going on. To counteract that, I'm modifying the HXT900s to add a pivot point opposite to the servo horn shaft. I'm glueing M2 nut inside the case with a hole for a bolt to go through. This will allow me to add a second femur part to the legs.


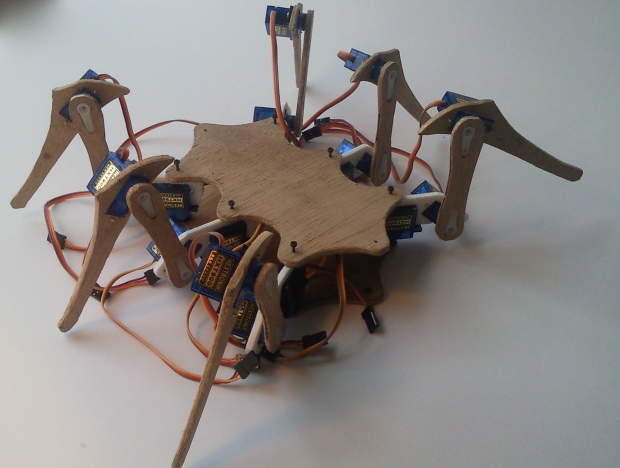
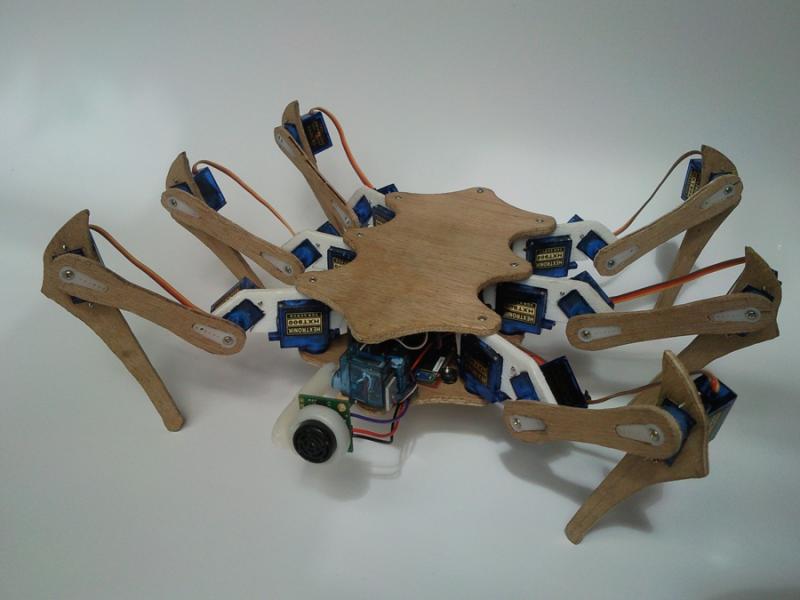
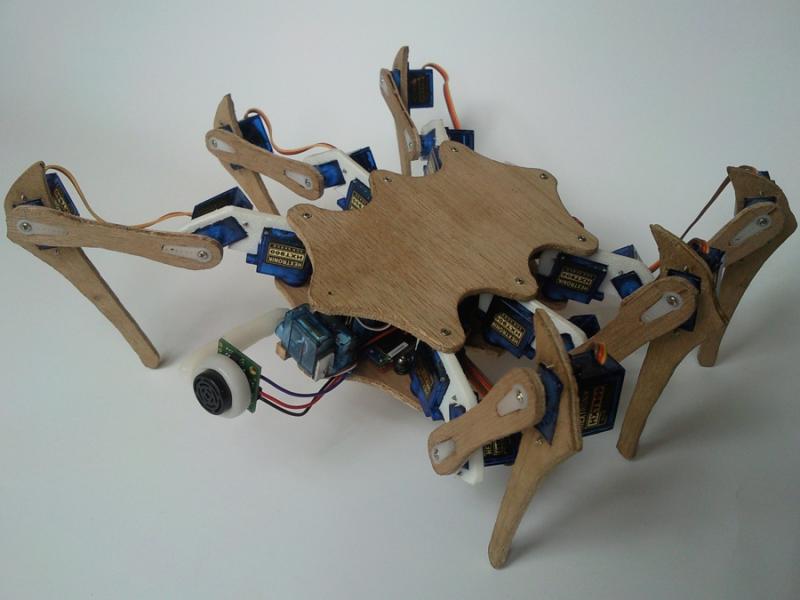
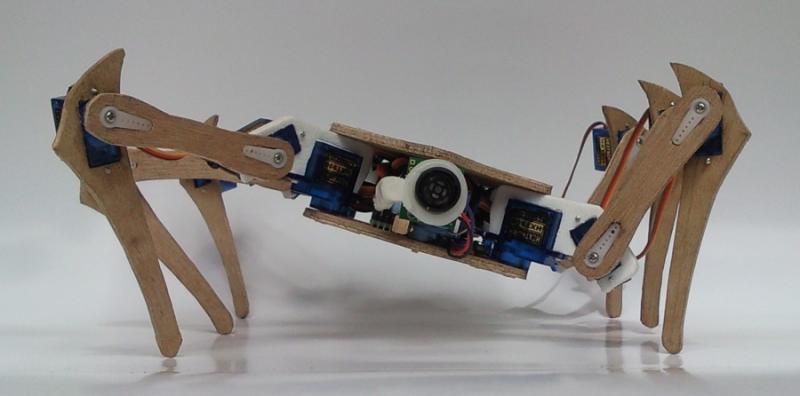
Here's a few pics of the hexapod as it is just now. I think I'll wait until after I strengthen the legs to post a video.


Update, 31/5/11;


Well I've been doing a bit more work, and got the walking smoothed out quite a bit! Video attached showing IK movements and walking with a couple a different gaits. Also I have added an autonomous behaviour, which is currently just wandering around using the sonar. It doesn't work all that well; I think the way I have it mounted or its position (quite close to the ground) might be interfering a bit and giving poor ranges. I am going to add a Sharp IR sensor and some whisker switched so it'll have a range of sensors to rely on. Once I have it avoiding objects reliably, I can start working on more interesting behaviours :) . Thanks for all the comments btw!

Code now added. Most of the interesting stuff is done by the classes in the hexapod namespace. It's pretty messy, there are a few classes which aren't used at all and it could definitely be organised better, hopefully it's useful to someone.

  • Actuators / output devices: 22x HXT900 servos
  • Control method: Bluetooth
  • CPU: Smartphone's 800MHz processor
  • Operating system: Windows Mobile
  • Power source: 11.1v Lipo
  • Programming language: C#
  • Sensors / input devices: Sharp IR, Maxbotics EV-1

This is a companion discussion topic for the original entry at https://community.robotshop.com/robots/show/barry-hxt900-hexapod-video-code-added

thats cool

looking good, how long till u have it walking?

Ill try to get it walking

Ill try to get it walking over the weekend. I’ve already done the programming so I just need to find the servo centres and make some adjustments once I get it assembled.

how did you cut the plywood?

how did you cut the plywood? Did you just jigsaw them or do you have a laser cutter or cnc?

What are these machines of which you speak?

Nope, just coping saw and sandpaper unfortunately.

What are the specs on that board…?

The SD21, where’d you get it from?

SD21

I got it from Rev-Ed (the Picaxe people). It’s I2C controlled, and the Picaxe plugs right into it. I might be posting it for sale actually because for this application I’d be better off with a serial servo controller.

I look forward to seeing some video!!!

I look forward to seeing some video. I am working on a hexapod quite similar to this and I look forward to seeing if these servos are up to the task. I like your servo brackets and how you ensured that the cheaper servos had adequate contact with both decks for stability and control.

I see you got that mid-section going on.

I see you got that mid-section going on. Just stick that bubble butt on the back and add the mandible head and you’ve got the Ply-A-Pod. Then prepare to get chomped up by the real A-Pod…Then revive it and kick that ABS plastic ass with Lexan.

|x

I think A-pod is awesome so

I think A-pod is awesome so my design is quite similar in some ways. I’m not sure if I’ll do a mandible but I may have to do an abdomen because I don’t quite have room for my batteries just now. Yep, A-pod would walk all over it.

I’ll give you the credit man.

I’ll give you the credit man. For cutting these with that saw you did some really good work. Have you thought about spray painting the pieces? Maybe silver or black to complement those blue servos?

I GOT IT!

I GOT IT!  Plasti-Dip these pieces and create the world’s first Rubbery Hexapod. That’ll give A-Pod something to chew on…

Wow, I’m impressed. Nice

Wow, I’m impressed. Nice work.

Hi

maybe this servo controller will do?

http://www.pololu.com/catalog/product/1355

0J2340.600.jpg

The white pieces that you’re

The white pieces that you’re mounting the two servos onto - I guess it’s the “thigh” piece?

I’m wondering why they’re angled at all - was it necessary? if so, what constrained the angle?

Bang on. I have one of the

Bang on. I have one of the Pololu Maestro 24’s onboard now and it’s a lot better than the SD21 and Picaxe. Takes up less space too so the battery now fits in the body.

Yeah, most people seem to

Yeah, most people seem to call it the coxa part. It’s not really necessary - I did it to break up the squareness a bit for looks. The angle does reduce the length of the coxa joint by a small amount, which has advantages and disadvantages.

Good job!

This one looks great. cant wait to see a video, but I guess programming those moves takes a lot of time.

I am curious to know what the problem was with the picaxe servo driver board. You say it was to slow to update the servos, but is that because it took too long to send the commands or did the servos just moved out of sync?

Thanks. Actually most of the

Thanks. Actually most of the programming work is done, I just need to organise it a bit better to make it possible to add more complex behaviours.

The problem was that it took too long to get the commands across the bluetooth connection, and then read into the Picaxe, and then sent out again over i2c for the SD21. The bluetooth serial connection couldn’t be higher than 9600 baud because of the Picaxe. The end result was that each servo would only be updated a few times a second. Also, as each leg was updated as a unit, you could see all the legs were being updated one after the other.

It still walked okay, but now the servos are updated a lot more frequently and I have extra room in the body as the Maestro is more compact. I’ll probably build another hexapod using the SD21 and Picaxe, using scripted movements. 

This is totally awesome. I

This is totally awesome. I love the design of it. I can’t wait for some video