I bought a robot by lynxmotion smart servo and I will communicate by the LSS configuration software - Configure IDs
in this case, can I apply the PID with this configuration without adding a sensor? how can we do it or send me the code we use arduino.
Thank you and best wishes.
@midou To confirm, you want to individually change the P (proportional), I (integral) and D (derivate) values used in the motion controller?
The LSS Config software allows you to communicate with an individual servo (including changing the servo’s ID), but there is no specific PID interface.
Can you explain your application a bit more so we better understand what it is you’re trying to do?
it’s very good Thank you very much for the answer in this case then it is necessary a sensor to apply PID in closed loop since there is no specific PID interface.
which sensor I should buy you can give me its name and its reference and I want the PID code please.
You don’t really need an external sensor for PID - you largely only need to know the position and time elapsed, as well as the PWM signal sent. There are (currently) two main control modes:
EM1 = Enable Motion 1, which uses a motion controller / trajectory planner
EM0 = No motion controller
Note that in the latest firmware version, EM0 also has the option of using filters to smooth out the motion. Unfortunately we do not have any official code to share with you regarding the motion controller and modifying the PID values. Others here have been able to create their own though (will provide links soon).
These two main control modes can be found in LSS - Configuration software lynxmotion ??
There is no shortcut button, but you can use the interface to send the command to change the motion controller between modes. In terms of generating a PID however, this will need to be done separately from the interface. We have had a number of customers asking for a PID interface and it is in the plans, but we cannot indicate when that might be worked on and ready.
Ok thank you very much I will try, hope I can make use of the interface to send the command to change the motion controller between the modes, is there some explanatory steps makes it easier for me to do so.
Regarding PID as soon as it is worked and ready, please send it to me in this e-mail: [email protected]
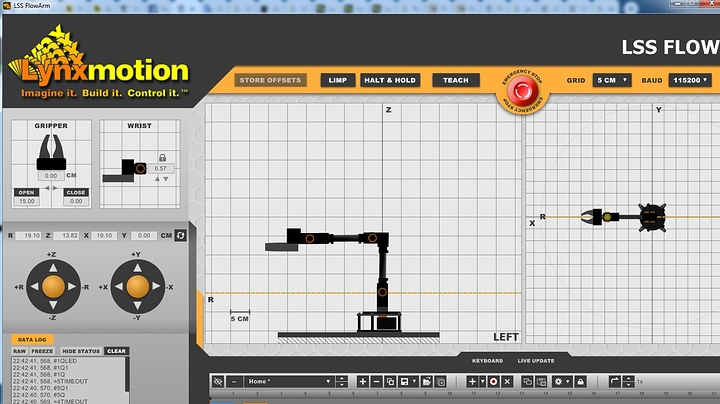
I have a problem on the application “LSS FlowArm App” when I open it, the right part where there is the com button does not appear like the window does not appear completely.
The following photo represents that.
Hey @midou,
It seems like your screen resolution is too low for the app to show fully. While you have the window in focus, press “Z” and see if it changes the “zoom” level.
Sincerely,
Thank you very much with Z it works the modification of the zoom, but now I have not happened to make arm movements with this application you do not have a video which shows me step by step how to use this program to make movements.
@midou Unfortunately a video is not available as we are adding features and a video would be quickly out of date. For the moment, it’s best to read through the manual here:
https://wiki.lynxmotion.com/info/wiki/lynxmotion/view/servo-erector-set-system/ses-software/lss-flowarm/
@cbenson Nothing worked, I followed this manual the robot doesn’t move anymore.
https://wiki.lynxmotion.com/info/wiki/lynxmotion/view/servo-erector-set-system/ses-software/lss-flowarm/
Can you take us through your process step by step and tell us what happens?
- Power the arm
- Open the software
- Select the appropriate COM port to which the arm is connected
- The arm should connect
Did you purchase the arm in kit form or pre-assembled? If it’s kit form, did you assign IDs to each of the servos?
I didn’t assign IDs for each servo, how can I do that ?
Good to know we found the issue. Assigning IDs is the first step in the process:
https://wiki.lynxmotion.com/info/wiki/lynxmotion/view/servo-erector-set-robots-kits/ses-v2-robots/ses-v2-arms/lss-4dof-arm/
The easiest way is to connect one servo at a time to the LSS Config interface.
https://wiki.lynxmotion.com/info/wiki/lynxmotion/view/servo-erector-set-robots-kits/ses-v2-robots/ses-v2-arms/lss-4dof-arm/4dof-arm-quickstart/4dof-servo-setup/
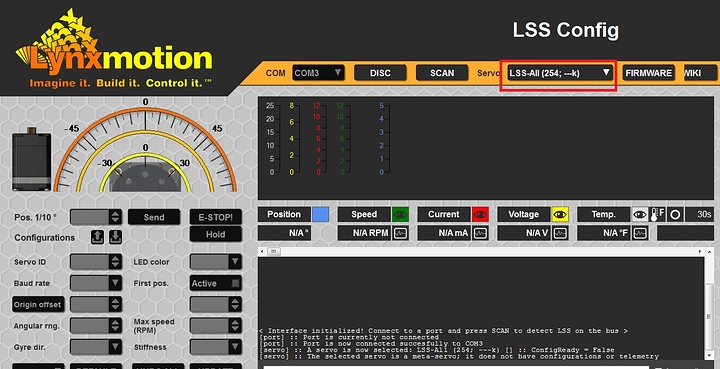
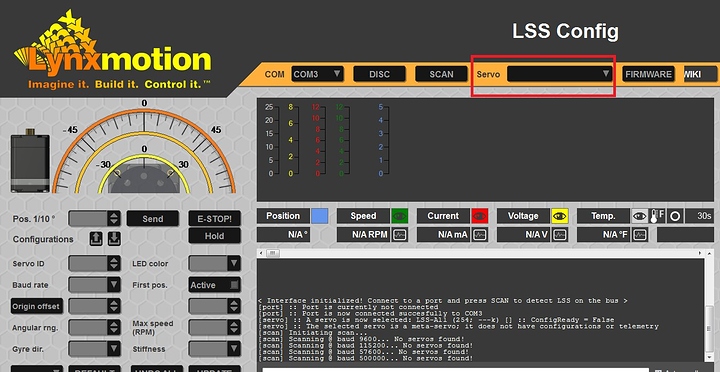
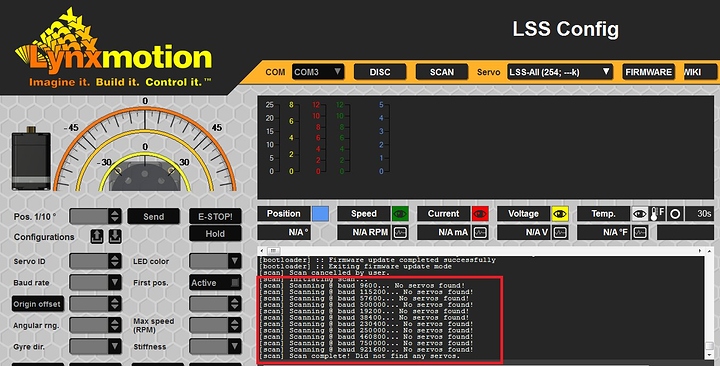
the servo configuration application has connected but as soon as I scan it will not find the servo " no servo found "
the pictures represents his!
- Can you provide several clear photos showing the setup?
- Ensure the cables are plugged in correctly (LSS serial cables, USB cable etc.)
- What are you using to communicate with and power the servos?
More information is needed.
@cbenson it’s very good it works well, thank you very much.
Now I will work with arduino and I want to understand this code where it will display and read positions, currents, voltages, temperatures.
#include <LSS.h>
// ID set to default LSS ID = 0
    #define LSS_ID		(0)
    #define LSS_BAUD	(LSS_DefaultBaud)

    // Create one LSS object
    LSS myLSS = LSS(LSS_ID);

    void setup()
    {
    	// Initialize the LSS bus
    	LSS::initBus(Serial, LSS_BAUD);
    }

    void loop()
    {
    	// Header 1
    	Serial.println("\r\nQuerying servo...");

    	// Get LSS position, speed, current, voltage, temperature
    	int32_t pos = myLSS.getPosition();
    	uint8_t rpm = myLSS.getSpeedRPM();
    	uint16_t current = myLSS.getCurrent();
    	uint16_t voltage = myLSS.getVoltage();
    	uint16_t temp = myLSS.getTemperature();

    	// Header 2
    	Serial.println("\r\n\r\n---- LSS telemetry ----");

    	// Display LSS position, speed, current, voltage, temperature
    	Serial.print("Position  (1/10 deg) = ");
    	Serial.println(pos);
    	Serial.print("Speed          (rpm) = ");
    	Serial.println(rpm);
    	Serial.print("Curent          (mA) = ");
    	Serial.println(current);
    	Serial.print("Voltage         (mV) = ");
    	Serial.println(voltage);
    	Serial.print("Temperature (1/10 C) = ");
    	Serial.println(temp);

    	// Read LSS telemetry once per second
    	delay(1000);
}@cbenson it’s very good it works well, thank you very much.
Now I will work with arduino and I want to understand this code where it will display and read positions, currents, voltages, temperatures.
#include <LSS.h>
// ID set to default LSS ID = 0
    #define LSS_ID		(0)
    #define LSS_BAUD	(LSS_DefaultBaud)

    // Create one LSS object
    LSS myLSS = LSS(LSS_ID);

    void setup()
    {
    	// Initialize the LSS bus
    	LSS::initBus(Serial, LSS_BAUD);
    }

    void loop()
    {
    	// Header 1
    	Serial.println("\r\nQuerying servo...");

    	// Get LSS position, speed, current, voltage, temperature
    	int32_t pos = myLSS.getPosition();
    	uint8_t rpm = myLSS.getSpeedRPM();
    	uint16_t current = myLSS.getCurrent();
    	uint16_t voltage = myLSS.getVoltage();
    	uint16_t temp = myLSS.getTemperature();

    	// Header 2


