

Sharp Sensor Mount on Lynxmotion Robotic Arm


Many customers who use the Lynxmotion AL5 series robot arms have asked how they can mount a distance sensor to the end of the arm. Up until now, we never had an optimal solution, so we decided to release an upgrade kit which contains both a new mounting plate as well as a Sharp IR distance sensor. This post explains all the steps to replace the standard Little Grip Attachment Plate LGA-KT supplied with Lynxmotion robotic arms by the new Little Grip + Sharp Upgrade Kit. We have ensured that this new kit includes the mounting hardware and wiring needed to attach the Sharp IR range sensor (included with the kit) on any Lynxmotion AL5 Robotic Arm. The Sharp IR range sensor measures the distance to any object from 10cm (~4") to 80cm (~30") and reports the value as an analog voltage. The sensor can also be interfaced with FlowBotics Studio so that the arm executes different preprogrammed tasks autonomously.
1. Remove the gripper by unscrewing the screws at the corners of the Lexan mounting plate and keep them aside. You do not need to remove the gripper servo.
2. After removing the gripper, take off the Lexan plate by removing the two screws and the two nuts holding it to the C-bracket. Since the nuts are quite small, you might use a set of long nose pliers to hold the nuts while removing the screws. Keep the screws and nuts since they will be used later.
3. Mount the Sharp IR range sensor to the new Lexan plate using two 4-40 x 3/8in SHCS screws and two 4-40 x 1/4in MS nuts provided in the kit.
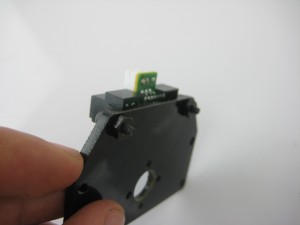 Sharp sensor with the new mounting plate
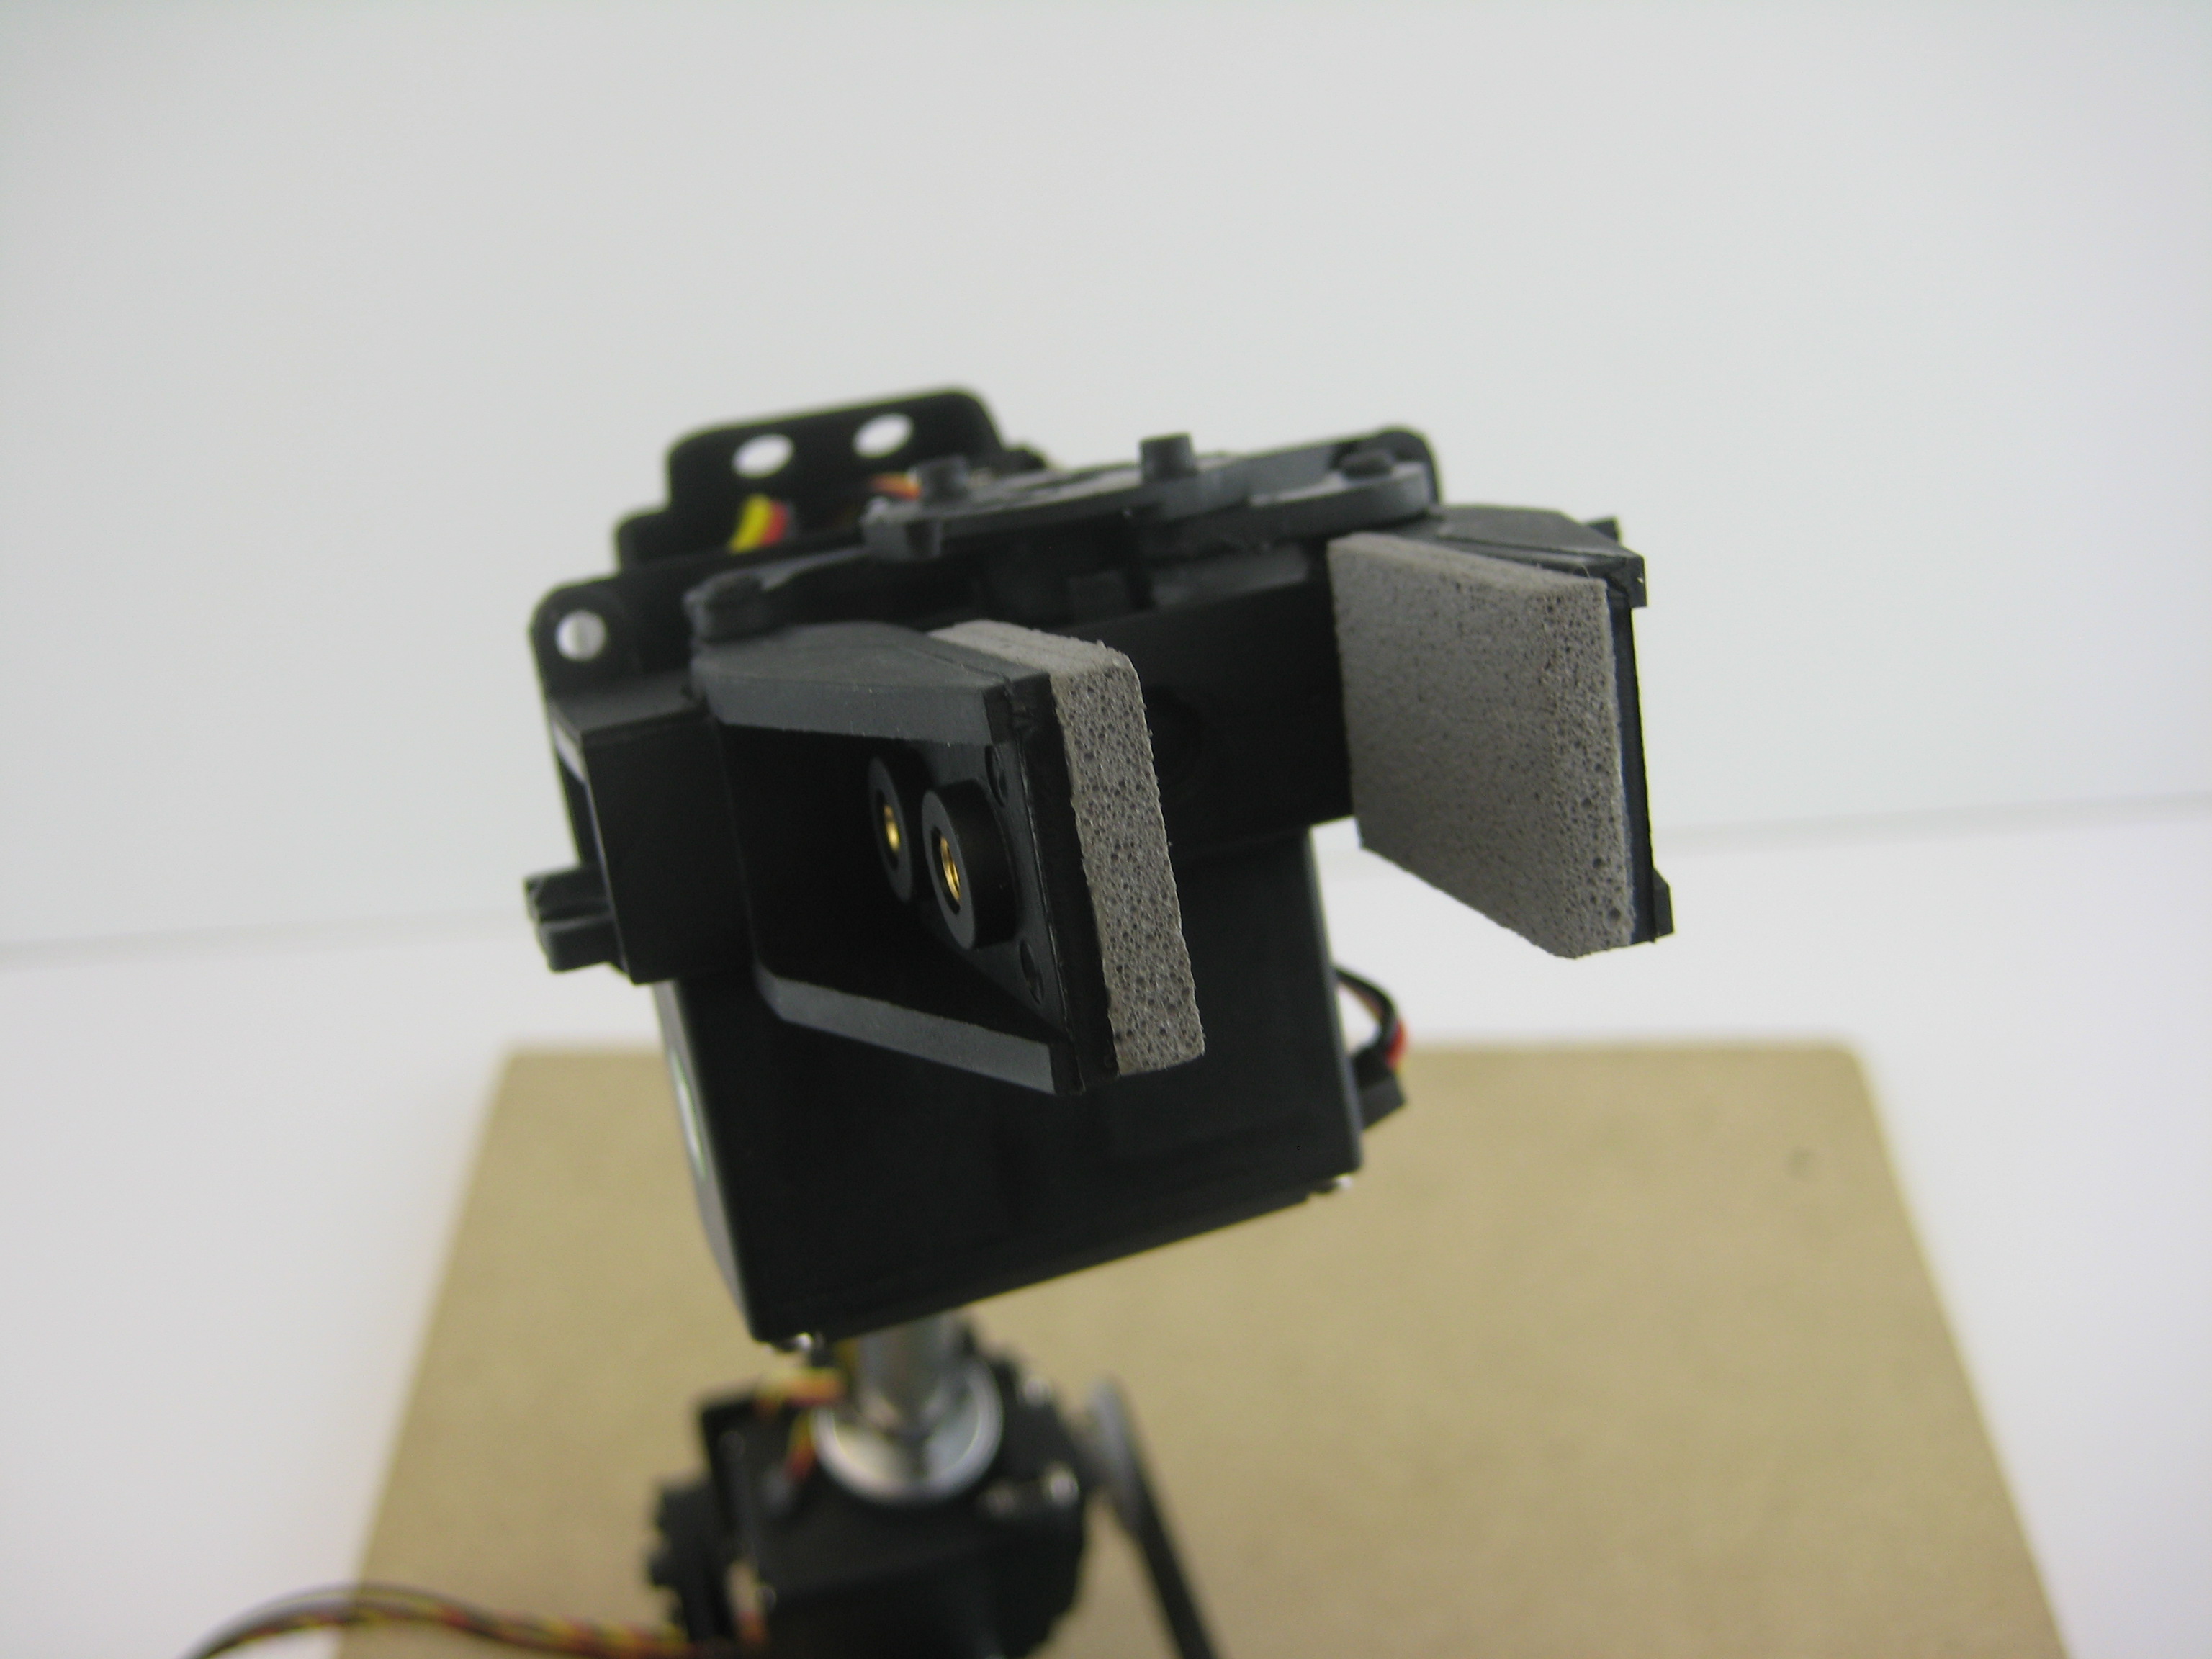
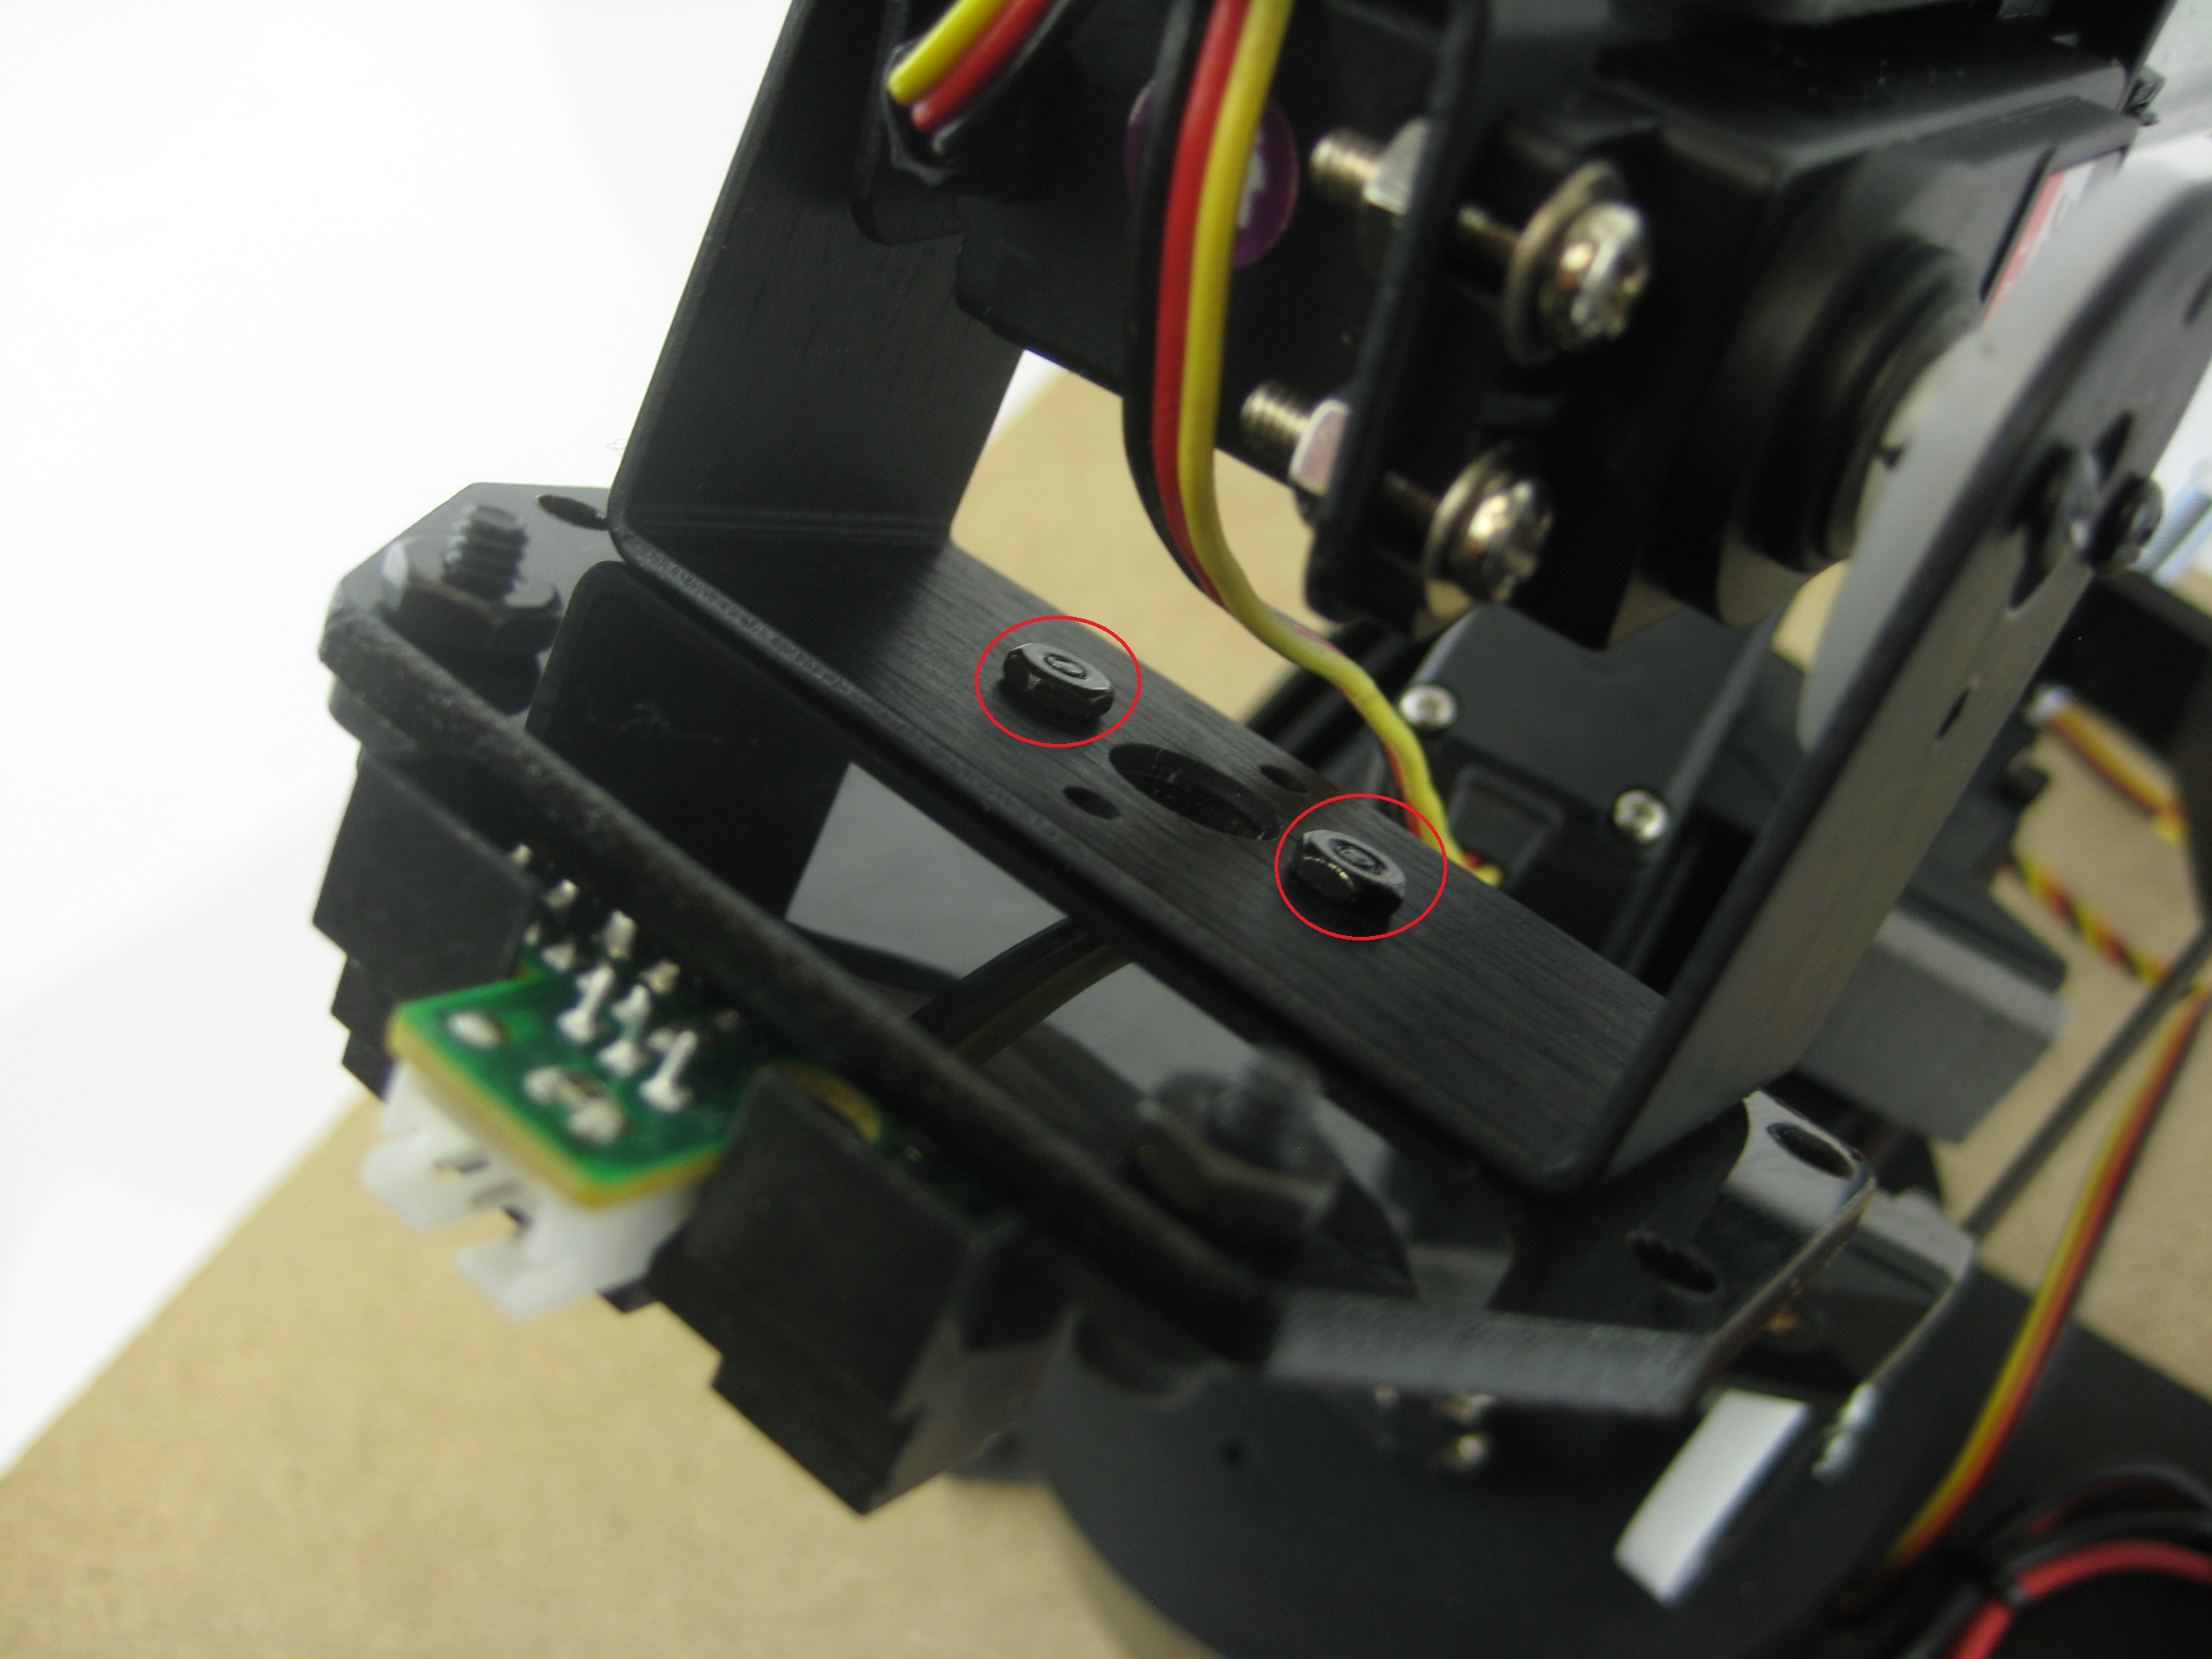
4. Use the same two screws and nuts removed in step 2 to mount the new plate with the Sharp IR range sensor to the C-bracket.
Sharp sensor with the new mounting plate
4. Use the same two screws and nuts removed in step 2 to mount the new plate with the Sharp IR range sensor to the C-bracket.
4. Use the screws removed in step 1 to re-mount the gripper.
 New plate installed
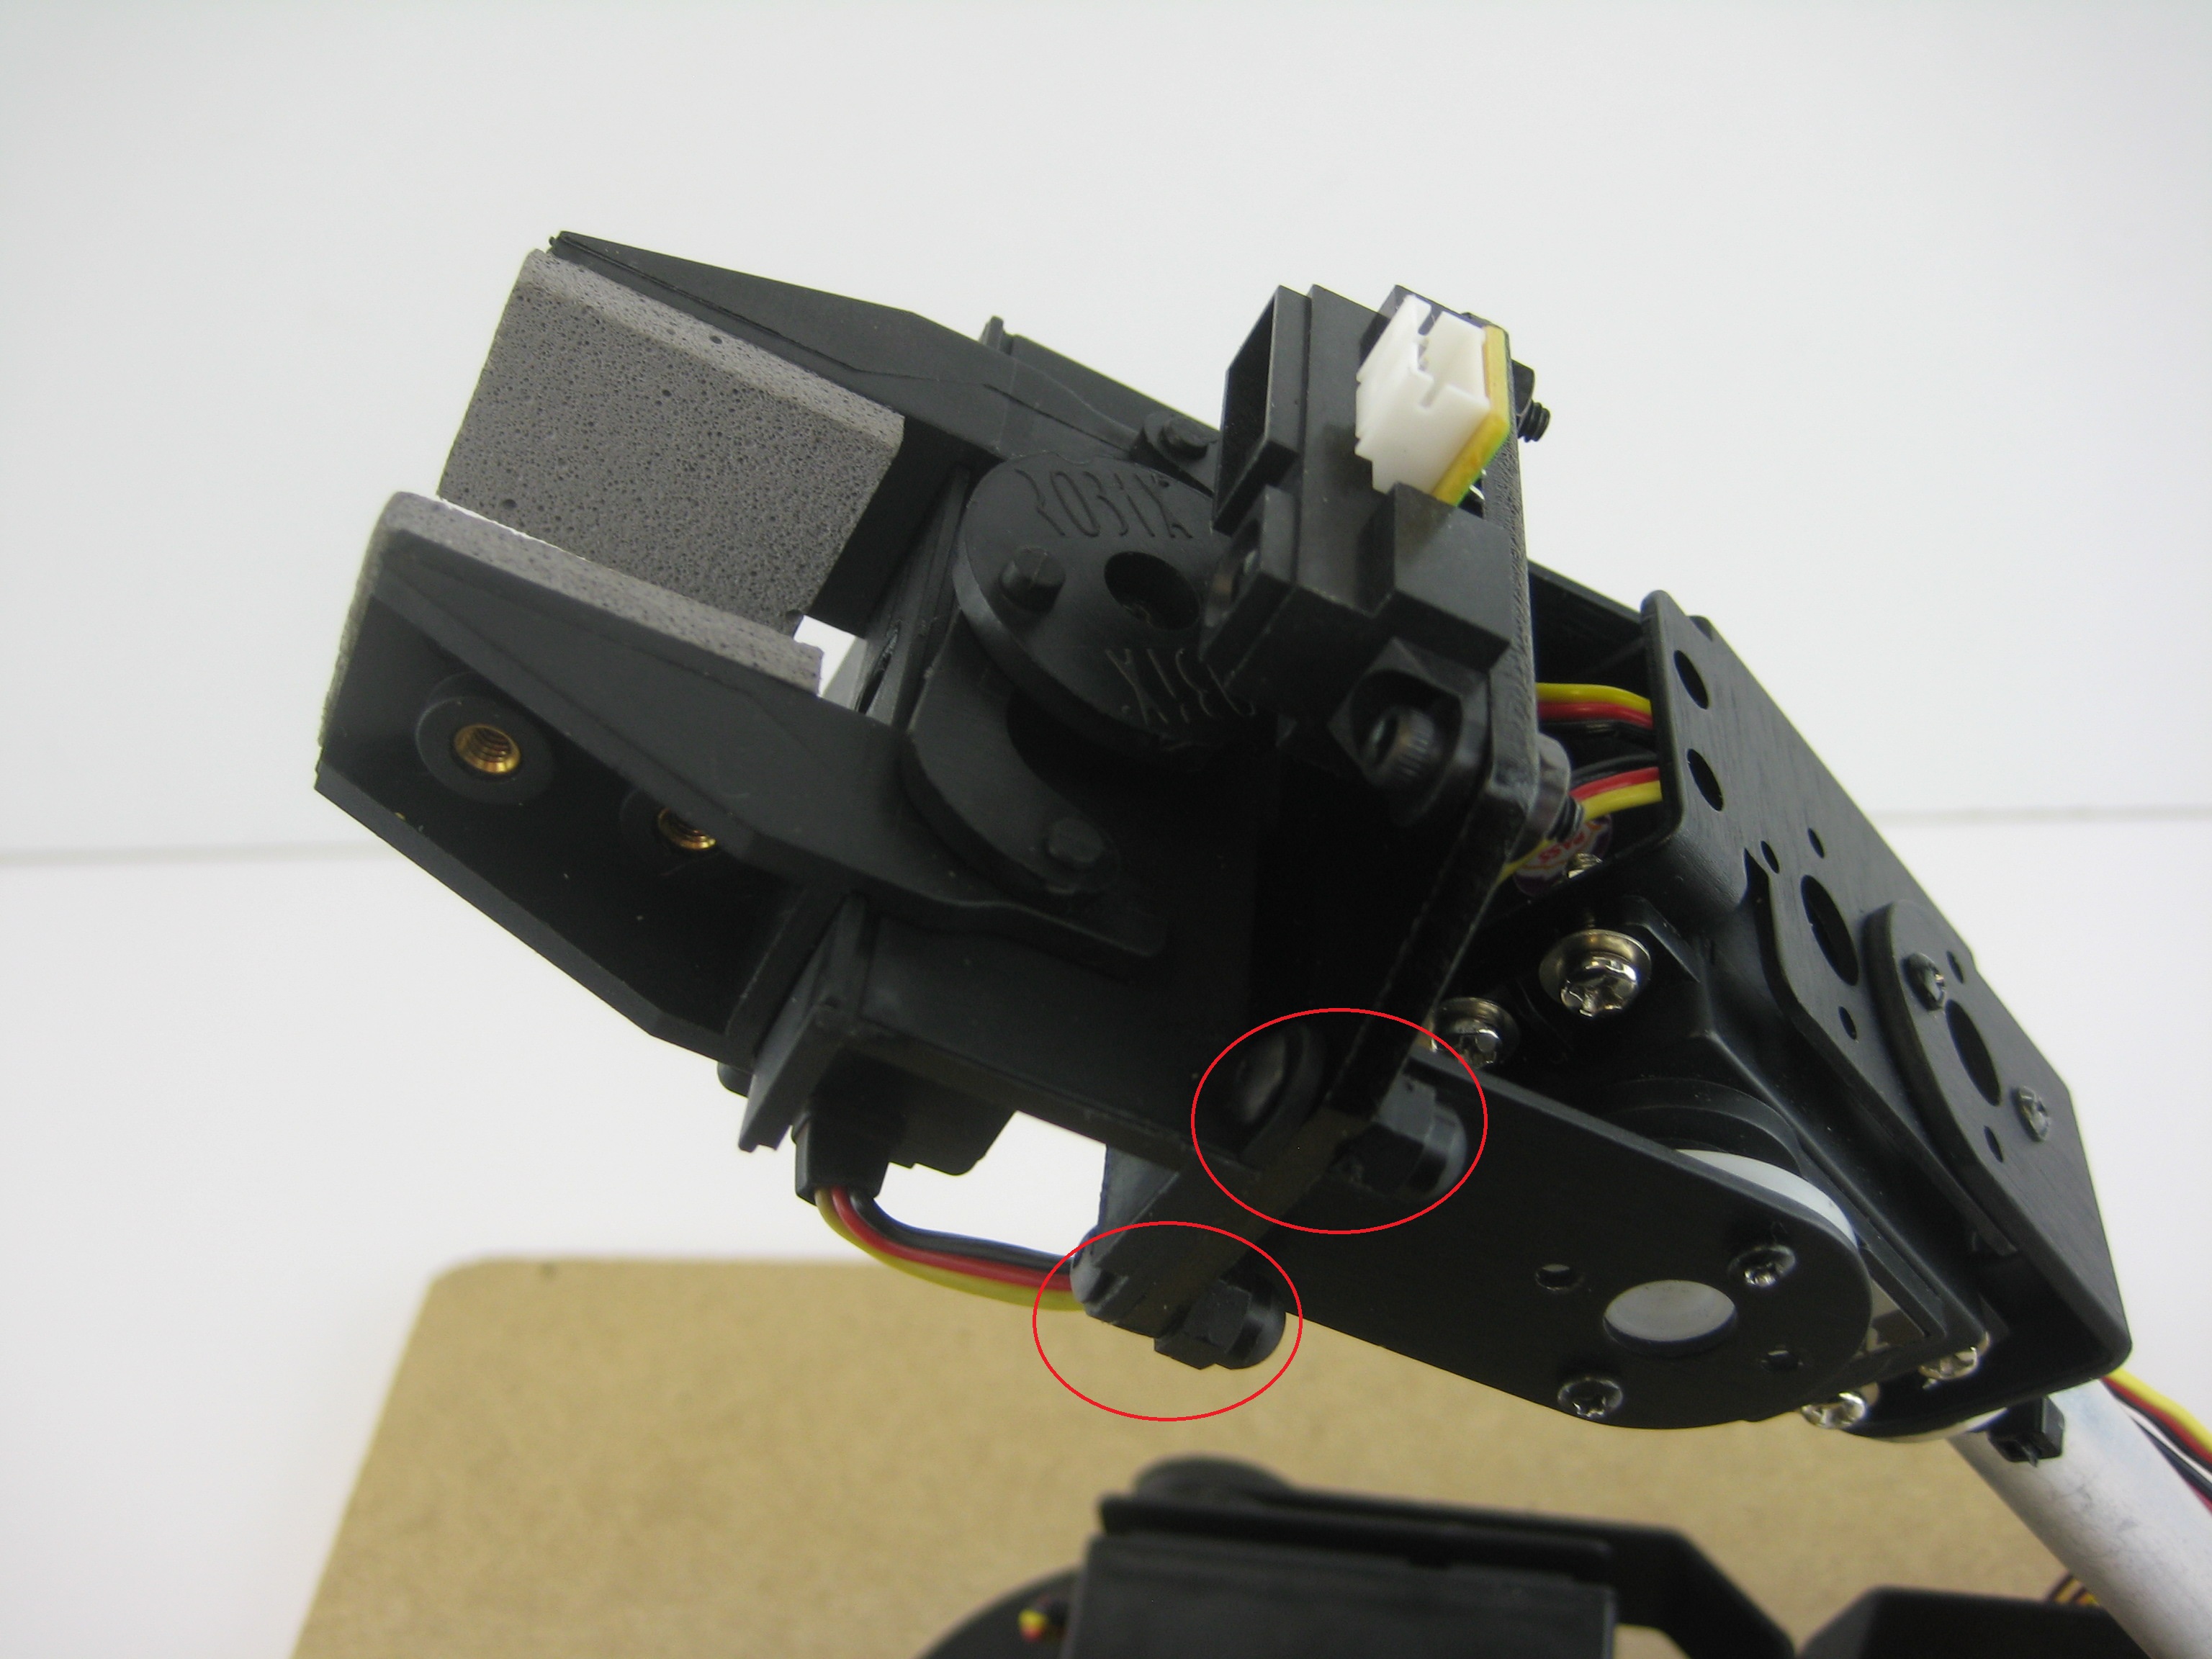
5. Connect the Sharp GP2 IR sensor cable included in the little grip + Sharp upgrade kit kit to the Sharp sensor, then connect the other end to the servo extender cable. We recommend passing the IR sensor cable through the servo bracket to protect it from any improper movement of the Lynxmotion robotic arm.
New plate installed
5. Connect the Sharp GP2 IR sensor cable included in the little grip + Sharp upgrade kit kit to the Sharp sensor, then connect the other end to the servo extender cable. We recommend passing the IR sensor cable through the servo bracket to protect it from any improper movement of the Lynxmotion robotic arm.
 Connecting the Sharp IR sensor
6. Use the nylon wire ties to clean up the wiring.
Connecting the Sharp IR sensor
6. Use the nylon wire ties to clean up the wiring.
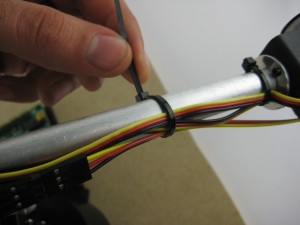 Attaching the Sharp sensor cables to the arm
7. You can now connect the sensor cable to the analog input of the BotBoarduino or the SSC-32 / 32U servo controller.
Attaching the Sharp sensor cables to the arm
7. You can now connect the sensor cable to the analog input of the BotBoarduino or the SSC-32 / 32U servo controller.
 Before Removing Little Grip Before Removing Little Grip |
 After removing the Little Grip After removing the Little Grip |
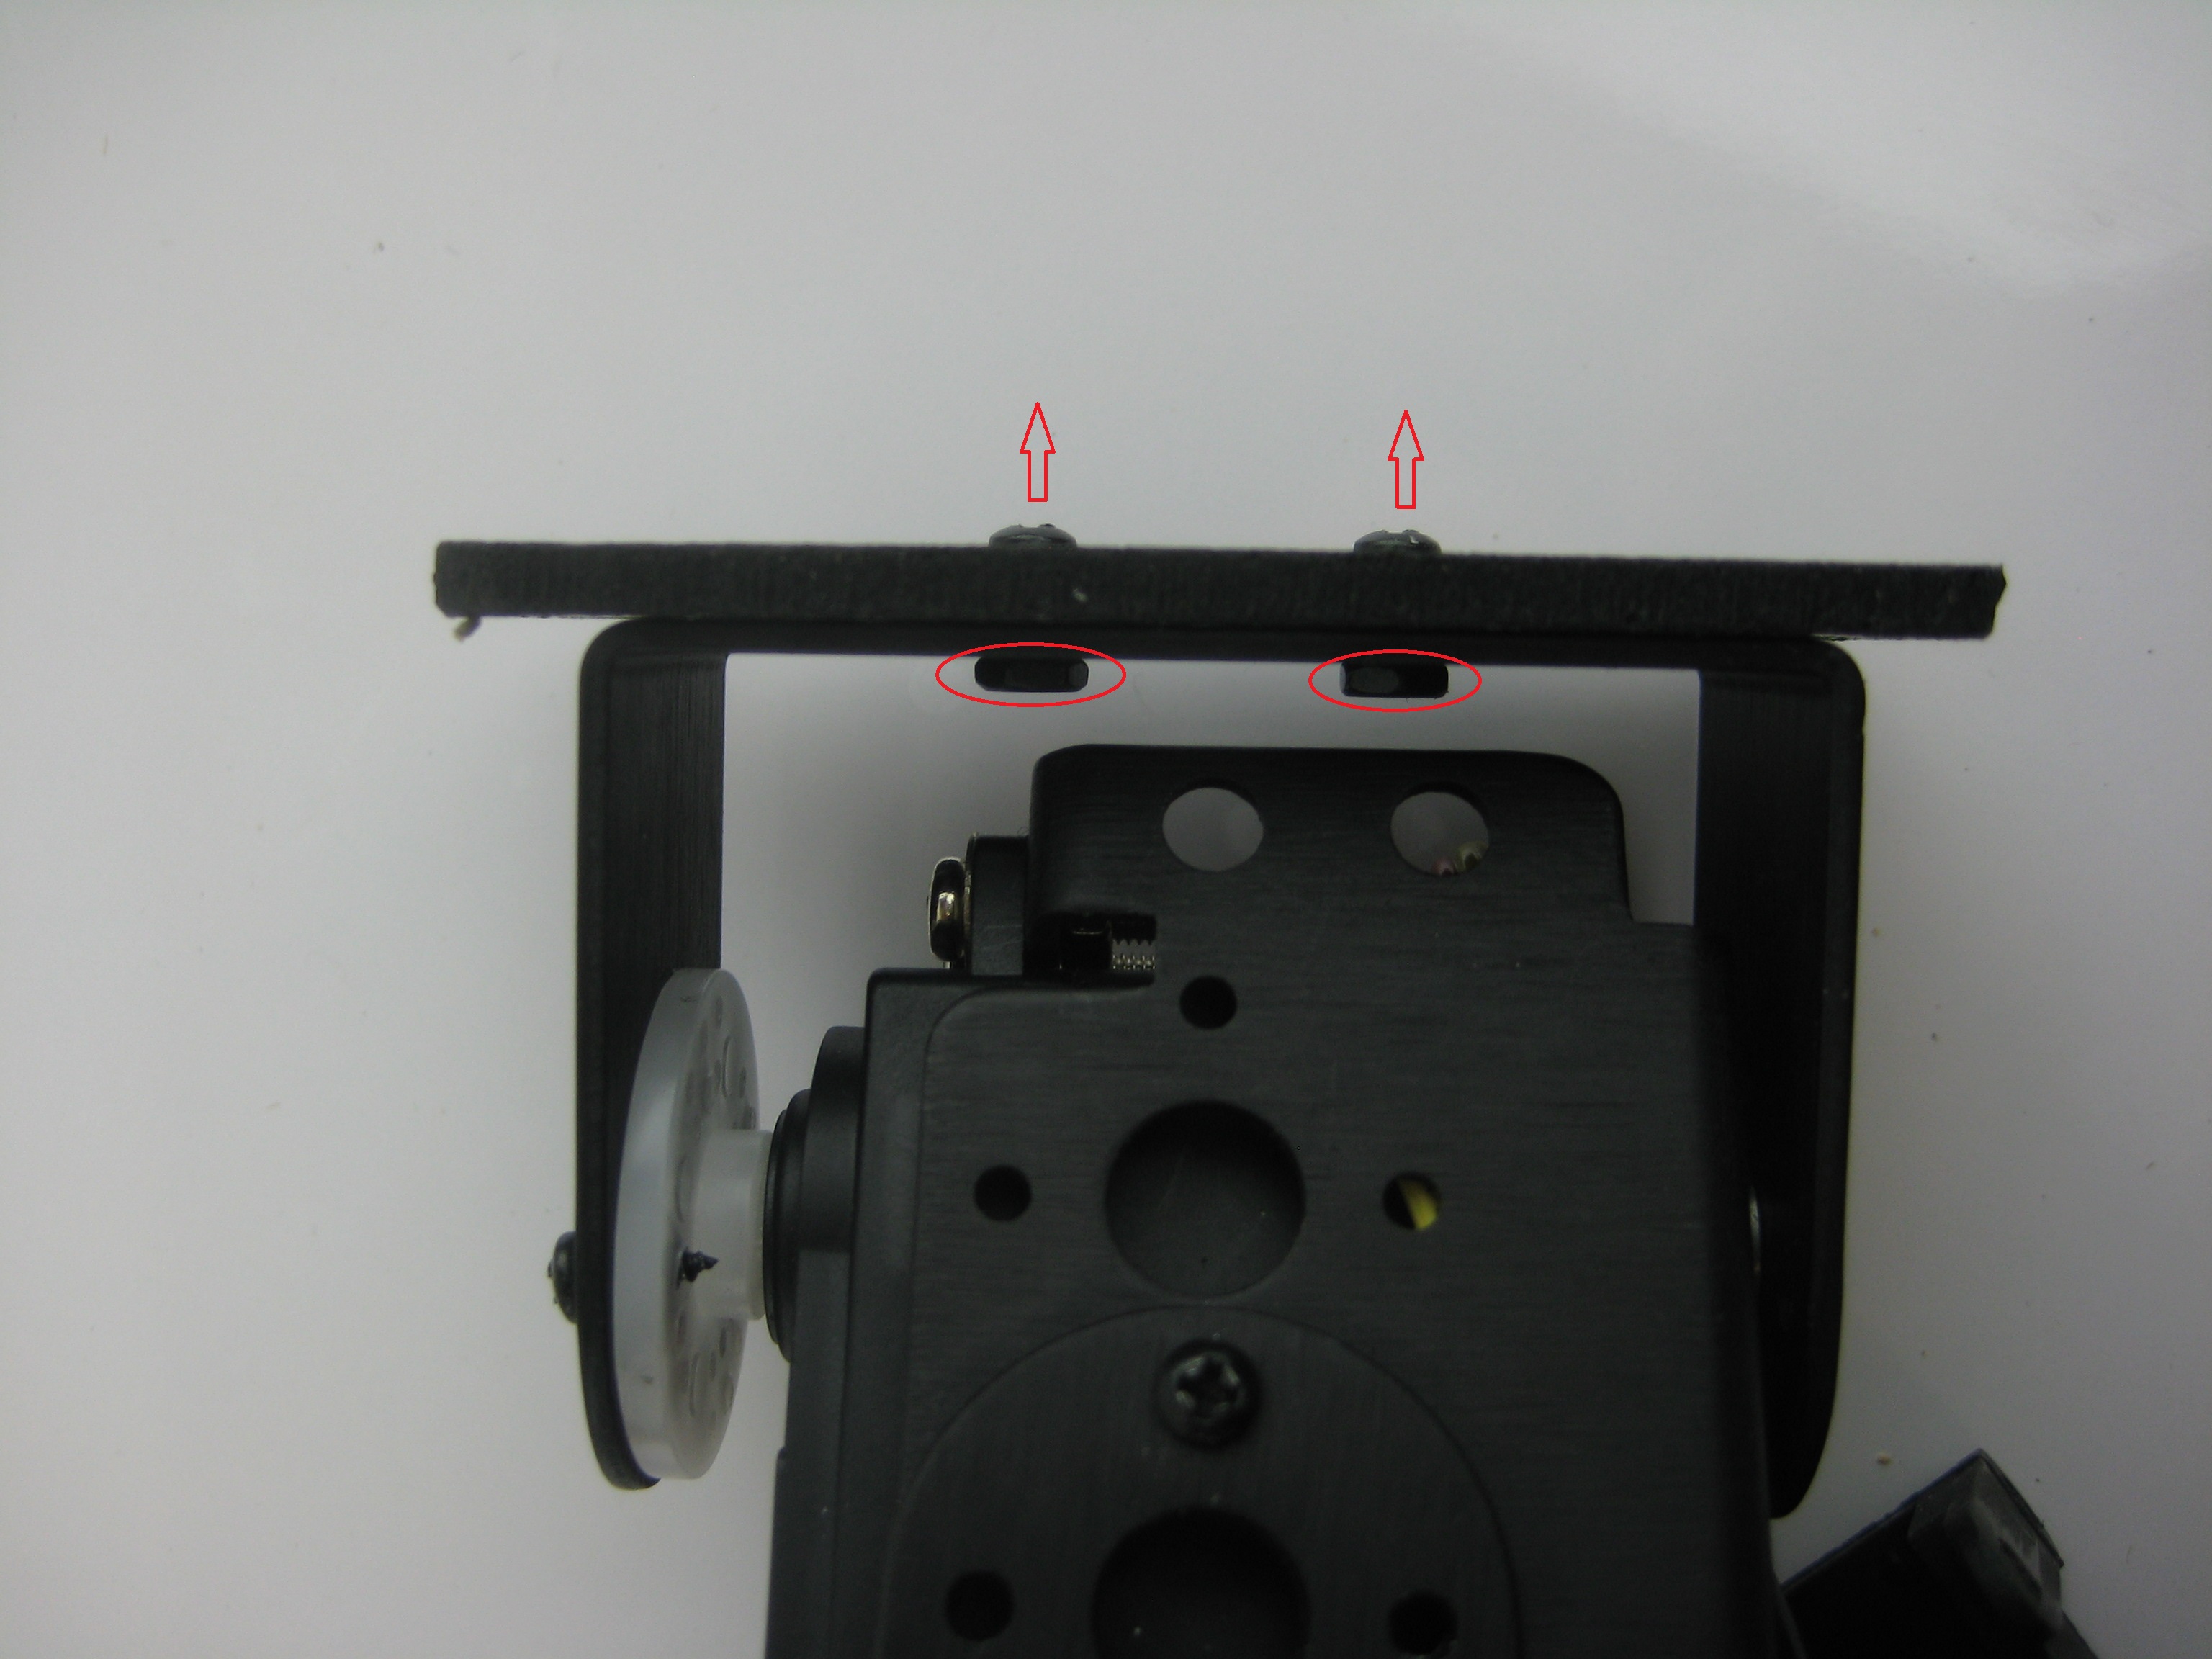 Removing the Lexan plate Removing the Lexan plate |
 Lexan Plate Removed Lexan Plate Removed |
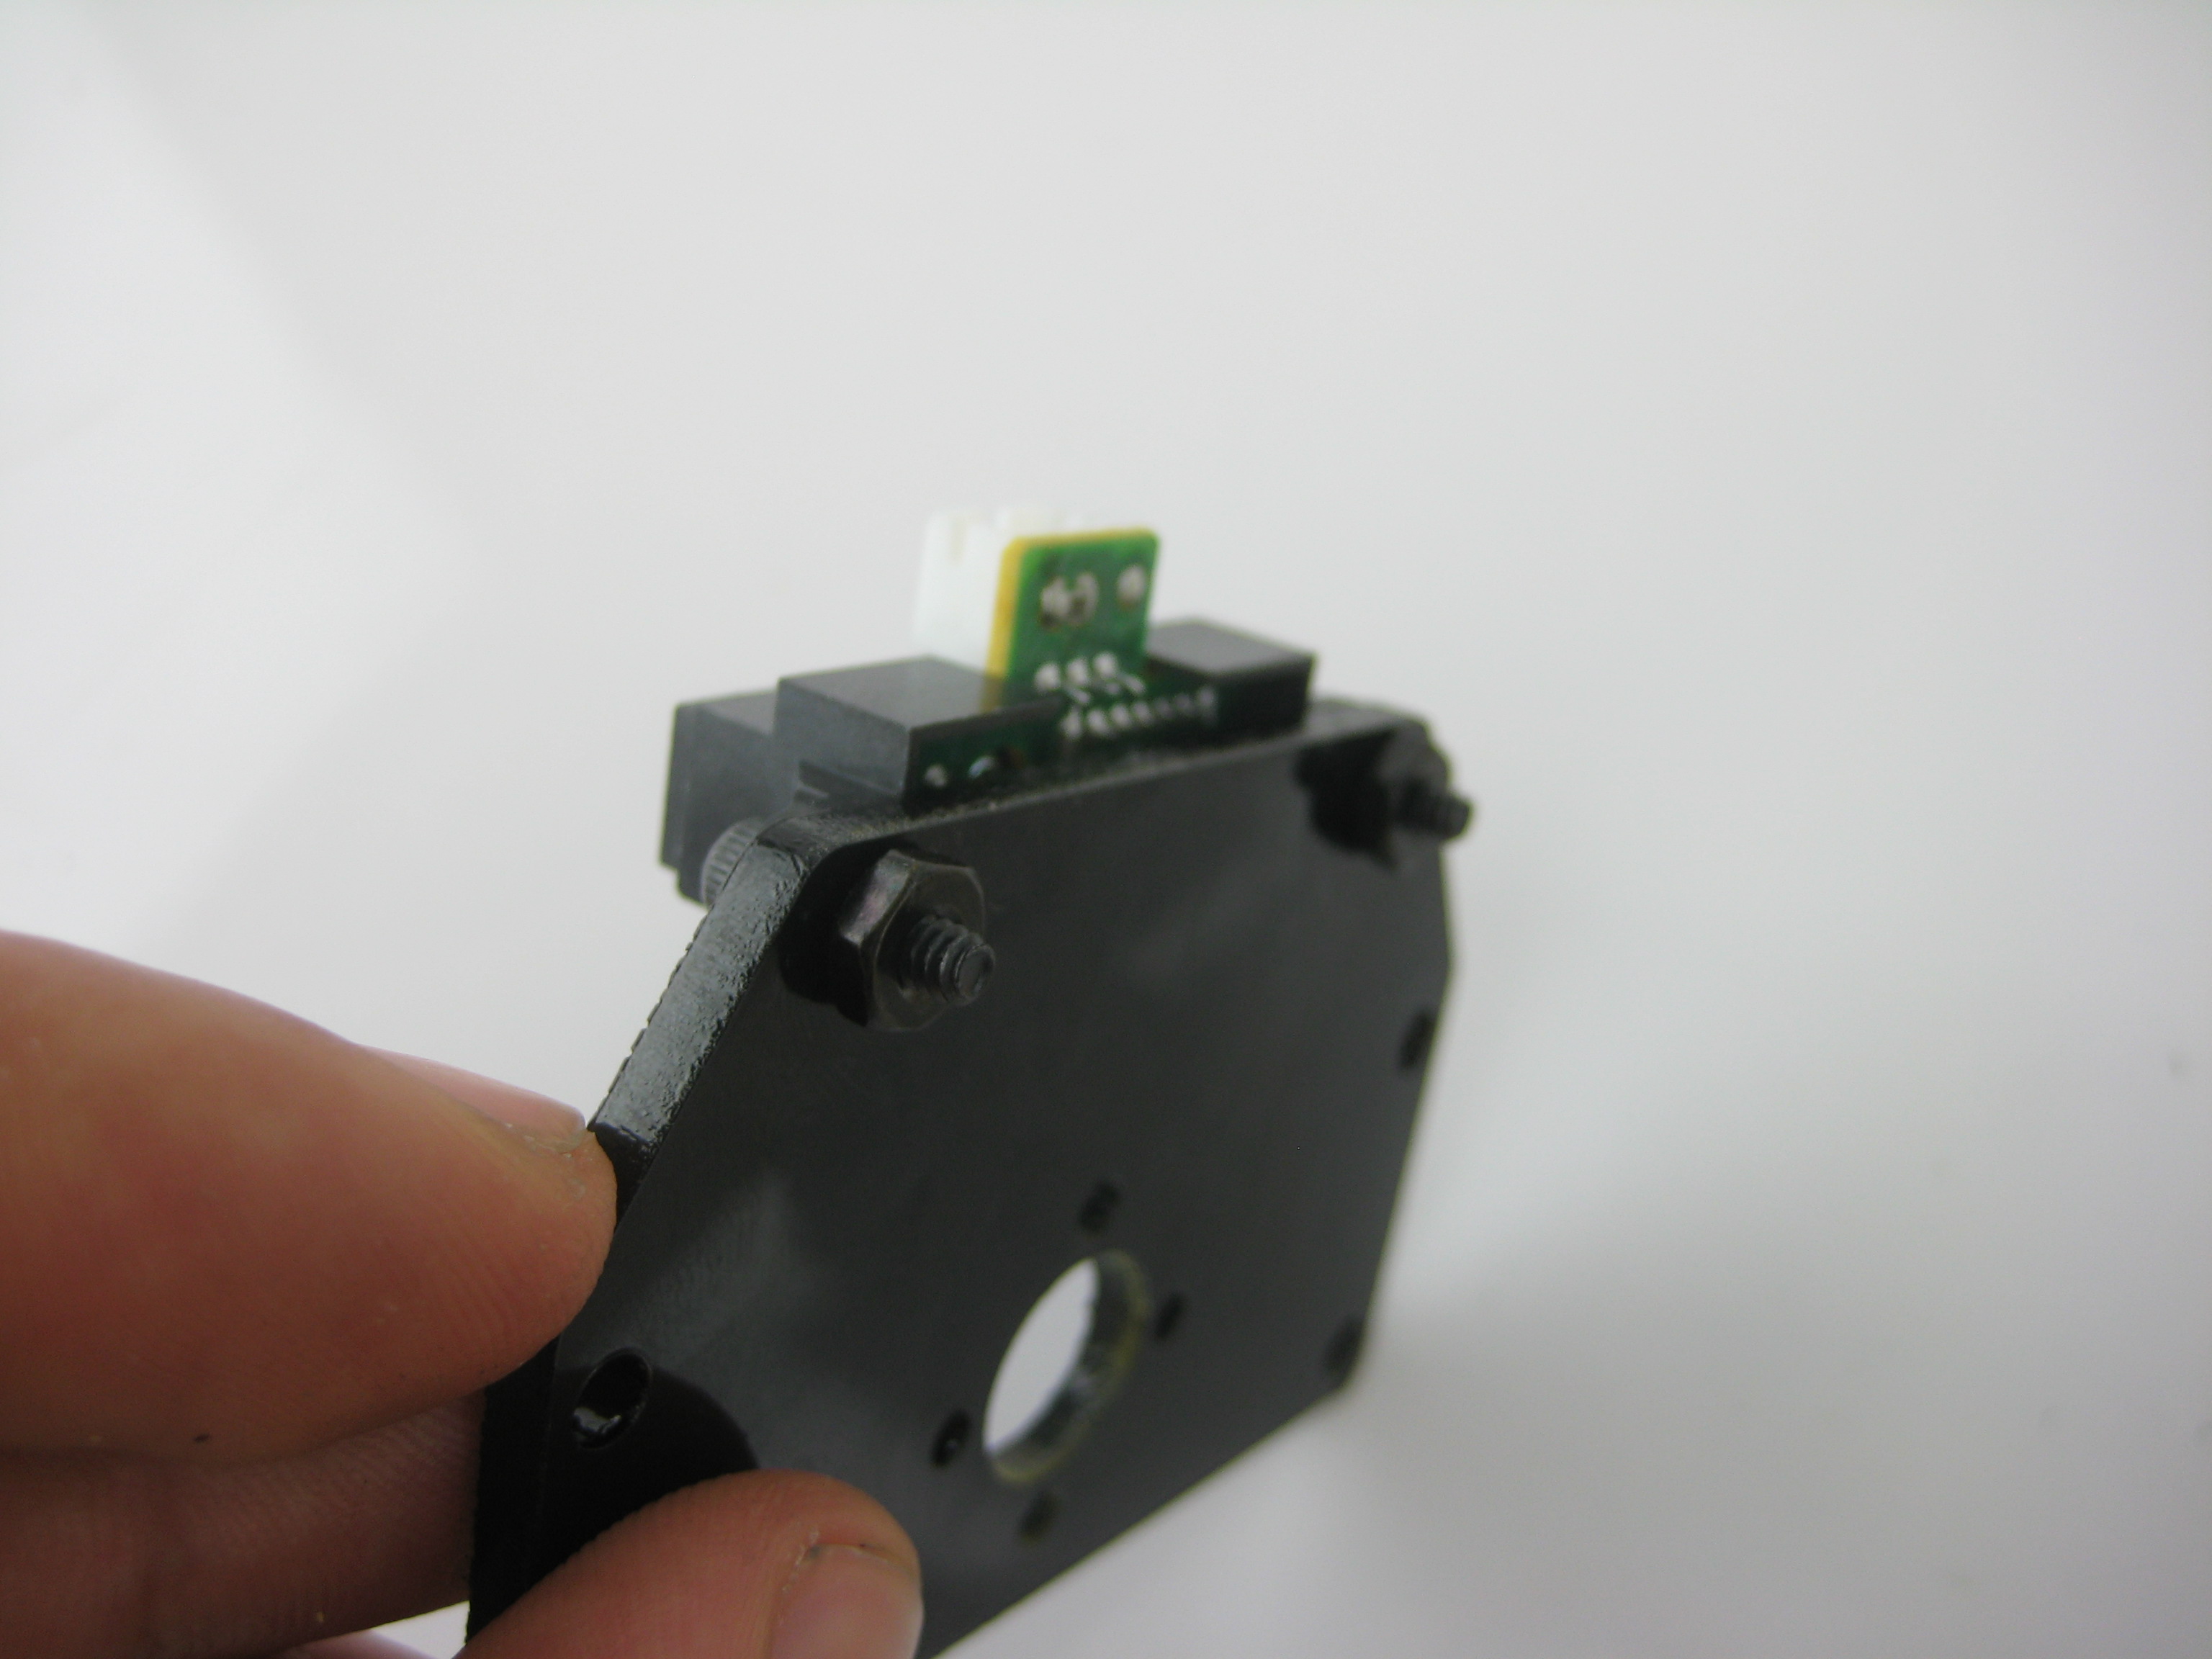 Sharp sensor with the new mounting plate
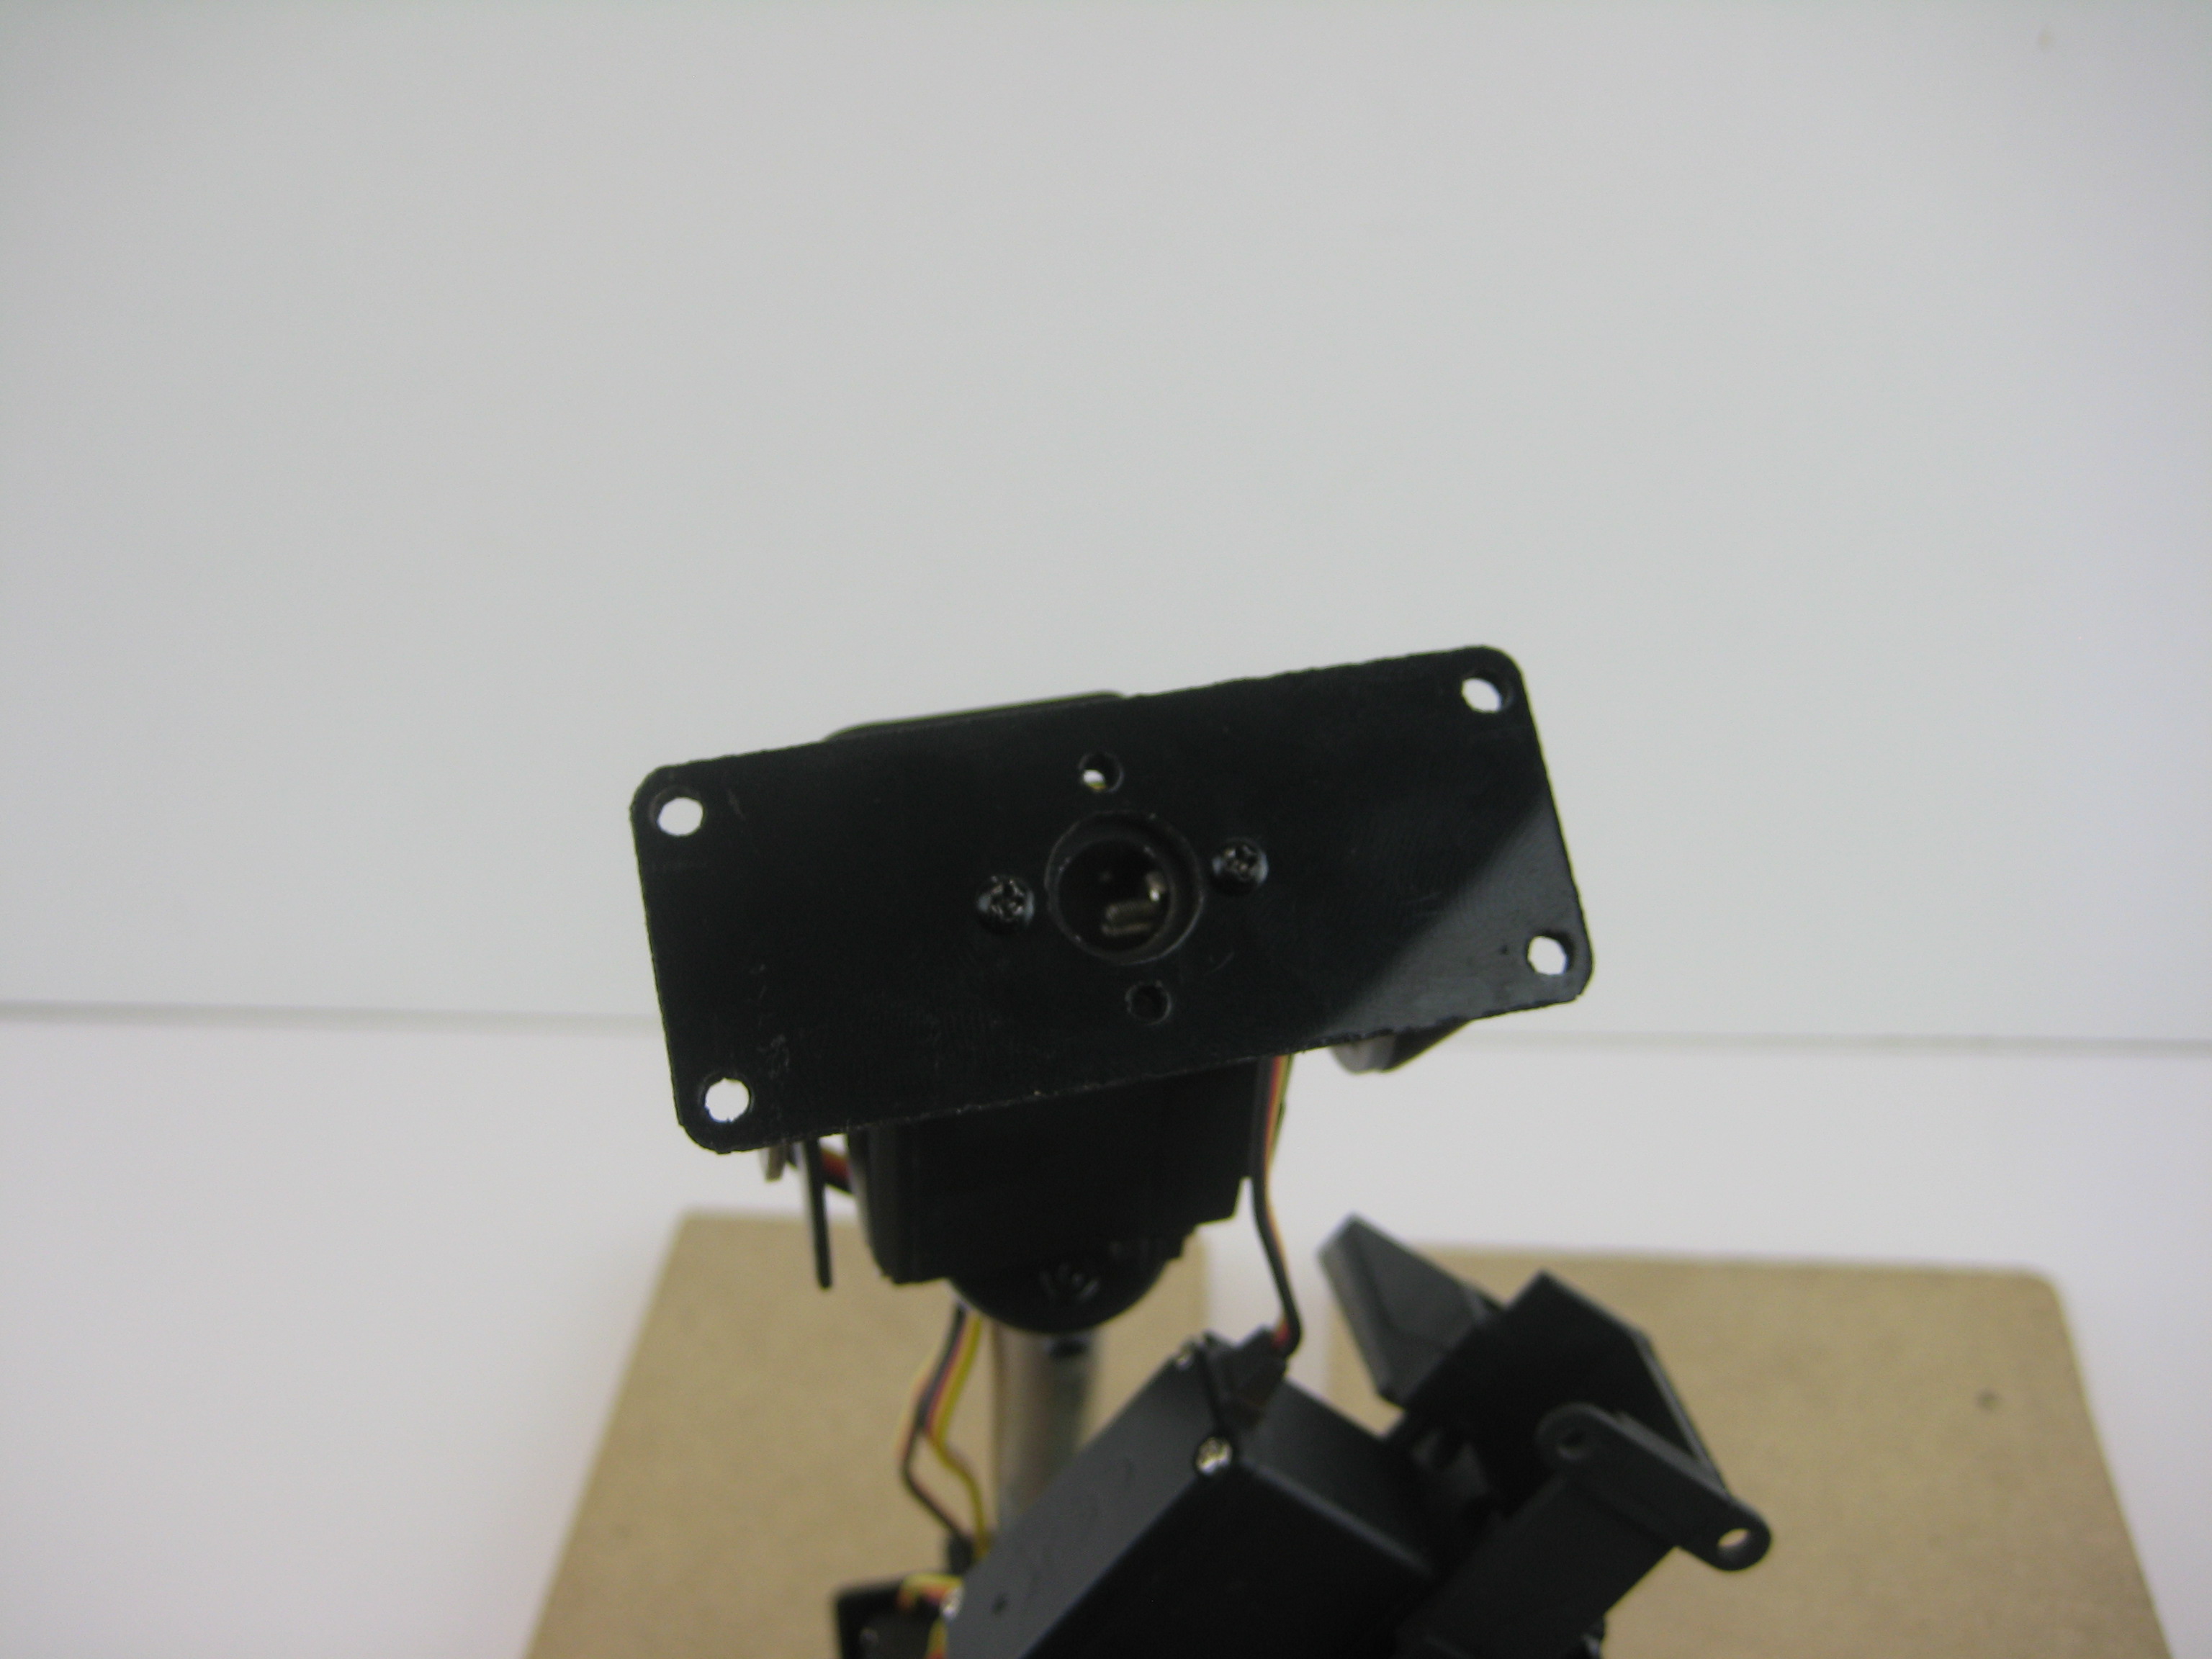
 Mounting the new plate with the Sharp sensor Mounting the new plate with the Sharp sensor |
 Mounting the new plate (rear view) Mounting the new plate (rear view) |
 New plate installed
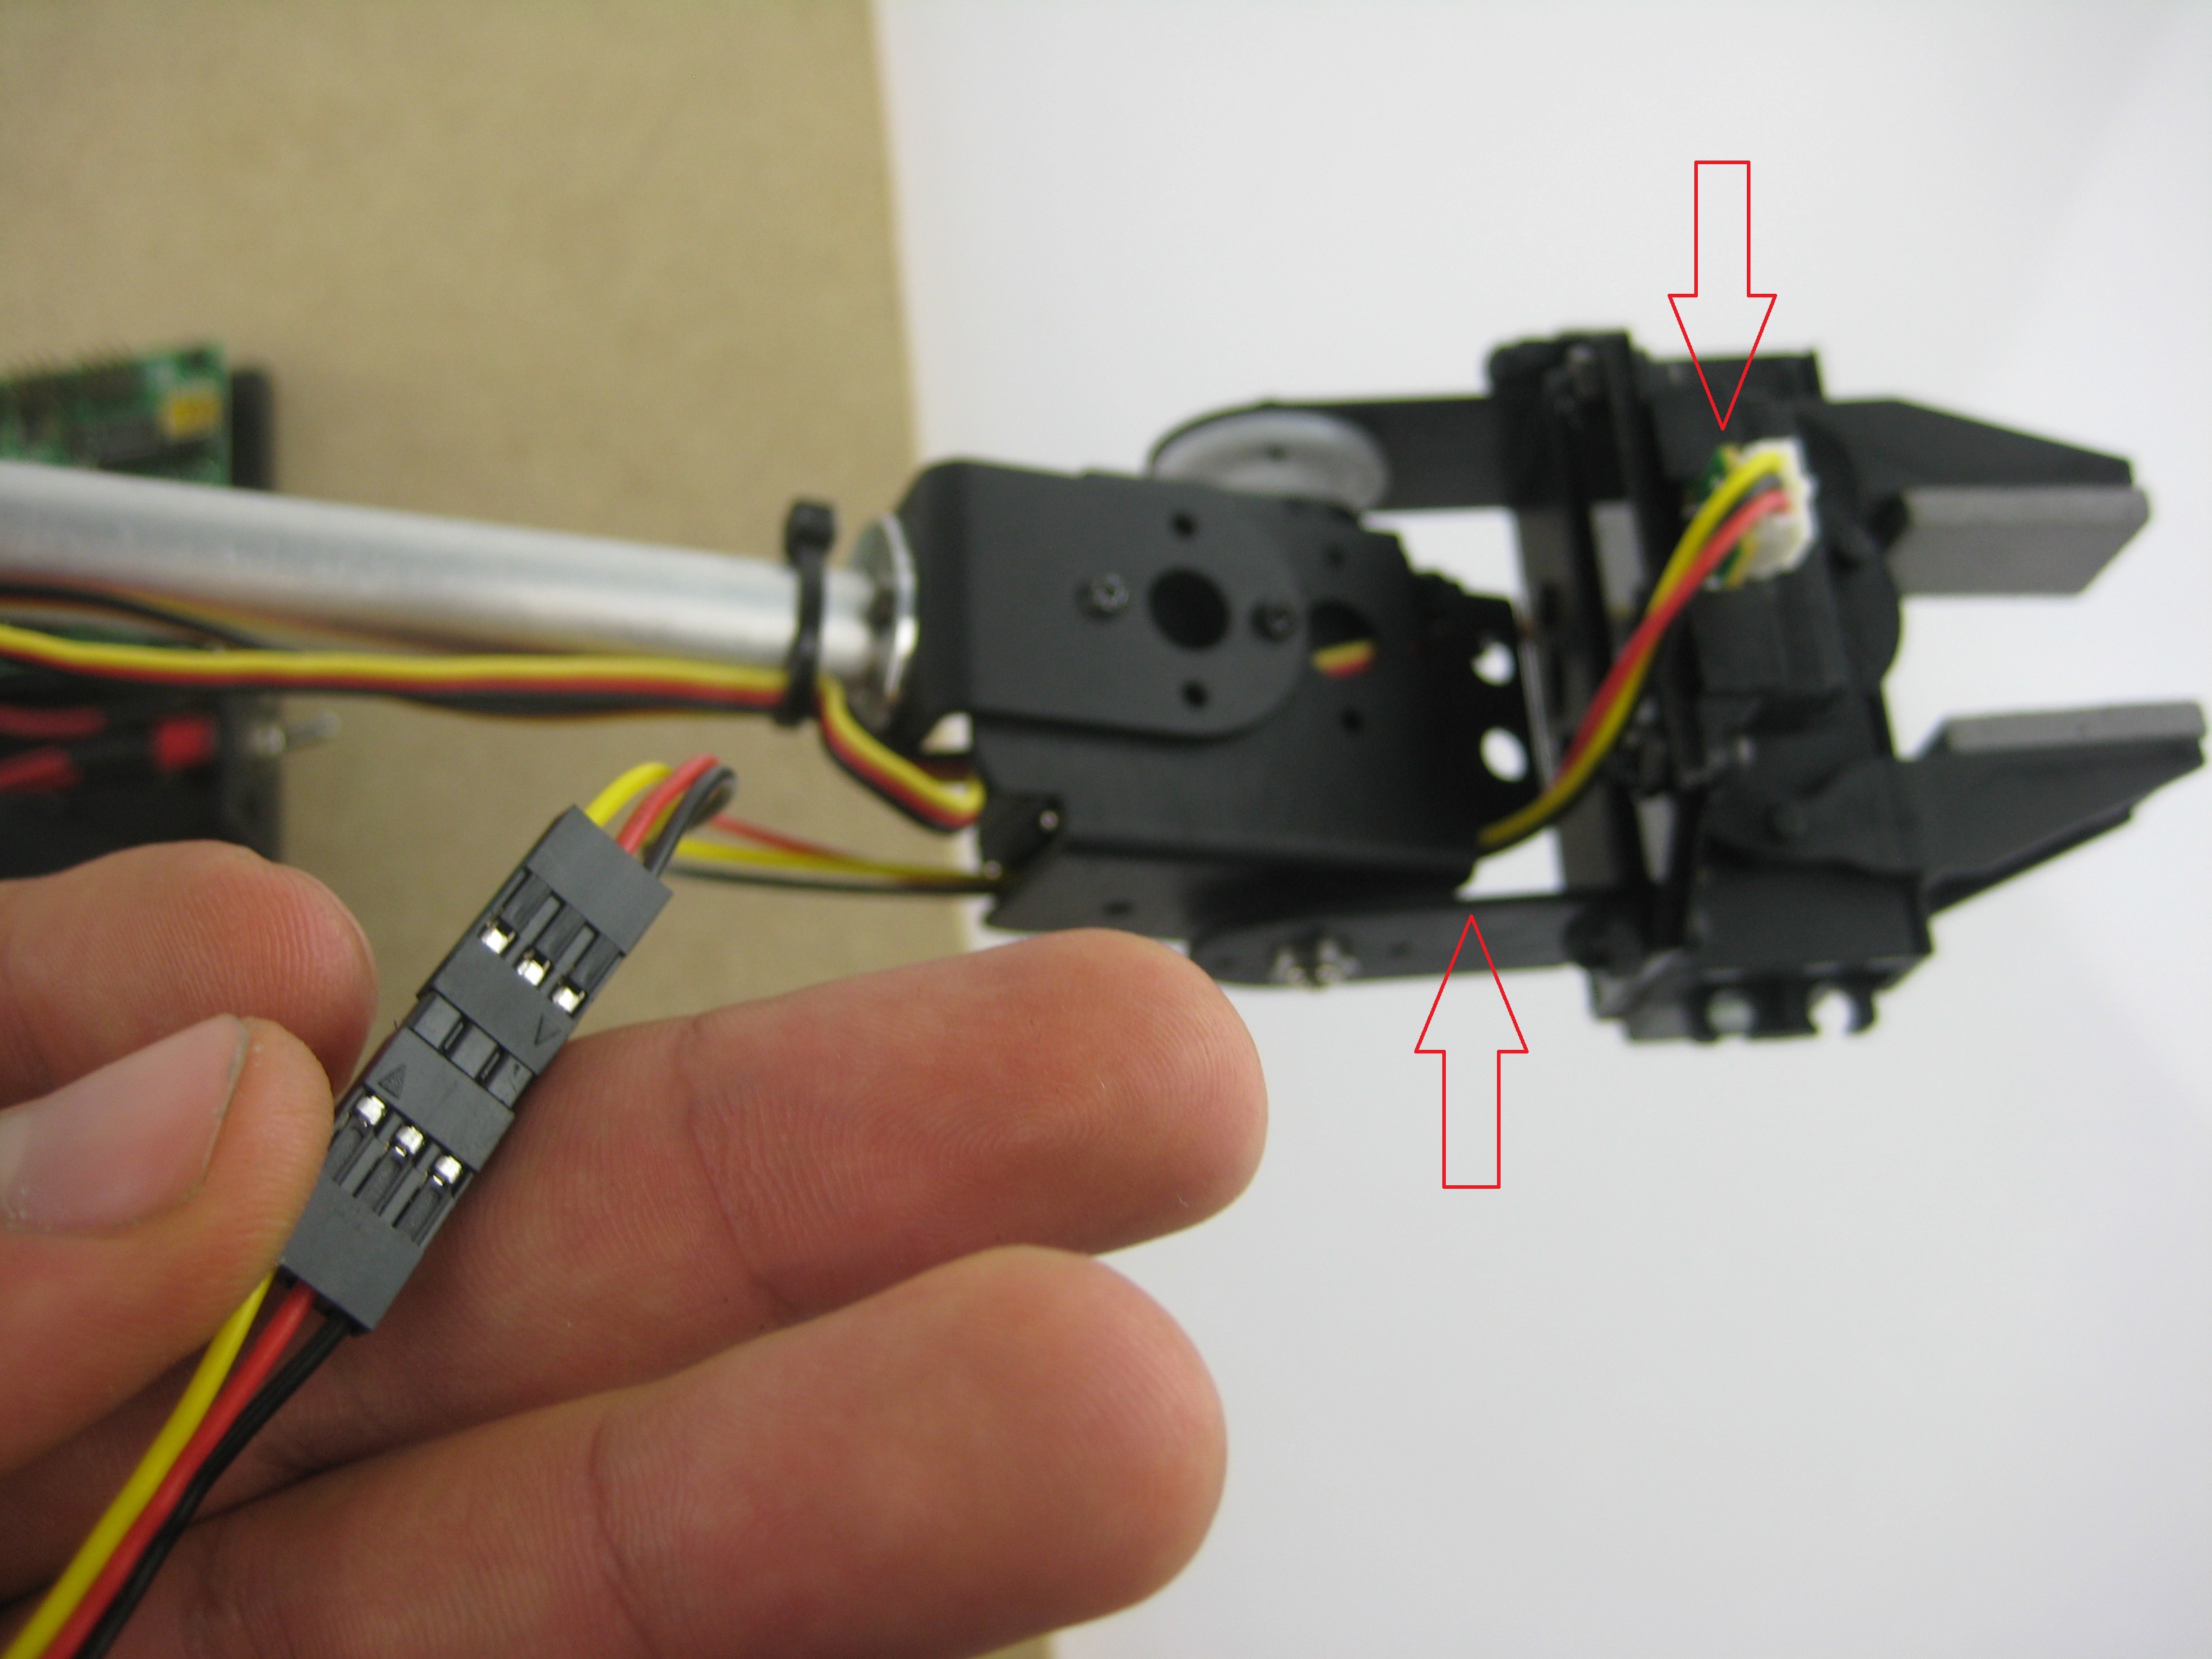 Connecting the Sharp IR sensor
 Attaching the Sharp sensor cables to the arm
Thanks for helping to keep our community civil!
Notify staff privately
You flagged this as spam. Undo flag.Flag Post
It's Spam
This post is an advertisement, or vandalism. It is not useful or relevant to the current topic.
Report Reason
This post is an advertisement, or vandalism. It is not useful or relevant to the current topic.
You flagged this as spam. Undo flag.Flag Post
✅ Your Post Has Been Submitted Successfully!
Your post is currently under review by our moderation team. The review process usually takes up to 48 business hours.
You can track your post's status in the "My Content" section of your profile. Once approved, it will be published and visible to others.

Thank you for contributing to our community!