Review of Microbric's Viper Robotics Development Kit

![]() I was recently offered the chance to review Microbric's Viper Robotics Development Kit. I always love to try out new robot kits and see what's on the market, so I jumped at the chance. Prior to Microbric contacting me, I had heard some about the kits. You may have read a prior review of the kit from our pals at robots.net, Sprocket's Slog, or at Robots Dreams. It seemed like a unique concept and I was eager to see if it played out in reality.
I was recently offered the chance to review Microbric's Viper Robotics Development Kit. I always love to try out new robot kits and see what's on the market, so I jumped at the chance. Prior to Microbric contacting me, I had heard some about the kits. You may have read a prior review of the kit from our pals at robots.net, Sprocket's Slog, or at Robots Dreams. It seemed like a unique concept and I was eager to see if it played out in reality.
Microbric, based in Australia, promptly shipped me a package containing the Viper kit along with the three main add-on kits: wheel kit, sumo kit, and line tracker kit.
The concept of ‘modules’ are the unique feature of this kit. They are the basic building blocks of a set. Each module is a self-contained unit with at least three connectors on a side, which provide power, ground, and signal to the main motherboard. This creates a modular system of construction that doesn't require any extra wires or soldering. The modules are attached to each other, or the motherboard, via a ‘bric’. Each bric is a small nylon connector that contains three nuts. Three small screws are threaded into the nuts and connect the modules together. The screws form the electrical contacts between the modules.
To keep users from incorrectly wiring the modules together, each bric is keyed to allow it to be attached in only one way, and each module is marked to indicate which holes to align.
Kit Contents
- Each kit comes with a number of pieces, including
- 2 gear motors, with controllers
- IR sensor module
- 2 bump sensor modules
- 1 button module
- 1 switch module
- 2 led modules
- IR remote control
- 20+ brics
- screw driver
- foam wheels
- battery holders
- misc. connectors and pieces
- Basic Atom motherboard
The kit comes with a nice plastic container that can be used to store the parts. This is much like the original Mindstorms box and is great for keeping track of small parts.
A little bit of assembly is required in order to get started. The manual guides you through this process. This includes placing the small nuts into the brics (which can be tedious), attaching the battery holder to the motherboard, and detaching the various parts from their PCB holders.
The modules, motherboard, and connector pieces are high quality PCBs.
I had a bit of trouble assembling my first robot. It was often difficult to position the screws into the holes, and the nuts tended to fall out of the brics as I was trying to attach things. I imagine that after use the nuts will work themselves tightly into the nylon brics and not fall out as often. Perhaps a little dab of glue between the nuts and brics would also help.
I was also sometimes confused when trying to connect modules and making sure that they were facing the right direction. The keying on the brics is very slight and takes a bit of close examination to determine which side to place on which module. Some sort of indication molded into the bric’s plastic would probably help this.
The wheels form-fit nicely on the shafts of the motors and are easily removed if necessary. The motors are high quality and provide a decent amount of torque. I believe they are, or are very similar, to the GM11 gear motors from Solarbotics. However, keep in mind that Microbrics motor modules also contain a controller. A single line of code (a serial out command) is all that is required to command the motors at a certain speed and direction.
The programming environment for the Viper kit is the standard IDE from Basic Micro for their Basic Atom line of products. The Viper motherboard contains an OEM version of the microcontroller along with power regulation. The Basic Atom is programmed with Visual Basic syntax and is quite simple and powerful. It has hardware interrupts, serial outputs, servo control, and many other features. It should be noted that the Viper motherboard only brings out 16 I/O lines which eliminates the use of the extra A/D inputs.
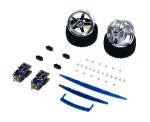
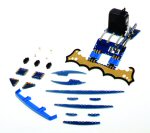
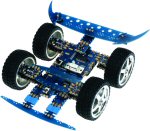
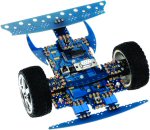
Microbric also has several add-on kits, including an extra wheel and motor pack, a sumo robot pack, and a line following sensor pack. These kits are pictured below.
To be on the honest side there are some downsides to the Viper kit. For starters, the kit doesn't come with a printed manual. This is not such an issue now-a-days with ink jet printers, but I always appreciate having something in paper to reference.
Secondly, and far more damaging, is the fact that the motherboard runs on triple A (AAA) batteries, and not double A’s. Alkaline AAA’s generally have a significantly smaller capacity than AA’s (1.1 Ah, compared to 2.8Ah). In addition, it’s difficult to find rechargeable triple A batteries. Microbric would do well to create an add-on pack for different power sources. Perhaps even a lithium polymer battery addition. It would also be nice to have a module that would allow the motherboard to be powered off of a wall transformer.
There are a few other minor complains, like how it’s easy to cut yourself when initially removing the parts from their PCB holders. It can also be sometimes difficult to maneuver your fingers in order to attach certain brics, especially when building upwards. I had to use the screw driver a few times in order to lever a piece into place.
Aside from these minor complains the Microbric Viper Robotics Development Kit is a sound platform for experimenting with robotics. It takes all the difficult out of correctly wiring parts and eliminates the danger of destroying delicate electronics by connecting them improperly. The Basic Atom is a good chip that can be easily programmed and is powerful.
The kit retails for about $140 USD (depending on the exchange rate). And can be shipped internationally. They even have a compact package for international shipping. The price of kit makes it well worth the purchase. $140 is a steal for what you get.
You can find more information about the kit here, and purchasing information here.
Thanks to Josh Richards from Microbric for letting us review the kit.
Thanks for helping to keep our community civil!
This post is an advertisement, or vandalism. It is not useful or relevant to the current topic.
You flagged this as spam. Undo flag.Flag Post


