Phidgets Lesson 1: Installing Phidgets Drivers

 Phidgets are easy to use sensors and controllers for programmers. After just a bit of coding, you'll have your computer connected to the real world via an assortment of sensors as well as motors, relays, remote control, RFID, LEDs and more! But first, you'll need to get the drivers installed, and luckily, it will take less than 5 minutes.
- Download the appropriate Phidgets driver for your operating system from Phidgets.com.
- If you're on Windows or Mac, open the installer you just downloaded. A wizard will guide you through the installation.
- If you're using Linux, use
apt-getto installlibusb-1.0-0-dev, if you don’t have it already. (Note thatlibusb-1.0may be on your system already, but the development libraries probably aren't.) Navigate to the directory where you unpacked the Phidget libraries. From the main unpacked library directory first run./configure, thenmakeand finallysudo make install.
- Now that the Phidgets drivers are installed, let's do some quick tests to make sure the installation worked. First plug in one of your USB devices (like an interface kit, which is what we'll use in this example).
- On Windows, go to the Windows Device Manager, then to Devices and Printers (this is for Windows 7 and exact naming may be different on your computer). A list of all the connected devices should appear, and if you scroll down, any connected Phidgets should be listed under the section titled “unspecified”.
- On Mac, go to “About This Mac” and click on more info, then system report. Under hardware, click on USB and there you can see that a Phidget device is connected.
- On Linux, you can use the kernal log reader
dmesg. Pipe the output of thedmesginto the utilitytailto read the last ten lines of the log:$> dmesg | tail ....(9 lines).... [24344.013638] usb 2-1.2: new low speed USB device number 5 using ehci_hcdThe number between the square brackets is the system time in seconds since the last boot up, so you can tell whether the event was recent or not.
- If you've got it working, it's time to try out the software. The Windows and Mac installation come with a Control Panel app that offers a quick check that your devices are connected. For Linux, we'll use the examples to check that everything is working fine, which will be covered in the next lesson.
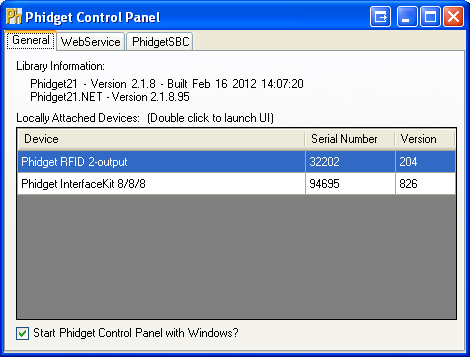
- On Windows, you should see the
 icon in the taskbar. Double click on it to bring up the Phidget Control Panel. If the icon does not appear, just find and open the Phidget Control Panel from the start menu.
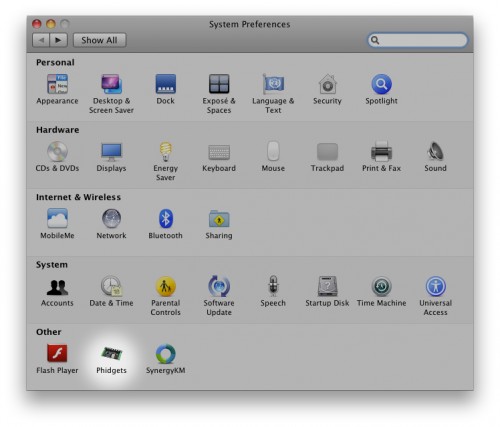
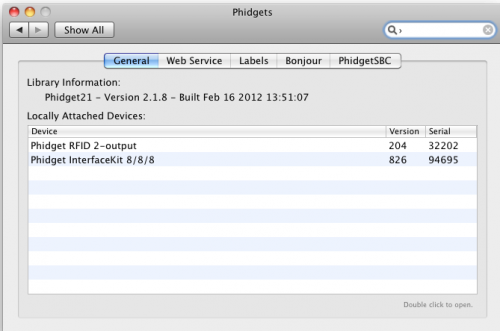
 - On a Mac, open up your System Preferences. You should see a Phidgets icon in the “Other” section at the bottom. Clicking on it will open the Phidgets Control Panel.
- On Windows, you should see the
- If you have devices connected, they’ll show up in the Control Panel. As you can see in the General tab, we’re working with an RFID 2-output and Phidget InterfaceKit 8/8/8.
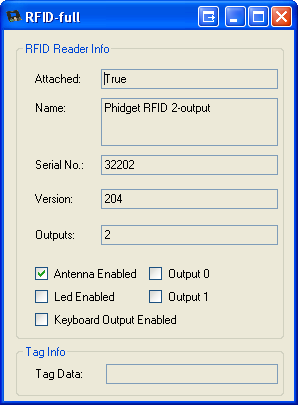
- Double click on the Phidget device you want to play with. The software will be able to control outputs (like LEDs) and respond to inputs (like sensors or RFID chips). If the Phidget device is not showing up or working properly, then check these troubleshooting tips.
Thanks for helping to keep our community civil!
Notify staff privately
You flagged this as spam. Undo flag.Flag Post
It's Spam
This post is an advertisement, or vandalism. It is not useful or relevant to the current topic.
This post is an advertisement, or vandalism. It is not useful or relevant to the current topic.
You flagged this as spam. Undo flag.Flag Post


