

Integration Riverdi modules with Arduino

Riverdi company is the leader in intelligent TFT display modules. We use cutting-edge technologies and the experience gained for years on the market, thus we can provide the best display solution for the specific application.
As our specialization are the intelligent solutions our standard lines provides the support of the SSD1963 graphic controller, as well as the three generations of EVE (Embedded Video Engines). We do have in offer modules with control boards with EVE1, EVE2 and the newest on the market – EVE3.
The modularity of our products makes it possible to accomplish various requests of the project – from simple hobby design to the industrial application!
In this short article we will show you how easy is the implementation of Arduino board to our display via the Arduino TFT shield.

To start programming your Riverdi display with the Arduino Riverdi TFT shield, you will need few basic components:
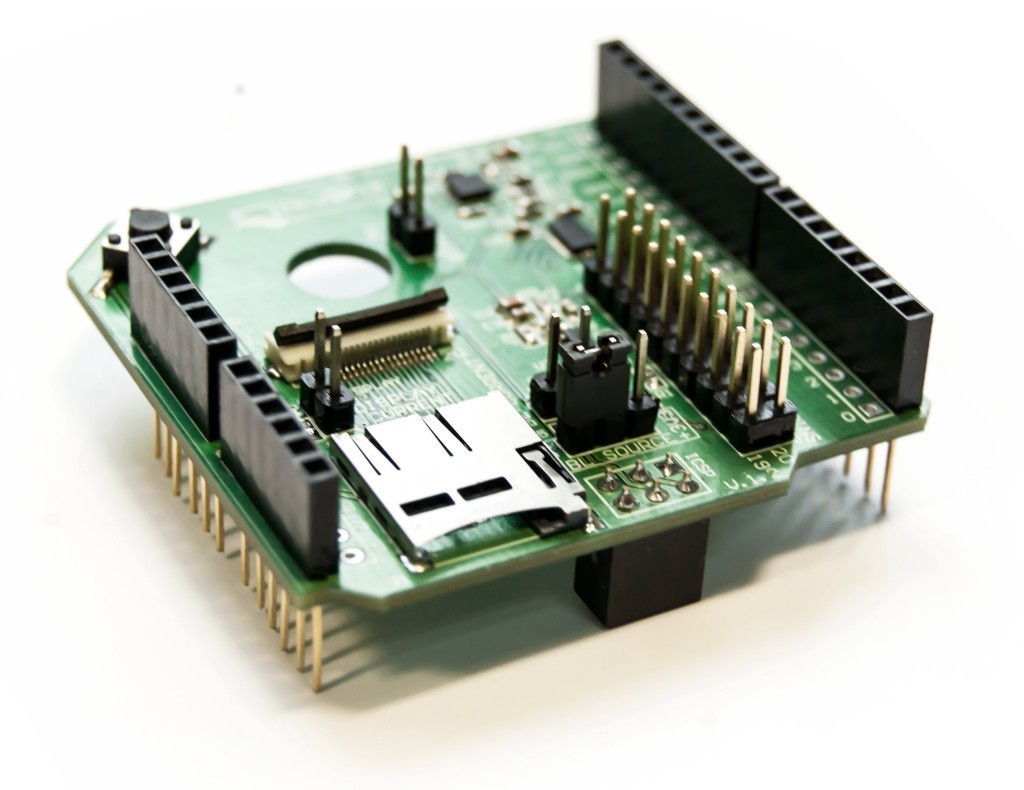
- Arduino TFT shield
- Arduino board
- 20 pin 0.5mm FFC
- Riverdi TFT display with FT8xx chip (EVE1 or EVE2)
- Micro USB connector which works as 5V power supply and data connector for your PC.
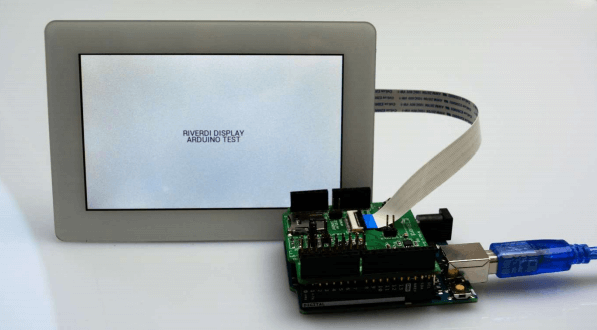
The assembled equipment, ready to work:
You will also need an IDE from Arduino and project files from Riverdi github:
- Project files: https://github.com/riverdi/riverdi-eve-arduino
- Arduino IDE: https://www.arduino.cc/en/main/software
To install Arduino IDE download the file from the official website and follow the official Arduino Guide.
Then just install Riverdi project files from the github repository and extract it to chosen location.
After the successful installation, you need to connect the Arduino board to your PC via USB cabel. Windows will autodetect the device and install drivers whether necessary. If any problem would occur, please contact Arduino help directly.
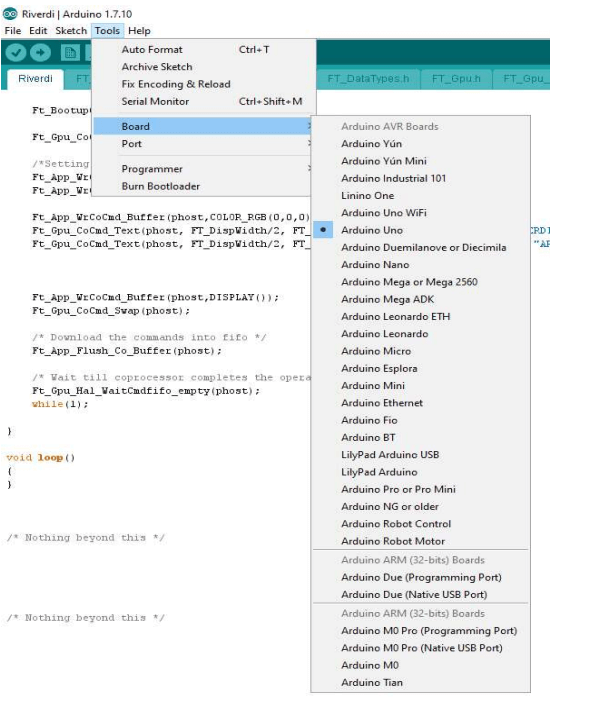
The last step is to show your IDE what type of board you have and where it is connected. To perform that go to the Tools> Board and choose your Arduino board:
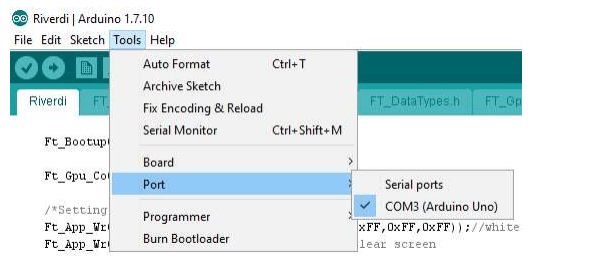
Then choose the port and select connected device:
To compile the library first clone the repository and then go to File > Open> select the riverdi-eve-arduino.ino file. After that build (Ctrl+R) and upload (Ctrl+U) project to your Arduino Device.
Note: before compilation please edit Platform.h file to choose Embedded Video Engine series (-DEVE_1, -DEVE_2 or -DEVE_3 flags), choose type and size of connected TFT module (choose predefined macros for Riverdi EVE modules or edit timings manually in Riverdi_Modules.h file for custom displays) or to redefine Chip Select and Power Down pins (default configuration supports Arduino Riverdi TFT Shield).
Using above guide you created the simple Arduino app. You can easily implement full color graphic user interface to your arduino project thanks to Riverdi TFT intelligent display solutions.
The example of the possibilities of the module is shown in the link:
To get help, please contact the Riverdi support: [email protected]
Thanks for helping to keep our community civil!
This post is an advertisement, or vandalism. It is not useful or relevant to the current topic.
You flagged this as spam. Undo flag.Flag Post
Your post is currently under review by our moderation team. The review process usually takes up to 48 business hours.
You can track your post's status in the "My Content" section of your profile. Once approved, it will be published and visible to others.

Thank you for contributing to our community!