


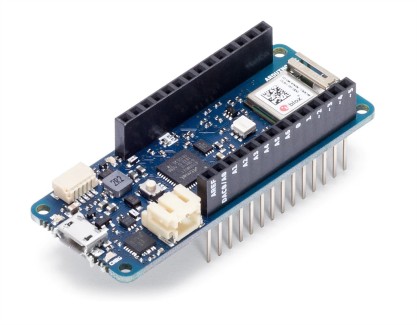
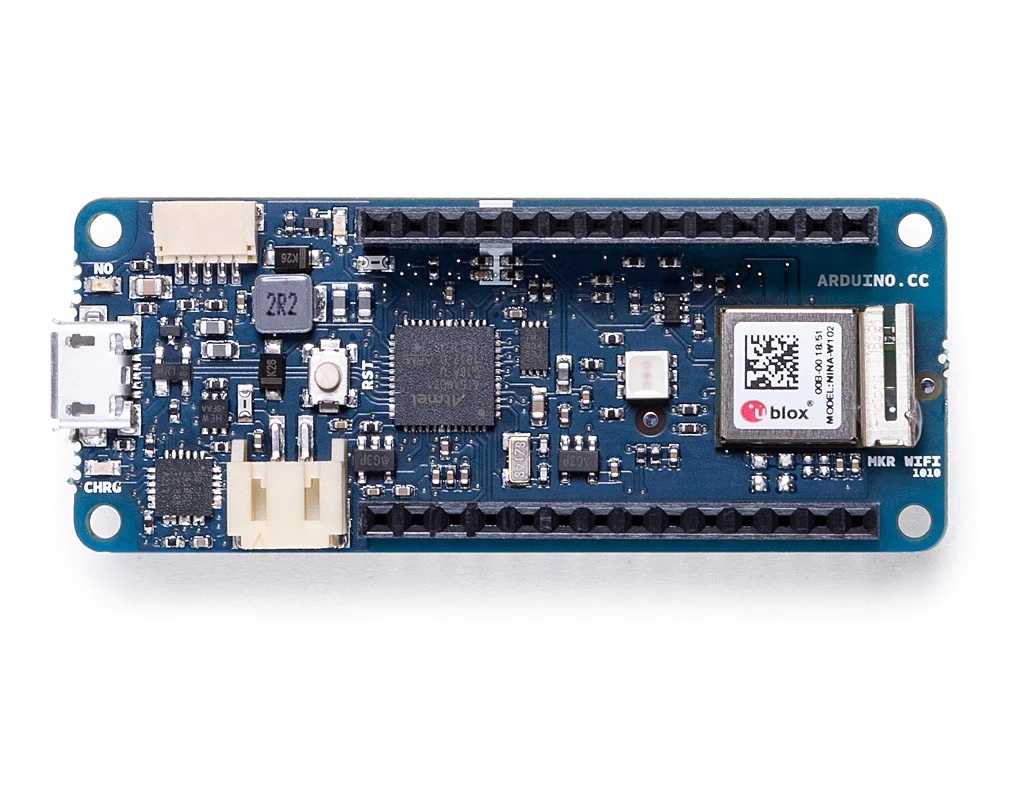
The Arduino MKR WiFi 1010 is a great choice for any beginner, maker or professional to get started with Internet of Things (IoT).
It uses the popular Arm® Cortex®-M0 32-bit SAMD21 processor, and adding the ECC508 crypto-chip for security.
The MKR WiFi 1010 is a dual processor device that invites for experimentation. The WiFiNINA module allows you to, for example, make use of both WiFi and Bluetooth® / Bluetooth® Low Energy at once on the board.
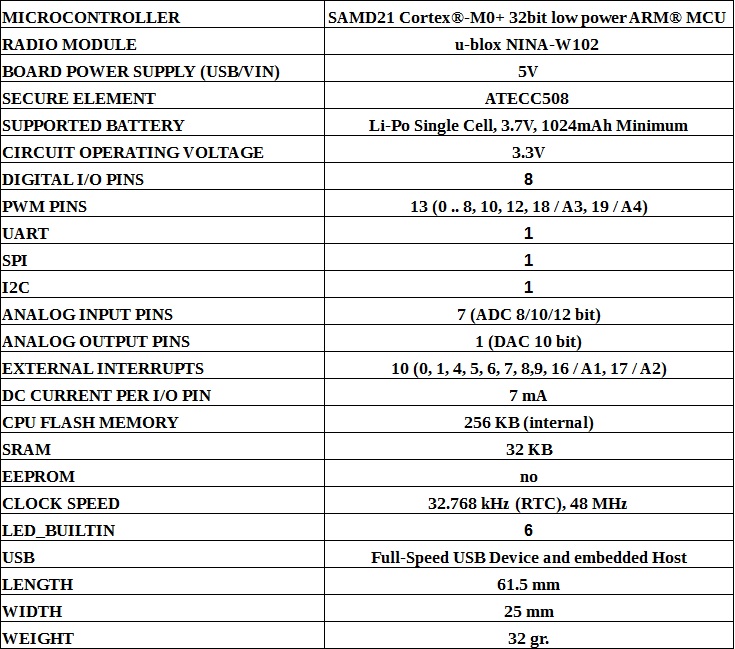
MKR1010 Technical features :
The Arduino IoT Cloud is a platform that allows anyone to create IoT projects, with a user friendly interface, and an all in one solution for configuration, writing code, uploading and visualization.
Here a list of some Arduino IoT Cloud features :
- Data Monitoring - you can easily monitor your Arduino's sensor values through a dashboard.
- Variable Synchronisation - variable synchronisation allows you to sync variables across devices, enabling communication between devices with minimal coding
- Scheduler - schedule jobs to go on/off for a specific amount of time (seconds, minutes, hours).
- Over-The-Air (OTA) Uploads - upload code to devices not connected to your computer.
- Webhooks - integrate your project with another service, such as IFTTT.
- Amazon Alexa Support - make your project voice controlled with the Amazon Alexa integration.
- Dashboard Sharing - share your data with other people around the world.
- Arduino IoT App Remote - a dashboard on your Android or Apple device
Compatible Hardware
A cloud compatible board is required. You can choose between using an official Arduino board, or a board based on the ESP32 / ESP8266 microcontroller.
Connection via Wi-Fi is an easy alternative, and your credentials can safely be entered during the configuration of a project.You can connect your board to the cloud via your home/work/school router.
Open a free Arduino IoT Cloud Account at https://cloud.arduino.cc/
We need just a few simple step to setting up the Arduino IoT Cloud and accessing the different features available .
1st : Create an Arduino Account
To starting using the Arduino IoT cloud, we first need to log in or sign up to Arduino.
2nd : Go to the Arduino IoT Cloud
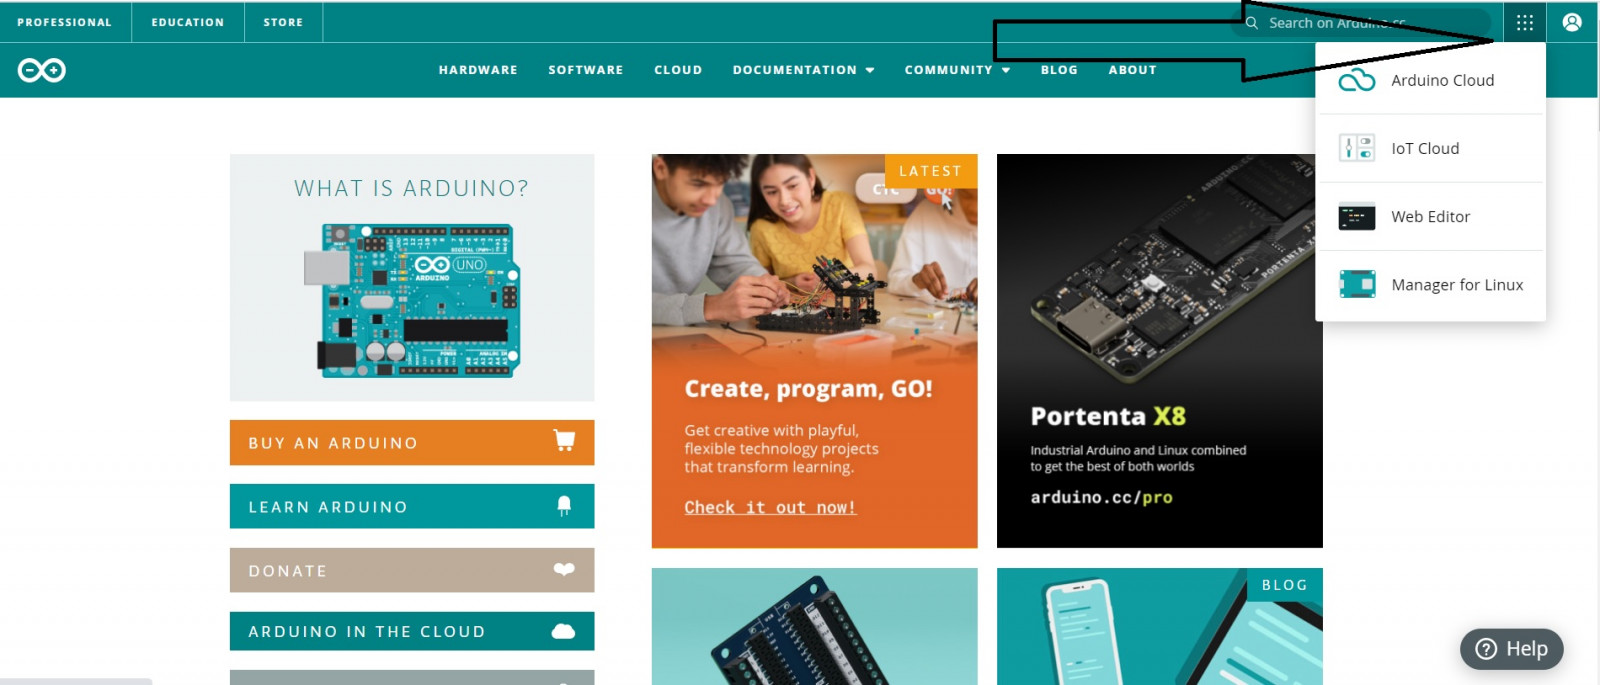
After we have signed up, you can have access to the Arduino IoT Cloud from any page on arduino.cc by clicking on the four dots menu in the top right corner. You can also go directly to the Arduino IoT Cloud.
3rd : Create a Thing
What is a "Thing" ?
It is a representation of a connected object. It includes the properties of the object (e.g., temperature, light, pressure...), an associated device (MKR1010 in this case ) , a Wi-Fi network connected, a special sketch file to upload on your MKR1010.
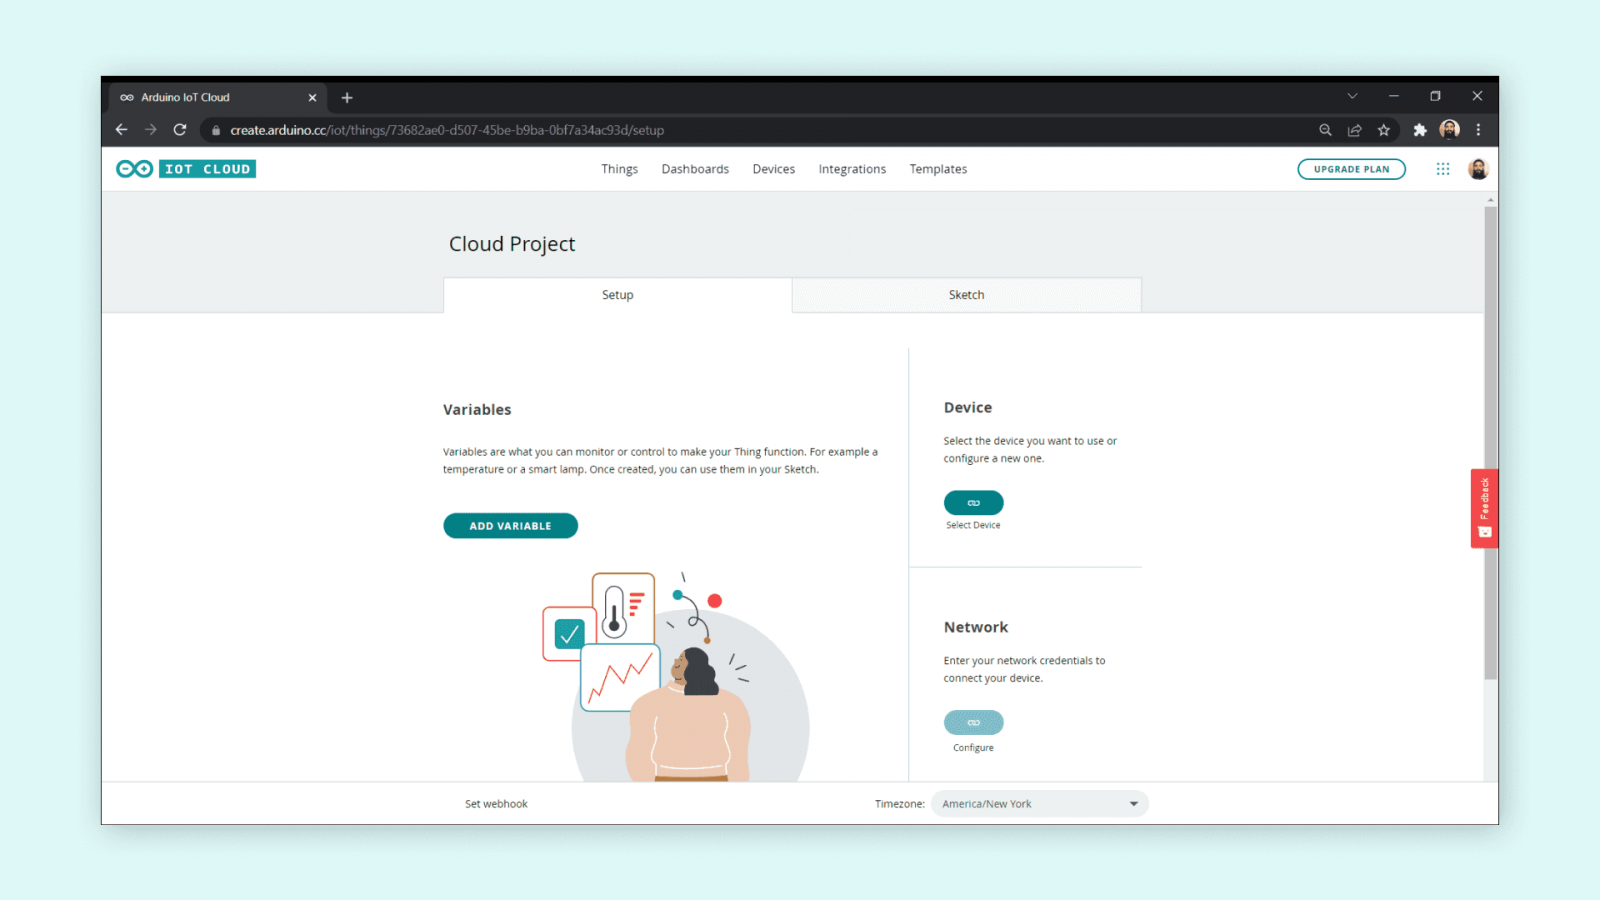
Initial view before to create a Thing
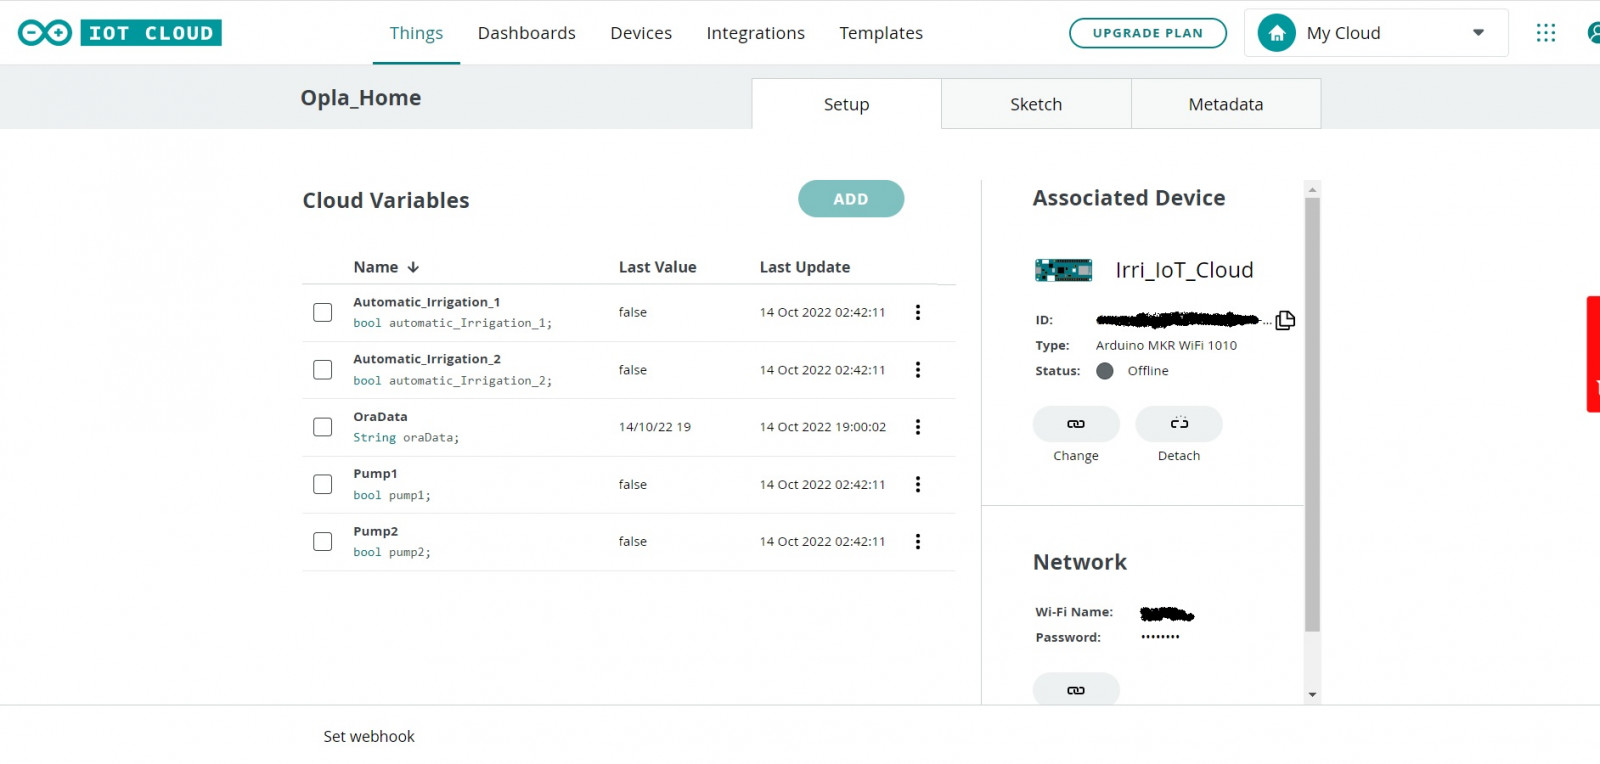
Example of a Thing
4th : Configure your Device
Your device can easily be added and linked to your Thing.
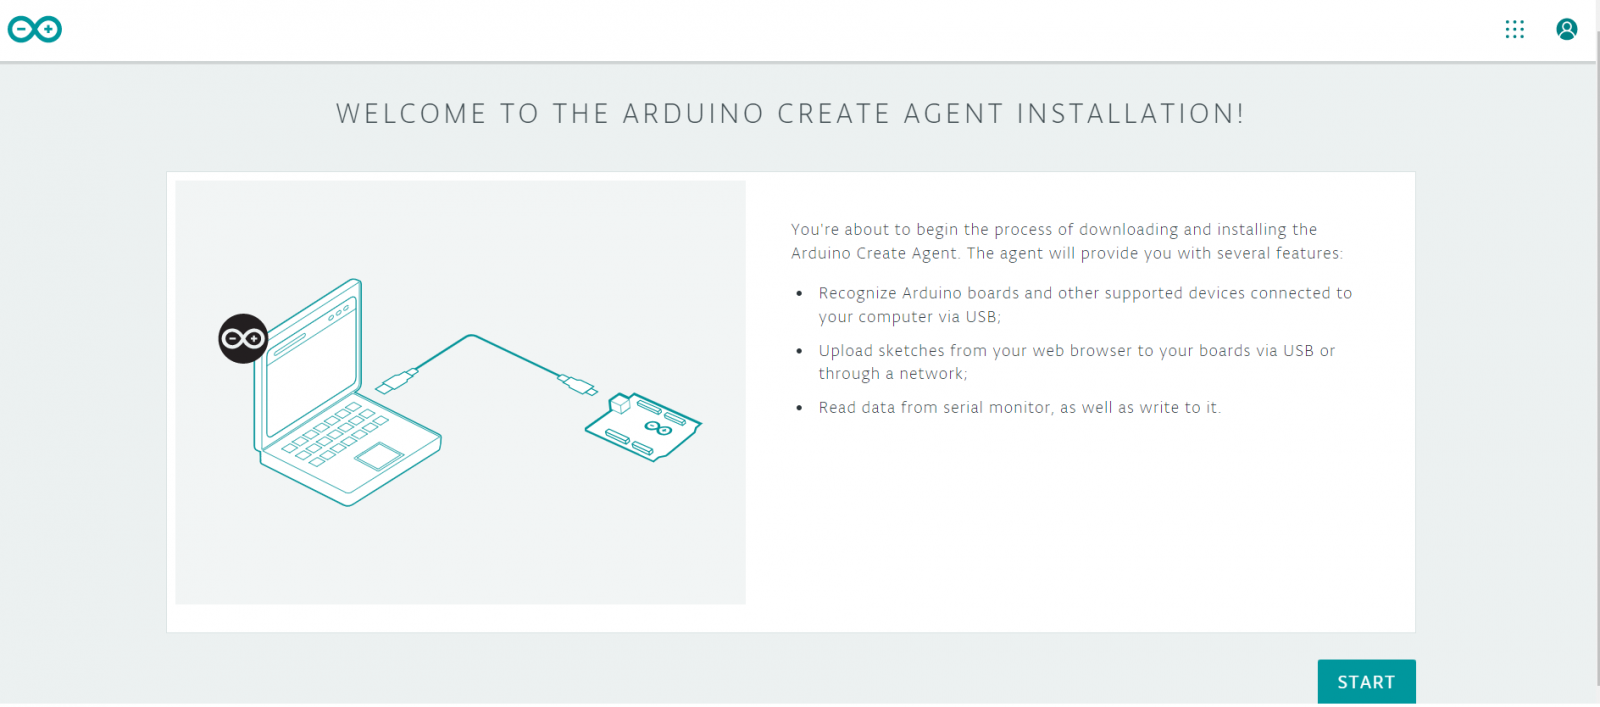
The Arduino IoT Cloud requires your computer to have the Arduino Agent installed. Here the link to install the Arduino Agent e below the screen shot about the installation of the Arduino Agent.
After the Create Agent installation, the configuration process of your Arduino board is very easy, and can be done by clicking on the “Select device” button in the Thing overview. Here, we can choose from any board that has been already configured, or select the “Configure new device” option ( in this case, you can assign a name to your device ) .
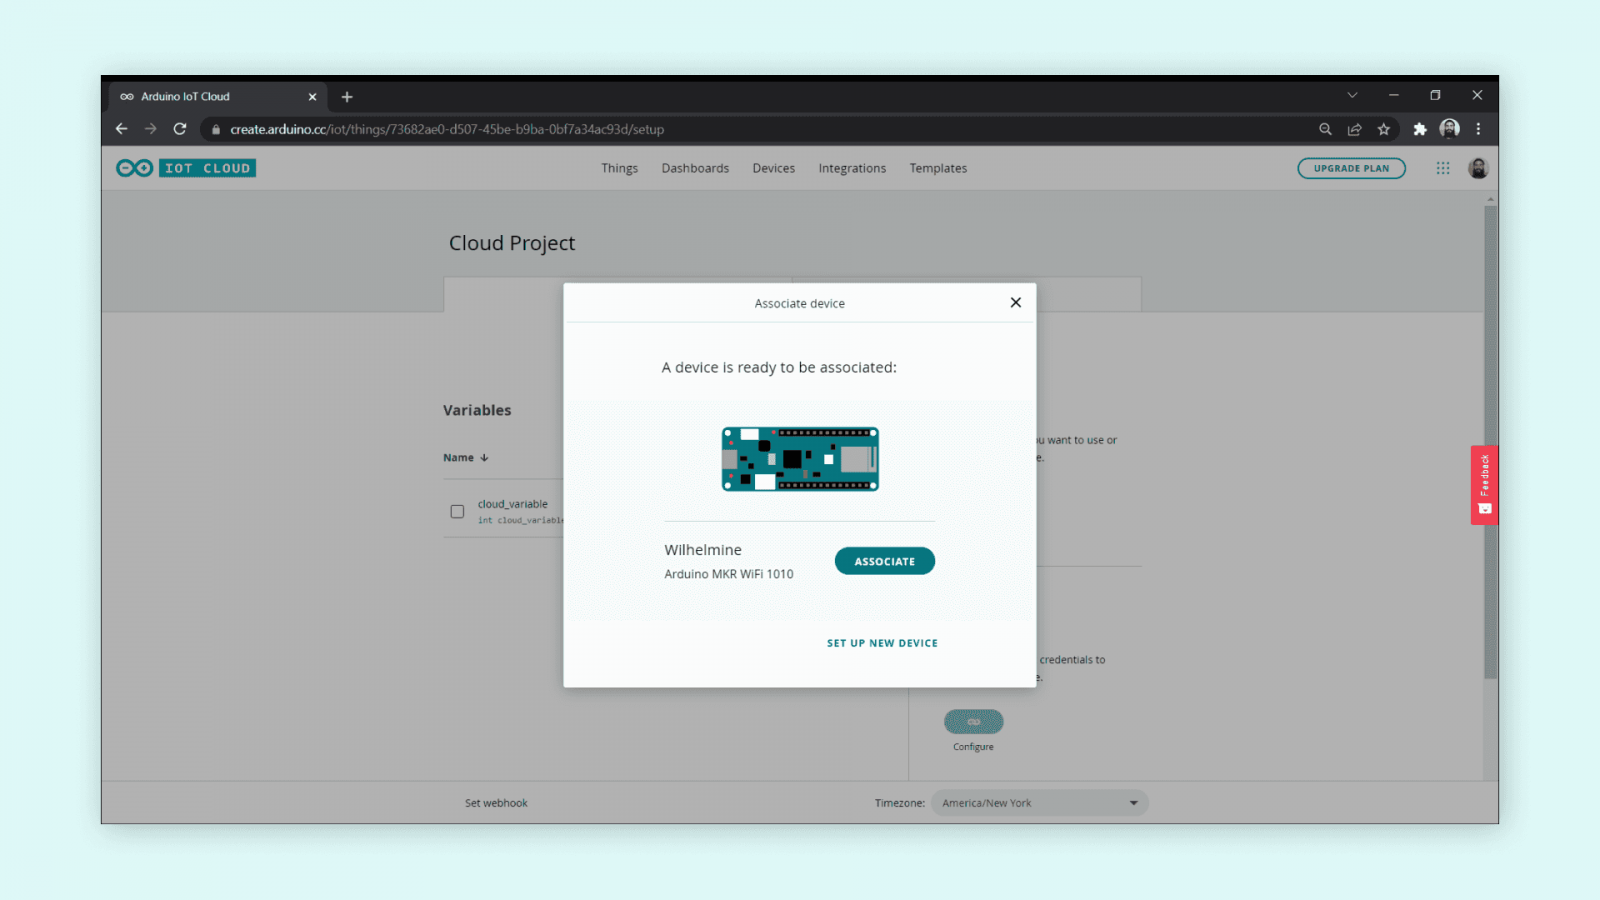
Configure a new device

Select a board already configured
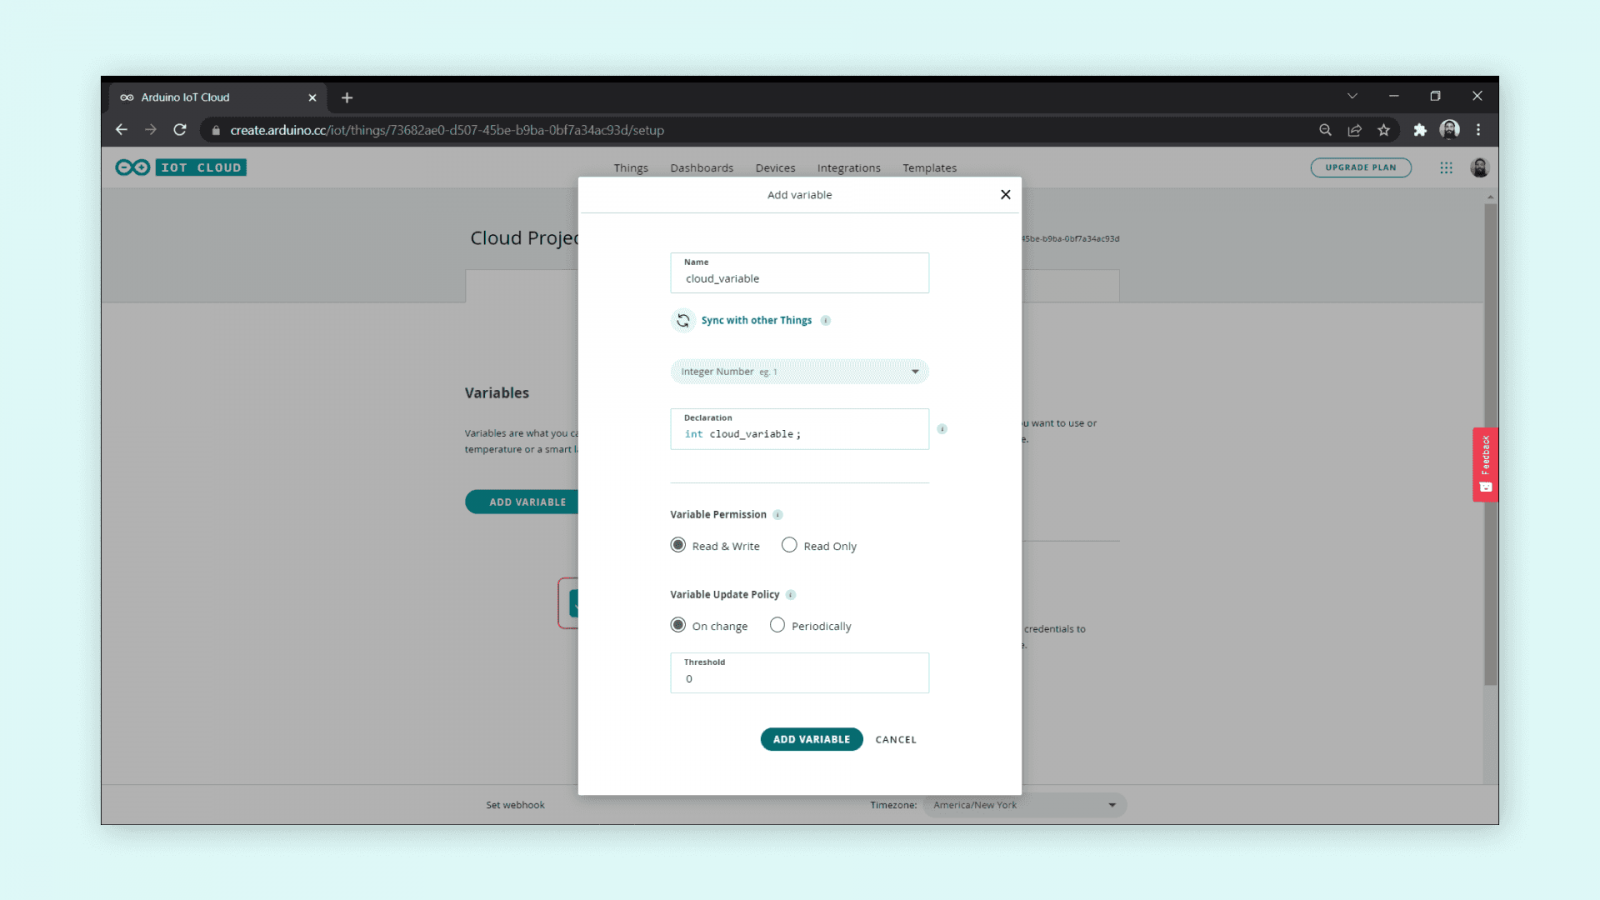
5th : Create your Variables
The variables created on the IoT Cloud are automatically generated into a sketch file. There are several data types we can choose from, such as int, float, boolean, long, char. The variable can be read only or read & write.
You don't need to remember or manually copy your variables into the Arduino Sketch ( to upload into your MKR1010 ). These variables are automatically generated into the sketch file.
There are also special variables, such as Temperature, Velocity, Luminance that can be used. When clicking on the “Add variable” button, we can choose name, data type, update setting and interaction mode.
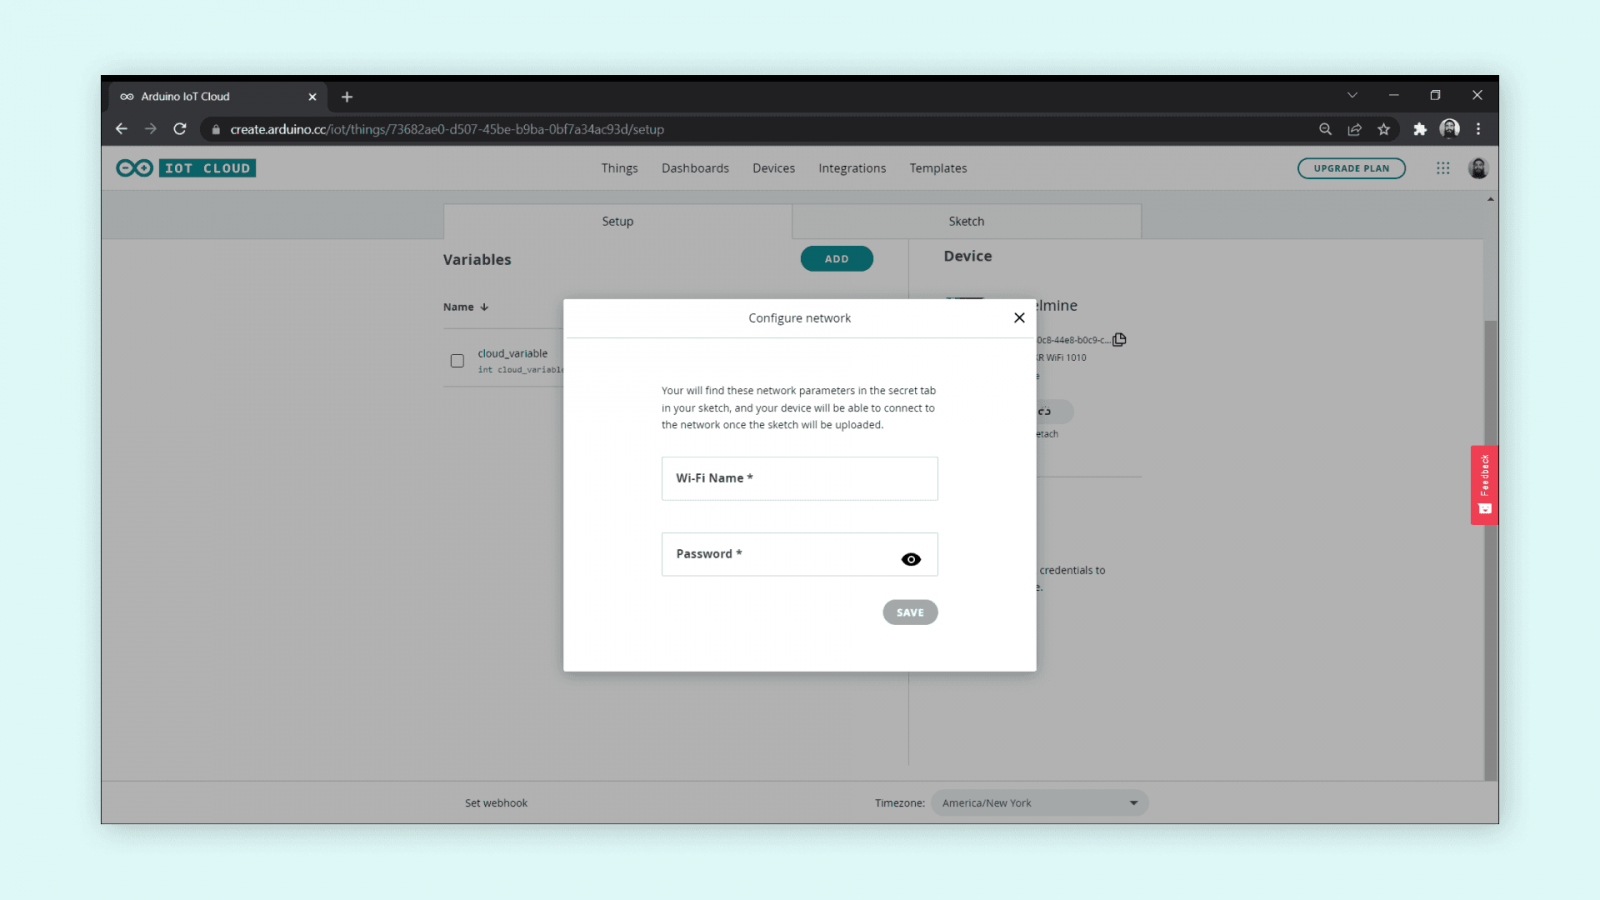
6th : Connect to a Wi-Fi Network
To connect to a Wi-Fi network, simply click the “Configure” button in the network section. Enter your network credentials and click “Save”.
Also this information is generated into your sketch file !
7th : Edit , verify and upload your Sketch
Now that we have configured variables, devices and network settings, we can get to program our MKR1010
An automatically generated sketch file can be found in the “Sketch” tab. It has the same structure as a typical .ino file, but with some additional code to make the connection to your network and to the cloud.
A sketch that, for example, reads an analog sensor, and use the cloud variable to store it. When the sketch has been uploaded, it will work as a regular sketch, but it will also update the cloud variables that we use!
Additionally, each time we create a variable that has the Read & Write permission enabled, a function is also generated, at the bottom of your sketch file. Each time this variable changes, it will execute the code within this function! This means that we can leave most of the code out of the loop() and only run code when needed.
To verify your code . just click the "Verify" button.
To upload the program to our board, simply click the "Upload" button.
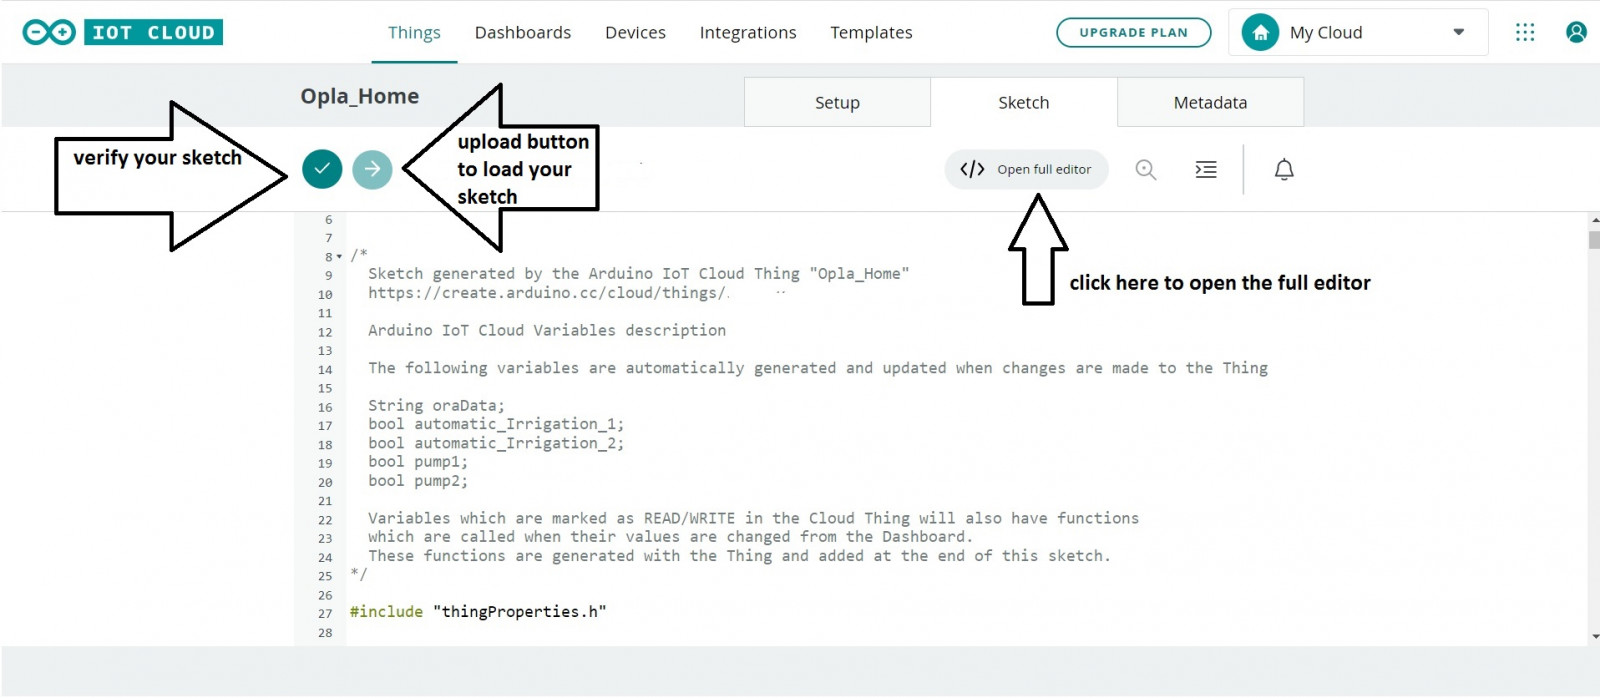
There is also the possibility to use the Arduino Web Editor, to create,modify, verify and upload your sketch . Just click in "open full editor" button .
Here below an image of the full editor . On the "thingProperties.h" tab you can see the Property variables . On the "secret" tab you can see the WiFi network details.
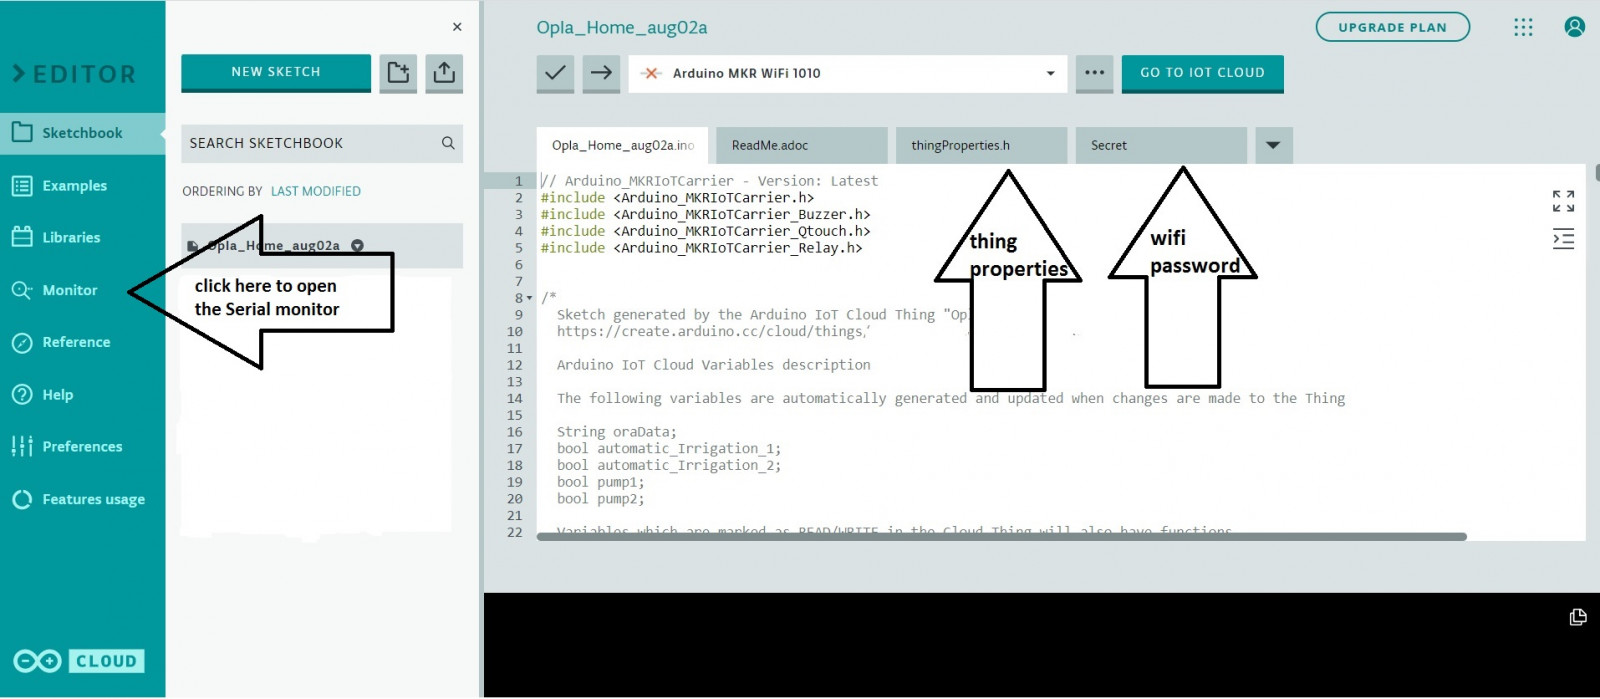
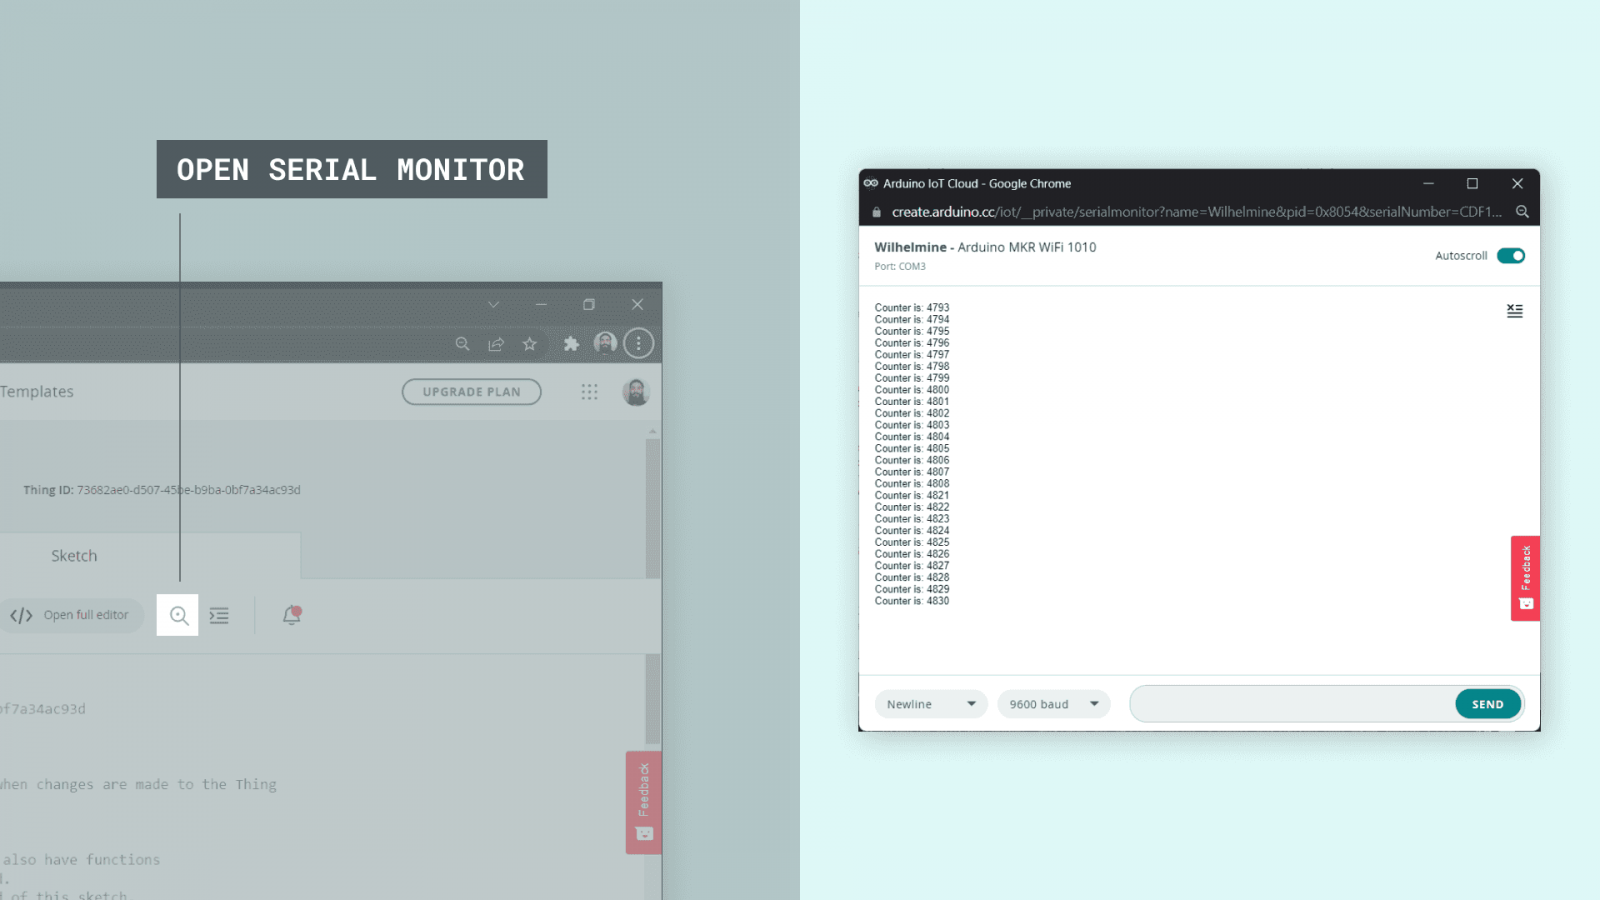
Both editors have a Serial Monitor Tool, which can be opened by clicking :
- on Full Web Editor clicking the "monitor" tab on the left ( see above image )
- or clicking the magnifying glass in the toolbar ( see below image) .
Here you can view information regarding your connection or your commands printed via Serial.print() ( USB connection from MKR1010 to your PC )
After we have successfully uploaded the code, open the “Serial Monitor” tab to view information regarding your connection. If it is successful, it will print “connected to network_name” and “connected to cloud”. If it fails to connect, it will print the errors here as well.
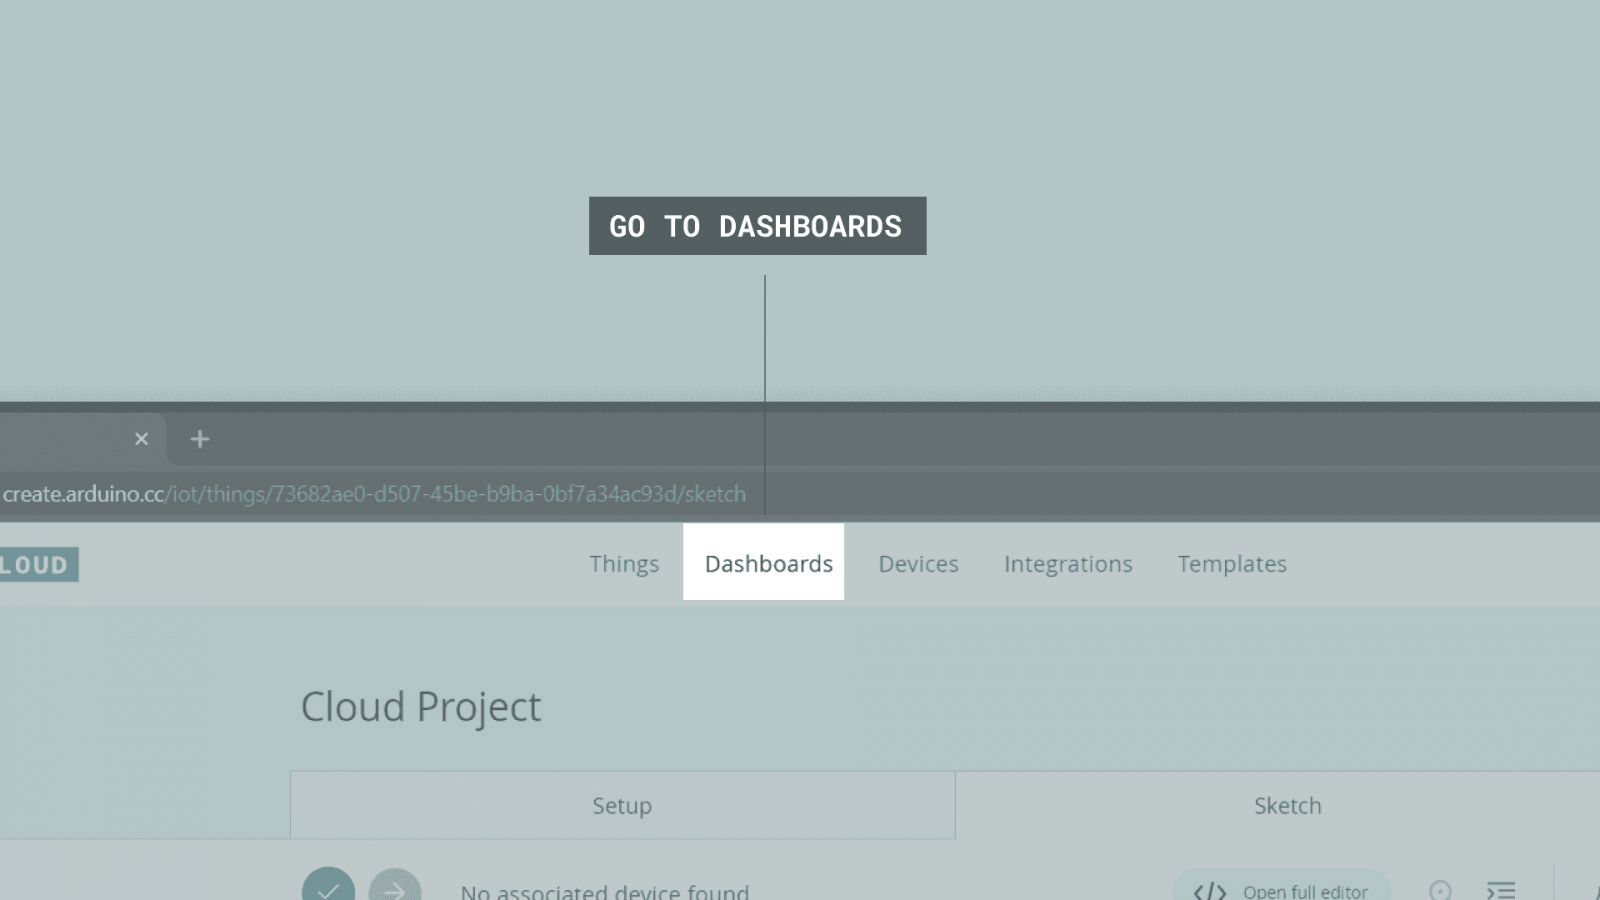
8th : Create a Dashboard
Now that we have configured the device and the network, created variables, completed the sketch and successfully verified and uploaded the code, we can move on to the last part: Create the dashboard , where is possible to see the variables value and interact with your Thing
Dashboards are visual user interface for interacting with your boards over the cloud, and we can setup many different setups depending on what your IoT project needs.
We can access our dashboards by clicking on the “Dashboards” tab at the top of the Arduino IoT Cloud interface, where we can create new dashboards, and see a list of dashboards created for other Things.
If we click on “Create new dashboard”, we enter a dashboard editor. Here, we can create something called widgets.
Widgets are the visual representation of our variables we create, and there are many different to choose from. Below is an example using several types of widgets.
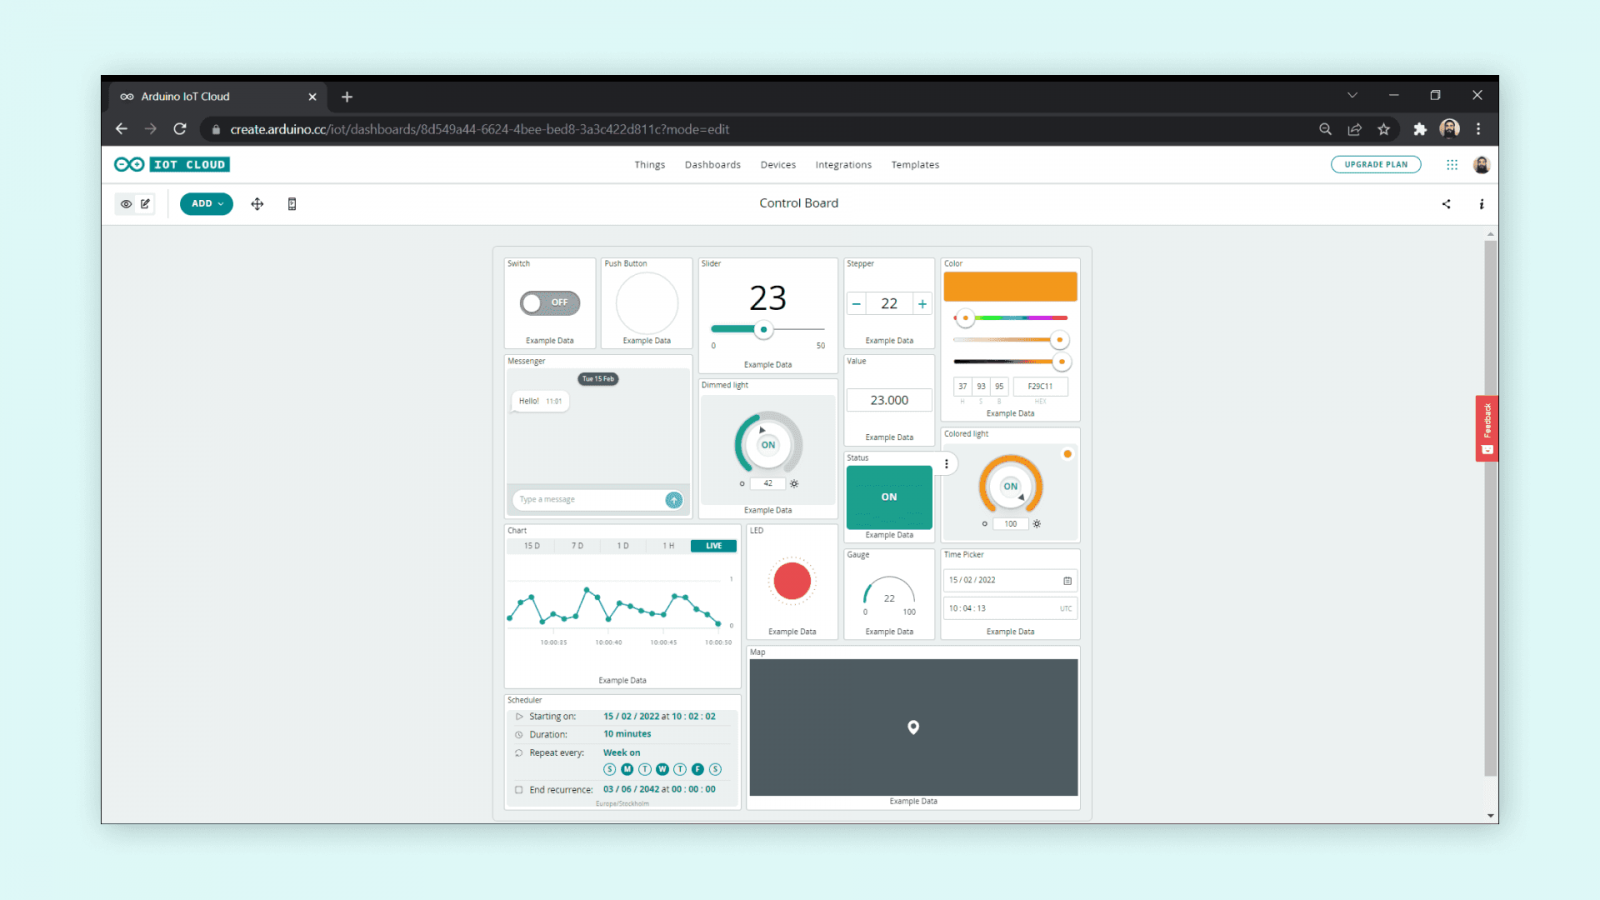
When we create widgets, we also need to link them to our variables. This is done by clicking on a widget we create, select a Thing, and select a variable that we want to link. Once it is linked, we can either interact with it, for example a button, or we can monitor a value from a sensor. As long as our board is connected to the cloud, the values will update!
For example , we can have a "Push Button" widget that we want to link to our irrigation Pump1 variable inside the Cloud project thing.
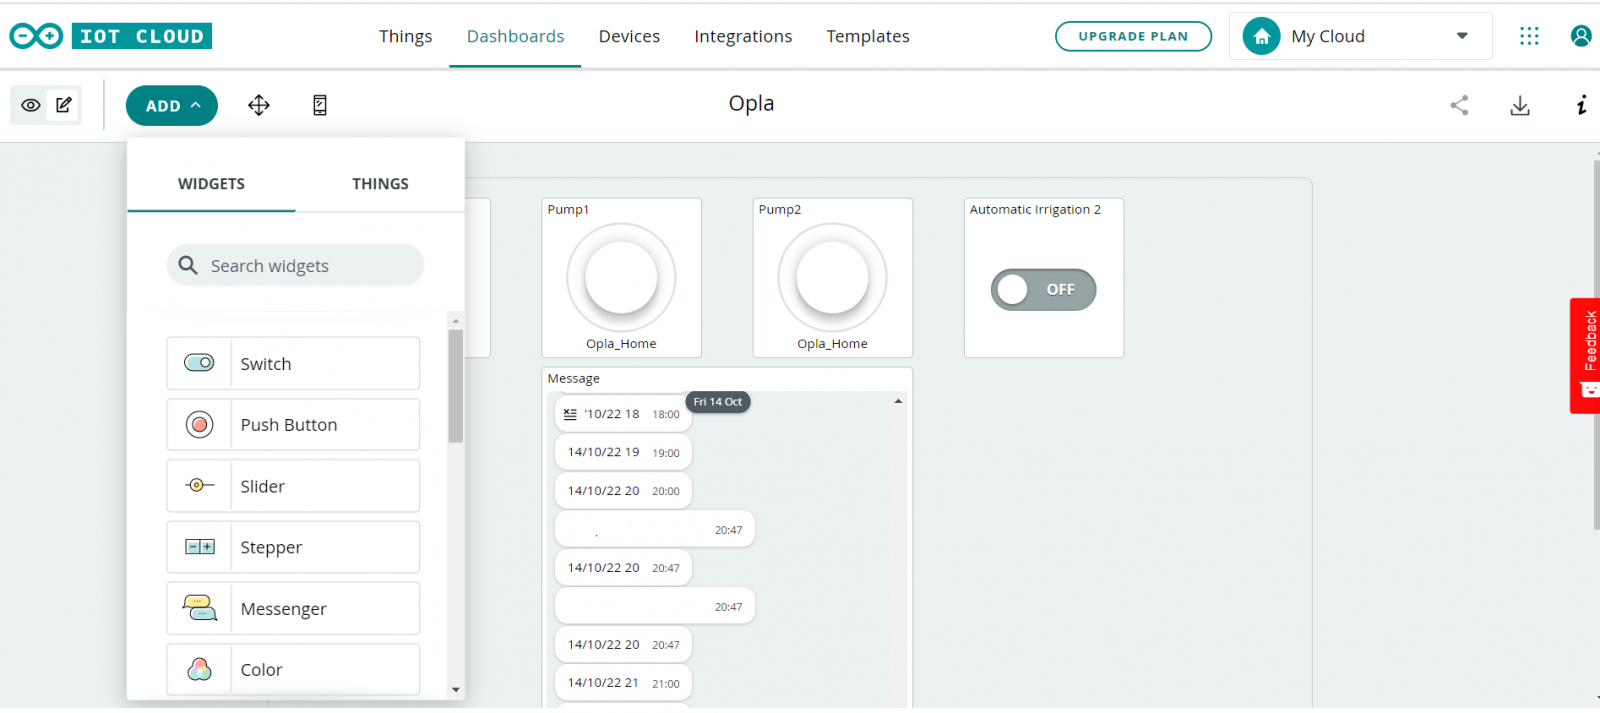
We can also have several things running at once, depending on your Arduino IoT Cloud plan, which we can include in the same dashboard. This is a great feature for tracking multiple boards in for example a larger sensor network, where boards can be connected to different networks around the world, but be monitored from the same dashboard.
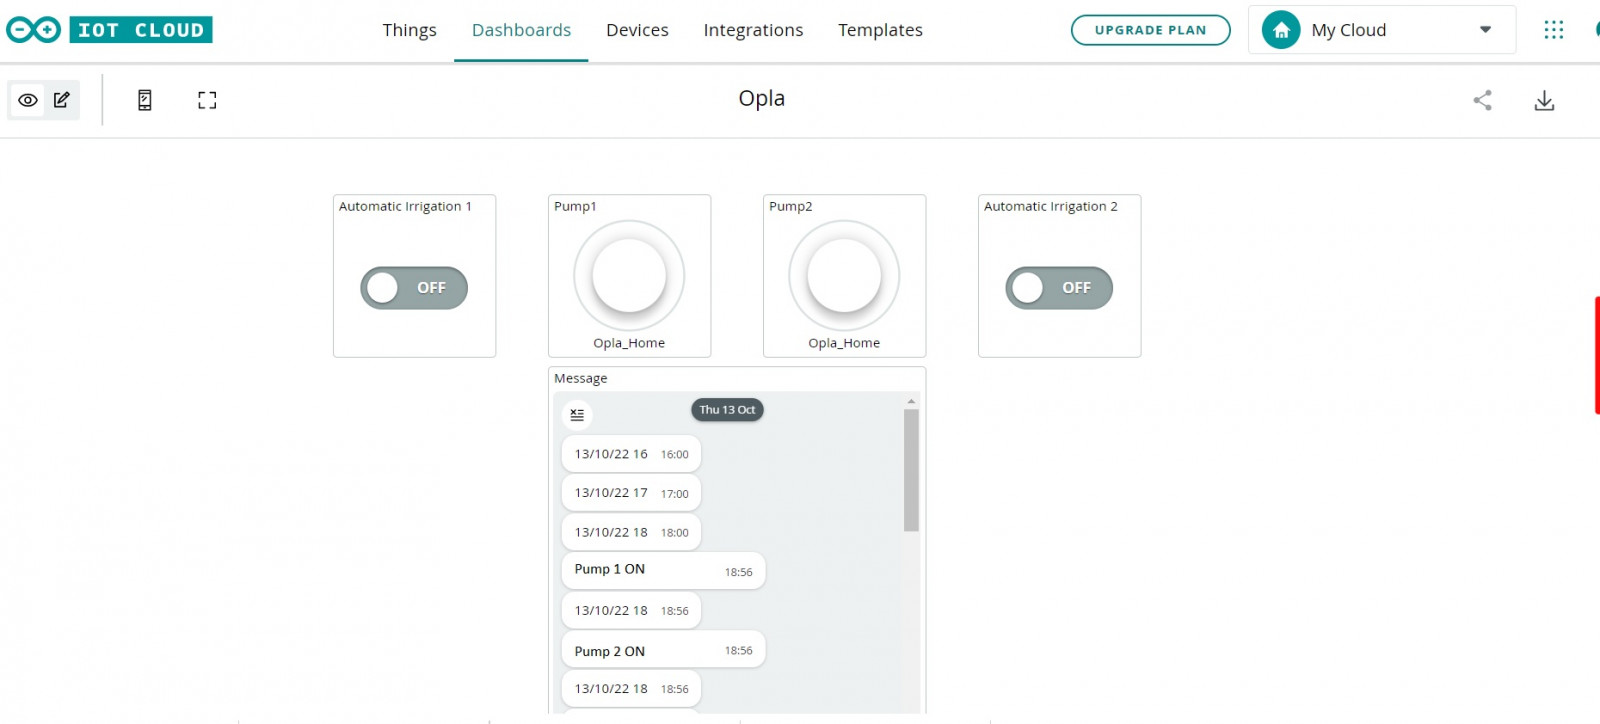
Here below another example of a simple dashboard
Having a project connected to the Arduino IoT Cloud opens up many possibilities, such as tracking data in real time, triggering remote devices and building wireless systems.
This is the first article about the Arduino IoT Cloud.
Arduino IoT Cloud Account at https://cloud.arduino.cc/