


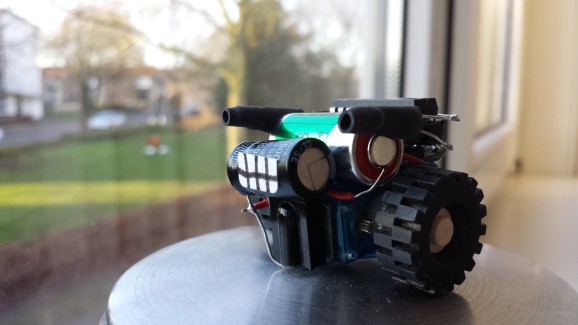
"zig-zag" microbot
This is my robot, made for the microbot challenge.
I did like to use of parts I already had lying around instead of buying new parts.
I did want to merge 2 9g servos into each other to make a small robot. so I did take them apart and removed the potentiometers. Then filed the hole bigger so the motor of the opponent side would fit in more deeply.
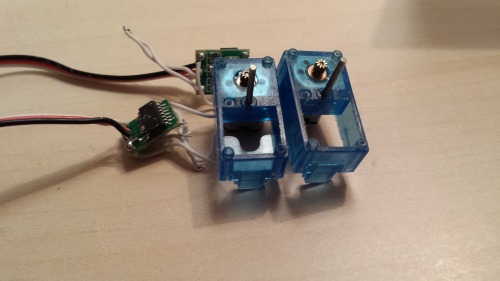
Also removed the notch using a knife.
Then this is the result: 2 servos together but only 1 servo width.

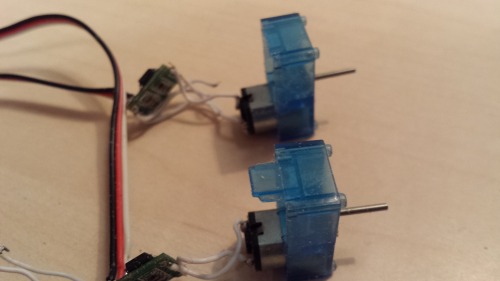
Then added the gears again except the last gear. and I did put on some lego wheels. however the potentiometer didn’t fit anymore I still needed the axle. therefore I hotglued a pinch pin in place. then I had to find a way to keep the gears from falling off.. and a simple piece of wire seems to be the most simple solution.

when I had everything working on breadboard I did solder the rest of the parts in place.
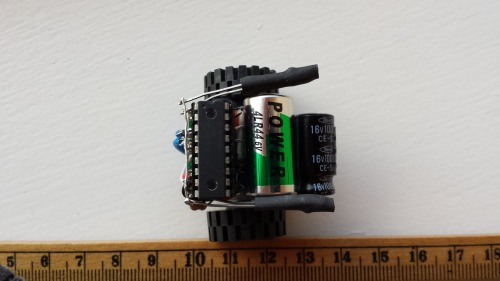
left on top the 16f628a microcontroller, in the center the 6v battery and the IR leds in shrinktube. right on front there is a capacitor and underneath there is the tsop1738 IR receiver.

I had some problems as it turns out the battery I use is too weak to power the 2 wheels at the same time. I tried to lower the speed but that didn't help. so now I turn them on left and right alternately.
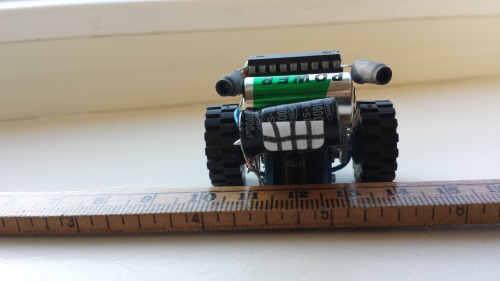
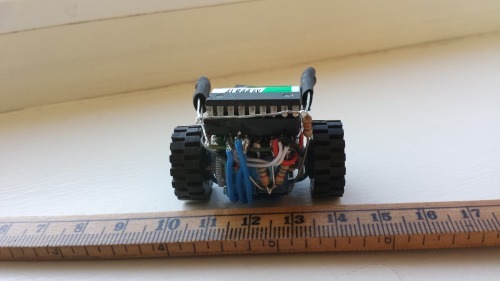
and some measurements:
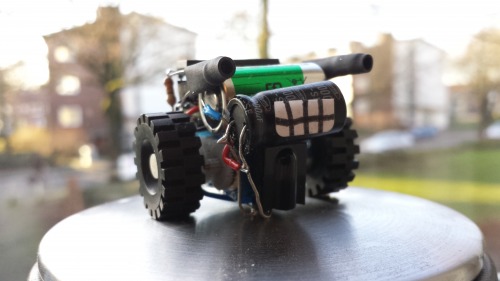
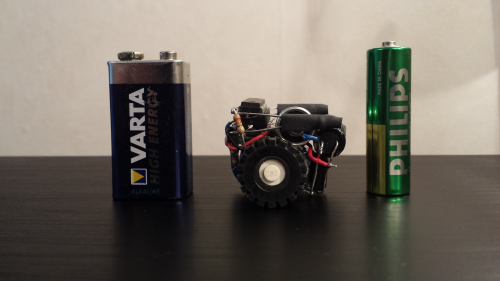
Edit: Added a picture with some batteries for size comperation:
After all I have to say is was both challenging and fun to build such a small robot. Maybe there will follow more little robots as there are fun to build. :D
avoiding obstacles using infrared.
- Actuators / output devices: 2 modified 9g servos
- Control method: fully autonomous
- CPU: 16F628A
- Power source: 4lr44 6v battery
- Programming language: Proton Picbasic
- Sensors / input devices: 2 infrared leds and a tsop1738 receiver
- Target environment: flat surfaces