


Yellow Drum Machine II
How to make a Yellow Drum Machine
Audiofile Engineering asked me to do a sequel to a robot of mine, Yellow Drum Machine.
It was named Yellow Drum Machine II (YDM II).
And.. sniff.. now it is no longer with me.
I have drowned it in polestyrene in a box, taped it up, and have given it to the lady at the post office.
It is flying to the states now, so that it can be first prize in a world wide promotional contest.
Sniff.. Count me in on the contest, I am going to win it back!
"TheCowGod" once wrote somewhere something about soldering friends.. and now I know he knows what he talks about.
Bye YDMII !
I filmed you just before drowning you, here it is, to the meomory of you..
How to make / get your own Yellow Drum Machine

For more details of this project, I would like to start with this picture:
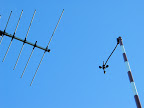
Is is taken from our house, looking up. To the left is a TV-areal. Please note how one stick is missing.. and how that left drumstick on YDMII is looking like something from a TV-antennae! I do not have much time for watching TV myself, but I told my wife that signal strength might possible increase if we took of that very one stick from there!
Also thanks to my wife for making the fine belt-track-pattern in black & yellow! (She did it while watching TV - and honestly nothing happened, picture is just as fine now as before)
To the right is my weather-stations wind meter. One might get the idea that the right drumstick on YDMII resembles that. Materials and inspiration can come from many places!
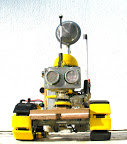
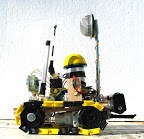
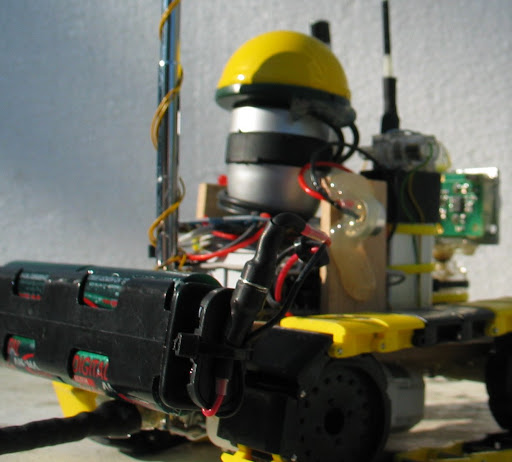
In most ways YDMII is the same as YDM, but for these differences:
A) The yellow "hat" instead of the huge speaker on YDM. I did not have more speakers like the one on YDM, so I 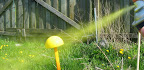
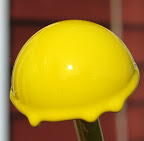 spray-painted half a tennis-table ball and mounted it on top of a small speaker, that I mounted on top of the front part of a small flash-light.
This gives a perfect sound for the sample-playback!
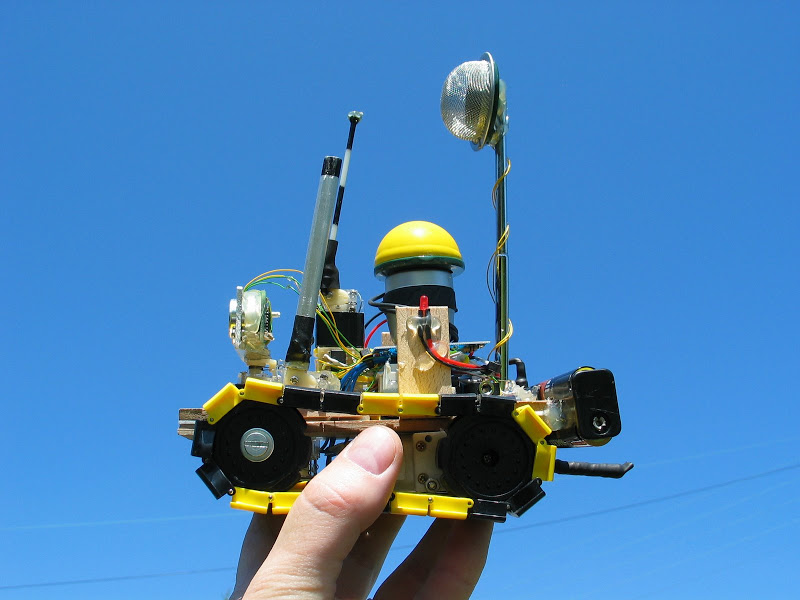
B) YDMII has a tea-cup-speaker mounted on an old radio-antennae, the telescopic kind. By re-thinking (erh - in YDM, the original I did not plan or think much at all) .. by re-thinking ins- and outs to the standard picaxe 28 board used, I got some extra things to play with, and so I gave this fellow the possibility to twist the speaker that on YDM was placed in between the belt-tracks, bottom.
The videos:
Well - it is hard to do a number II; You have all seen a drumming robot now, and this one is even much like another robot of mine :)
I wanted the robot to play on a large fish's head. But I just could not find a fish with the right size head, that also had a good sound to it.
So what I ended up doing was just to carry the robot and a camera with me for about a week, shooting when/where ever.. And the last couple of evenings I have been editing little videos out of that material.
The programming / the code:
I ended up re-writing the "musical parts" of the core, and kept all the navigational from YDM.
I also created 3 extra "modes"; "Curious and playfull", "Tai Chi", and "Jam to musician". However, the basic code "Search and play" is now so expanded that there is no room in the tiny brains for anything more than that.
If you are the winner of the robot, you are very welcome to contact me, so I can advice you on how to enter the other "modes" by uploading other instructions to the robot, instructions I can send you :)
A nice detail IMHO is the on/off-switch:
It is two very powerfull (rear earth-material) magnets incapsulated in heat-schrinking plastic, with wires mounted on.
I tend to use this more and more over standard switches; It can be switched on/off by one hand.. and one can place a strip of plastic or paper between; Then it is a matter of pulling this out to turn on the robot.
It gives a better feeling; the robot is not something you just turn on or off; It wants to be on, but you can stop it by pulling the plug. Also this way you can attach a string to a door, attach the string to what's between the magnets.. and when you come home and open the door, you pull the string, and the robot greets you, and start it's business :D
I cannot remember where I got the pre-soldered magnets from, I bought a bunch.. But I will edit this as soon as I do :)
Congrationlations to the winner of this robot :)
I hope it makes you happy! I did my best to create and test it so it should be a good beat-maker for you in years to come :)
Get funky!
Gets funky with it's surroundings
- Actuators / output devices: 2 speakers, 7 geared motors
- Control method: autonomous (very)
- CPU: Picaxe 28x1
- Operating system: Picaxe
- Power source: 4 AA batteries
- Programming language: Picaxe basic
- Sensors / input devices: SRF05, microphone
- Target environment: where ever there is something to play on