


Xpider--the smallest smart robot spider
Since this Project was transferred from the project:
Xpider--the smallest smart robot spider (Stop Updating)
I will describe the project infomation simplely.
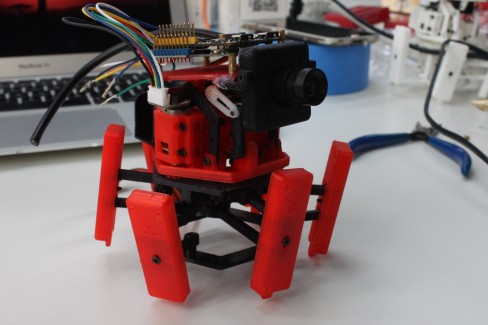
The Xpider project is the smallest smart robot spider in the world. It used Intel Edison platform which is a tiny pc. It contains some cool functions. For example, it can be controlled by your mobile phone, it has the camera, can make you watch through the FPV view on the robot, thus you will know what your pets seen. And also the camera can be used for computer vision to recognize some simple geometric pictures even human face.
And I embedded a graphical programming tool in the Edison platform. So you can program this robot yourself. The most funny thing is that you can train this small robot by some simple neural network algorithm. That make you can custom the only one Xipder for yourself.
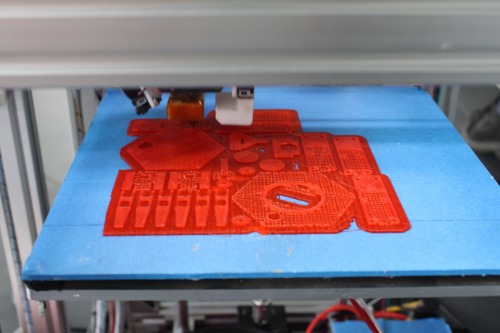
The main parts of Xpider were printed by 3D printer, PLA material. and the attached file is the stl file for all the printed parts. Please feel free to download it and make your own Xpider
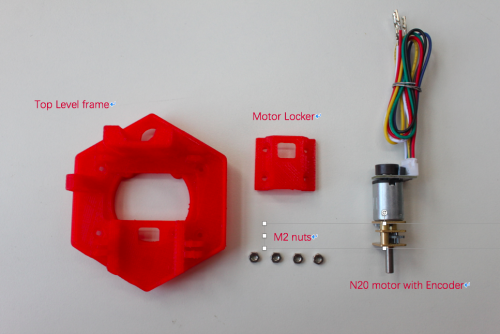
BOM list:
1. 3D printed Parts.
2. M2*5, M2*8, M2*10 screws and some nuts.
3. Intel Edison (buy) *1
4. small camera (any small USB camera (light enough), driver free, with UVC class) *1
5. N20 motors 310RPM w/Encoder (buy) *1
6. N20 motors 270RPM wo/Encoder (buy) *1
7. 9G servo (buy) *1
8. micro motor driver (buy) *1
3D print tips
All the stl file were attached. When you unarchive the zip file, you will find the file list looks like:
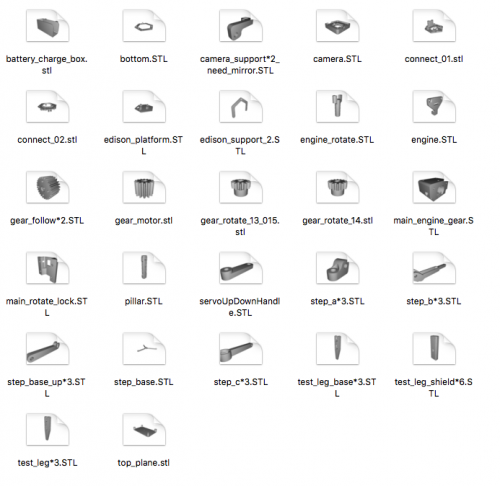
Looking at the file name, if the file name contained "*3", that means this part should be printed 3 times. If the file name contained "need mirror", that means this part should be printed 2 times, and one should be a mirror part of another.
This is the picture of all printed parts:
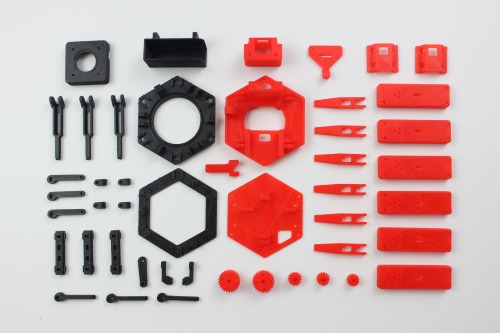
After printing, don't forget deburring the edge of parts.
Assembly of mechanical parts
This is my main tool. since I can't find a M2 allen wrench head for this Bosch screwdriver, I cut off a M2 allen wrench, and insert it into the screwdriver. Lol...
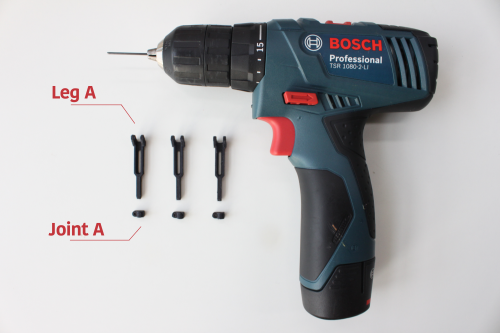
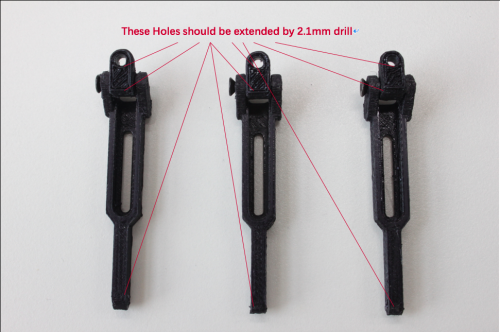
notice the front side and the back size of the Leg A. Because the screws were axis for the Joint, these holes should be extended by a 2.1mm drill, to make sure the screws can cross the hols easily.
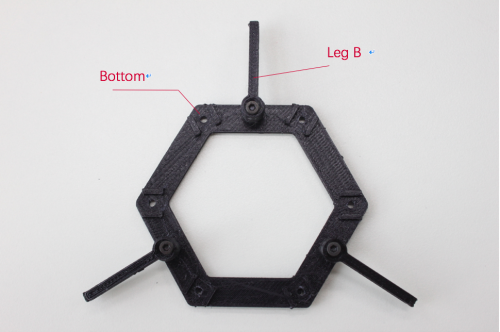
connect Bottom and LegB, the screws should not be tight.
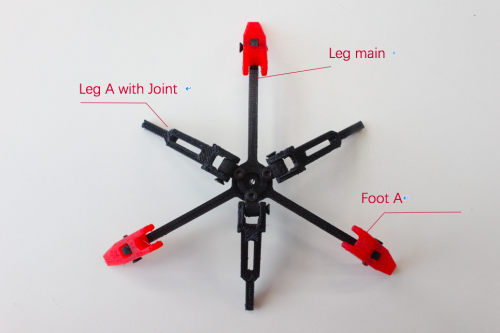
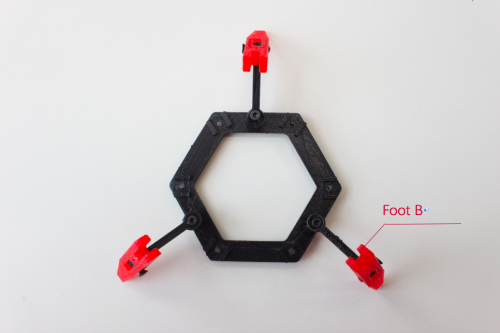
attach the Leg main part and Leg A parts. then attach the foot parts. Notice the difference between Foot A and Foot B, remeber to select a fit one.
attached Foot B to Bottom
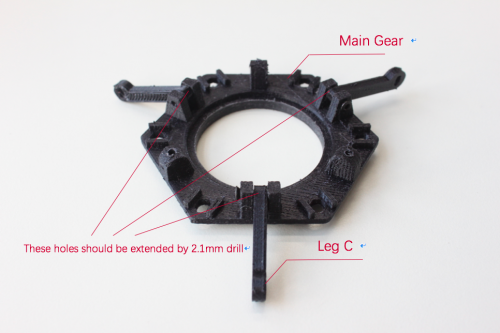
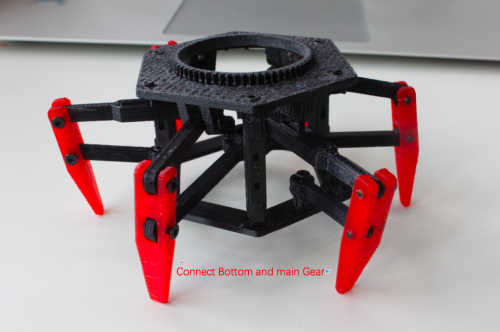
attached the Leg C and Main Gear. Don't forget to extend the screw holes.
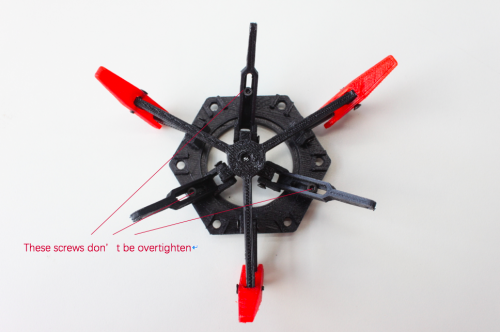
attached the main leg to Main gear. Notice that these three screws should not be tight.
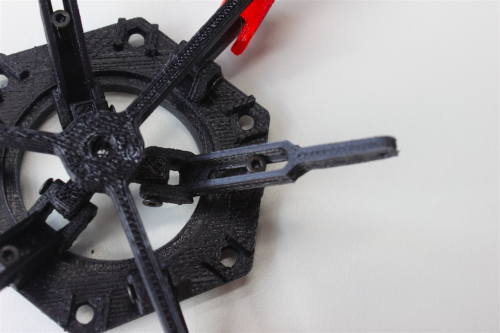
and this is the detail photo.
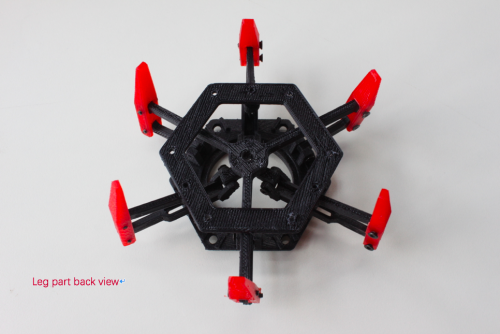
Attached all 6 feet, and this is back side view.
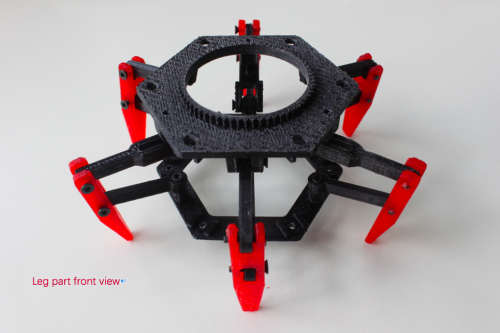
This is front side view.
Now let's assemble the upper layer.
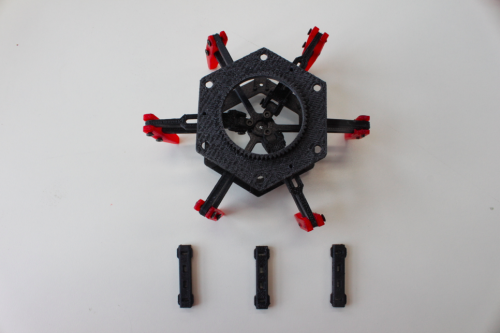
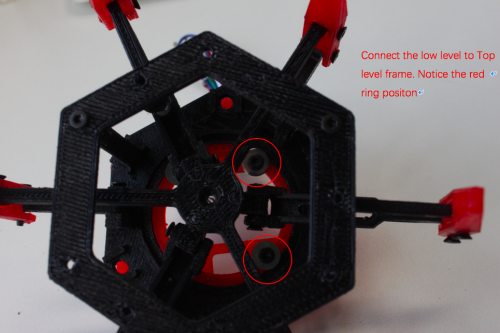
Use the pillar to connect main gear and the bottom part like that:
need these material.
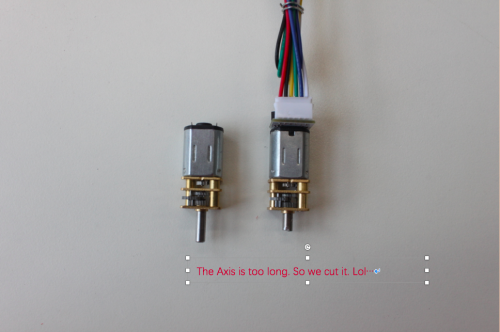
since the transmission shaft is too long, We cut it to 4mm.
This is the spinning structure.
connect two parts
this is Gear box
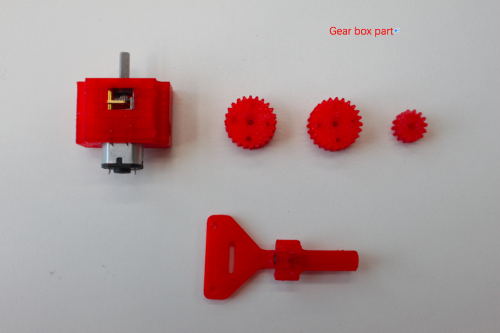
combine them together.
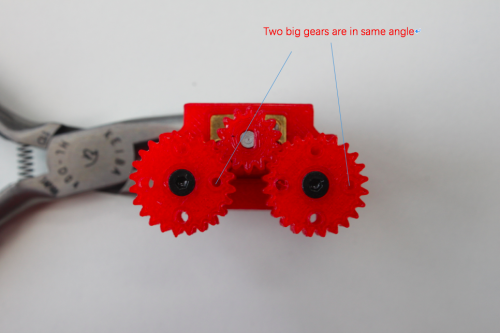
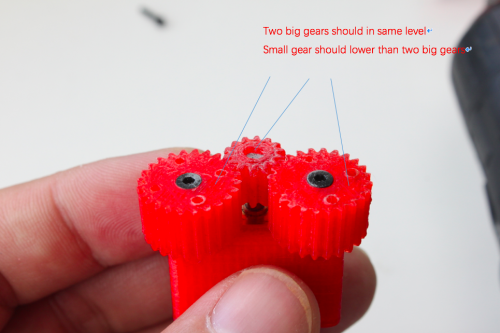
this is finish picture of Gear box.
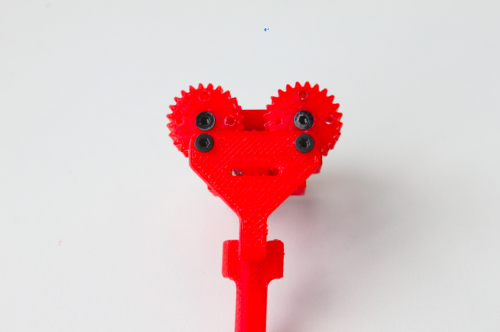
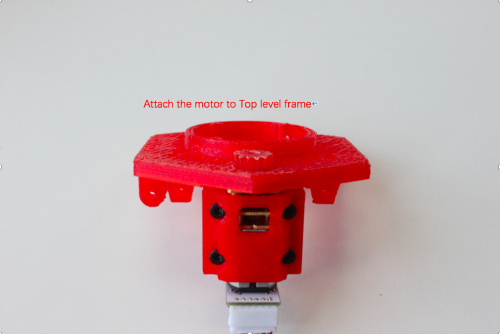
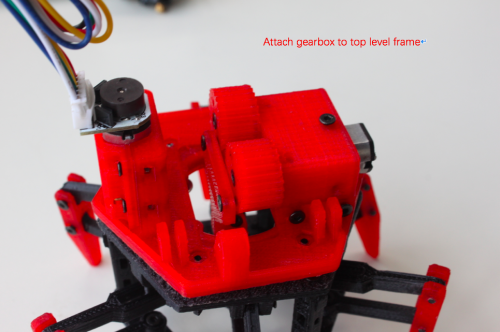
Gearbox and frame
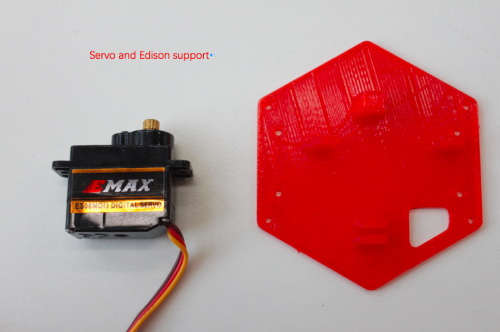
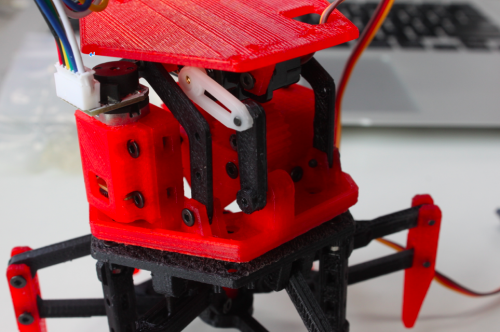
Servo and Edison support
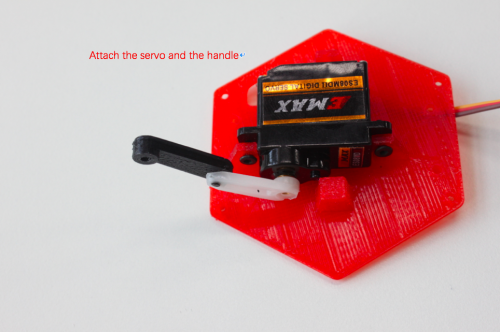
add servo support part
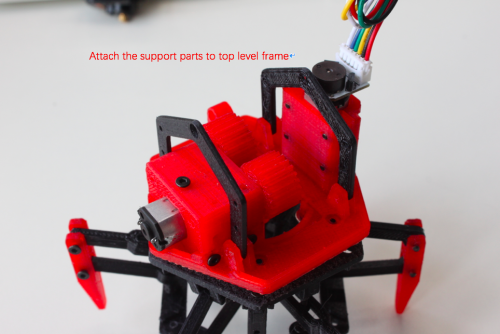
connect servo part and main frame
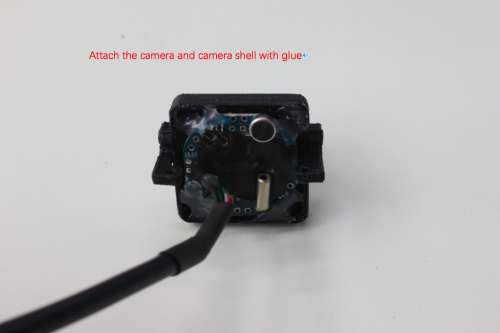
camera and camera shell, since maybe you use different camera, so feel free to use the glue.
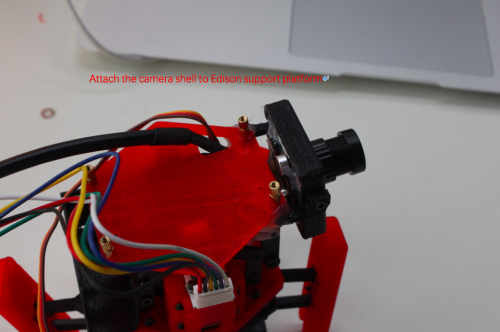
attach camera part to servo platform
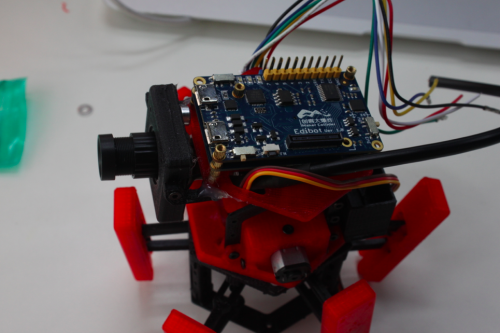
Ok, mechanical parts finished. LOL...
=====================================================================
Hi everyone,
Long time no see. Sorry for the late. These days we focused on the production. But now we are getting very close to launch the Indiegogo campaign for Xpider. Your support has been valuable to us. We'd love to keep you updated on the campaign progress. Please click the following link to sign up for our newsletter. (http://eepurl.com/chaJDH )
And after that we will keep going on updating this tutorial. Thanks for your all.
Roboeve team
=====================================================================
explore the world via camera, Programmable, Through narrow places easily, battle with other robots
- Actuators / output devices: 2 motors, one servo
- Control method: Bluetooth, WiFi, Phone, Web browser
- CPU: intel Edison
- Operating system: Linux
- Power source: 7.4V Lipoly
- Programming language: SmartNode, C++, C, javascript
- Sensors / input devices: IR, Ultrasonic sensors, camera
- Target environment: indoor, outdoor, anywere not near water