


Work Robot
Hello
I have been scrounging junk again! -lol
I'm still working on my Jansen walker project, but found this mechanical thingy (junk) at my job and was told I could have it.
( sorry for the crappy pictures, my phone camera sucks! -lol )

My coworkers find the concept of making robots from their junk very interesting and they are following along with my build.
As such I've been allowed to work on this robot WHILE being on the clock paid at work!
Granted I have to mess with it in my free time, but still.....
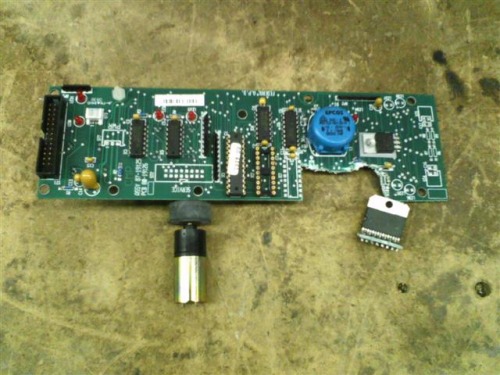
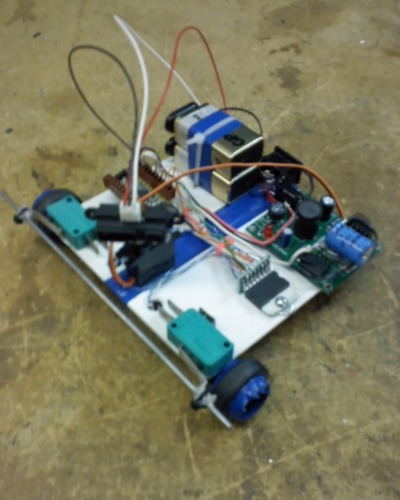
I chopped up the PCB to remove the 298 motor driver and unscrewed the matching pair of 141:1 gear motors.
It also has a 293 chip on it as well as a third gear motor not shown.
Then broke out the hot glue gun and electrical tape to make the start of a simple robot chassis using only junk my work would otherwise throw away.
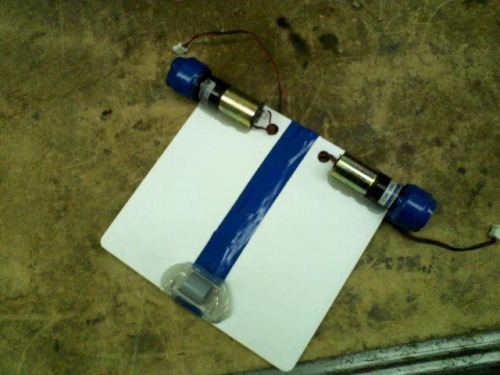
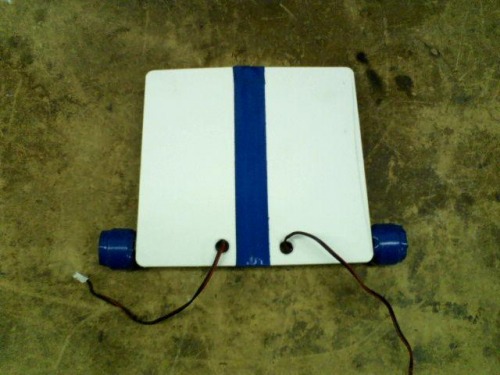
The rollers are permanently mounted on the motor shafts. Since I had no wheels I could scrounge. I used blue electrical tape to make them a larger diameter. The tail caster is a piece of PVC tubing hot glued on. The frame is 2 plastic drawer separators hot glued together then electrical taped for color contrast.
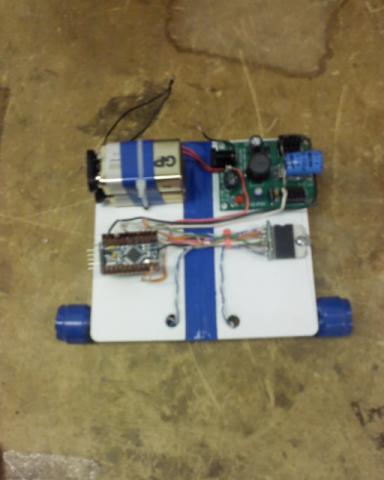
Here I'm starting the wiring to get this critter up and running. I'm using an Arduino Mini Pro clone for its brains shown below.
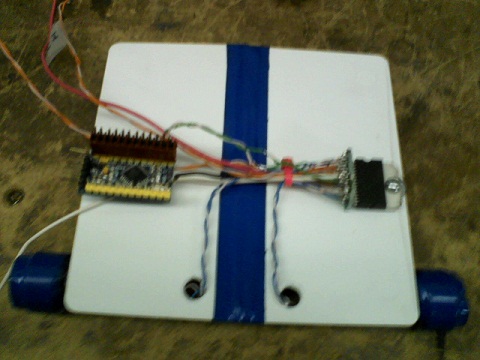
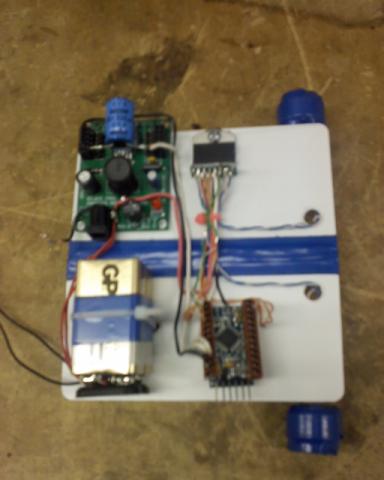
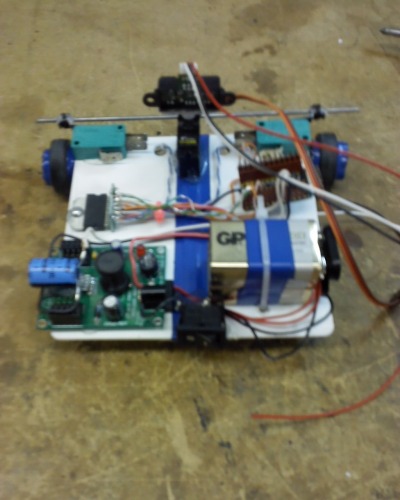
Here I've wired up the power supply (which I hacked to change it from 18v to 5v DC), 9v battery's, Arduino 328 Pro Mini, and L298N motor controller.
Here I tested it by throwing in some simple motor on/off looping code. Yep, all works so far.
I really need to get bigger wheels on this thing as these gear motors are really powerful but slow speed.
I got some unintentional/unexpected inspiration from talking to a couple Aussie LMR members! :-)
Thanks guys for making me think outside the box!
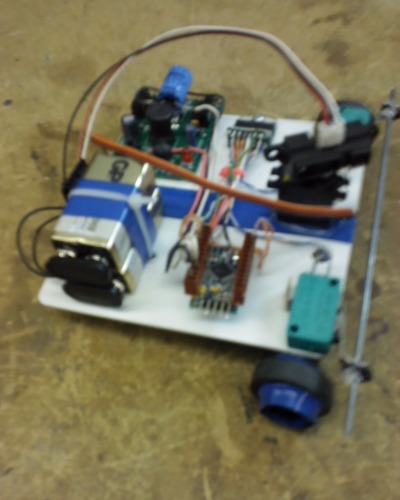
A reclaimed pair of bump sensors, a used power switch, and some newly re-purposed tires resulted.
Thanks guys!
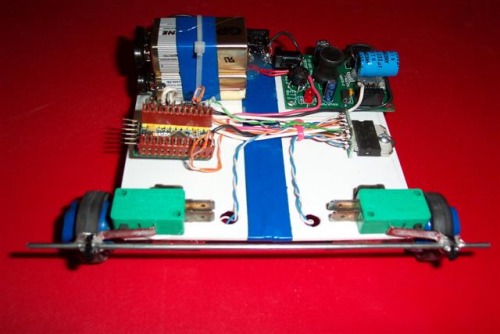
Today is a slow Friday, so I broke out some cheap purchased parts to finish this critter off.
(I've never found a "junk"source for servo's and IR ranging sensors, though at this job I can get IR emitter/receiver leds.)
A bit of hot glue globbed to hold'em on and here's the gist of it (minus some more wiring).
Next will be the programming.....
I fowled up during wiring the last couple parts on this thing and apparently melted the jacket on the enable wires while soldering thus shorting the two together. As such during programming/testing I found the problem and had to rewire only to find out I killed 1 side of the 298. DOH!!! (it was funny because it briefly worked after replacing the enable wires)
I used a DMM on the pins and am getting 5v out the PWM pins so I think the micro pins are still good. So I'll have to scrounge up another motor driver.
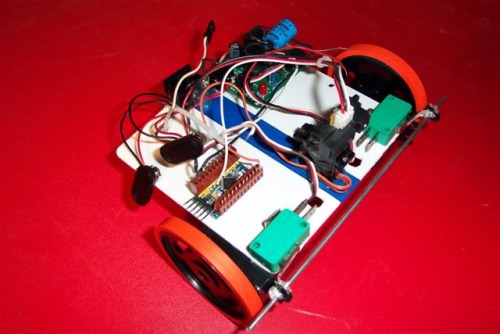
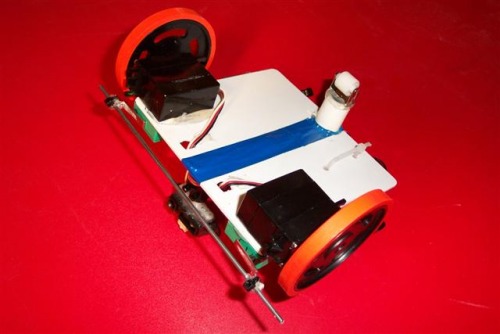
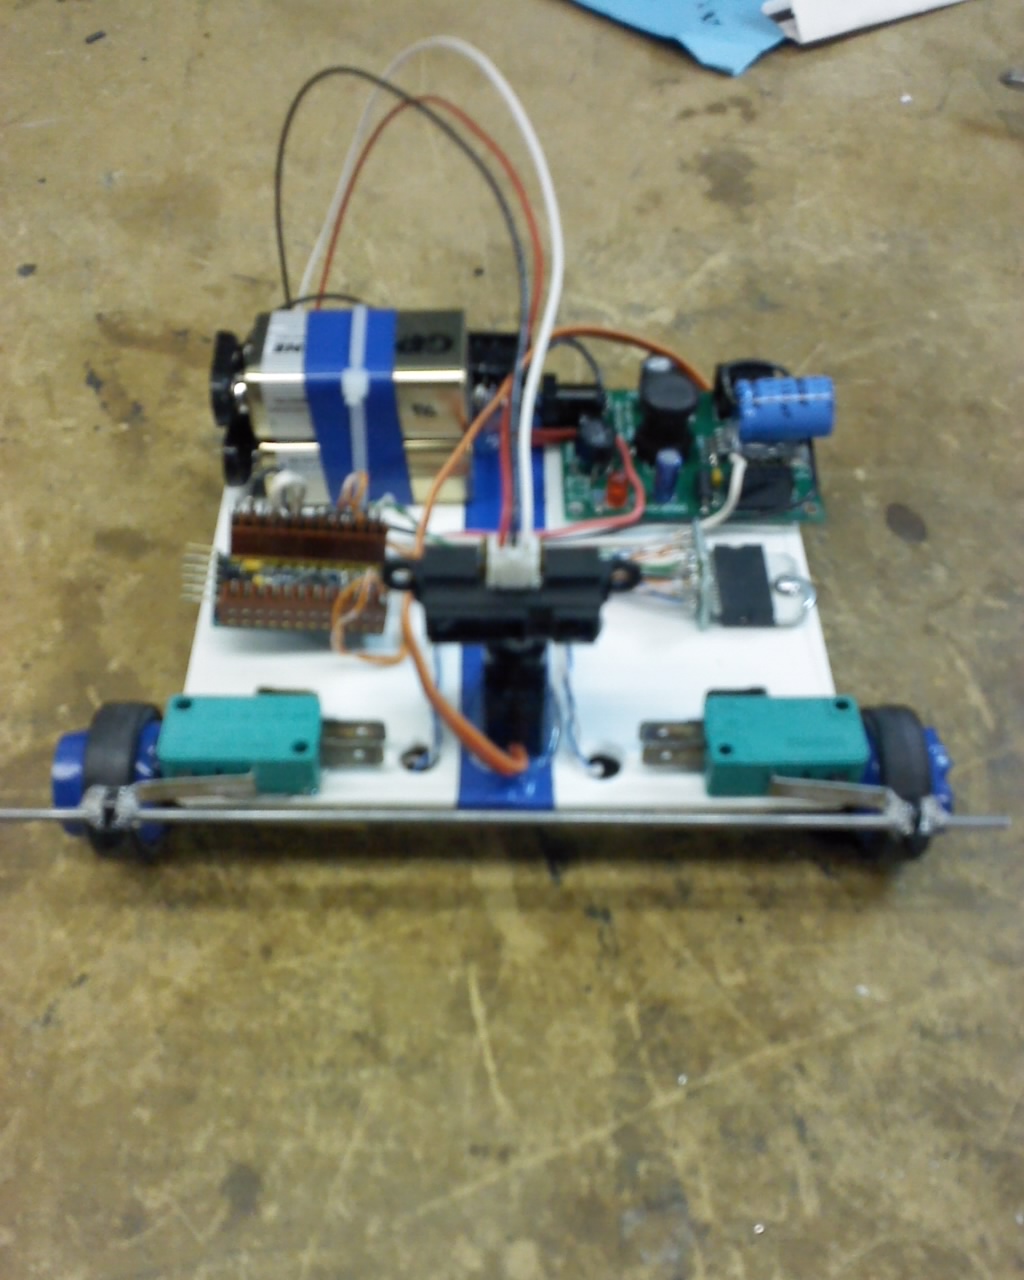
Alrighty since I killed the 298 and didn't wanna wait for shipping to buy one. I went another direction and glued on some servo's and made a ball caster from junk. So now I've gotta rewire again but really it should run a whole lot better with the bigger wheels
Update 3/18/12
I've been slacking on this project of late. I got really bummed when my plan got changed and I couldn't make it completely from junk parts. Then I had a brain fart on the whole bump switch wiring and programming. I searched LMR and finally found my answer then got it verified by Mr Carpenter. (Thanks!) So now I've wrote code for every part of this robot. I just have to combine my code chunks to one file and make a test run video!
Update 3/24/12
Crap....I did kill the pins that used to be connected to the 298. That kind of breaks the motivation a bit. So far my robot made completely from junk has done little but create a bunch of junk! I've since ordered a new 328 Uno and am waiting on shipping....Yay I get to rewire a 3rd time.
Does your office have robots running around?
Why NOT! Get off yer bum mister at make your employer an office "pet" ! -lol
Seriously do it.
Creeps around
- Actuators / output devices: 3 servos
- Control method: autonomous
- CPU: Arduino mini pro 328 5v
- Power source: 9v x 2
- Programming language: Arduino
- Sensors / input devices: Sharp GP2D120 IR sensor, 2 front bump sensors
- Target environment: indoors