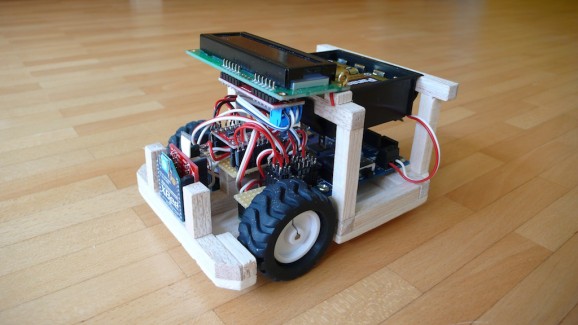
Woody Mk1 - A small Indoor Ground Reconnaissance Robot
Introduction
This is my first robot, well in its current state it is more a remotely controlled vehicle, as it does not have any self-contained intelligence in it. Its name is Woody, as the frame is made of balsa wood. Woody is controlled via a very rough but still powerful remote control, which comprises basically a breadboard, a battery, an XBee module, an 3.3V power converter, a cheap thumb joystick and some loose wires. I have chosen to build my own remote control, as I don't like those bulky and heavy two joystick remotes widely used for RC cars, planes, boats, etc. When trying out the remote I also noticed the fun of having a simple control with one hand. Before we go into details have a look on the video and the photo set attached.
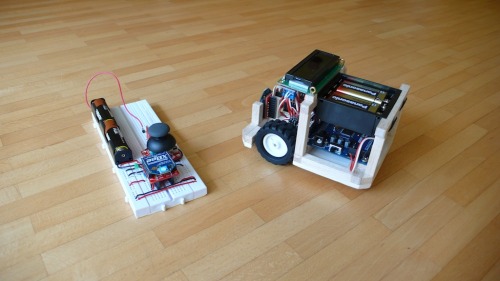
Photo 1: Overview of both devices, remote conrol (left) and robot (right)

Photo 2: Close-up of the robot with both Pololu-motors and the TB6612 double H-bridge controller
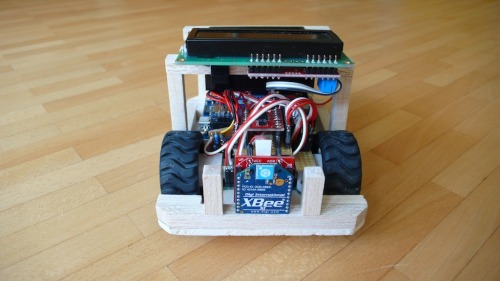
Photo 3: Front side with XBee module and motors (ball caster not visible)

Photo 4: Right-hand side with battery compartment and Propeller Plattform USB from GadgetGangster
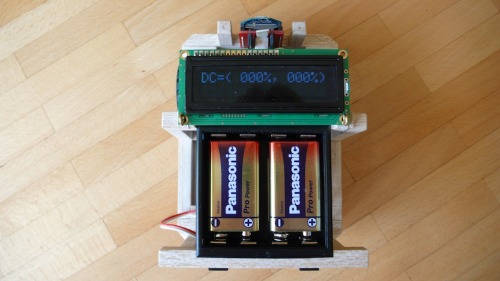
Photo 5: Top view on LCD display with duty cycle info for left and right motor
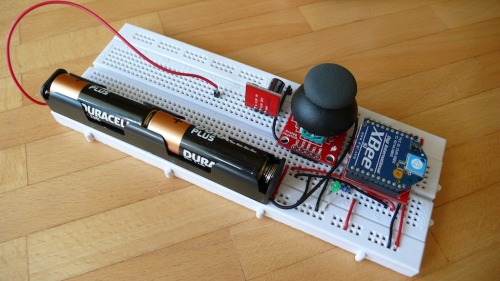
Photo 6: Breadboard-level remote control
Some more details
So far I only use three of the eight available cogs (or cores) of the Propeller: Cog 0 for the high level stuff like booting the other cogs after start and driving the serial COM with the LCD display. Cog 1 is responsible for the COM with the remote control and Cog 2 is doing the PWM for both motors.
The most interesting aspect for the remote control is this special mode of operation of the XBees, where permanently the ADC or DIO lines are read and transmitted without need for an extra microcontroller. This is the reason, why the remote can be made with so few elements. The thumb joystick deliveres two voltages, these are digitized with 10 bits and the result is transmitted every 50ms to the other XBee on the robot. As both XBees are paired with their unique serial numbers, no interference is expeced from other COM devices at 2.4 GHz.
Cog 1 then permanently reads the remote control transmissions, processes them into suitable PWM values (including indication of motor revolution direction) and puts them into a hub-memory register. Finally this register is permantly read by Cog 2 to get the latest values of the motor duty cycles. As Cog 1 and Cog 2 by definition never can access the mentioned hub-memory register at the same time, there can not be any access conflict or race condition. That's all basically.
Way ahead
Now as the motor control is done I am going to focus on video capture and processing with Woody and its Propeller based heart. For me it would be nice to have a video data link over the XBee-to-XBee communication line, say from a small CMOS camera (bw or colour) to a cheap 3" LCD video display on the remote control. I recently found one for about 20€ on Ebay. If this works well and if there is even more space or bandwidth for a second camera, then the way is open for a true stereoscopic video transmision into video glasses, capable of displaying 3D data. Right now I have the Zeiss Cinemizer Plus or the upcoming Zeiss Cinemizer OLED in mind, as most of the FPV video glasses (e.g. Fatshark RCV922) are not stereoscopic to my knowledge.
A platform for further works towards a remotly controlled ground reconnaissance vehicle
- Actuators / output devices: 2 motors
- Control method: RF Remote Control
- CPU: Parallax Propeller
- Power source: 9v battery
- Programming language: Spin and Assembly
- Sensors / input devices: none right now
- Target environment: Indoor or outdoor


