


This is my first project posted on LMR as well as my first robot project ever. I started it about 8 months ago in my spare time.
I'm a programmer at my day job so all electronic stuff & Robots is new for me. This project was mostly to learn & help me go to the next level. My initial goal was to make a robot based on the 6WD Dagu Wild Thrumper but I decided to begin with a cheaper frame to experiment.
My goal right now is to create a Wifi Rover that could be controlled from anywhere in the world over the internet (video feed included) and also to "gamify" the experience at the same time. I might as well give it a 3G connection and drive it out of my Wifi coverage, in the neighbourhood. Robots anywhere :)
Step 1:
Make the experience a little more "FPS" like. (e.g. Battlefield) That mean, directly controlling the Rover with a video stream and HUD to display various data.
Step 2: (If I ever make it this far)
Make the Rover autonomous and control it like a RTS game (e.g. Starcraft). Ideally, I would like to be able to select the rover with the mouse on a generated map of what the Rover "scanned" and right-clic where I want the Rover to go. The Rover should then use a path-finding algorythm to go where I asked on the "scanned map" the more efficient way. Ideally (but that will involve a lot more work if I go this far) many rovers could be active at the same time and "share" their position & revealed portion of the same map so they all know where they are relative to each other and they won't crash if I ask them to move all at the same time.
I know these goal are far fetched but I think to make great thing you have to aim even higher. So even if I don't make it, I'll have learned a lot and made a lot of fun.
So my first step was to make the Rover. I began with a small 20$ Rover chassis from Robotshop.

The Raspberry PI & USB Wifi came for a CanaKit bundle I bought earlier from Amazon
I also bought other stuff at Adafruit:
- The Camera
- Wires
- Breadboard
- Raspberry PI Camera Mount
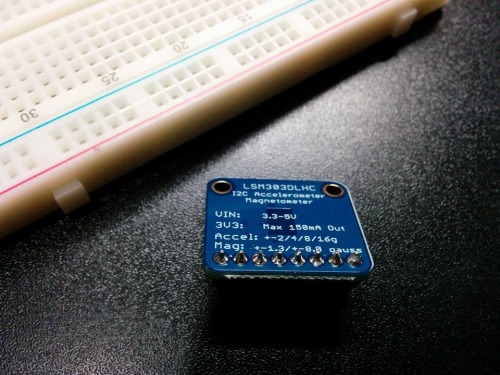
- Triple-axis Accelerometer+Magnetometer (Compass) Board - LSM303
- DC Current Sensor Breakout
And finally a Polulu dual motor driver & voltage regulator to step up a 3.7V lipo:
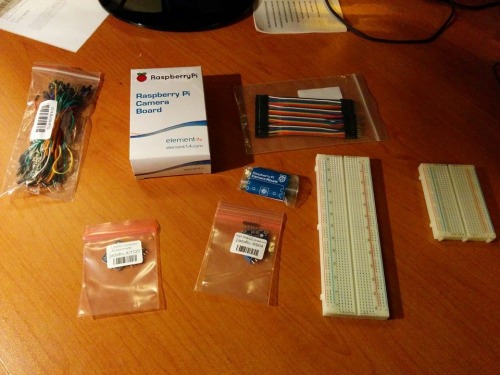
Some stuff I received from Adafruit
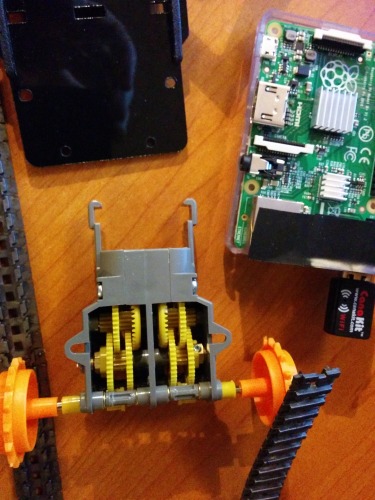
Gearbox assembly
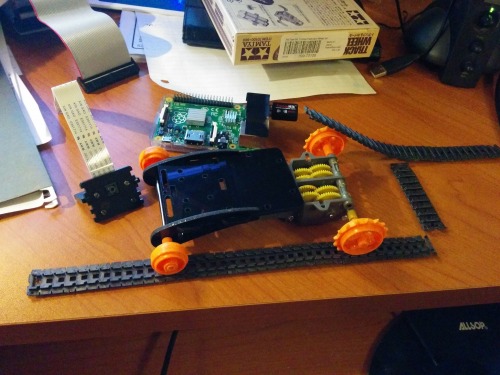
Installation of the motors & tracks
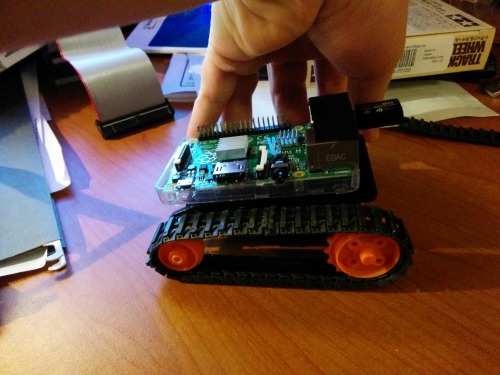
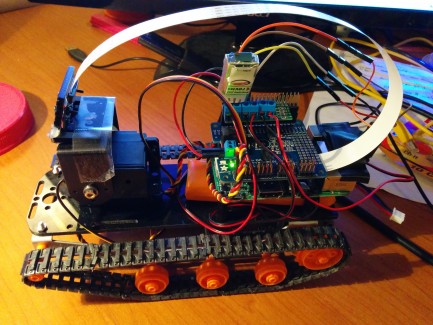
Raspberry PI installed on top of it. (It was a B+ Model at the time)
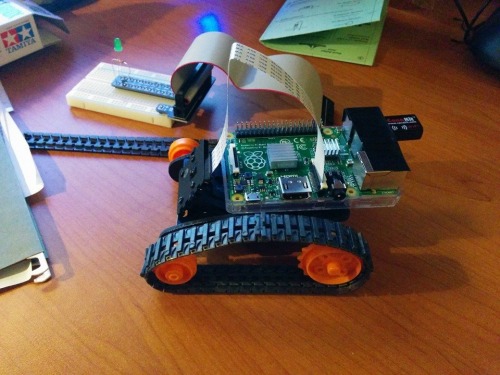
Connected camera (Take note that it wasn't bolted to the frame yet in the picture) I managed to fix it to a little hole at the front
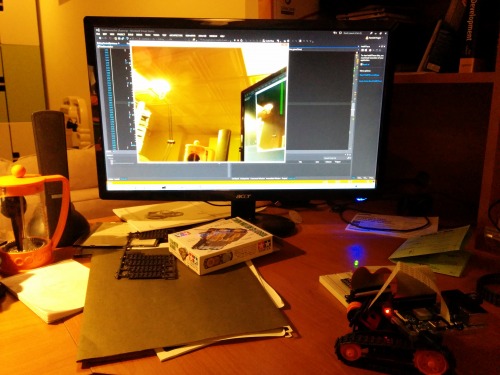
First video stream test working using MjpgStreamer :D
That video part was of great importance to me because I wanted to use the power of the raspberry PI to stream the feed over Wifi instead of using a wireless camera. That way, I could use the Rover over Wifi, and, most importantly, the PI could eventually "see" the image and use it in the logic part. (Maybe with OpenCV)
After searching a bit I decided to use MJpgStreamer to stream video. I found this special distribution which allowed me to use MJpgStreamer with the Raspberry PI Camera: https://github.com/jacksonliam/mjpg-streamer
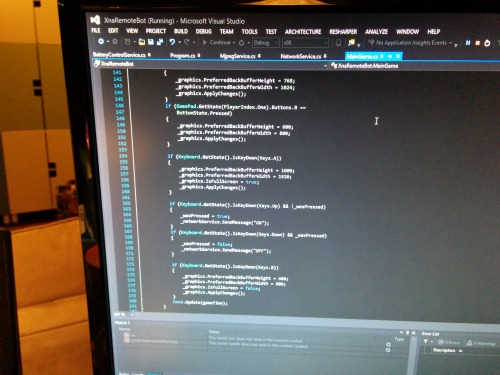
Then came the code part
I decided to use the Microsoft XNA framework on the PC side (* more on that later) to allow me to display the camera feed and add additional HUD part over it. Note that the PC is only a client. No complex logic is happening on the PC. The Raspberry PI part is programmed in Python (I had to learn from scratch but well, it wasn't that hard)
HUD Widgets
The first video shows the result with already a lot of HUD widgets:
- Camera feed in the back
- Game-like compass not working but still displayed in the top (Working in video 2 and 3)
- Top image of the rover displayed bottom left of the screen with "power bars" that light up depending on each motor throttle position.
- Visor. Nothing special here except it looks great. Help to determine where zoom would take place
- Software zoom with small text display on the right working (Display "1x" usually but changed to 2x when zoom is enabled)
- Speed display on the right but it's not working since I don't have motors with encoders. (I learned afterward that I need special motors to determine speed)
- Battery displayed but faked for now (I didn't installed my current sensor yet so I can't "fuel gauge" the battery)
- Headlight indicator at bottom-right of the screen working (and communication done to the PI that I was lights on or off) but no light is installed on the Rover yet (I want to be able to light them up and navigate in the dark)

Screenshot of the video showing the HUD of my Raspberry PI Rover.
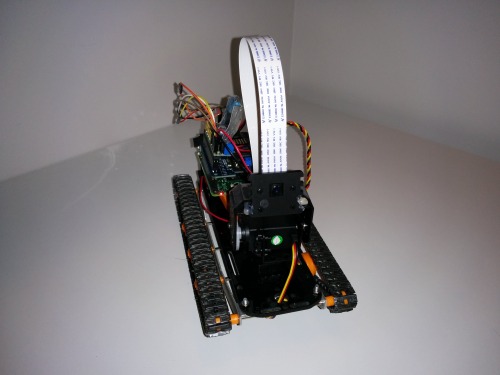
Then I realized I wanted to be able to PAN & Tilt the camera which was impossible with the small chassis I had, so I upgraded to a bigger Rover Chassis Kit.
This Rover chassis is a little more expensive but allow way more place for my project and come predrilled with holes for a Pan & Tilt kit.
I also decided to upgrade my battery to 7.4V to have more power for my motors (I wanted more speed) and to make sure the servo get enough power. My step-up voltage regulator would not be strong enough and stepdown regulators are more efficient.
I also added a servo hat to drive the servos for the Pan & Tilt camera.

The chassis upgrade with pan & tilt
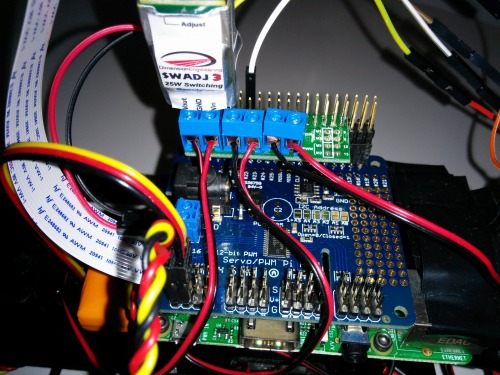
Here we can see the Raspberry PI, under the the Adafruit Servo Hat, under the Polulu dual motor driver hat and the voltage regulator.
However I wonder if that 25W switching regulator was a bit overkill for the task. The Servo hat has a connection point to add a capacitor but I didn't have to install one and the servo still run fine. Maybe I could have bought a smaller regulator but soldered a capacitor instead.
While working on my project, Microsoft launched Windows IoT for the Raspberry PI. Since I'm more familiar with C# and that could be easier to maintain, I began to think about trying this for my Rover project. However, to install Windows IoT on the Raspberry PI, I needed Visual Studio 2015 and Windows 10. I therefore went ahead with the upgrades but as soon as I started my project with VS2015, I quickly realized that Microsoft does not support XNA anymore. (It refuse to install on Vs 2015) Bummer. I managed to install it anyway using some hack I found on the net but I think I might have to port my code to Mono XNA to ensure better support in the future.
And while Windows IoT is promissing, the Raspberry PI Camera still don't work with it. So I'm learning about this OS but my Rover will stay in with Python / Linux.
Here is a couple of picture of the Rover with everything installed


While making the project, I quickly realized that while the software part was easy for me, the hardware part was another story. My soldering skill was awful and, even worse, I ordered stuff and never realized there was any soldering to do...until I received the first batch of products home.

One of my first soldering project. This Adafruit LCD board suddently stopped working and I have no idea why. ;)
But hey, I'm here to learn so I went ahead anyway and luckily, my skills quickly improved:
I suppose that's probably not ideal for a veteran but it's way better than my first tries.
Also, I had no idea that "stacking headers" ever existed.
On this version of the Rover, we can see the compass connections were done with a bit of soldering on the tip of the wires because the header pins that came with the motor controller "hat" were too short. I had a hard time not accidentally disconnecting them while working on the Rover.
That project was clearly out of my zone of comfort but, overall, I can say that I learned a LOT through this project and that it's a lot of fun to work on it. I recommand anyone who is interested in robotics but lack knowledge to just go ahead and hope for the best. :) It's not as hard as it seems and the only thing I regret is not trying it sooner.
* update 2016-02-20
Source