


Walter II
Ladies and Gents, may I introduce, "Walter II"
(Walter II is this year's "big project" going with me to Maker Faire NYC 2013)
In the style of the orginal Walter, I have built Walter II to be a desktop compainion. I may end up building a proper base for him, or I may just keep him on my desk to keep me company and read me my email. I dunno. Either way, he was a labor of love, requiring many hundreds of hours, an insane amount of math and hand-written notes, and a ton of patience.

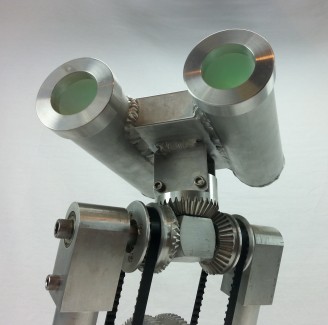
Bevel gears on neck assembly. The timing belts can work in unison to tilt the head, or against each other to rotate.
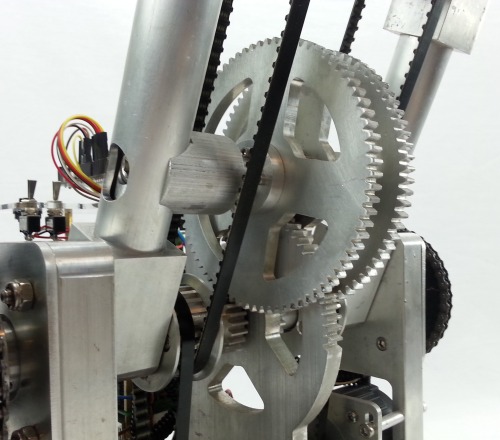
Main gears for the lift of the main arm. This is basically just a lot of gearing to increase the strength of the stepper motors. The central axle is turned via chain drive from the steppers. This turns two pinion gears (attached to the main axle). These pinion gears turn the main gears which ride on bearings about 1/3 of the way down the arm. These main gears turn a smaller gear between them which, in turn, "climbs" its way along the teeth cut in the the center support.
The two sprockets you can see are allowed to turn freely on this main center axle and transfer power from the stepper motors to the neck assembly.
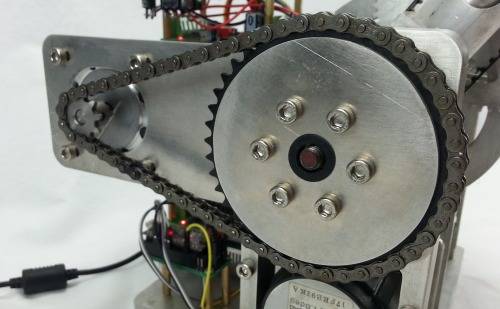
Chain drive for the main lift mechanism.

Here are all the stepper drivers and electronics. Two Arduino Nano's (each running Teacup firmware) control the steppers. One drives the neck (X/Y) and the second drives the main arm up and down (Z). A standard Arduino Uno feeds G-code via serial to the two Nano's. Also included is a Wii NunChuck connector that allows me to drive the mechanics manually via joystick and tilt.
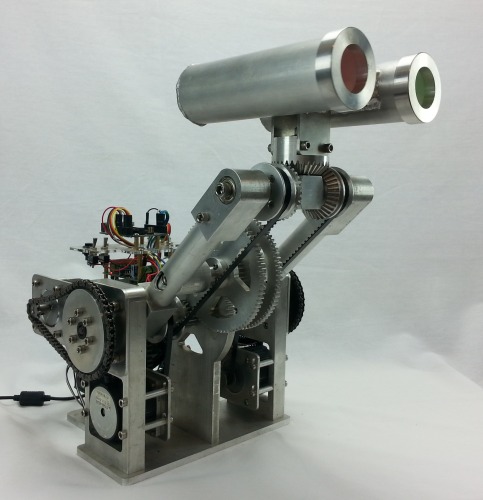
And there he is!
Sits on a desk and looks around
- Actuators / output devices: (4) Stepper Motors
- Control method: autonomous, Predetermined Routines
- CPU: (3) Arduinos
- Operating system: Teacup (3d printing firmware)
- Power source: 12v 6A External
- Programming language: Arduino
- Sensors / input devices: Wii Nunchuck
- Target environment: desk