


Wall-e - push-toy conversion
The mission
To convert a little pushtoy Wall-e into a fully motorised, arduino powered robot with bluetooth for control. Why? My little boy loves Wall-e, I love coding - so why not make a toy that will entertain the little fella by day, and serve as a test platform for me by night?
The Plan
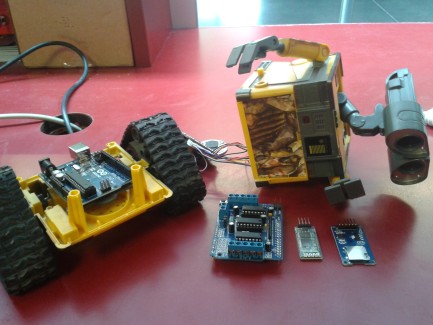
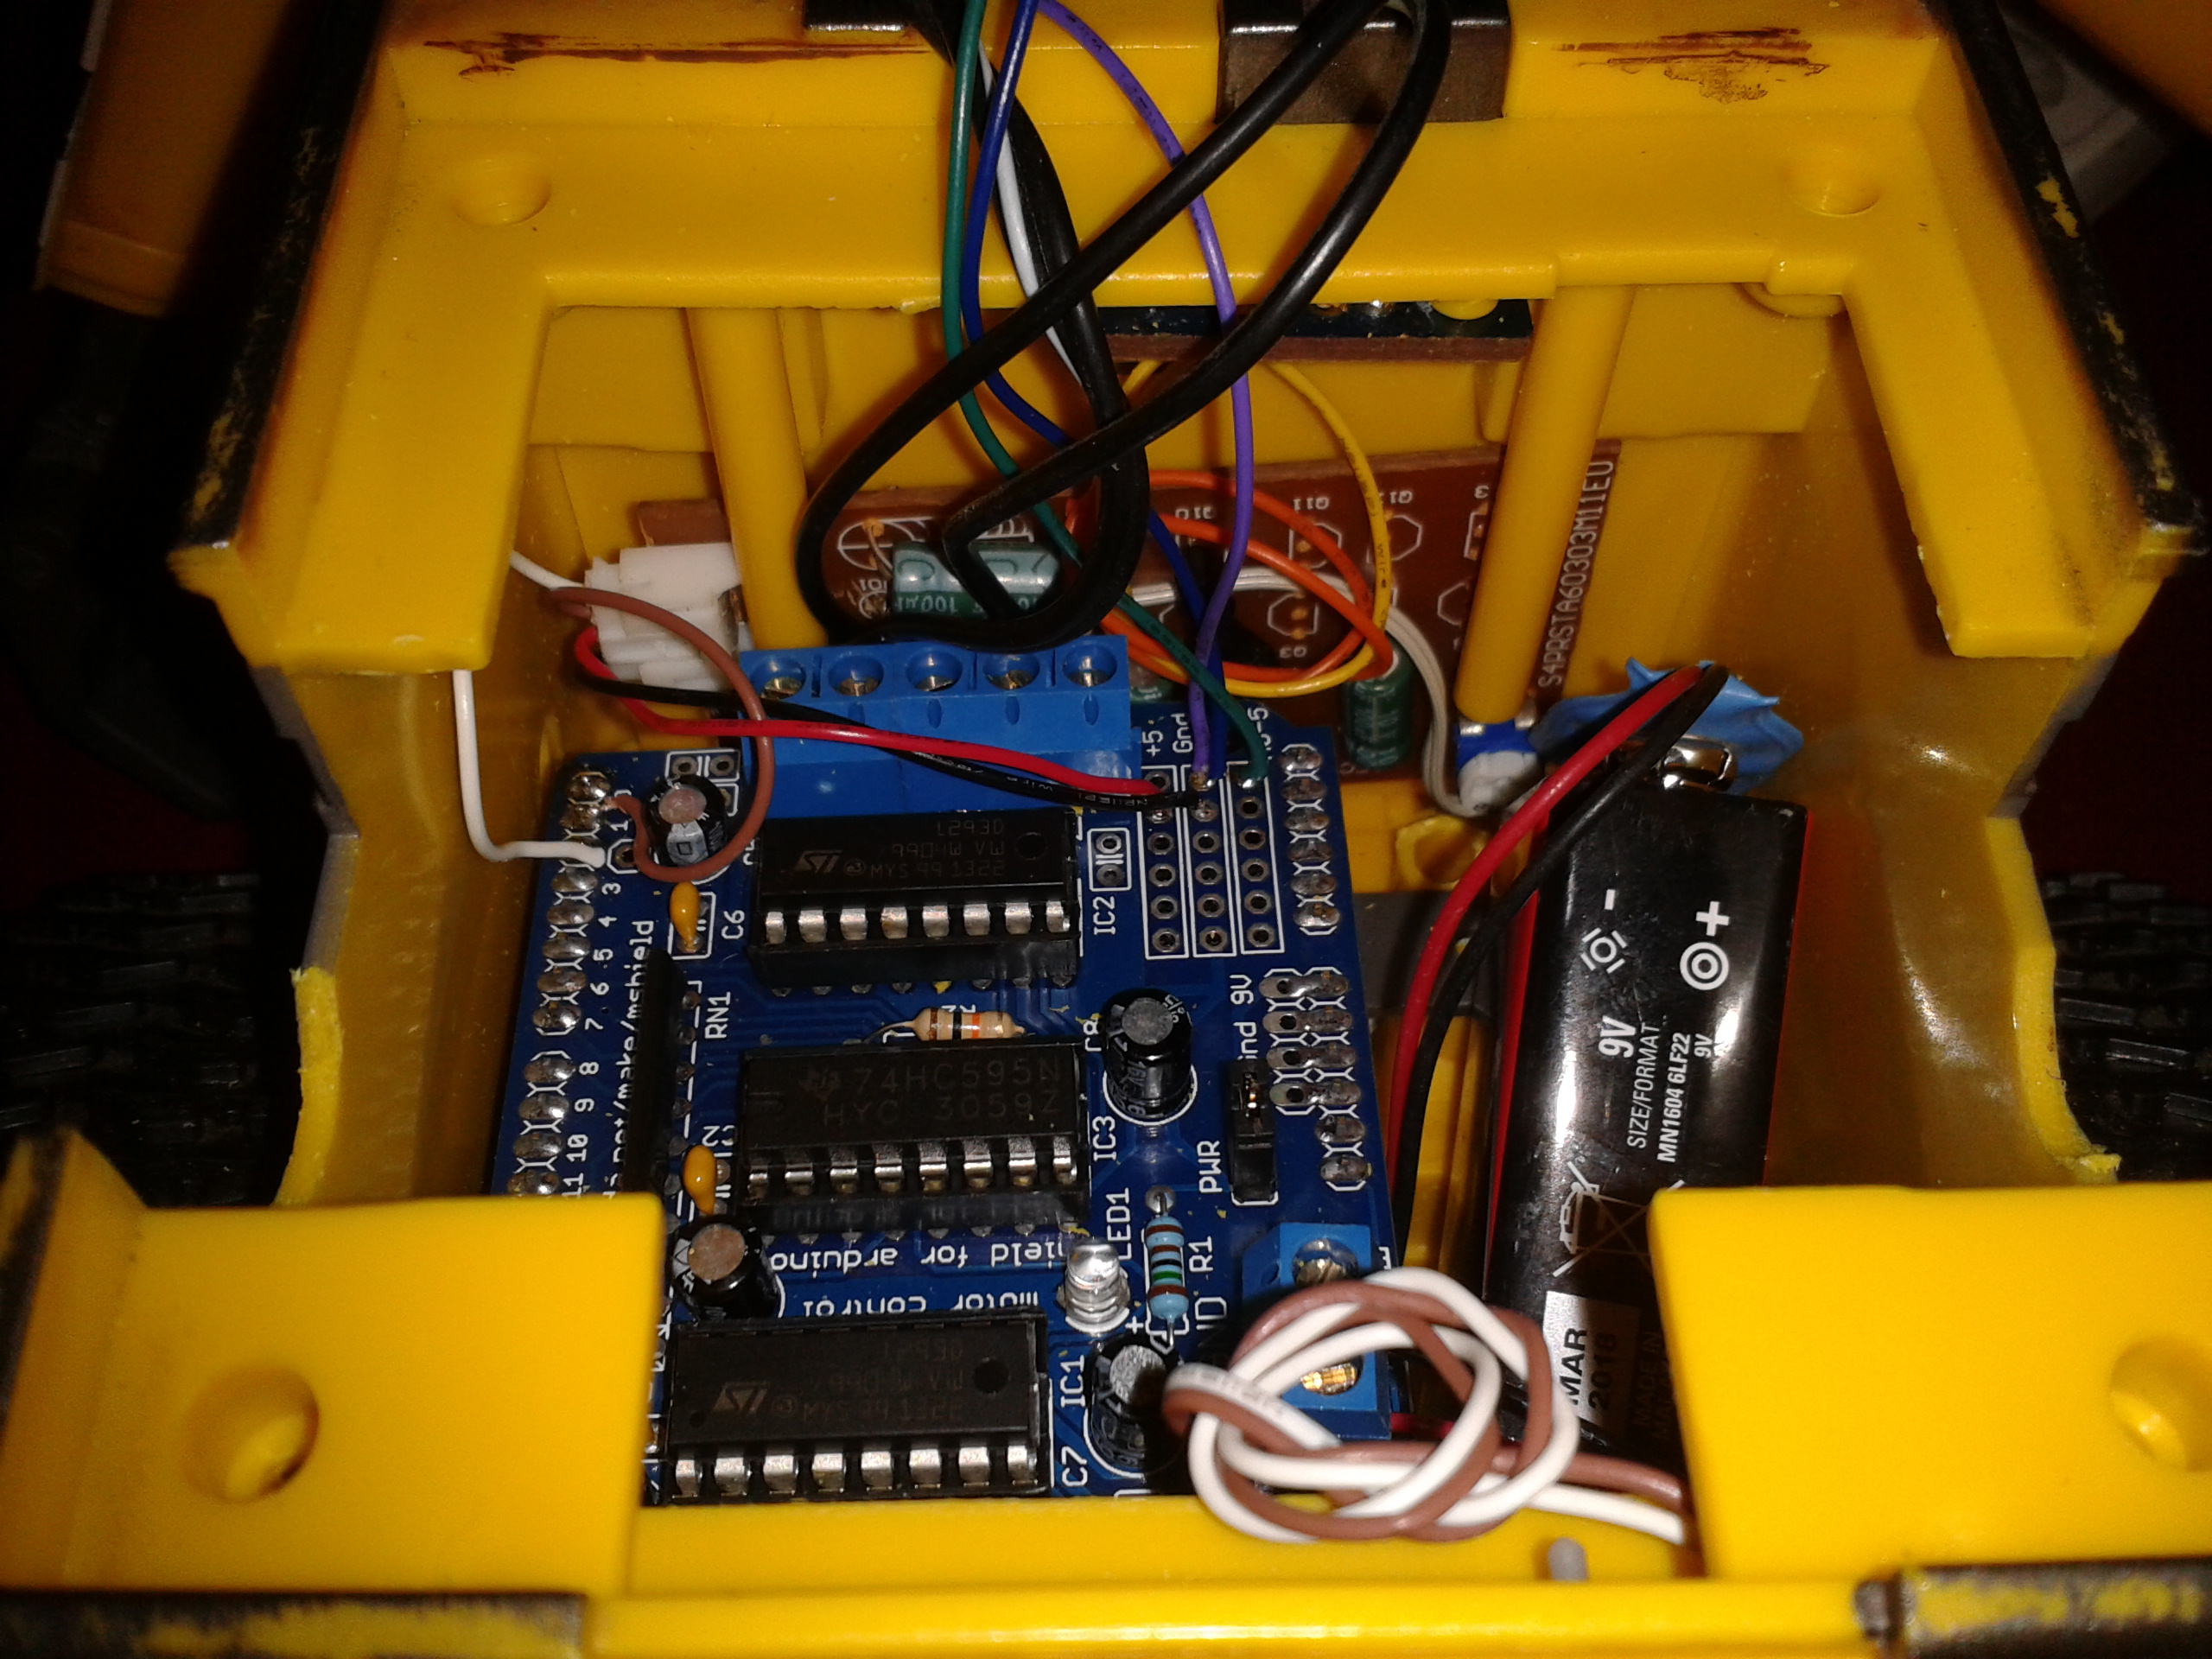
- Internals - The main component of this build will be the Arduino Uno, complete with Motor Shield. A Bluetooth module has been added and will be used via a serial connection to the controlling device (mobile phone with RC app, PC/Laptop with a little Python app I am working on).
- Onboard sounds/lights/effects - In the future I hope to add an SD Card to store Wall-e sound effects and trigger them from the Python app I will eventually write (he says, with mild heart palpatations at the thought), Due to the lack of pins available, however, the original PCB will be refitted for now and troggered from the Analog Pins. The LEDs will be attached to an Analog pin too.
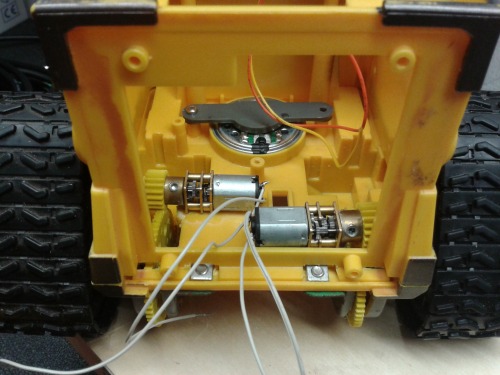
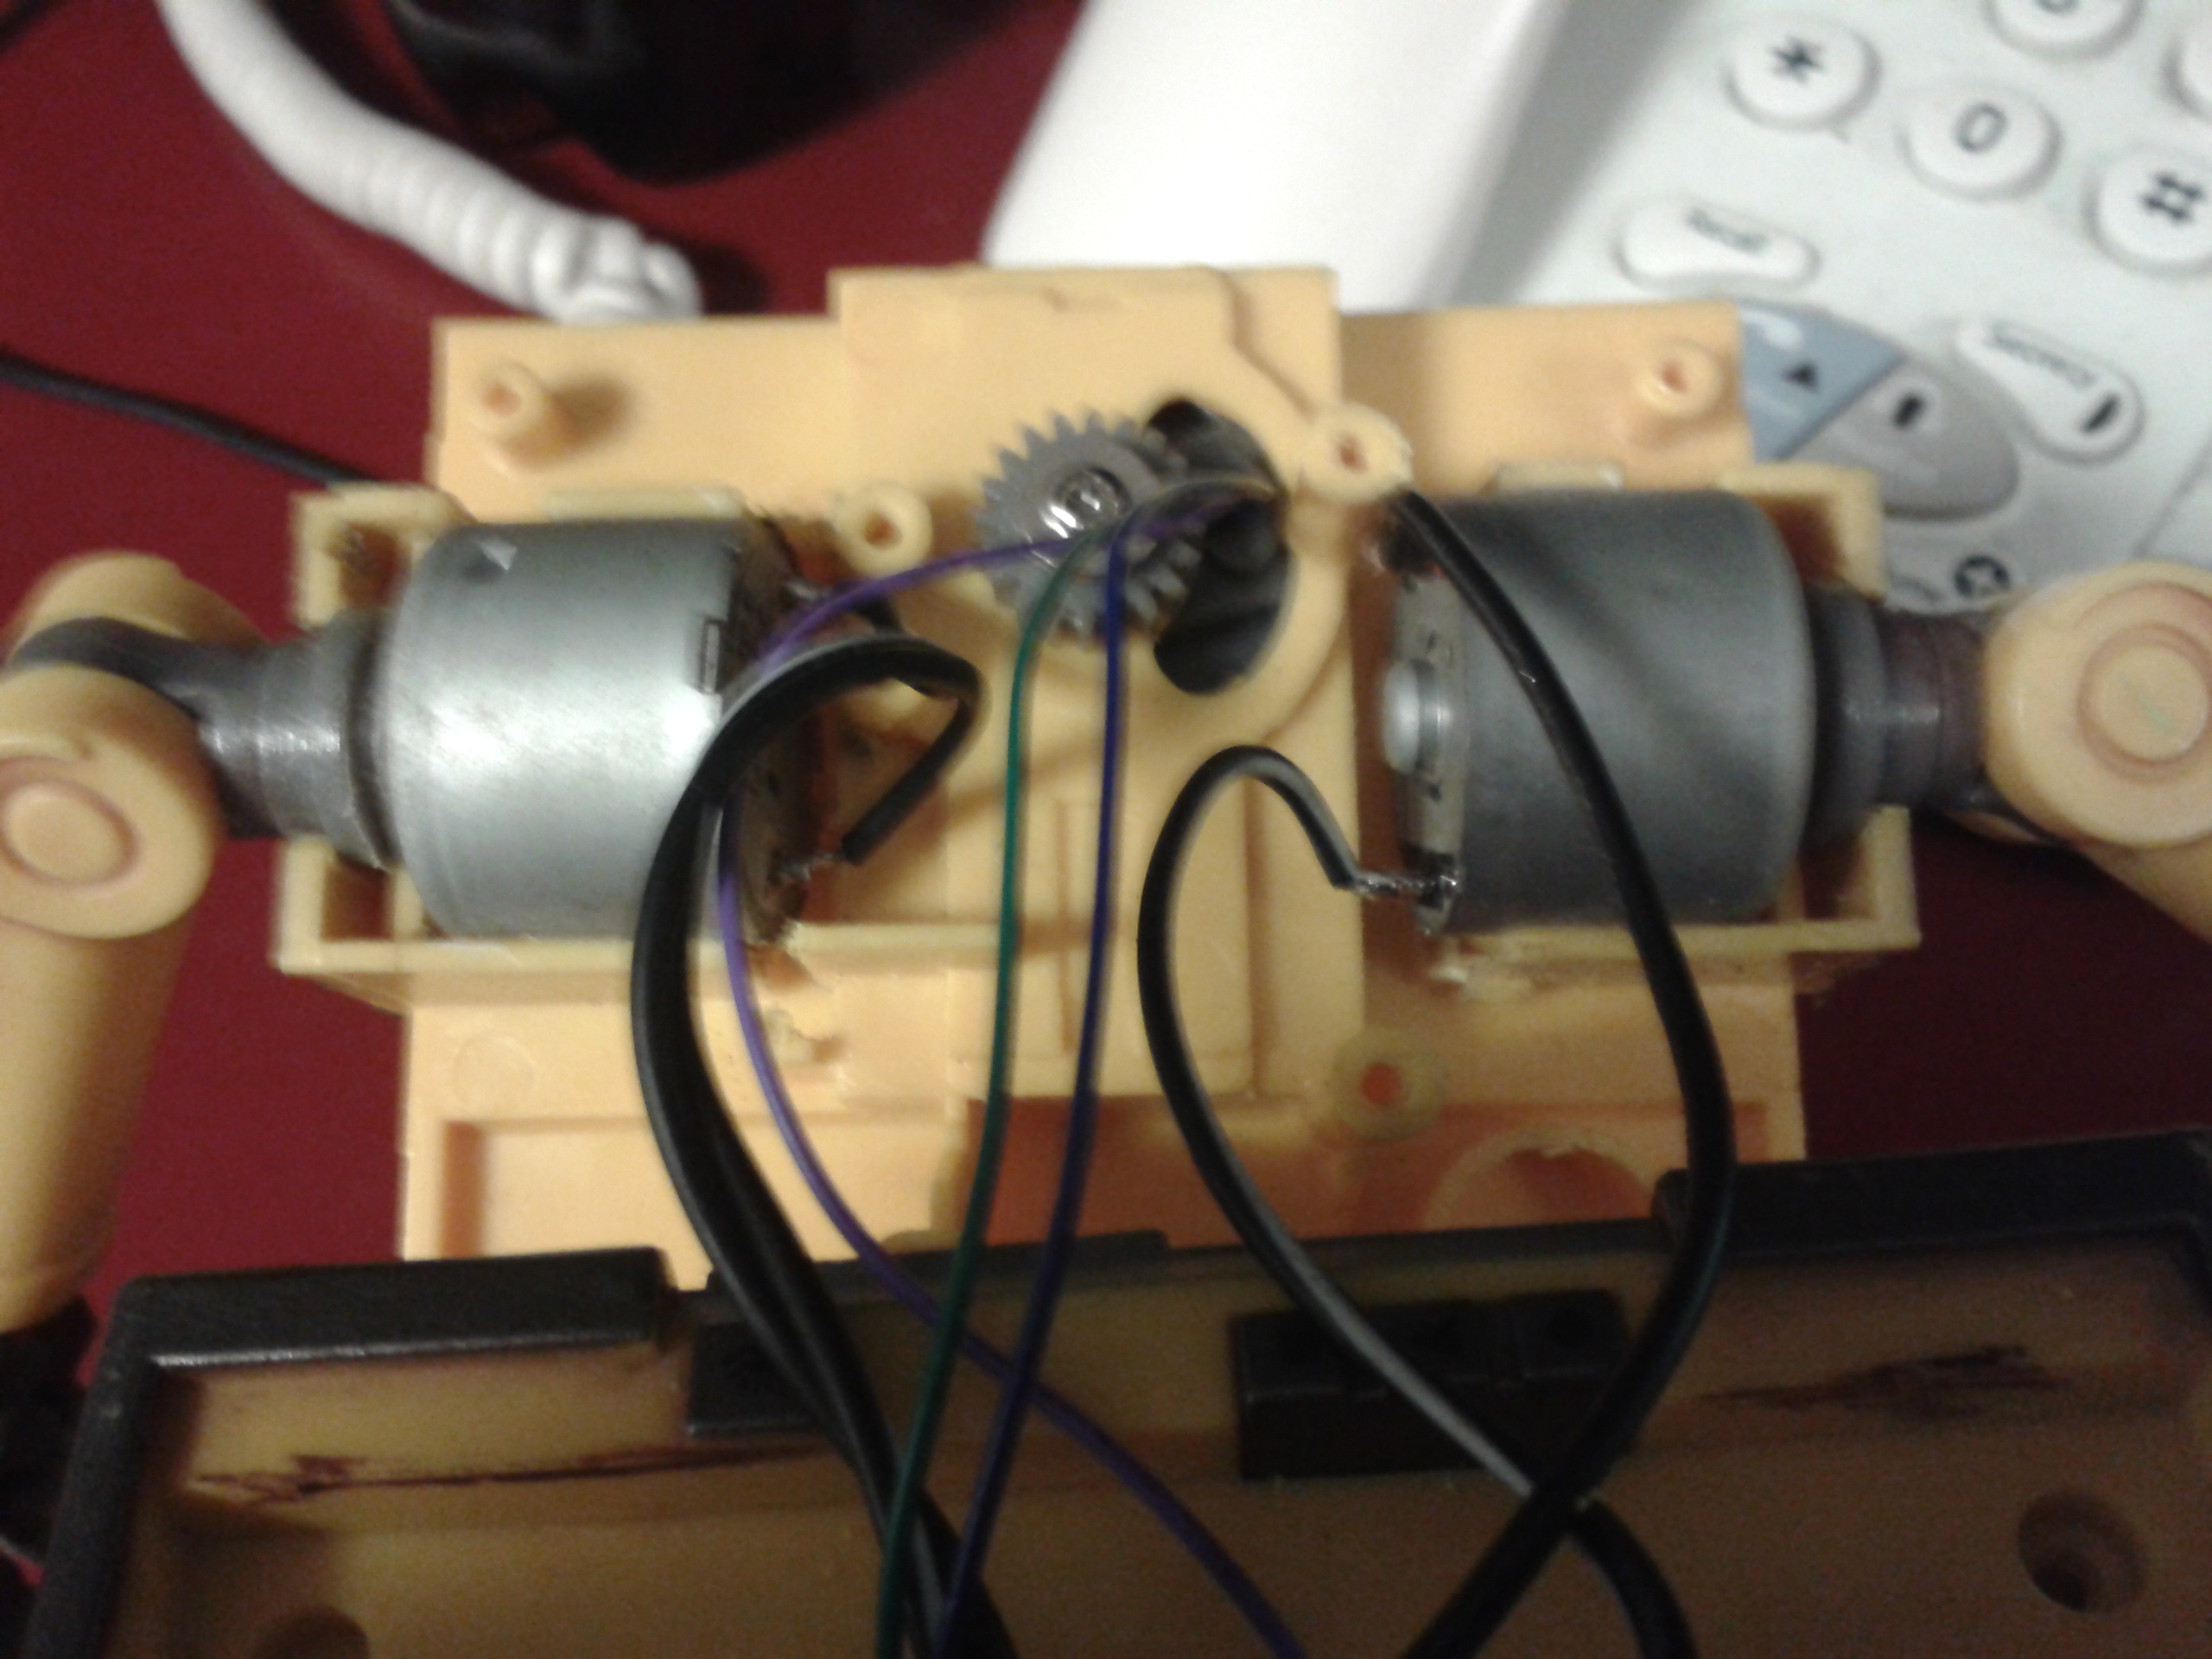
- Motor installation - Motors are being added for arm and track control, coupled with a worm gear drive system he is devising; the particular toy we are working with has very tough-to-turn tracks, so there has been a lot of work done on getting the gearing to allow a good balance of torque and speed. I am not very hack-savvy AT ALL, so i have emplyed the services of a friend to aid me with the hardware aspects of my project.
The Execution
The Build - updates
- UPDATE - Wall-e now moves! His tracks and motors have been attached. Next phase is to add motors to the arms, a servo for the neck, and find a small enough 9v-12v rechargable power solution. After that, if time permits, add the control of the LEDs in.his eyes to a pin and add triggering of sounds from the original board to another pin. Somehow!
- UPDATE 2 - just had an email from Ian E Barnes, the man tasked with assembling Wall-e (he is the Barry to my Paul,if you are Chuckle Brothers fans). Wall-e now has arm motors attached, original PCB reinstalled for sounds, plus the eyes/LEDs are triggerable from the Arduino! It is currently running running on a 9v battery, so on Tuesday I will look to sort a rechargable, onboard solution. If I somehow have 12v of onboard rechargable goodness I will be an even happier man. ALL HAIL THE BARNES!!
- UPDATE 3 - I have received Wall-e back, and am over the moon with the results :-)

Tracks are attached to the geared motors and sprockety setup
Two motors have been added to the arms
The original PCB has been stripped of some unnecessary components and relocated.
The LEDs in the eyes are attached to a pin
Bluetooth Module has been attached for control
9v Battery attached
The App
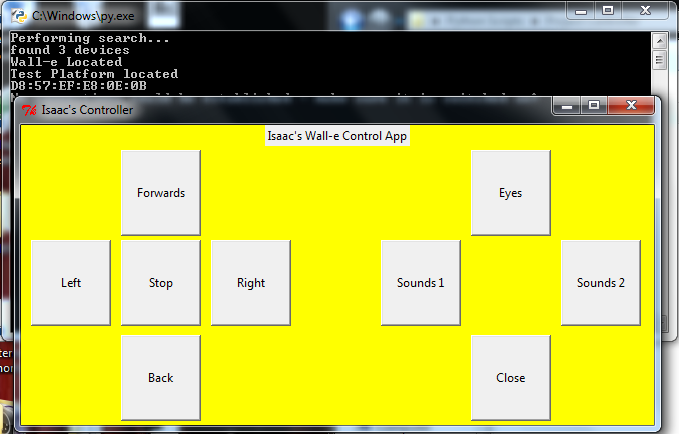
The Python app I am working on is starting to take Shape:
Upon runnning it searches for any Bluetooth devices in the area, then tries to first connect to Wall-e's Bluetooth Address. If not successful, it will then try to connect to my other Bluettoth module, which is currently attached to my testing platform. Upon successful connection it then opens up the basic screen below, with movement controls and Eye/Sound trigger buttons.
The button functions are also mapped to keys too, for ease of use.
Current Issues
I'm having a real issue on the coding aspect; I'd really like a Wall-e robot that can be controlled from a multitude of sources; my android, the missus' iPhone, the grandparents' tablets, my Python app etc. Problem is finding an app that is both android and iOS compatible.Throw into the mix the primitive nature of my Python controller i have a little problem!
The python controller (and the ArduinoRC app i have been using) are configured to send 'F', 'B', 'R', 'L' to the arduino. I haven't been able to find an iPhone app that will be able to allow me to do the same. Other Android Apps (such as Bluebots) are geared up to send more complex controller information.
I am unsure how to proceed; either keep with the simple stuff or write the Arduino code to cater for multiple methods of control.
If anybody can offer a lovely little cross platform solution that would be lovely!
Future amendments to be made:
- Add 12v, rechargable power supply
- change arm motors to servos for greater control
- Consider Continuous servos for tracks/ reworking gearing to allow the current geared motors to move faster.
- Add the ping sensor for automation ie object avoidance
- locate a cross-platform controller
- Add Head Servo
Videos
Coming Soon!
Thanks for reading!
Controlled via Bluetooth, autonomous object avoidance mode. Future: play sounds from MicroSD card, control Walle's LED eyes etc