


Video of a homemade 5-DOF manipulator with tactile feedback made from styrene
Materials List:
Polystyrene sheets: 0.5mm, 1.5mm and 2mm thick (Evergreen Models).
Polystyrene tubing: Various
Brass sheet: 0.5mm thick
Brass tubing: Various
Servos & Motors: 2 x HS-805BB (Shoulder yaw & pitch joints)
1 x HS-485HB (Elbow joint)
1 x HS-322HD (Wrist joint)
DC motor with 300:1 gearbox (Gripper)
Tactile Feedback: Quantum Tunnelling Composite (QTC)
1 x custom-made Electrical Rotary Union (Elbow-to-Wrist joint)
1 x SKF Thrust Bearing (AXK 2542) + 2 x SKF Thrust Washers (AS 2542)
Various springs
Polystyrene glue
Epoxy glue
Heat glue
Multi-strand wire
Heat-shrink
Tools List
Scalpel
Studding knife
Small saw
Small files – various cross-sections
Sanding paper
Dremmel
Hand-drill
Vice
M3 & M4 taps
Heat-gun
….generally speaking the more the better!
This is a project I’ve been working on, during the last month. This is a preliminary post, is work in progress since its not fitted with any electronics yet - hence no video, but very very soon. I must have this ready for Spain - Campus Party Europe. I will be constantly adding context.
A few words about Styrene
The main construction material used is Polystyrene (or simply Styrene), which is widely available on most hobby stores. For bulk quantities or for those coming from the States, you can contact Evergreen Models – they will stock every styrene sheet / tubing you will ever need.
Styrene is a soft, normally white plastic, which is very easy to handle and will bond very nicely when glued with polystyrene glue. I normally design the part I want to make directly onto the styrene sheet and cut it off using scissors. For internal cut-outs I use my Dremmel with a 2.5mm diameter Carbide cutter. If I need my part to be thicker than the sheet’s thickness, I make multiple identical parts and glue them together. When you make parts like that, make sure you leave the drilling for the end - this will ensure holes are aligned across all glued sheets.
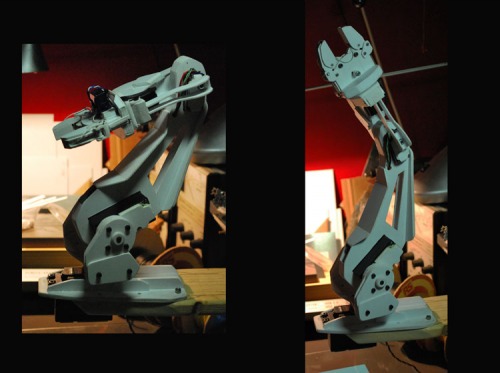
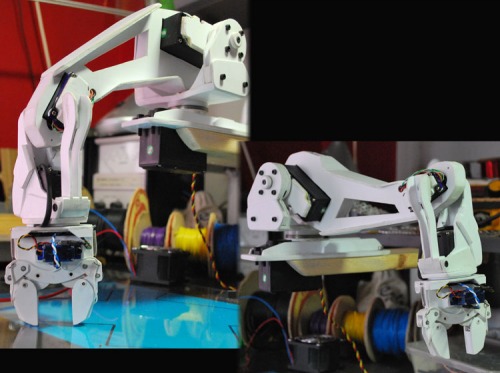
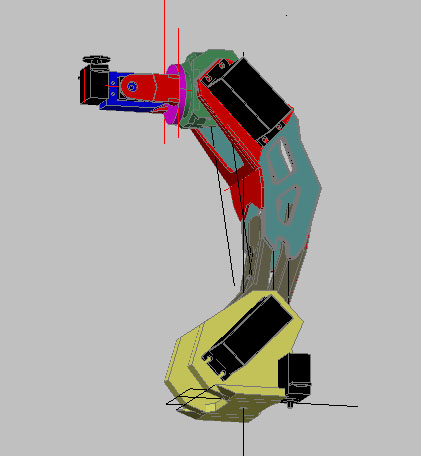
This manipulator arm has been built without CAD drawings; entirely with the method described above. It comprises 5 DOFs: a yaw and pitch root (shoulder joints), an elbow joint, a wrist joint and a gripper. The wrist joint is fitted with a custom-made electrical rotary union that will allow for continuous rotation of the end-effector (gripper) without electrical connectivity problems. Basically the electrical rotary union eliminates the need for cables between rotating mechanical assemblies.
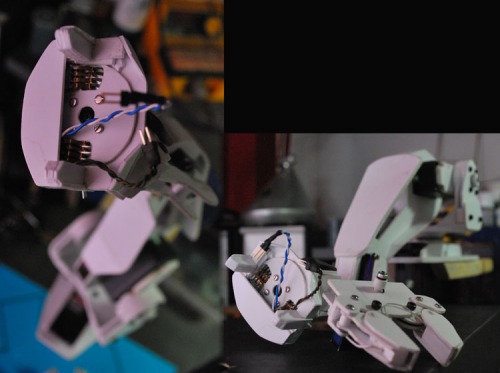
The gripper comprises two fingers each fitted with a Quantum Tunnelling Composite (QTC) pressure sensor. These sensors are basically pressure sensitive resistors that under pressure change from insulators (R >10 MΩ) to conductors (R < few Ohms). The two sensors are wired in series and the signal is fed directly to the controller of the wrist joint.

I am currently waiting on the controllers, but more on that soon....!
Any comments welcome!
30/3/10
The preliminary design on V2... in AutoCad this time :))
5/5/2010
Added the video.... from a resisting Greece I salute you!
7/5/2010
A few words on the control just to clarify some details ;)
Each axis of motion is controlled via a 'Supermodified' combo. The arm was built using the first generation of Supermodified controllers which work in conjunction with a magnetic encoder (1024ppr) (https://www.robotshop.com/letsmakerobots/node/18470). The second generation comes with 4 times the resolution (4096ppr) (https://www.robotshop.com/letsmakerobots/node/18615) so i am really looking forward to try out those babes on the second generation 6DOF manipulator. Supermodified controllers are direct replacement boards for the original servo electronics, that allow full PID speed and position control of the servo. Based on the ATMega 368P (fully Arduino compatible with half the footprint of Arduino nano and 4MHz faster) also allow for controlling 4 digital IOs, as well as 4 analog inputs.
So for example the gripper’s pressure sensors need not be fed back to the main controller, since the Supermodified controller board of the gripper can handle the analog signal from the sensors and report back to the main controller (in the video that would be the PC). The Arduino merely plays the role of a USB to I2C bridge. Btw the gripper’s DC motor has been a recent addition since its predecessor - a tower pro 90 micro - proved inadequate. The tiny DC motor powers the dual parallel-link finger assembly by using a tiny pulley system having an extra-strong thread acting as its timing belt :))).
The remaining servos have all been “Supermodified”. The joint hierarchy is as follows:
Shoulder (yaw) -> Shoulder (pitch) -> Elbow -> Wrist -> Gripper
The wiring is fairly simple and straightforward since each Supermodified controller can be ‘daisy-chained’ with other Supermodified controllers, minimising complexity and offering a neat end-result. The whole manipulator arm wiring effectively comprises a single 4 core cable (Power and I2C comms), running from one servo to the next according to the hierarchy above. I2C comms are then fed to the Arduino, which for the time being acts as a USB (com) to I2C communication-bridge between the host computer and the Supermodified servo controller network.
Thats it for now soon I will upload a number of high quality pictures of the assembly process for the electronics and the arm.
- Actuators / output devices: 2 x HS-805BB (Shoulder yaw & pitch joints) 1 x HS-485HB (Elbow joint) 1 x HS-322HD (Wrist joint) 1 x Tower Pro 90 micro (Gripper)
- Control method: TBU
- Operating system: undefined
- Sensors / input devices: Magnetic encoders, Quantum Tunnelling Composite (QTC) pills
- Target environment: indoors