


Underwater ROV
Hi, I started my work on my ROV a few weeks back. By now I have finished the main body for the electronics and have tested it up to 28meter depth with success. Here are my initial ideas/concepts for my design: - ROV will be powered by internal battery, so no long distance power issues - Communication will be done using a standard CAT5/6/7 network cable using standard TCP/IP - Main control board will be arduino with network interface - Camera will be High resolution IP Camera - Motors will be brushless motors with propellors run directly underwater, with no special waterproof housings
Testing so far;
- First test was with depth sensor in ROV and Network cable attached. The ROV was send 28meter down (bottom of my local lake) and I have a very small water leakage. I suspect it was the network cable connection
- Second test I removed the network connection and just send down the ROV with electronics and depthsensor to do internal logging. This test went perfect, no water came in. It did proof my selected depthsensor worked and the housing was waterproof.
Key components used so far:
- Pipe; 100mm aluminum pipe with 10mm wall thickness
- Front glass: 10mm plexiglass with an 10mm aluminum ring in front to spread pressure well
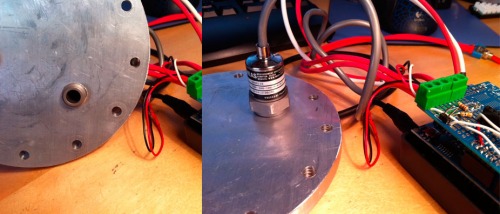
- Back connection plate: 10mm aluminium plate with NTP 1/4 tread for depth sensor
- Logging: arduino with ethernetshield and micro SD slot, for log recordings
- Depth sensor: MEAS MSP-300-100-P-4-N-1 (goes up to 100psi, 68meters depth) delivers just 1v to 5v for amount of pressure, so easy to use with arduino
More details: www.diyrov.net
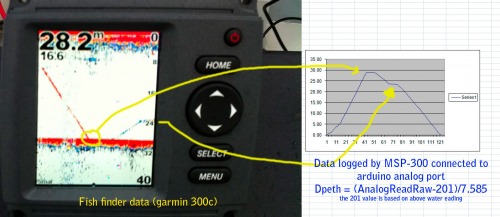
First Depth Sensor Test: (May 30th 2011)
The first thing I wanted to get running was basic data from the ROV. So I paced an MCP9701 temperature sensor on the arduino, build a basic voltage divider with 2 resistors to messure battery voltage and use the MSP-300-100-P-4-N-1 as depth sensor.
The MSP gives a voltage between 1v and 5v, depending on how much PSI it is messuring. I had my fishfinder that allowed me to follow the decent of my ROV underwater. and when I was bringing it back up you see a horizontal line at ~24meters, this is because I was making the photo. This allowed me to easily calibrate my MSP data to build the formula to messure depth. It might not be exact to the millimeter, but good enough for now :-)
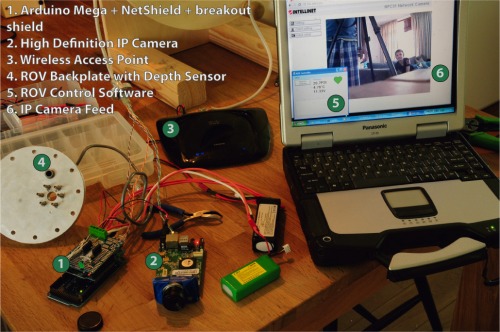
Setting up the Electronics: (June 12th 2011)
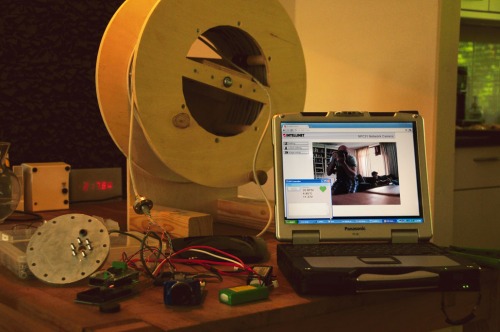
After last week’s successful test of the main body and cable connector, I started to assemble all the electronics. I made a big cable winder with about 80meters of CAT5+metal cable. In the middle of the winder will be the wireless access point (battery powered), this will allow me to wind down and up the ROV while also having connectivity with it.
I Split the CAT5 cable into 2 network connections. A standard 100mb ethernet connection only uses 2 pair of cables, as my CAT5 has 4 pairs, you can run 2 connections over it. By just using pins 1,2,3 and 6 you will have a 100mb network connection and make sure you use 2 pairs, do not just mix any wire.
I successfully tested this setup, using one part of the cable connected to the arduino and the other part cable connected to my high definition IP Camera
Next step is to make some Lights on the ROV, so we can test the camera underwater and actually see something :-)