


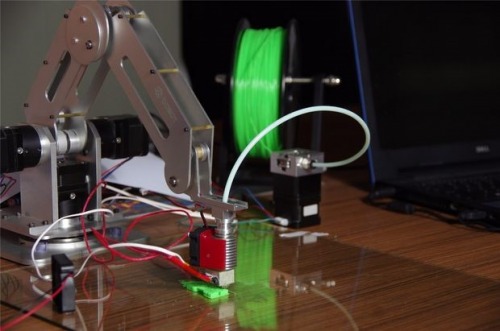
Turn Adunio-based robot arm into a 3D printer!
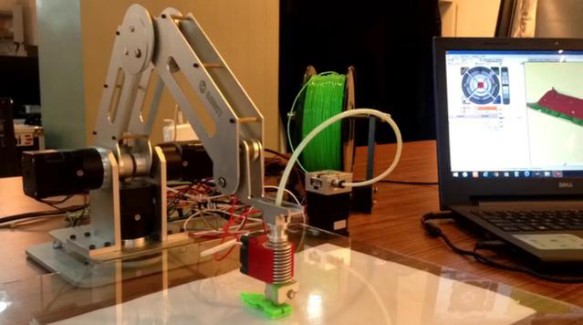
After day and night's hard work, we finally made Dobot arm a high precision 3D printer! It's different from the traditional Delta and
XYZ 3D printer. It may be the first desktop robotic arm that can be used for 3D printing!!!We have proved that Dobot arm is
not only good at horizontal motion with laser cutters, but also do a great job on three-dimensional motion with 3D printing!
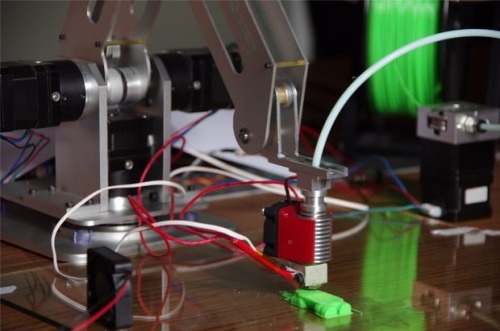
Over the last two weeks, we worked incredibly hard to solve Dobot arm's problem on 3D printing such as how to secure a printer head
on Dobot arm's head and how to optimize its precision as good as the traditional 3D printer.
But thanks for Dobot arm's great material and mechanical structure which can reduce the mechanical vibration
between its parts and finally we made Dobot a 3D printer with a bowden extruder!
Now Dobot is available on Kickstarter, go see what other tasks Dobot can do well:D
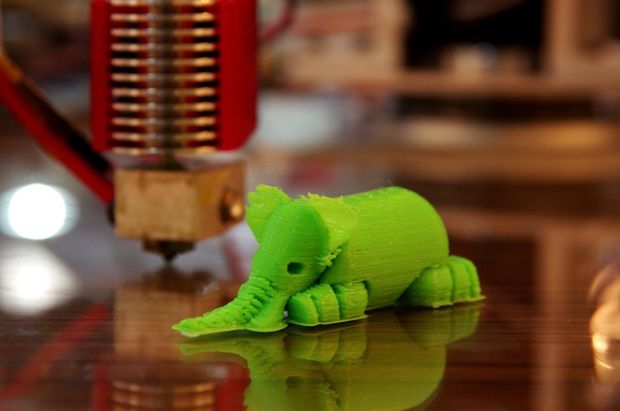
Dobot arm is good at 3D printing(show in the video):
Dobot arm is also a great laser cutter(show in the video):
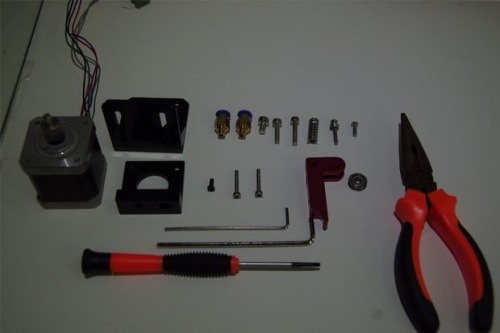
1, Some components you need to get:
Materials:
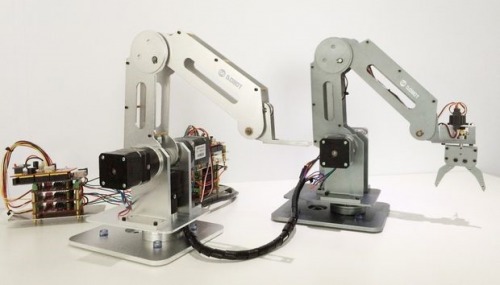
A basic Dobot robotic arm: more details on instructables: http://www.instructables.com/id/Build-a-Laser-Cut-and-Soldering-Dobot-arm/
A printing controller based on ATmega2560 compatiable with Arduino Mega2560:It is a great printing controller that also can
be used to control CNC and laser cutter and it's compatiable with Mega 2560 used Arduino IDE to develop and I will show you
more details on http://reprap.org/wiki/Mega_controller
A E3D V6 3D printing head: This is a J-head extrusion head with a rediatiing fan and you will find more details in the file.
A E3D J-head MK8 bowden extruder: this extruder can use 1.75mm and 3mm PLA and compatiable with E3D/ J-head/MK8 heating nozzle and more details in the file.
A roll of 1.75mm PLA print material. Some dupont lines
Tools:
A hammer
A needle-nose pliers
A Phillips screwdriver
A M3 and a M4 Allen wrench
2, Assemble basic Dobot arm
All the original Solidwork files have been posted on GrabCAD and you can download on GrabCAD.
I have shown you how to build a basic robot arm on instrucatbles: http://www.instructables.com/id/Build-a-Laser-Cut-and-Soldering-Dobot-arm/ please go to have a look.
3, assemble E3D V6 J-head printer nozzle
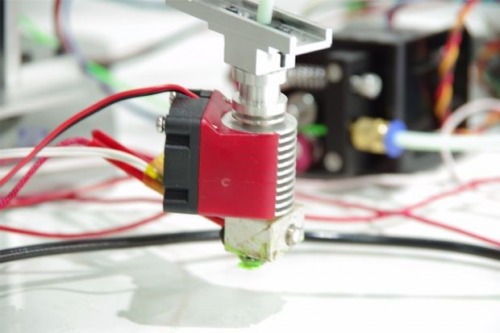
First, you need to prepare a sprinkler nozzle and a 20*16*11.5 heating block and connect these two parts with screw thread.
We need to rotate the sprinkler nozzle into the right hole of heating block and fix it with a M3*4 screw.
Second, we need to insert the end of M7 screw thread of throat tube into the radiating pipe
and then insert the end of M6 screw thread into the heating block and be sure the throat tube closely contacted with
sprinkler nozzle in order to heat perfectly.Then we need to insert the plug into the radiating tube.
Insert the thermocouple into the heating block and be careful for the direction of thermocouple which can look for the picture and
secure it with a M3*10 screw.
Assemble the fan with the plastic base and secure them with 4 M3*6 screws.
Assemble the plastic base with the radiating heating.
4, Assemble bowden extruder
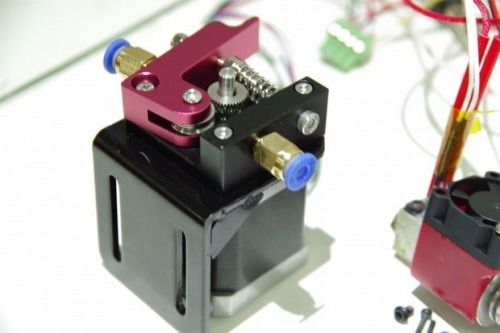
Insert the gear into the axis of step motor and secure with two set screws.
Assemble the L-shaped block with step motor and fix it with two M4*6 Phillips screws and fix a M3*5 secure
with the L-shaped block.
Assemble the bearing with the other L-shaped block and fixed them with a M4*5 screw.
Assemble this block with motor with a M4*10 screw.
Put the spring into the screw inserts and insert a M3*20 screw to secure the spring.
Secure two plugs with the two L-shaped block.
5,Connect the circuit
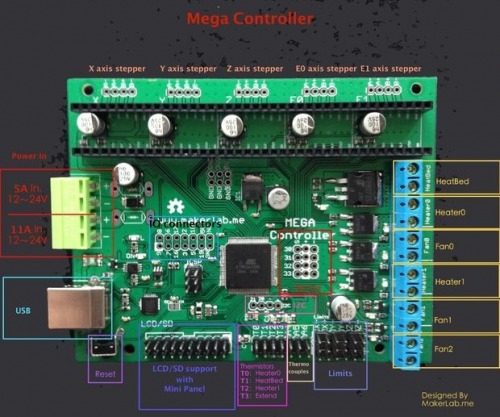
Insert the motor drive into the corresponding interfaces as shown in the picture above.
After insertion, you will get something like in the picture below.
Note the direction of the knob, do not insert reversely, otherwise it will burn after a power drive.
We just connect the base motor to motor of X axis, big arm to motor of Y axis and small arm to motor of Z axis.
The line of fan and heating and thermocouple is withe the original position.
6, Upload the firmware
Dobot arm's firmware is based on Marlin firmware and you can download here:https://github.com/MakerLabMe/Marlin
We just add a code about how to deconstruct the position of nozzle to Dobot's robotic arm.
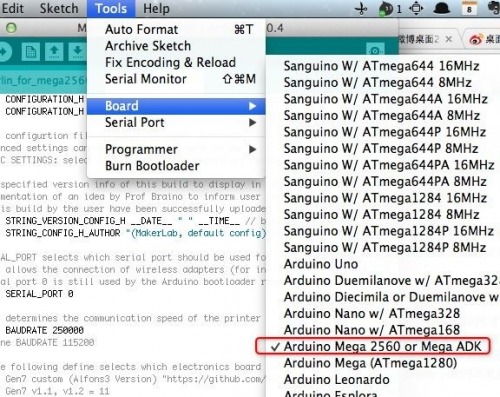
After downloading, put the U8glib folder in ArduinoAddons -> Arduino_1.x.x -> libraries to your Arduino's libraries and choose the right Serial port and board to upload to Mega controler.
7, fix the 1.75mm PLA and start to print
Download a module online or build one yourself and get Gcode with slice software and start to print.
Enjoy your Dobot arm 3D printer!!